Table of Contents
Advertisement
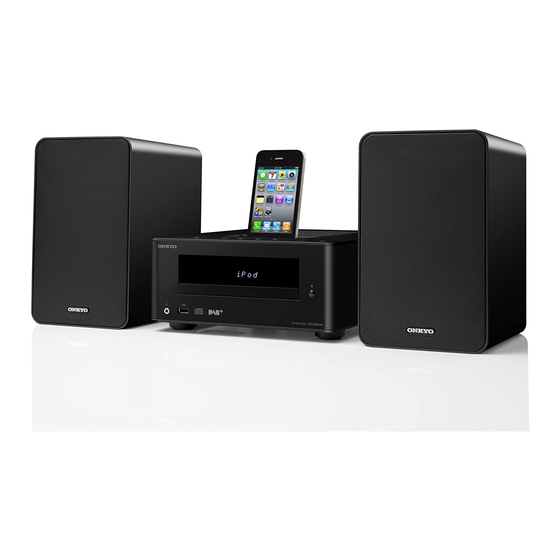
CD Receiver
CR-245DAB
CD Receiver System
CS-245DAB
CD Receiver (CR-245DAB)
Speakers (D-T05)
Instruction Manual
Thank you for purchasing an Onkyo CD Receiver System.
Please read this manual thoroughly before making any
connections and plugging it in.
Following the instructions in this manual will enable you to obtain
optimum performance and listening enjoyment from your new CD
Receiver System.
Please retain this manual for future reference.
Getting Started
............................En-
Connections
.............................. En-
Basic Operation
....................... En-
Playing CDs
............................... En-
Playing Your iPod/iPhone
Listening to the Radio
Playing a USB Flash Drive
Clock and Timer
...................... En-
Miscellaneous
.......................... En-
2
14
17
19
23
... En-
25
.......... En-
30
... En-
31
35
E
n
Advertisement
Table of Contents

Related Manuals for Onkyo CR-245DAB


Summary of Contents for Onkyo CR-245DAB
- Page 1 Listening to the Radio ..En- Playing a USB Flash Drive ... En- Thank you for purchasing an Onkyo CD Receiver System. Please read this manual thoroughly before making any Clock and Timer ...... En- connections and plugging it in.
-
Page 2: Important Safety Instructions
WARNING: WARNING AVIS RISK OF ELECTRIC SHOCK RISQUE DE CHOC ELECTRIQUE TO REDUCE THE RISK OF FIRE OR ELECTRIC DO NOT OPEN NE PAS OUVRIR SHOCK, DO NOT EXPOSE THIS APPARATUS The lightning flash with arrowhead symbol, within an TO RAIN OR MOISTURE. equilateral triangle, is intended to alert the user to the presence of uninsulated “dangerous voltage”... -
Page 3: Precautions
If water or any other liquid gets inside this unit, have it checked by your Onkyo This unit contains a semiconductor laser system and is dealer. -
Page 4: Declaration Of Conformity
• If the speakers are placed close to a TV or monitor, GERMANY due to the electromagnetic waves radiated by the TV declare in own responsibility, that the ONKYO product or monitor, you may hear noise from the speakers even described in this instruction manual is in compliance with the... -
Page 5: Package Contents
Package Contents Make sure you have the following items: CR-245DAB Speakers (D-T05) Speakers are included only with the CS-245DAB. Speaker cables Remote controller (RC-823S) 8 floor pads Indoor FM antenna Power cord Make sure to use a compatible power cord for your area. -
Page 6: Connections
Features General • CD tuner audio system with built-in iPod/iPhone dock • Super Bass (S.Bass) function for deeper bass sounds • Bass and treble tone controls • Line input for external audio source *1. iPhone, iPod, iPod classic, iPod nano, iPod shuffle, and iPod •... -
Page 7: Table Of Contents
Contents Important Safety Instructions......2 Playing CDs............19 Using the CD receiver ..........19 Precautions ............3 Using the Remote Controller........20 Displaying CD Information ........20 Package Contents ..........5 Selecting MP3 Files..........21 Displaying MP3 Information........22 Features .............. 6 Random Playback ............22 Getting to Know the CD receiver ...... 8 Repeat Playback ............22 Top and Front Panels .......... -
Page 8: Getting To Know The Cd Receiver
Getting to Know the CD receiver Top and Front Panels Top Panel e f g h Front Panel For detailed information, see the pages in parentheses. iPod/iPhone Dock (23) Headphones jack (17) Dock cover (23) USB port (30) ON/STANDBY button (17, 32, 34, 35) Display INPUT button (17, 23, 24, 25, 29, 30) Disc tray (19) -
Page 9: Display
Getting to Know the CD receiver —Continued Display ˆˆˆ„ „ ˆ ˆ… „ ˆ ˆ„ „ ˆ „ „ ˆ ˆ… ‡ ˆ ˆ SLEEP indicator TIMER indicators Play and Pause indicators Tuning indicators USB indicator RDS indicator FOLDER indicator FILE indicator DAB indicator... -
Page 10: Remote Controller
—Continued Getting to Know the CD receiver Remote Controller For detailed information, see the pages in parentheses. button (17, 32, 34) CLOCK CALL button (31) MUTING button (17) SLEEP button (33) TIMER button (31, 32, 33) PRESET MEMORY button (28) Input Selector buttons (17) TREBLE/BASS buttons (18) Stop [] (20, 24),... -
Page 11: Before Using The Cd Receiver
• Replacing the battery incorrectly may cause an explosion. Use only a battery of the same type or an equivalent. When using the remote controller, point it toward the CD receiver’s remote control sensor, as shown below. CR-245DAB Remote control sensor 30° 30°... -
Page 12: Disc (Audio Cd And Mp3) And Usb Flash Drive (Mp3) Notes
Disc (Audio CD and MP3) and USB Flash Drive (MP3) Notes Precautions for Playback Playback from USB Flash Drives Compact discs (CDs) with the following logo on the MP3 files recorded on a USB flash drive can be played label surface can be used. with the CD receiver. - Page 13 Disc (Audio CD and MP3) and USB Flash Drive (MP3) Notes —Continued Precautions for Inkjet Printable Discs Do not leave a CD-R/CD-RW having a label printed with an inkjet printer in the CD receiver for a long time. The disc could get stuck in the CD receiver, or could damage the CD receiver.
-
Page 14: Connecting Speakers
• Do not connect anything other than the included speakers (D-T05). We cannot take responsibility for malfunctions or poor results if this CD receiver is used with any other speakers. (CS-245DAB only) • You can connect speakers with an impedance of between 6 and 16 ohms. (CR-245DAB only) -
Page 15: Connecting Antennas
Connecting Antennas Connecting FM Antenna Connecting the DAB Antenna This section explains how to connect the supplied indoor If using a DAB antenna, connect it to the same antenna FM antenna. jack as the FM antenna. The CD receiver won’t pick up any radio signals if no If an FM antenna is already connected, you'll need to antenna is connected, so you must connect the antenna to disconnect it. -
Page 16: Connecting A Powered Subwoofer
—Continued Connecting Other Components About Connections Connecting a Powered Subwoofer • Before making any connections, read the manuals Using a suitable cable, connect the CD receiver’s supplied with your other components. AUDIO OUT: SUBWOOFER to the input on your • Don’t connect the power cord until you’ve completed powered subwoofer. -
Page 17: Basic Operation
Basic Operation MUTING Input Selector buttons VOLUME INPUT VOLUME [–]/[+] [–]/[+] M ON/STANDBY Turning On the CD Receiver Muting the CD Receiver (remote controller only) Press the [ ON/STANDBY] button. Alternatively, press the remote controller’s [] button. You can temporarily mute the output of the CD receiver. Press the remote controller’s [MUTING] button. -
Page 18: Adjusting The Bass And Treble (Remote Controller Only)
—Continued Basic Operation TREBLE BASS S.BASS CLEAR DIMMER Adjusting the Bass and Treble (remote controller only) Press the [BASS] or [TREBLE] button, and then use the []/[] buttons to adjust the bass or treble, respectively. The default setting is “0.” You can adjust the bass and treble from –5 to +5. -
Page 19: Playing Cds
Playing CDs Using the CD receiver ■ Information Displayed When Playback is Stopped: • Audio CD “DISC TOTAL” lights up CD „ „ „ „ 1 9„ † „ „ 6 7„ ‡ 2 9 Total number of tracks Total playing time Selecting Tracks To return to the beginning of the track currently playing, press the Previous [] button. -
Page 20: Using The Remote Controller
—Continued Playing CDs Using the Remote Controller Press to start playback If you press this while the CD receiver is in standby mode, the CD receiver will power-on. If a CD had been selected before the receiver entered standby mode, the CD will begin playing. Press to pause playback To resume playback, press the Play/ Pause [/] button. -
Page 21: Selecting Mp3 Files
Playing CDs —Continued Selecting MP3 Files While playback is stopped, press the [MODE] button. The files on an MP3 CD can be located at the disc’s root “FOLDER” will light, and the name of the first level or within a folder. folder will be shown. -
Page 22: Displaying Mp3 Information
Playing CDs —Continued CLEAR REPEAT SHUFFLE DISPLAY Displaying MP3 Information Press the [SHUFFLE] button until the RANDOM indicator appears. You can display various information about the MP3 file currently playing, such as title, artist, and album. To start random playback, press the Play/ Pause [/] button. -
Page 23: Playing Your Ipod/Iphone
Playing Your iPod/iPhone • Before using your iPod/iPhone with the CD receiver, Press the [INPUT] button repeatedly to be sure to update your iPod/iPhone with the latest select “iPod/USB”. software, available from the Apple Web site. Notes: • If you leave your iPod/iPhone paused when using it on •... -
Page 24: Using The Remote Controller
Playing Your iPod/iPhone —Continued Note: • Operation using the remote controller is explained below. Using the Remote Controller Start or pause playback Select the iPod as the source Press to fast forward or fast reverse During playback or while playback is paused, press and hold the Fast Forward [] button to fast forward, Press to pause playback... -
Page 25: Listening To The Radio
Listening to the Radio Tuning into FM Radio Stations TUNER TUNING C/U MODE CLEAR INPUT When tuned to a station, the Tuned ( ) indicator Tuning into weak stereo FM stations appears. When receiving a stereo FM signal, the FM ST If the signal from a stereo FM station is weak, it may be indicator appears as well. -
Page 26: Listening To Dab Digital Radio
—Continued Listening to the Radio Listening to DAB Digital Radio TUNER TUNING C/U MENU ENTER DISPLAY INPUT If no station is detected after scanning, “No Station” Press the [TUNER] button on the remote con- appears on the display. troller, or the [INPUT] button on the top panel, repeatedly to select “DAB”. - Page 27 Listening to the Radio —Continued ■ Scan? 3. Bit Rate and Audio Mode This setting determines which DAB bands are scanned Displays the station’s bit rate and audio mode by the Auto Tuning function (see page 26). (stereo, mono, or joint stereo). World (default): Band III (5A–13F).
-
Page 28: Presetting Fm Stations Automatically (Auto Preset)
—Continued Listening to the Radio TUNER ENTER PRESET MEMORY CLEAR INPUT Presetting FM Stations Automatically Presetting FM/DAB Stations Manually (Auto Preset) With the Preset Write function, you can manually preset individual FM and DAB radio stations. Presets make it With the Auto Preset function, you can automatically easy to select your favorite stations and eliminate the preset all of the FM radio stations available in your area need to tune the radio manually each time you want to... -
Page 29: Selecting Preset Stations
Listening to the Radio —Continued TUNER PRESET C/U CLEAR DISPLAY PRESET C/U INPUT RDS can be viewed on this unit only in areas where RDS Selecting Preset Stations broadcasts are available. You must store some presets before you can select them (see page 28). -
Page 30: Playing A Usb Flash Drive
Playing a USB Flash Drive iPod INPUT Notes: Disconnect the iPod/iPhone from the iPod • Do not connect your USB flash drive via a USB hub. dock. • When connecting or disconnecting a USB flash drive, A USB flash drive cannot be used if an iPod/ use your hand to support the CD receiver so that it iPhone is inserted. -
Page 31: Setting The Clock
Setting the Clock Displaying the Time Setting the Clock To display the time, press the remote controller’s [CLOCK CALL] button. Press the button again or perform another operation to cancel the time display. CLOCK CALL If the CD receiver is on Standby, the time will be TIMER displayed for 8 seconds. -
Page 32: Using The Timer
Using the Timer The CD receiver has a programmable timer for disconnect the iPod/iPhone from the iPod dock automated playback, and a sleep timer for turning the (see page 30). CD receiver off after a specified period. If you want to play a device connected to LINE, make settings on the connected device so that it You can also use the alarm playback function of your will start playing when the timer operates. -
Page 33: Turning Timer On And Off
Using the Timer —Continued Tips: If you specify Timer On (set), the “TIMER” • If you decide to cancel during this procedure without indication and the number of the selected input making timer settings, press the [TIMER] button. source will light. If you select Timer Off (i.e., turn off the timer), the •... -
Page 34: Timer Playback Using The Alarm Play Function Of Your Ipod/Iphone
—Continued Using the Timer Timer Playback using the Alarm Play Use the arrow []/[] buttons to select Function of your iPod/iPhone “iPodAlarmOn,” and then press the [ENTER] button. When the alarm play function of the iPod/iPhone If there is no operation for several seconds, the connected to the CD receiver starts playing a song, the setting will be made with the currently-shown CD receiver will power-on and switch to the iPod input. -
Page 35: Troubleshooting
If you have any trouble using the CD receiver, look for a solution in this section. If you can’t resolve the issue yourself, try resetting the CD receiver before contacting your Onkyo dealer. To reset the receiver to its factory defaults, turn it on and, while holding down the CD receiver’s stop [] button, press the [... - Page 36 —Continued Troubleshooting CD Playback The disc will not play. • Make sure the disc has been loaded correctly, with the label-side facing up. • Check to see if the surface of the disc is dirty (see page 12). • If condensation is suspected, turn on the CD receiver and leave it for 2 to 3 hours before playing any discs. •...
- Page 37 Troubleshooting —Continued USB Flash Drive Playback Can’t access the music files on a USB flash drive. • Make sure that an iPod/iPhone is not connected to the iPod dock. If an iPod/iPhone is connected, disconnect it (see page 30). • The CD receiver supports USB flash drives only. Note, however, that playback may not be possible with some USB flash drives.
- Page 38 CD receiver enters standby mode. Onkyo is not responsible for damages (such as CD rental fees) due to unsuccessful recordings caused by the unit’s malfunction. Before you record important data, make sure that the material will be recorded correctly.
-
Page 39: Specifications
Specifications Amplifier General 15 W (6 Ω, 1 kHz, 2ch driven) Rated output power (IEC) 2ch Power supply AC 220–240 V, 50/60 Hz THD + N (total harmonic distortion + N ) Power consumption 30 W 10 % (Power Rated) Standby power consumption 0.2 W (when not charging iPod) ... - Page 40 1301, 555 Tower, No.555 West NanJin Road, Jin an, Shanghai, China 200041, Tel: 86-21-52131366 Fax: 86-21-52130396 I1108-1 SN 29400927 (C) Copyright 2011 ONKYO SOUND & VISION CORPORATION Japan. All rights reserved. * 2 9 4 0 0 9 2 7 *...
Need help?
Do you have a question about the CR-245DAB and is the answer not in the manual?
Questions and answers