Table of Contents
Advertisement
FK1873 B P0113OZ
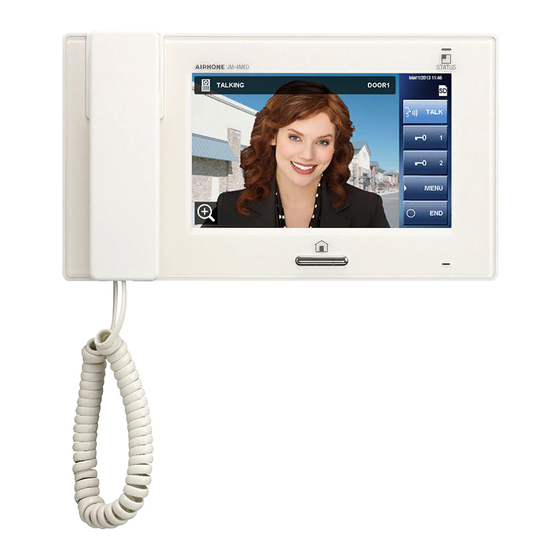
JM-4MED
HANDS-FREE COLOR VIDEO INTERCOM MASTER STATION
OPERATION MANUAL
Thank you for selecting Aiphone for your communication and security needs. Please read this manual carefully before using this
system.
Please make sure to read this manual for safe and correct use of the system, and keep it in a safe place for future reference.
*
Please note that images and illustrations depicted in this manual may differ from the actual product.
Advertisement
Table of Contents

Related Manuals for Aiphone JM-4MED


Summary of Contents for Aiphone JM-4MED
- Page 1 HANDS-FREE COLOR VIDEO INTERCOM MASTER STATION OPERATION MANUAL Thank you for selecting Aiphone for your communication and security needs. Please read this manual carefully before using this system. Please make sure to read this manual for safe and correct use of the system, and keep it in a safe place for future reference.
-
Page 2: Table Of Contents
CONTENTS PRECAUTIONS ......4 Monitor settings [MONITOR] ..13 ■ Settings for indoor monitoring WARNING ........... 4 [ROOM MONITOR] ........13 CAUTION ..........4 ■ Night illumination when monitoring door GENERAL PRECAUTIONS ....4 stations [VIDEO DOOR LED] ....13 ■ Setting the duration time of entrance NOTICES .......... - Page 3 Recording settings [RECORD] ..17 RECORDING AND PLAYING IMAGES ........25 ■ Camera setting during automatic recording Recording ........25 [SELECT RECORD SETTINGS] ...17 ■ Automatic recording ........25 ■ Erasing all the recorded images [ERASE ALL RECORDED IMAGES] ..17 ■ Manual recording ........25 USING THE SYSTEM ....
-
Page 4: Precautions
Negligence could result in injury or damage to property. only. Do not use at outdoor locations. 1. For power supply, use Aiphone power supply model specifi ed 11. Please note the LCD panel, though manufactured with very high for use with system. If non-specifi ed product is used, fi re or precision techniques, inevitably will have a very small portion of its malfunction could result. -
Page 5: Notices
We will under no conditions be liable for any damages or losses resulting from this product's contents or specifi cations. • This manual was created by Aiphone Co., Ltd., all rights reserved. Copying, in part or in whole, this manual without prior permission from Aiphone Co., Ltd. is strictly forbidden. -
Page 6: Part Names
PART NAMES Front panel Remove protective fi lm from screen Color LCD touchscreen before use. See the next page for Handset details. Status LED Indicates current status of this station by lighting up or blinking. See the table below for details. Speaker Call tones, audio from a station, and alarms are heard from here. -
Page 7: Screen
Screen This station features a touchscreen. Simply touch the icons or buttons displayed on the screen. The following are examples of typical windows and icons. The displayed windows and icons may differ depending on the devices connected to this system. HOME window This window appears when the screen is turned on. -
Page 8: Setting And Adjustment
SETTING AND ADJUSTMENT Program system settings using this station after all devices are installed. Program individual device settings on all master and sub master stations separately. NOTE: First set the current date and time, and change the display language for the screen to the language you need. (→ P. 9) SETTING LIST To begin, touch SETTINGS from HOME window to program the settings before using this station for the fi... -
Page 9: Initial Set-Up
INITIAL SET-UP NOTES: Setting the current date and time A maximum of 60 seconds time gain/loss can occur in the • [GENERAL] - [DATE/TIME] displayed time over a month. It is recommended to correct the time periodically. When this station is powered up for the fi rst time or after this If there is no power supply for 30 minutes or more, the date and •... -
Page 10: Setting The Pin [General] - [Pin Setting]
Setting the PIN [GENERAL] - [PIN SETTING] Some settings require a PIN to prevent content from being altered by unauthorized individuals. Create a unique PIN to properly secure settings. The factory default is "1111". From HOME window, touch → SETTINGS GENERAL PIN SETTING . -
Page 11: Setting And Adjustment Details
SETTING AND ADJUSTMENT DETAILS ■ Designate sub master station(s) to receive a Call settings [CALL] call from this station [ROOM STATION CALL SETTINGS] You can make the following settings for call. You can set whether or not the sub master stations receive a call (all call or single call) from this station. -
Page 12: Setting Incoming Call Tones [Call Tone]
■ Setting incoming call tones [CALL TONE] Talk settings [TALK] You can select incoming call tones for calls from the door stations and sub master stations. You can make the following settings available when talking. An individual tone can be assigned from 8 tones for each door station. -
Page 13: Monitor Settings [Monitor]
When the setting has fi nished, touch ENTER . Monitor settings [MONITOR] You can make the following settings for monitoring. CAUTION: When set to "CONTINUOUS", the backlight LED of the screen may degrade faster, potentially shortening the lifespan of this station. -
Page 14: Enabling/Disabling Door Release [General] - [Door Release]
■ Setting the EXIT DELAY SETTING and Enabling/Disabling door release RETURN DELAY SETTING [GENERAL] - [DOOR RELEASE] Select an alarm delay to allow for enough time to vacate or enter the premises before alarm is triggered. You can make it possible (ENABLE) or not (DISABLE) to release door locks from this station. -
Page 15: Settings For External Alarm/External Device [General] - [Alarm Setting] - [Utility Setting]
Settings for external alarm/external device Formatting an SD (or SDHC) card [GENERAL] - [ALARM SETTING] - [GENERAL] - [SD CARD] [UTILITY SETTING] SD (or SDHC) cards require formatting when using them in this station for the fi rst time. This setting is available when the inputs 1, 2, and/or 3 of When formatting an SD (or SDHC) card, all existing data on this station is set to “UTILITY”... -
Page 16: Naming Master Station And Sub Master Stations [General] - [Room Station Name]
How to rename Naming master station and sub master stations EX: To enter “ROOM 1” [GENERAL] - [ROOM STATION NAME] Touch to delete the current name. You can name the master station and sub master stations by Enter R O O M . entering characters. -
Page 17: Recording Settings [Record]
■ Erasing all the recorded images Recording settings [RECORD] [ERASE ALL RECORDED IMAGES] You can make the following settings for recording. You can erase all the recorded images in both the built-in memory and SD (or SDHC) card (if used). It may take long to erase a large number of images. -
Page 18: Using The System
USING THE SYSTEM ANSWERING A CALL When receiving a call from a door station When there is a call from a The call tone sounds, an image is on the screen, and audio from the door video door station station can be heard. Blinks Blinks during automatic recording. -
Page 19: Receiving A Call While Talking With Another Door Station
■ Receiving a call while talking with another Adjusting the display mode for viewing door station images at a video door station The call tone sounds in a lower volume. You can adjust the display mode for viewing images at a video The video image on the screen will continue to display door station by using the following functions. -
Page 20: Pan & Tilt
<Setting initial zoom position> Adjusting images [IMAGE] When an image at a door station is displayed, change While communicating with a door station, you can adjust the the display to the zoom mode, and then move to screen brightness and viewability of images. the desired position by touching on the Adjustment can also be made while receiving a call from,... -
Page 21: Adjusting Viewability Of Images [Adjust]
■ Adjusting viewability of images [ADJUST] To return lighting to default Touch again. ADJUST If the image on the screen is hard to see due to bright light, adjust settings. The icon is no longer visible. NOTE: NOTES: This function is not available for an image from a CCTV camera. Any lighting adjustments return to default when the screen is •... -
Page 22: Door Release [Door Release]
Door release [DOOR RELEASE] Select desired sub master station, or touch ALL CALL to transfer the call to all sub master Door release can be activated during a call-in, communication, stations. or while monitoring a door station. Release a door when is displayed on the screen. -
Page 23: Calling/Monitoring Other Stations
CALLING/MONITORING OTHER STATIONS Communication with a door station ends automatically after 1 minute in hands-free mode, or after 3 minutes using handset. Communication with a sub master station ends automatically after approx. 10 minutes. Calling all sub master stations Calling a single sub master station simultaneously Sub master stations must be set to receive a call from this station. -
Page 24: Monitoring
■ Monitoring sub master station (Audio only) Monitoring You can monitor sounds at a sub master station. You can monitor a door station or sub master station. Press the [HOME] button, touch screen, or lift ■ Monitoring door station (entrance) handset. -
Page 25: Recording And Playing Images
RECORDING AND PLAYING IMAGES Recording NOTES: Automatic recording function cannot be cancelled. • ■ Automatic recording → P. 20) You can also The display mode (Zoom/Wide) can be set. ( • switch Zoom and Wide while recording. This station automatically records images from door station. The status LED blinks in blue to show there are recorded images •... -
Page 26: Viewing Images
Should this occur, reformat card. Aiphone is not responsible for the performance of an SD or SDHC • A set of images that has not been played card. -
Page 27: Locking Recorded Images
Locking recorded images Touch INT MEMORY to view images stored in the built-in memory. You can lock a set of recorded images to protect them from being overwritten. Touch SD CARD to view images stored on SD (SDHC) card. NOTE: Locked images cannot be erased. -
Page 28: Copying Images From Built-In Memory Onto Sd (Or Sdhc) Card
Copying images from built-in memory onto SD (or SDHC) card You can copy images stored in the built-in memory onto an SD (or SDHC) card. From HOME window, touch SETTINGS → GENERAL → SD CARD → EXPORT RECORDED IMAGES . Touch YES to copy. -
Page 29: Using The Security Function
USING THE SECURITY FUNCTION This function is available when the inputs 1, 2, and/or 3 of When a sensor is triggered this station are set to “SECURITY” in the [INSTALL] menu A message is displayed, the sensor ID number is shown, window during installation, and a sensor is connected to the status LED blinks in red and an alarm sounds on all of each of the inputs. -
Page 30: Functions Combined With External Devices
FUNCTIONS COMBINED WITH EXTERNAL DEVICES Triggering an alarm by using an external Activating an external device device This is available when an external device is connected to the option contact outputs of this station. This is available when the inputs 1, 2, and/or 3 of this station are set to “UTILITY”... -
Page 31: Appendix
APPENDIX TECHNICAL PRECAUTIONS Cleaning: Clean all units with a soft cloth and gentle cleaner. Do not spray cleaner directly on unit. Do not use an abrasive cleaner or cloth. Door stations are water resistant. Wiring: If a message "WIRING MALFUNCTION CHECK FOR SHORT BETWEEN A1 - A2." is displayed, a short exists within the door station wires. -
Page 32: Warranty
fi nal decision whether there is a defect in materials and/or workmanship; and whether or not the product is within the warranty. This warranty shall not apply to any Aiphone product which has been subject to misuse, neglect, accident, power surge, or to use in violation of instructions furnished, nor extended to units which have been repaired or altered outside of the factory.
Need help?
Do you have a question about the JM-4MED and is the answer not in the manual?
Questions and answers