Table of Contents
Advertisement
Quick Links
Download this manual
See also:
Service Manual
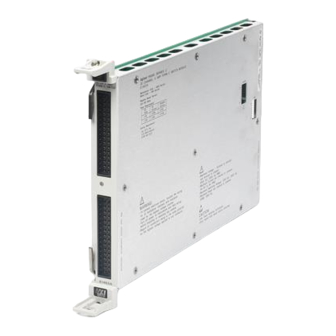
Agilent E1463A
32-Channel, 5 Amp, Form C Switch
User's Manual and SCPI Programming Guide
Where to Find it - Online and Printed Information:
System installation (hardware/software) ............VXIbus Configuration Guide*
Module configuration and wiring .......................This Manual
SCPI programming ............................................. This Manual
SCPI example programs .....................................This Manual, VXIplug&play Driver CD
SCPI command reference ..................................This Manual
VXIplug&play programming ............................ VXIplug&play Online Help
VXIplug&play example programs .....................VXIplug&play Online Help
VXIplug&play function reference......................VXIplug&play Online Help
Soft Front Panel information ..............................VXIplug&play Online Help
VISA language information................................Agilent VISA User's Guide
Agilent VEE programming information.............Agilent VEE User's Manual
*Supplied with Agilent Command Modules, Embedded Controllers, and VXLink.
*E1463-90004*
Manual Part Number: E1463-90004
Printed in Malaysia E0606
Agilent 75000 Series C
Advertisement
Table of Contents

Related Manuals for Agilent Technologies E1463A


Summary of Contents for Agilent Technologies E1463A
- Page 1 VXIplug&play function reference......VXIplug&play Online Help Soft Front Panel information ......VXIplug&play Online Help VISA language information........Agilent VISA User's Guide Agilent VEE programming information.....Agilent VEE User's Manual *Supplied with Agilent Command Modules, Embedded Controllers, and VXLink. *E1463-90004* Manual Part Number: E1463-90004 Printed in Malaysia E0606...
-
Page 3: Table Of Contents
Contents E1463A 32-Channel Form C Switch User’s Manual Front Matter........................7 Agilent Technologies Warranty Statement ..............7 Safety Symbols ......................8 Warnings ........................8 Declaration Of Conformity.................... 9 Chapter 1 - Getting Started ................... 11 Using This Chapter ....................11 Form C Switch Description.................. - Page 4 Example: Detecting Error Conditions (Turbo C) ..........45 Synchronizing the Form C Switch ................46 Example: Synchronizing the Form C Switch (BASIC) ........46 Chapter 3 - E1463A Command Reference ..............47 ABORt ........................50 ARM ........................... 51 ARM:COUNt ....................... 51 ARM:COUNt? .....................
- Page 5 Example: Making Measurements (BASIC) ............87 Example: Making Measurements (C/HP-UX) ............. 88 Example: Scanning Channels (BASIC) .............. 90 Example: Scanning Channels (C/HP-UX) ............91 Appendix C - E1463A Error Messages ................ 93 Error Types ........................ 93 Error Messages......................94 Index ..........................95...
- Page 6 Notes:...
-
Page 7: Front Matter
QUALITY, AND FITNESS FOR A PARTICULAR PURPOSE. 8. Agilent will be liable for damage to tangible property per incident up to the greater of $300,000 or the actual amount paid for the product that is the subject of the claim, and for damages for bodily injury or death, to the extent that all such damages are determined by a court of competent jurisdiction to have been directly caused by a defective Agilent product. -
Page 8: Safety Symbols
Agilent Technologies, Inc. assumes no liability for the customer's failure to comply with these requirements. Ground the equipment: For Safety Class 1 equipment (equipment having a protective earth terminal), an uninterruptible safety earth ground must be provided from the mains power source to the product input wiring terminals or supplied power cable. -
Page 9: Declaration Of Conformity
The product was tested in a typical configuration with Agilent Technologies test systems. September 5, 2000 Date Name Quality Manager Title For further information, please contact your local Agilent Technologies sales office, agent or distributor. Authorized EU-representative: Agilent Technologies Deutschland GmbH, Herrenberger Stra e 130, D 71034 Böblingen, Germany... - Page 10 Notes:...
-
Page 11: Chapter 1 - Getting Started
Programming the Form C Switch ..... . .27 Form C Switch Description The E1463A 32-Channel, 5 Amp, Form C Switch module (Form C switch) is defined as a VXIbus instrument. VXIbus plug-in modules installed in a mainframe or used with a command module are treated as independent instruments each having a unique secondary address. - Page 12 E1463A MODULE TERMINAL MODULE Channel 0 C0N0 C0NO C0NC C0NC Pads Channel 15 for MOVS C15N0 C15NO Jumper C15C C15C C15C C15NC Pads for MOVS Channel 16 C16N0 C16NO C16C C16C C16C C16NC Channel 31 C31N0 C31NO C31C C31C C31C C31NC Figure 1-1.
-
Page 13: Typical Configurations
Typical The Form C switch accepts user inputs up to 125 Vdc or 250 Vrms. Maximum rated power capacity (external load) is 150 Wdc or 1250 VA per Configurations channel. Per module, you can switch 1500 Wdc or 12500 VA. As noted, the switch may be configured for general purpose switching/scanning or digital output applications. -
Page 14: Configuring The Form C Switch
E1463A TERMINAL MODULE MODULE Channel C0NO C0NC Relay Open Closed Figure 1-3. Digital Output Configuration Configuring the Form C Switch This section gives guidelines to configure the Form C switch, including the following topics. See "Configuring a Terminal Module" for guidelines to configure the terminal modules. -
Page 15: Setting The Logical Address Switch
CAUTION Static electricity is a major cause of component STATIC ELECTRICITY. failure. To prevent damage to the electrical components in the Form C switch, observe anti-static techniques whenever removing a module from the mainframe or whenever working on a module. The Form C switch is susceptible to static discharges. -
Page 16: Setting The Interrupt Priority
Setting the Interrupt The Form C switch generates an interrupt after a channel has been closed. These interrupts are sent to, and acknowledgments are received from, the Priority command module (E1406, for example) via the VXIbus backplane interrupt lines. For most applications where the Form C switch is installed in a C-Size mainframe, the interrupt priority jumper does not have to be moved. -
Page 17: Installing The Form C Switch In A Mainframe
Installing the Form The E1463A may be installed in any slot, except slot 0, in a C-size VXIbus mainframe. See Figure 1-6 to install the Form C switch in a mainframe. C Switch in a Mainframe Set the extraction levers out. -
Page 18: Configuring A Terminal Module
Configuring a Terminal Module The E1463A 32-Channel, 5 Amp, Form C Switch consists of a relay switch card and a screw type standard terminal module. In addition, a solder eye terminal module (Option A3G) is available. User inputs to the Form C switch are to the normally open (NO), normally closed (NC), and common (C) terminal connectors on the terminal module. -
Page 19: Connecting User Inputs
Connecting User Figure 1-9 shows the front panel of the E1463A and the Form C switch connector pin-out that mates to the terminal module. Actual user inputs Inputs are connected to the applicable terminal module. 00NO 00NC 01NO 01NC 02NO... -
Page 20: Wiring A Terminal Module
Wiring a Terminal Figures 1-10 and 1-11 show how to connect field wiring to the terminal module. When making wiring connections, be sure the wires make good Module connections on screw terminals. Maximum terminal wire size is No. 16 AWG. When wiring all channels, a smaller gauge wire (No. 20 - 22 AWG) is recommended. - Page 21 Install the Terminal Push in the Extraction Levers to Lock the Module Terminal Module onto the E1463A Extraction Levers E1463A Module Figure 1-11. Wiring a Terminal Module Chapter 1...
-
Page 22: Attaching A Terminal Module To The Form C Switch
E1463A module. Extraction Levers To remove the terminal module from the E1463A, use a small screwdriver to release the two extraction levers and push both levers out simultaneously to free it from the Form C switch module. -
Page 23: Protecting Relays And Circuits
Protecting Relays and Circuits This section gives guidelines to protect relays and circuits in the Form C switch, including: • Relay Life Factors • Extending Relay Life • Adding Relay and Circuit Protection • Maximum Allowable Module Switch Current NOTE Relays that wear out normally or fail due to misuse should not be considered defective and are not covered by the product's warranty. -
Page 24: Extending Relay Life
Replacement Strategy The replacement strategy depends on the application. If some relays are used more often, or at a higher load, than the others, the relays can be individually replaced as needed. If all the relays see similar loads and switching frequencies, the entire circuit board can be replaced when the end of relay life approaches. -
Page 25: Adding Relay And Circuit Protection
Adding Relay and The Form C switch has space for adding relay and circuit protection. Relay protection can be added by placing a protective device across the specified Circuit Protection pads. This is done by adding metal oxide varistors (MOVs) between the common (C) and normally open (NO) or normally closed (NC) terminals. -
Page 26: Maximum Allowable Module Switch Current
Maximum Allowable The Form C switch has an individual channel current specification of 5A. However, if you apply 5A to all the channels with a relay contact resistance Module Switch of .25 Ohms, the power dissipation is 200 W. Since, for example, the Current E1401B mainframe can only provide cooling for 55W per slot (to keep the temperature rise to 10... -
Page 27: Programming The Form C Switch
Programming the Form C Switch This section gives guidelines to program the Form C switch, including: • Using SCPI Commands • Addressing the Form C Switch • Initial Operation Using SCPI There are several ways you can program the Form C switch. One way is to write directly to the registers. - Page 28 Card Numbers The card number (cc of the channel_list) identifies the module within a switchbox. The card number assigned depends on the switch configuration used. Leading zeroes can be ignored for the card number. In a single-module switchbox configuration, the card number is always 01. In a multiple-module switchbox configuration, modules are set to successive logical addresses.
-
Page 29: Initial Operation
Initial Operation Two example programs follow to help get you started using the Form C switch. The first example assumes an HP 9000 Series 200/300 controller running BASIC and a GPIB interface. The second example assumes a PC running Borland Turbo C and an 82350A (or equivalent) Interface Card (with command library) Example: Closing a This program closes channel 02 of a Form C switch at logical address 120... - Page 30 char ch; if (error != NOERR) printf ("\n Error %d %s \n", error, errstr(error)); printf (" in call to function %s \n\n", routine); printf ("Press 'Enter' to exit: "); scanf ("%c", &ch); exit(0); return 0; 30 Getting Started Chapter 1...
-
Page 31: Chapter 2 - Using The Form C Switch
Chapter 2 Using the Form C Switch Using This Chapter This chapter uses typical examples to show ways to use the E1463A Form C switch module for switching channels and scanning channels. See Chapter 3 for command information. Chapter contents are: •... -
Page 32: Power-On And Reset Conditions
Module Identification The following example programs use the *RST, *CLS, *IDN?, SYST:CTYP?, and SYST:CDES commands to reset and identify the E1463A Form C switch module. A typical print for the E1463A Form C switch is: HEWLETT-PACKARD,SWITCHBOX,0,A.04.00 32 Channel General Purpose Relay HEWLETT-PACKARD,E1463A,0,A.04.00... -
Page 33: Example: Module Identification (Turbo C)
Example: Module #include stdio.h #include chpib.h /*Include file for GPIB*/ Identification #define ISC 7L (TURBO C) #define FORMC 70915L /*Form C default address*/ #define TASK1 "*RST;*CLS;*IDN?" /*Reset, clear, and query id*/ #define TASK2 "SYST:CDES? 1" /*Command for card description*/ #define TASK3 "SYST:CTYP? 1" /*Command for card type*/ main( ) char into1[51], into2[51], into3[51];... -
Page 34: Switching Channels
CLOS (@101,103). To OPEN or CLOSe a continuous range of channels place a colon (:) between the first and last channel numbers. Example: This BASIC program shows one way to close and open channel 2 on an E1463A Form C module (card #1). Opening/Closing Channels (BASIC) NOTE Implied commands are those that appear in square brackets ([ ]) in the command syntax. -
Page 35: Example: Controlling Rf Switches/Step Attenuators (Basic)
E1463A TERMINAL MODULE MODULE Channel C0NO C0NC Figure 2-1. Example: Voltage Switching Example: Figure 2-2 shows one way to drive the 8761 SPDT RF Switches or 33300 Series Programmable Step Attenuators. (Figure 2-2 only shows control for Controlling RF the 33300 40 dB step. Additional drive relays are required for the 10 dB and Switches/Step 20 dB steps.) - Page 36 6205C EXTERNAL DUAL PWR SUPPLY E1463A TERMINAL -12V +12V MODULE MODULE Channel C0NO C0NC 8761A RF Switch or 33300A/C Step Attenuator (12V Coil Voltage) 33300 E1463A TERMINAL MODULE MODULE Channel Port 1 8761 C0NO Port C C0NC Port 2 8761B RF Switch or...
-
Page 37: Example: Digital Output Configuration (Basic)
(BASIC) 10 DISP "Closing channel 0" 20 OUTPUT 70915; "CLOS (@100)" !Close channel 00 relay (connect NO to C). 1 is the card number and 00 is the channel number. 30 END E1463A TERMINAL MODULE MODULE Channel C0NO C0NC Relay... - Page 38 Table 2-3. Matrix Switching Connections Connect These Common (C) Connect These Normally Open (NO) Channel Numbers Together Channel Numbers Together 5, 13, 21, and 29 6, 14, 22, and 30 7, 15, 23, and 31 Close the channel number enclosed in the circle in Figure 2-4 to connect the corresponding row and column.
-
Page 39: Scanning Channels
Module Trig Trig Voltmeter External Complete Trigger 3457A Multimeter (Rear View) HI LO NC(00,01,02) E1463A Module C(00,01,02) E1463A FORM-C Terminal Module Figure 2-5. Example: Scanning Using Trig In and Trig Out Ports Chapter 2 Using the Form C Switch 39... -
Page 40: Example: Scanning Using The Ttl Trigger Bus (Basic)
Figure 2-6 shows one way to connect the Form C module to the E1412A multimeter module. The connections shown with dotted lines are not actual hardware connections. These connections indicate how the firmware operates to accomplish the triggering. Part of VXIbus E1463A E1406A E1412A Module Command Module... - Page 41 The following BASIC program sets up the multimeter (GPIB address 70903) to scan making 2-wire resistance measurements. The common terminals for channels 0 through 2 are connected together for this example. When one of these switches is closed (C connected to NO), different DUTs are switched in for a measurement.
-
Page 42: Querying The Form C Switch
Querying the Form C Switch All query commands end with a "?". These commands are used to determine a specific state of the module. The data is sent to the output buffer where you can retrieve it into your computer. See Chapter 3 for more information on these commands. -
Page 43: Example: Using The Scan Complete Bit (Basic)
Example: Using the This example monitors bit 7 in the Status Register to determine when the scanning cycle is complete. The computer interfaces with an E1406A Scan Complete Bit Command Module over GPIB. The GPIB select code is 7, the GPIB primary (BASIC) address is 09, and the GPIB secondary address is 15. -
Page 44: Saving And Recalling States
Saving and Recalling States The *SAV <numeric_state> command saves the current instrument state. The state number (0-9) is specified by the <numeric_state> parameter. The settings saved by this command are: • Channel relay states (open or closed) • ARM:COUNt • TRIGger:SOURce •... -
Page 45: Detecting Error Conditions
Detecting Error Conditions The SYSTem:ERRor? query requests a value from an instrument's error register. This register contains an integer in the range [-32,768 to 32,767]. The response takes the form <err_number>,<err_message> where <err_number> is the value of the instrument's error and <err_message> is a short description of the error. -
Page 46: Synchronizing The Form C Switch
int error_handler (int error, char *routine) char ch; if (error != NOERR) printf ("\n Error %d %s \n", error, errstr(error)); printf (" in call to GPIB function %s \n\n", routine); printf ("Press 'Enter' to exit: "); scanf ("%c", &ch); exit(0); return 0;... -
Page 47: Chapter 3 - E1463A Command Reference
Using This Chapter This chapter describes Standard Commands for Programmable Instruments (SCPI) and summarizes IEEE 488.2 Common (*) commands applicable to the E1463A Form C Switch Module. This chapter contains the following sections: • Command Types........47 •... - Page 48 Some commands have what appears to be a variable syntax, such as Syntax OUTPut:TTLTrgn. In this command, the "n" is replaced by a number. No space is left between the command and the number because the number is not a parameter. 48 E1463A Command Reference Chapter 3...
-
Page 49: Scpi Command Reference
ROUT:CLOS (@101);:ROUT:CLOS? (@101) or ROUT:CLOS (@101);CLOS? (@101). SCPI Command Reference This section describes the Standard Commands for Programmable Instruments (SCPI) commands for the E1463A. Commands are listed alphabetically by subsystem and within each subsystem. Chapter 3 E1463A Command Reference 49... -
Page 50: Abort
!Trigger command will be via backplane (bus) interface (*TRG command generates trigger) INIT:CONT ON !Set continuous scanning SCAN(@100:107) !Scan channels 00 to 07 INIT !Start scan, close channel 00 ABOR !Abort scan in progress 50 E1463A Command Reference Chapter 3... -
Page 51: Arm
When the scan sequence completes, channels 00 through 03 (relays 00 through 03) are closed. ARM:COUN 10 !Set 10 scans per INIT command SCAN(@100:103) !Scan channels 00 to 03 INIT !Start scan, close channel 00 Chapter 3 E1463A Command Reference 51... -
Page 52: Arm:count
This example sets a switchbox for 10 scanning cycles and queries the number of scan cycles set. The ARM:COUN? command returns 10. ARM:COUN 10 !Set 10 scans per INIT command ARM:COUN? !Query number of scans 52 E1463A Command Reference Chapter 3... -
Page 53: Display
AUTO to select the last module addressed by a switching command (for example, [ROUTe:]CLOSe). DISPlay:MONitor:CARD AUTO *RST Conditions: Example Select Module #2 in a Switchbox for Monitoring DISP:MON:CARD 2 !Selects module #2 in a switchbox Chapter 3 E1463A Command Reference 53... -
Page 54: Display:monitor[:State]
Chan , , ,3, , , , 7, , , , ,12, , , , ... etc. DISPlay:MONitor[:STATe]OFF | 0 *RST Condition: Example Enabling Monitor Mode DISP:MON:CARD 2 !Select module #2 in a switchbox DISP:MON 1 !Turn monitor mode ON 54 E1463A Command Reference Chapter 3... -
Page 55: Initiate
At the end of the scanning cycle, the last channel in the channel list is opened. See the ABORt command. Stopping Continuous Scan: ABORt, ARM:COUNt, TRIGger:SOURce Related Commands: INITiate:CONTinuous OFF | 0 *RST Condition: Chapter 3 E1463A Command Reference 55... -
Page 56: Initiate:continuous
This example enables a single scan of channels 00 through 03 of a single-module switchbox. The trigger source to advance the scan is immediate (internal) triggering set with TRIGger:SOURceIMMediate (default). SCAN(@100:103) !Scan channels 00 - 03 INIT !Begin scan, close channel 00 (use immediate triggering) 56 E1463A Command Reference Chapter 3... -
Page 57: Output
[ROUTe:]SCAN, TRIGger:SOURce Related Commands: OUTPut:EXTernal[:STATe] OFF (port disabled) *RST Condition: Example Enabling "Trig Out" Port OUTP:EXT ON !Enable "Trig Out" port to output pulse after each scanned channel is closed Chapter 3 E1463A Command Reference 57... -
Page 58: Output:external[:State]
ON | OFF | 1 | 0 OFF | 0 Comments OUTPut[:STATe] OFF (port disabled) *RST Condition: Example Enabling "Trig Out" Port OUTP ON !Enable "Trig Out" port to output pulse after each scanned channel is closed 58 E1463A Command Reference Chapter 3... -
Page 59: Output[:State]
For example, if TTLTrg1 is the active output and TTLTrg4 is enabled, TTLTrg1 will become disabled and TTLTrg4 will become the active output. [ROUTe:]SCAN, TRIGger:SOURce, Related Commands: OUTPut:TTLTrgn[:STATe]? OUTPut:TTLTrgn[:STATe] OFF (disabled) *RST Condition: Chapter 3 E1463A Command Reference 59... -
Page 60: Output:ttltrgn[:State]
This example enables TTL Trigger bus line 7 and queries the enable state. OUTPut:TTLTrgn? returns "1" since the port is enabled. OUTP:TTLT7:STAT 1 !Enable TTL Trigger bus line 7 OUTP:TTLT 7? !Query bus enable state 60 E1463A Command Reference Chapter 3... -
Page 61: [Route:]
NOTE Closure order for multiple channels with a single command is not guaranteed. Channel numbers can be in the <channel_list> in any random order. [ROUTe:]OPEN, [ROUTe:]CLOSe? Related Commands: All channels open. *RST Condition: Chapter 3 E1463A Command Reference 61... -
Page 62: [Route:]Close
[ROUTe:]OPEN <channel_list> by <channel_list>. <channel_list> has the form (@ccnn) where cc = card number (01-99) and nn = channel number (00-31). Parameters Name Type Range of Values Default Value <channel_list> numeric cc00 - cc31 62 E1463A Command Reference Chapter 3... -
Page 63: [Route:]Open
This example opens channels 100 and 213 of a two-module switchbox and queries channel 213 state. Since channel 213 is programmed to be open, "1" is returned. OPEN(@100,213) !Open channels 100 and 213 OPEN?(@213) !Query channel 213 state Chapter 3 E1463A Command Reference 63... -
Page 64: [Route:]Scan
See ABORt Stopping Scan: TRIGger, TRIGger:SOURce Related Commands: All channels open. *RST Condition: Example Scanning Using External Device See "Scanning Channels" in Chapter 2 for examples of scanning programs using external instruments. 64 E1463A Command Reference Chapter 3... -
Page 65: Status
:ENABle? [:EVENt?] :PRESet As shown in Figure 3-1, the STATus subsystem for the E1463A Form C Switch includes the Status Byte Register, the Standard Event Status Register, OPERation Status Register, and Output Queue. The Standard Event Status Register (*ESE?) and the Status Byte Register (*STB?) are under IEEE 488.2 control. - Page 66 *SRE 128 unmasks the OPR bit (operation) in <8192> the status byte register. This is effective only if the STAT:OPER:ENAB 256 command <16384> is executed. <32768> STAT:QUES:ENAB 256 unmasks the "Scan Complete" bit. Figure 3-1. E1463A Status System Register Diagram 66 E1463A Command Reference Chapter 3...
-
Page 67: Status:operation:condition
The value returned is the value set by Maximum Value Returned: STATus:OPERation:ENABle <unmask>. However, the maximum decimal-weighted value used in this module is 256 (bit 8 in the Condition Register within the OPERation Status Register is set to true). Chapter 3 E1463A Command Reference 67... -
Page 68: Status:operation[:Event]
Status Register by setting all Enable Register bits to 0. It does not affect either the Status Byte Register or the Standard Event Status Register. STATus:PRESet does not clear any of the Event Registers. 68 E1463A Command Reference Chapter 3... -
Page 69: System
!Return description of module card #1 SYSTem:CPON sets the selected module (card) in a SYSTem:CPON <number> | ALL switchbox to its power-on state. Parameters Name Type Range of Values Default Value <number> numeric 1 through 99 Chapter 3 E1463A Command Reference 69... -
Page 70: System:ctype
SYSTem:CTYPe? <number> returns E1463A Form C Switch Model Number: HEWLETT-PACKARD,El463A,0,A.04.00 where the 0 after E1463A is the module serial number (always 0) and A.04.00 is an example of the module revision code number. Example Reading the Model Number of a Module... - Page 71 -350, "Too many errors". The least recent error numbers/messages remain in the queue and the most recent errors are discarded. Example Reading the Error Queue SYST:ERR? !Query the error queue Chapter 3 E1463A Command Reference 71...
-
Page 72: Trigger
TRIGger is executed. TRIG:SOUR HOLD !Set trigger source to HOLD SCAN(@100:103) !Define channel list INIT !Begin scan, close channel 00 loop statement !Start count loop TRIG !Advance scan to next channel increment loop !Increment loop count 72 E1463A Command Reference Chapter 3... -
Page 73: Trigger:source
OUTPut:EXTernal[:STATe] OFF or OUTPut:EXTernal[:STATe] 0 for that module. Only one output (TTLTrg or EXTernal) can be One Output Selected at a Time: enabled at one time. Enabling a different output source will automatically disable the active output. Chapter 3 E1463A Command Reference 73... -
Page 74: Trigger:source
EXTernal, HOLD, IMMediate, or TTLTrgn, respectively. Example Querying the Trigger Source This example sets external triggering and queries the trigger source. Since external triggering is set, TRIG:SOUR? returns "EXT". TRIG:SOUR EXT !Set external trigger source TRIG:SOUR? !Query trigger source 74 E1463A Command Reference Chapter 3... - Page 75 SCPI Commands Quick Reference The following table summarizes the SCPI Commands for the E1463A Form C Switch module. Command Description ABORt ABORt Aborts a scan in progress <number> :COUNt MIN |MAX Multiple scans per INIT command :COUNt? [MIN|MAX] Queries number of scans <number>...
- Page 76 IEEE 488.2 Common Commands Reference The following table lists the IEEE 488.2 Common (*) commands accepted by the E1463A Form C Switch module. The operation of some of these commands is described in Chapter 2 of this manual. For more information on Common commands, refer to the user’s manual for your mainframe or to...
-
Page 77: Appendix A - Form C Switch Specifications
Appendix A Form C Switch Specifications General Module Size / Device Type: Relay Life (Typical):* C-size VXIbus, Register based, A16/D16, Interrupter Condition Number of Operations (levels 1-7, jumper selectable No Load 5 x 10 250 Vac, 2A, Resistive Power Requirements: 250 Vac, 5A, Resistive Voltage: +5 V... - Page 78 Notes: 78 Form C Switch Specifications Appendix A...
-
Page 79: Appendix B - Register-Based Programming
Programming Examples ......85 Register Programming vs. SCPI Programming The E1463A Form C Switch is a register-based module that does not support the VXIbus word serial protocol. When a SCPI command is sent to the Form C switch, the E1406 Command Module parses the command and programs the switch at the register level. -
Page 80: The Base Address
The Base Address When reading or writing to a switch register, a hexadecimal or decimal register address is specified. This address consists of a base address plus a register offset. The base address used in register-based programming depends on whether the A16 address space is outside or inside the E1406 Command Module. -
Page 81: Register Offset
Relay Control Register 2 SPACE Relay Control Register 1 Status/Control Register Device Type Register ADDRESS ID Register SPACE E1463A A16 REGISTER MAP C000 (49,152) Base Address = COOO + (Logical Address 64) 49,152 + (Logical Address 64) OOOO Register Address = Base address + Register Offset Figure B-1. -
Page 82: Register Descriptions
Manufacturer ID - Returns FFFF = Agilent Technologies A16 only register-based device. Device Type The Device Type Register is at offset address 02 and returns 0121 an E1463A Form C Switch module. This register is read only. Register b+02 Write Undefined Read... - Page 83 Reading the For Status/Control register reads, three bits are defined as follows. Status/Control Register • 0 indicates the module has been selected MODID Select (bit 14): by MODID (module ID) and a 1 indicates the module has not been selected. •...
-
Page 84: Relay Control Register
Relay Control There are two relay control registers: Relay Control Register 1 (base + 06 and Relay Control Register 2 (base + 08 ). These registers are used to Register connect the common (C) to the normally open (NO) terminal. Reading any Relay Control Register will always return FFFF regardless of the channel states. -
Page 85: Programming Examples
Programming Examples This section provides example programs in BASIC and C/HP-UX, including: • Example: Reading the Registers (BASIC) • Example: Reading the Registers (C/HP-UX) • Example: Making Measurements (BASIC) • Example: Making Measurements (C/HP-UX) • Example: Scanning Channels (BASIC) • Example: Scanning Channels (C/HP-UX) Example: Reading This BASIC programming example reads the Manufacturer ID Register,... -
Page 86: Example: Reading The Registers (C/Hp-Ux)
Example: Reading This C/HP-UX programming example reads the Manufacturer ID Register, Device Type Register and Status Register on the Form C switch. the Registers (C/HP-UX) /***************************************************/ /****** readreg.c ******/ /**************************************************/ #include <sys/vxi.h> /*source file for controller VXI drivers*/ #include <fcntl.h> #include <stdio.h>... -
Page 87: Example: Making Measurements (Basic)
Example: Making This BASIC programming example closes bit 1 on bank 0, waits for a measurement to be made, and then opens the channel. You must insert Measurements your own programming code for the measurement part of this program. For (BASIC) example, if you are using the E1411B, see the E1326B/E1411B Multimeter User's Manual for programming examples. -
Page 88: Example: Making Measurements (C/Hp-Ux)
Example: Making This C/HP-UX programming example closes bit 1 on bank 0, waits for a measurement to be made, and then opens the channel. You must insert Measurements your own programming code for the measurement part of this program. For (C/HP-UX) example, if you are using the E1411B, see the E1326B/E1411B Multimeter User's Manual for programming examples. - Page 89 /*SUB VER_TIME*/ ver_time( ) struct timeval first, second, lapsed; struct timezone tzp; gettimeofday(&first,&tzp); for (j=0; j<=10000; j ++); gettimeofday ($second,&tzp); if (first.tv_usec > second.tv_usec) second.tv_usec +=1000000; second.tv_sec--; lapsed.tv_usec = second.tv_usec - first.tv_usec; lapsed.tv_sec = second.tv_sec - first.tv_sec; printf("Elapsed time for closing a channel is: %ld sec %ld usec \n", lapsed.tv_sec, lapsed.tv_usec);...
-
Page 90: Example: Scanning Channels (Basic)
Example: Scanning This BASIC programming example scans through the bank 0 channels (closing one switch at a time) and makes measurements between switch Channels (BASIC) closures. You must insert your own programming code for the measurement part of this program. For example, if you are using the E1411B, see the E1326B/E1411B Multimeter User's Manual for programming examples. -
Page 91: Example: Scanning Channels (C/Hp-Ux)
Example: Scanning This C/HP-UX programming example scans through the bank 0 channels (closing one switch at a time) and makes measurements between switch Channels (C/HP-UX) closures. You must insert your own programming code for the measurement part of this program. For example, if you are using the E1411B, see the E1326B/E1411B Multimeter User's Manual for programming examples. - Page 92 /*sub to verify the time to close the switch*/ ver_time( ); /*sub to close a set of switches and make measurements*/ scan_meas(dev); /*END of main program*/ /*SUB VER_TIME*/ ver_time( ) struct timeval first, second, lapsed; struct timezone tzp; gettimeofday(&first,&tzp); for (j=0; j<=10000; j ++); gettimeofday ($second,&tzp);...
-
Page 93: Appendix C - E1463A Error Messages
E1463A Error Messages Error Types Table C-2 lists the error messages generated by the E1463A Form C Switch module firmware when programmed by SCPI. Errors with negative values are governed by the SCPI standard and are categorized in Table C-1. Error numbers with positive values are not governed by the SCPI standard. -
Page 94: Error Messages
Attempting to begin scanning when no valid <channel_list> is defined. +2600 Function Not Supported On Sending a command to a module (card) in a switchbox that is not This Card supported by the module or switchbox. 94 E1463A Error Messages Appendix C... -
Page 95: Index
Index E1463A 32-Channel Form C Switch User’s Manual abbreviated commands declaration of conformity ABORt subsystem description, switch adding relay protection detecting error conditions addressing registers Device Type register addressing the switch DISPlay subsystem ARM subsystem DISPlay:MONitor:CARD ARM:COUNt DISPlay:MONitor[:STATe] ARM:COUNt? documentation history... - Page 96 E (continued) examples (cont’d) offset, register Querying the OPERation Status Register operation status register Querying the Trigger Source operation, switch Querying TTL Trigger Bus Enable State Option A3G terminal module Reading the Description of a Module OUTPut subsystem Reading the Error Queue OUTPut:EXTernal[:STATe] Reading the Model Number of a Module OUTPut:EXTernal[:STATe]?
- Page 97 R (continued) S (continued) [ROUTe:] subsystem switch (cont’d) [ROUTe:]CLOSe logical address [ROUTe:]CLOSe? module identification [ROUTe:]OPEN operation [ROUTe:]OPEN? programming [ROUTe:]SCAN power-on conditions querying recalling states relays safety symbols reset conditions saving states saving states scan complete bit scan complete bit scanning channels scanning channels schematic diagram schematic...
- Page 98 Notes: 98 Index...