
Related Manuals for Zibro Kamin R 616 C


Summary of Contents for Zibro Kamin R 616 C
- Page 1 ® R 616 C MANUEL D'UTILISATION GEBRAUCHSANWEISUNG BRUGSANVISNING INSTRUCCIONES DE USO OPERATING MANUAL ISTRUZIONI D’USO > GEBRUIKSAANWIJZING...
- Page 2 PAGE PLIANTE AUFFALTBLATT FOLDEUDSIDE HOJA DESPLEGABLE FOLD-OUT PAGE > PIEGHEVOLE UITVOUWBLAD...
- Page 3 AFNOR CERTIFICATION 11, AVENUE FRANCIS DE PRESSENSE 93571 SAINT-DENIS LA PLAINE CEDEX FICHE INFORMATIVE La marque NF garantit la qualité de cet article suivant les normes françaises CHAUFFAGES MOBILES et Règlement de certification A COMBUSTIBLE LIQUIDE de l’application NF 128 NF 128 02 / 01 CONFORME A LA NORME NF D 35-300 ET AUX SPECIFICATIONS COMPLEMENTAIRES DEFINIES PAR LE REGLEMENT...
- Page 4 AFNOR CERTIFICATION 11, AVENUE FRANCIS DE PRESSENSE 93571 SAINT-DENIS LA PLAINE CEDEX FICHE INFORMATIVE La marque NF garantit la qualité de cet article suivant les normes françaises et Règlement de certification de l’application NF 128 NF 128 02 / 01 CONFORME A LA NORME NF D 35-300 ET AUX SPECIFICATIONS COMPLEMENTAIRES DEFINIES PAR LE REGLEMENT PARTICULIER DE LA MARQUE NF 128...
- Page 5 Dear Sir, Madam, Congratulations on your purchase of this Zibro Kamin heater, the number one brand amongst portable heaters. You have purchased a first-class quality product, which will serve you for many years to come. This, of course, provided you use the heater correctly. Please read these Directions for Use first, to ensure the maximum lifetime for your Zibro Kamin heater.
-
Page 6: General Directions For Use
• The right quality of fuel will be assured, when you use Zibro Plus for your heater. • If you change to another brand and/or type of paraffin oil, you must first finish up all the... -
Page 7: What You Need To Know In Advance
Only use Class C1 paraffin fuel in accordance with BS2869 Part two, or equivalent. Your heater has been designed for use with high-quality water-free pure paraffin oil, such as Zibro Plus. Only fuels of this kind will ensure clean and proper burning. Lower quality fuel may result in:... -
Page 8: Installing The Heater
MANUAL INSTALLING THE HEATER Carefully remove your heater from the box and check the contents. In addition to the heater you also need to have: a manual fuel pump a transportation cap a fuel cap cover these directions for use Keep the box and the packaging materials (Fig. - Page 9 Take the manual fuel pump and insert the smooth, most rigid tube into the jerrycan. Make sure that it is in a higher position than the removable tank (Fig. I). Insert the ribbed hose into the opening of the removable tank. Lock the valve on top of the pump (turn clockwise).
-
Page 10: Switching Off The Heater
After having ignited the heater, always check whether the combustion chamber is level, by sliding it slightly to the left and the right by its handle (Fig. E). This should be a smooth movement. If the combustion chamber is not level, this will cause smoke and soot to develop. -
Page 11: Malfunction, Causes And Solutions
If adjustment of the wick height does not have the required effect, let the heater burn until all fuel has been used up (Section H). If the flame height is still too low and the wick is set on position 3, then contact your dealer, or replace the wick, refer to section M. -
Page 12: Maintenance
Leave a window or a door wide open for a while. THE HEATER IS BURNING TOO HIGH You are using an incorrect, too volatile type of fuel. Refer to THE RIGHT FUEL (See Section ’What you need to know in advance’). Wick position too high. -
Page 13: Specifications
Clean the fuel filter (refer to section H). Store the heater in a dust-free place, if possible in its original packaging. Unused fuel cannot be used for the next heating season. If there is still some fuel left, do not throw it away, but dispose of it in accordance with the local regulations for the disposal of domestic chemical waste. -
Page 14: Tips For Safe Use
Any repairs or replacements of components within the term of warranty will not result in an extension of the term of warranty. The warranty will no longer apply, when the heater has been modified, non-original parts have been used, or when it is repaired by third parties. The warranty will not apply to parts that are subject to normal wear, such as the batteries, the ignition coil, the wick and the manual fuel pump. -
Page 15: Replacement Of The Wick
REPLACEMENT OF THE WICK ENSURE THAT THE HEATER IS OFF AND COMPLETELY COOL BEFORE STARTING TO REPLACE THE WICK. Open the lid and remove the removable tank. Remove the batteries from the battery holder. Open the front grill. Remove the combustion chamber from the heater. - Page 16 Put the wick holder and the wick mechanism back into 1 1 2 2 1 1 1 1 position. Screw the four wing nuts hand tight. Place the knurled wick adjustment knob on the wick mechanism. Turn the knob as far to the right as possi- ble.
- Page 17 Egregio Signore, Gentile Signora, Ci congratuliamo con Lei per l’acquisto di una Zibro Kamin, il marchio principale fra le stufe portatili. Lei ha acquistato un prodotto di qualità indiscussa, da cui trarrà grande soddisfazione per molti anni, naturalmente sempre a patto che Lei adoperi la stufa in modo corretto. Per tale motivo, al fine di garantire la massima durata della Zibro Kamin, Le consigliamo di leggere con attenzione le istruzioni prima dell’uso.
-
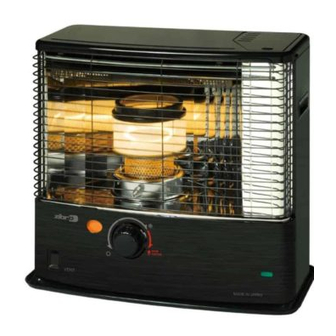
Page 18: Componenti Principali
L’accebsione a stagione fredda con nuovo combustibile. scintilla • Quando si fa uso di Zibro Plus, si è sicuri di utilizzare combustibile di qualità. • Se si passa ad un’altra marca o tipo di petrolio, fare bruciare dapprima la stufa fino a che non vi è... -
Page 19: Osservazioni Generali
IL COMBUSTIBILE GIUSTO La stufa portatile è stata progettata per l’uso di un petrolio di alta qualità, puro, senza acqua, come Zibro Plus, che assicura una combustione pulita ed ottimale. Un combustibile di qualità inferiore può causare i seguenti problemi:... -
Page 20: Installazione Della Stufa
MANUALE INSTALLAZIONE DELLA STUFA Estrarre con cautela la stufa dalla scatola e controllare il contenuto. Oltre alla stufa, devono essere presenti i seguenti componenti: una pompa a sifone per il combustibile un tappo per il trasporto un cappuccio del tappo del serbatoio le istruzioni d’uso Conservare la scatola ed il materiale d’imballaggio (fig. -
Page 21: Accensione Della Stufa
Prendere la pompa a sifone per il combustibile ed inserire il tubo liscio, più rigido, nella latta. Assicurarsi che questa sia più in alto rispetto al serbatoio estraibile (fig. I). Il tubo flessibile nervato deve essere inserito nell'apertura del serbatoio estraibile. Fissare la manopola che si trova sopra la pompa (verso destra). -
Page 22: Spegnimento Della Stufa
Dopo l’accensione della stufa controllare sempre che la camera di combustione sia nella posizione corretta, spostandola con la maniglia leggermente verso sini- stra e destra (fig. E). Questo movimento deve avvenire senza intoppi. Se la camera di combustione non si trova nella posizione corretta, si avranno fumo e fuliggine. LA COMBUSTIONE DELLA STUFA Dopo l’accensione, occorre attendere 10-15 minuti prima di controllare ed eventualmente la fiamma. - Page 23 Se la regolazione dell’altezza dello stoppino non porta all’effetto desiderato, occorre lasciare funzionare la stufa fino a che non vi è più combustibile (capitolo H). Se durante la combustione l’altezza della fiamma rimane ancora bassa e lo stoppino è nella posizione 3, consultare il rivenditore oppure sostituire lo stoppino: cfr capitolo M.
- Page 24 Si fa uso di combustibile vecchio o del tipo sbagliato. Cfr. IL COMBUSTIBILE GIUSTO (cfr. capitolo ‘Osservazioni generali’). Il locale non ha una ventilazione sufficiente. Spalancare per qualche minuto una finestra o una porta e poi lasciarle leggermente aperte. LA STUFA BRUCIA TROPPO, CON FIAMME NON REGOLARI. Si fa uso di un combustibile sbagliato, troppo volatile.
-
Page 25: Condizioni Della Garanzia
Accendere la stufa al di fuori dello spazio abitativo e lasciarla bruciare fino ad esaurimento del combustibile. Lasciare raffreddare la stufa. Pulire la stufa con un panno umido ed asciugarla con un panno asciutto. Togliere le batterie dalla stufa e conservarle in un luogo asciutto. Pulire il filtro (cfr. - Page 26 La PVG International rifiuta esplicitamente tutti gli accordi relativi a rimborso dei danni, compreso il rimborso di danni sorti in seguito a guasti. La riparazione o la sostituzione delle parti entro il termine di garanzia non implica un prolungamento della garanzia stessa. La garanzia viene considerata nulla qualora siano state apportate delle modifiche, qualora siano state montate delle parti non originali o qualora siano state effettuate delle riparazioni alla stufa da parte di terzi.
- Page 27 SOSTITUZIONE DELLO STOPPINO PRIMA DI PROCEDERE ALLA SOSTITUZIONE DELLO STOPPINO, LA STUFA DEVE ESSERE SPENTA E COMPLETAMENTE FREDDA. Aprire lo sportellino del serbatoio e togliere il serbatoio estraibile. Togliere le batterie dal suo comparto. Sollevare la griglia dalla’incastro e tirarla in avanti. Togliere la camera di combustione dalla stufa.
- Page 28 Rimettere a posto tutto il blocco. 1 1 2 2 1 1 1 1 Avvitare gradualmente i galletti seguendo una sequenza a croce (1-3-2-4). Inserire di nuovo la manopola nella sua sede e ruotarla completamente verso destra.Premere il tasto di spegnimento.
- Page 29 Geachte mevrouw, meneer, Van harte gefeliciteerd met de aankoop van uw Zibro Kamin, het A-merk onder de verplaatsbare kachels. U hebt een kwaliteitsproduct aangeschaft, waar u nog vele, vele jaren plezier van zult hebben, mits u de kachel verantwoord gebruikt natuurlijk. Lees daarom eerst deze gebruiksaanwijzing, voor een optimale levensduur van uw Zibro Kamin.
-
Page 30: Belangrijke Onderdelen
• Brandstof veroudert. Begin elk stookseizoen met nieuwe brandstof. • Wanneer u stookt met Zibro Plus, bent u verzekerd van de juiste kwaliteit brandstof. • Indien u overgaat op een ander merk en/of soort kerosine, moet u de kachel eerst helemaal laten... -
Page 31: De Juiste Brandstof
Uw verplaatsbare kachel is ontworpen voor het gebruik van watervrije, zuivere gebruik van uw verplaatsbare kachel. kerosine van hoge kwaliteit, zoals Zibro Plus. Alleen deze zorgt voor een schone en optimale verbranding. Brandstof van mindere kwaliteit kan leiden tot: overmatige teeraanslag op de kous... - Page 32 HANDLEIDING HET INSTALLEREN VAN DE KACHEL Haal uw kachel voorzichtig uit de doos en controleer de inhoud. Naast de kachel moet u ook beschikken over: een brandstofhevelpompje een transportdop een tankdop-opener deze gebruiksaanwijzing Bewaar de doos en het verpakkingsmateriaal (fig. A) voor opslag en/of trans- port.
- Page 33 Neem het brandstofhevelpompje en steek de gladde, meest stugge pijp in de jerrycan. Zorg dat deze hoger staat dan de wisseltank (fig. I). De geribbelde slang steekt u in de opening van de wisseltank. Draai de knop bovenop het pompje vast (naar rechts). Knijp enkele keren in het pompje, totdat de brandstof in de wisseltank stroomt.
- Page 34 Controleer na het ontsteken van de kachel altijd of de verbrandingskamer goed recht staat, door deze aan de handgreep even naar links en rechts te schuiven (fig. E). Dit moet soepel gaan. Als de verbrandingskamer ongelijk staat, leidt dit tot rook- en roetontwikkeling. HET BRANDEN VAN DE KACHEL Na het ontsteken van de kachel duurt het 10 à...
-
Page 35: Storingen, Oorzaken En Oplossingen
Duw de draaiknop voorzichtig op zijn plaats. Dit kan maar op één manier: bekijk de achterkant van de dop voor de juiste positie. Als het verstellen van de koushoogte niet het gewenste effect heeft, moet u de kachel helemaal laten leegbranden (hoofdstuk H). Blijft de verbranding ook dan nog te laag en staat uw kous inmiddels op stand 3, neem dan contact op met uw dealer of vervang de kous, zie hoofdstuk M) Als de verbranding na het bijstellen te hoog wordt (fig. - Page 36 U gebruikt oude of verkeerde brandstof. Zie DE JUISTE BRANDSTOF (hoofdstuk ”Wat u vooraf moet weten”). De ruimte wordt onvoldoende geventileerd. Zet even een raam of deur wijd open en laat deze daarna op een kier staan. DE KACHEL BRANDT TE HOOG. U gebruikt verkeerde, te vluchtige brandstof.
- Page 37 Haal de batterijen uit de batterijhouder en bewaar deze op een droge plaats. Reinig het brandstofzeefje (zie hoofdstuk H). Berg de kachel stofvrij op, zo mogelijk in de originele verpakkingsmaterialen. Overgebleven brandstof kunt u een volgend stookseizoen niet meer gebruiken. Houdt u toch wat over gooi deze brandstof dan niet weg, maar volg de regels zoals die in uw gemeente gelden voor Klein Chemisch Afval.
- Page 38 Alle verdere aanspraken op schadevergoeding, inclusief gevolgschade wijzen wij uitdrukkelijk af. Reparatie of vervanging van onderdelen binnen de garantietermijn leidt niet tot verlenging van de garantie. De garantie geldt niet wanneer veranderingen zijn aangebracht, niet- originele onderdelen zijn gemonteerd of reparaties aan de kachel zijn verricht door derden.
- Page 39 HET VERVANGEN VAN DE KOUS VOORDAT U BEGINT MET HET VERVANGEN VAN DE KOUS, DIENT KACHEL VOLLEDIG AFGEKOELD TE ZIJN. Open het tankklepje en haal de wisseltank eruit. Haal de batterijen uit de batterijhouder. Licht de grille uit de inkeping en trek hem naar voren. Neem de branderkop uit de kachel.
- Page 40 Plaats de branderzitting en het kousmechanisme terug. 1 1 2 2 1 1 1 1 Druk de kous met koushouder in de uitsparingen zover omhoog dat het niet verder gaat. Druk de pinnen goed aan totdat u een klikgeluid hoort. Let erop dat de kous niet vervormt.
- Page 43 Holloway Bank, Wednesbury tel: +43 7434 44867 West Midlands WS10 0AW fax: +43 7434 44868 Tel.: +44 121 506 1818 email: pvgaustria@zibro.com Fax: +44 121 505 1744 email: gases@lister.co.uk e BELGIË PVG Belgium NV/SA > ITALIA Industrielaan 55 PVG Italy SRL 2900 SCHOTEN Via Niccolò...
Need help?
Do you have a question about the Kamin R 616 C and is the answer not in the manual?
Questions and answers