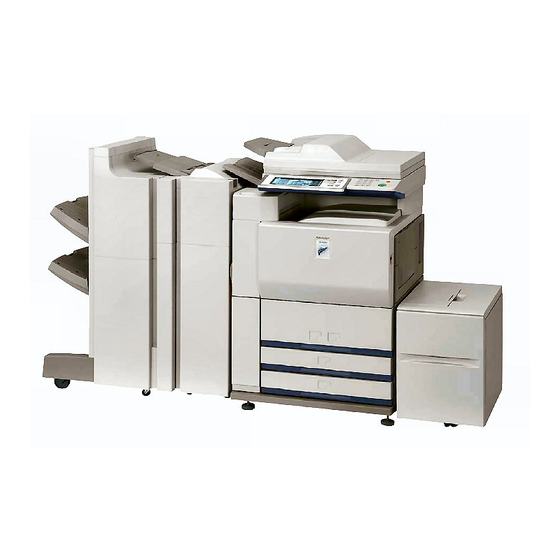
Sharp AR-M550N Printer Operation Manual
Digital multifunctional system
Hide thumbs
Also See for AR-M550N:
- Service manual (461 pages) ,
- Circuit diagram (198 pages) ,
- Operation manual (172 pages)
Table of Contents
Advertisement
Quick Links
OPERATION MANUAL
(for printer)
DIGITAL LASER COPIER/PRINTER
DIGITAL MULTIFUNCTIONAL SYSTEM
Be sure to become thoroughly familiar with this manual to gain
the maximum benefit from the product.
Before installing this product, be sure to read the installation
requirements and cautions sections of the "Operation manual
(for general information and copier operation)".
Be sure to keep all operation manuals handy for reference
including this manual, the "Operation manual (for general
information and copier operation)" and operation manuals for any
optional equipment which has been installed.
Advertisement
Table of Contents

Related Manuals for Sharp AR-M550N


Summary of Contents for Sharp AR-M550N
- Page 1 OPERATION MANUAL (for printer) DIGITAL LASER COPIER/PRINTER DIGITAL MULTIFUNCTIONAL SYSTEM Be sure to become thoroughly familiar with this manual to gain the maximum benefit from the product. Before installing this product, be sure to read the installation requirements and cautions sections of the "Operation manual (for general information and copier operation)".
-
Page 2: Trademark Acknowledgments
All information included herein is subject to change without notice. SHARP is not responsible for any loss or damages, direct or indirect, arising from or related to the use of this operation manual. -
Page 3: Table Of Contents
TABLE OF CONTENTS CHAPTER 1 CHAPTER 5 BASIC PRINTING PROCEDURES KEY OPERATOR PROGRAMS SETTING THE PRINTER DRIVER......1-2 Printer driver settings in Windows (selecting and KEY OPERATOR PROGRAMS ........5-2 setting print conditions) Key operator program list ........5-2 Using the Help file to view explanations of the Procedure for using key operator programs.. - Page 4 CHAPTER 1 BASIC PRINTING PROCEDURES This chapter explains how to configure printer driver settings at your computer, and provides basic information on printing. Page SETTING THE PRINTER DRIVER ..............1-2 Printer driver settings in Windows (selecting and setting print conditions) ..1-2 Using the Help file to view explanations of the settings ......1-3 Printing ....................1-4 Using options to print ................1-6...
-
Page 5: Setting The Printer Driver
Click the [Setup] tab in the printer driver The screen shows the example of selecting properties. SHARP AR-M620N PCL6. The SHARP AR-M620N PCL6 properties is shown as an example. Set each item. For setting items, see the printer driver help. For information on viewing Help, see the following Set each item. -
Page 6: Using The Help File To View Explanations Of The Settings
To view on-screen explanations of the settings in the printer driver, open the Help file. I I I I Opening Help in Windows This window is the SHARP AR-M620N PCL6 Properties in Windows Me. Click [Help] to display the Help screen. -
Page 7: Printing
[Image Adjustment] field. (2) In Windows 2000/XP When you are finished, go to step 6 on the next Select the [SHARP AR-M620N PCL6] printer icon page. in [Select Printer].In Windows 2000, the properties consist of five tabs: [Main], [Paper], [Advanced], [Job Handling], and [Watermarks]. - Page 8 SETTING THE PRINTER DRIVER Click the [Paper] tab. Check the paper size to make sure it is correct. Next, specify the paper feeding method in [Paper Selection]. Normally [Auto Select] is used. When finished, click the [OK] button to close the printer properties window.
-
Page 9: Using Options To Print
Click the [Properties] button to open the printer configure the settings in the following window: driver properties window. (2) In Windows 2000/XP In [Select Printer], select the "SHARP AR-M620N PCL6" printer icon. In Windows 2000, the properties consist of five tabs: [Main], [Paper], [Advanced], [Job Handling], and [Watermarks]. - Page 10 SETTING THE PRINTER DRIVER Click the [Paper] tab. Make sure that the selected paper size is correct in the [Paper Size] field. Next, select the paper feeding method in [Paper Selection]. Normally [Auto Select] is used. If you wish to use the optional paper tray, select it in the following window.
-
Page 11: Selecting Printing Functions
CHAPTER 2 SETTING THE PRINTER DRIVER PROPERTIES This chapter explains how to configure settings in the printer driver. The settings are changed in the software application. Page SELECTING PRINTING FUNCTIONS............2-2 Settings in the [Main] tab................2-2 Settings in the [Paper] tab..............2-6 Settings in the [Advanced] tab ...............2-9 Settings in the [Job Handling] tab ............2-13 Settings in the [Watermarks] tab ............2-16... -
Page 12: Selecting Printing Functions
SELECTING PRINTING FUNCTIONS Almost all print functions are selected in the print driver properties window that appears when printing from an application. The print functions can also be selected in the printer driver properties window that appears when [Properties] is selected in the printer icon menu. The printer driver settings are grouped on tabs in the printer driver properties window. - Page 13 SELECTING PRINTING FUNCTIONS Settings in the [Main] tab (continued) N-Up Printing User Settings Each page is reduced to allow multiple pages to be The user can store up to 30 sets of settings, printed on each sheet. The pages are printed in "Z" allowing the settings to be easily changed by order on each sheet.
- Page 14 SELECTING PRINTING FUNCTIONS Settings in the [Main] tab (continued) Finishing Staple sort function Configure settings for staple or punch finishing. Each set of pages printed using the sort function is stapled and delivered to the top tray, or stapled at [Binding Edge] the centre and delivered to the lower pamphlet tray.
- Page 15 SELECTING PRINTING FUNCTIONS Settings in the [Main] tab (continued) [Punch] [No Offset] Use this to select the punch function. Select this when you do not wish sets of collated or When the punch function is selected, [Collate] is grouped pages to be offset from each other. automatically selected.
-
Page 16: Settings In The [Paper] Tab
SELECTING PRINTING FUNCTIONS Settings in the [Paper] tab The following screen appears when the [Paper] tab is selected. The settings and buttons in this screen are explained below. Paper Size Image Orientation Select the size of paper to be printed on. Set the orientation of the document. - Page 17 SELECTING PRINTING FUNCTIONS Settings in the [Paper] tab (continued) Paper selection [Carbon Copy Settings] Select the paper tray and paper type in this item. Click this button to configure settings in the Default setting: Auto Select [Carbon Copy Settings] window. Default setting: Not selected [Auto Select] When [Auto Select] is selected, the tray containing the...
- Page 18 SELECTING PRINTING FUNCTIONS Settings in the [Paper] tab (continued) [Different Paper Settings] Paper Selection These settings are used to print selected pages on a [Paper Source] specified type of paper or on paper from a specified Select this if you wish to specify a paper tray to be tray, or to have blank sheets added as inserts at used for [Insert Position] specified pages.
-
Page 19: Settings In The [Advanced] Tab
SELECTING PRINTING FUNCTIONS Settings in the [Advanced] tab The following screen appears when the [Advanced] tab is selected. The settings and buttons in this screen are explained below. Image Quality Text To Black This item is used to select the [Resolution Settings] Use this setting to have all text other than white text and [Graphics Mode] for printing. -
Page 20: Key Operator Programs
SELECTING PRINTING FUNCTIONS Settings in the [Advanced] tab (continued) Margin Shift Tandem Print This is used to shift the print image to create margin Two machines that are connected in a system that at the left, right, or top of the paper. Select [None], allows tandem copying (sharing a large copy job [10mm.], [20mm.], or [30mm.]. - Page 21 SELECTING PRINTING FUNCTIONS Settings in the [Advanced] tab (continued) User Settings Position of the first Tab Up to 25 sets of custom Tab Print Settings can be Use this to set the distance to the first tab from the stored, allowing settings to be selected by simply top of the tabbed paper.
- Page 22 SELECTING PRINTING FUNCTIONS Settings in the [Advanced] tab (continued) Text Settings This field is used to enter the text to be printed on the tabs and the pages at which tabbed sheets are to be inserted. [Text Alignment] This is used to set the alignment of the text on the tabs.
-
Page 23: Settings In The [Job Handling] Tab
SELECTING PRINTING FUNCTIONS Settings in the [Job Handling] tab The following window appears when the [Job Handling] tab is clicked. The settings and buttons are explained below. Document Filing [Main Folder] This setting is used to save a print job as a data file Select this when you wish to save a print job in the in the hard disk of the machine. - Page 24 SELECTING PRINTING FUNCTIONS Settings in the [Job Handling] tab (continued) Retention [Pass Code] (5-digit number) To require that a passcode be entered at the [Hold Only] operation panel of the machine to print a job stored This setting is used to prevent a print job from being in a Filing folder, enter the passcode (5-digit misplaced.
- Page 25 SELECTING PRINTING FUNCTIONS Settings in the [Job Handling] tab (continued) Notify Job End Job ID Use this to set the default user name and job name This is used to select whether or not you wish to be that appear in the operation panel of the machine. notified when a print job is finished.
-
Page 26: Settings In The [Watermarks] Tab
SELECTING PRINTING FUNCTIONS Settings in the [Watermarks] tab The following window appears when the [Watermarks] tab is clicked. The settings and buttons are explained below. Watermark preview [Update] The watermark function is used to print a Click this button to adjust the size or angle of the watermark (a faint, shadowlike text image) on the text of a stored watermark. -
Page 27: Web Pages In The Printer
CHAPTER 3 WEB PAGES IN THE PRINTER This chapter explains various functions that allow you to access the Web pages in the printer from your computer. Page REMOTE OPERATION VIA A NETWORK ............3-2 Environment Required to Access the Web Page ........3-2 How to access the Web page and view Help.........3-2 Items in the menu frame of the Web page ..........3-3 E-mail Print.....................3-7... -
Page 28: Remote Operation Via A Network
REMOTE OPERATION VIA A NETWORK You can use a Web browser such as Netscape Navigator or Internet Explorer on your computer to access the Web page in the machine and configure settings. Environment Required to Access the Web Page You must have either of the following Web browsers to access the machine's Web page: •... -
Page 29: Items In The Menu Frame Of The Web Page
REMOTE OPERATION VIA A NETWORK Items in the menu frame of the Web page Click items in the menu frame and configure the settings as needed. Some settings may require a password. Only a network administrator should configure these settings (page 3-5). -
Page 30: Document Filing
REMOTE OPERATION VIA A NETWORK Document Filing Jobs stored on the hard disk using the Document Filing function can be printed, transmitted, and deleted. Folders on the hard disk can be added and deleted. I I I I Folder/Job Operate The Quick File folder is used to automatically save a finished job. -
Page 31: Device Setup
Setup menu. The passwords for "User" and "admin" are both initially set to "Sharp". If you wish to change the passwords when first establishing the settings, enter "Sharp" in "Admin Password" before you establish the settings. A password must consist of alphanumeric characters and be no more than seven characters long. -
Page 32: Network Setup
REMOTE OPERATION VIA A NETWORK Network Setup Configure network protocol, Direct Print, and LDAP settings. I I I I General Configure settings in the [GENERAL] and [Filter] screens. I I I I Protocol Configure settings in the [TCP/IP], [NetWare], [AppleTalk] and [NetBEUI] screens. I I I I Services Configure settings in the [DNS], [WINS], [SMTP], [SNMP] and [Kerberos] screens. -
Page 33: E-Mail Print
REMOTE OPERATION VIA A NETWORK E-mail Print When an e-mail account is set up for the machine, this function is used to have the machine periodically check the mail server and automatically print attachments to e-mails it receives without the need for the printer driver. I I I I Configuring E-mail print settings To use E-mail Print, the machine's e-mail account information must be configured in the machine. -
Page 34: Directly Printing A File On A Computer
REMOTE OPERATION VIA A NETWORK Directly printing a file on a computer The address of a file that can be accessed from your computer can be specified to directly print the file without using the printer driver. In addition to files on your computer, files on any other computer on the same network that can be accessed from your computer can be printed in this way. -
Page 35: Directly Printing A File On An Ftp Server
REMOTE OPERATION VIA A NETWORK Directly printing a file on an FTP server A FTP server can be stored in the machine to enable direct printing of a file on the FTP server from the operation panel of the machine without using the printer driver. Files with the extensions pcl, ps*, pdf*, tiff, tif, and prn can be printed. - Page 36 REMOTE OPERATION VIA A NETWORK Select the desired file or folder name. PPD1_FTP_server FILE OR FOLDER NAME Data base User_area Product_info.tiff Reply.pdf If the file or folder does not appear in the screen, press the key until it appears. To return to the global access screen, touch the key.
-
Page 37: Printer Basic Settings
CHAPTER 4 PRINTER BASIC SETTINGS This chapter describes the printer configuration settings. Page MAKING CONFIGURATION SETTING ............4-2 Operation procedure common to all printer configuration settings (items that can be set from the operation panel)........4-2 Printer Default settings................4-4 PCL settings...................4-5 PostScript settings .................4-5... -
Page 38: Making Configuration Setting
MAKING CONFIGURATION SETTING The printer configuration setting allows basic printer settings to be made. The items set with the printer configuration settings are shown below. G Printer default settings ..Basic settings used in printing (See page 4-4.) G PCL settings ......Sets a PCL symbol set. (See page 4-5.) G PostScript settings* ....Sets whether a PostScript error page is printed or not when a PostScript error has... -
Page 39: G Printer Default Settings
MAKING CONFIGURATION SETTING Supplementary explanation of key operation for configuration setting These keys and indicator are available on CUSTOM SETTINGS setting screens that require the entry of numerical values. PRINTER DEFAULT SETTINGS (1 999) DEFAULT OUTPUT TRAY CENTRE TRAY DEFAULT PAPER TYPE PLAIN LINE THICKNESS The name of the program category or particular item to be set will appear on the touch key. -
Page 40: Printer Default Settings
MAKING CONFIGURATION SETTING Printer Default settings The default settings are used to set specific print conditions for printing in an environment where the print driver is not used (such as printing from MS-DOS or from a computer that does not have the provided print driver installed). NOTE When some items can be set both in the printer driver and on the operation panel, the values set in the printer driver override those set on the operation panel. -
Page 41: Pcl Settings
MAKING CONFIGURATION SETTING I I I I Line thickness This setting is used to adjust the line width of vector graphics. For example, if you desire a finer line, select a value from 0 to 4. If you desire a thicker line, select a value from 6 to 9. To return to the standard line thickness, select 5. Use this setting for special applications such as CAD when lines do not appear with sufficient clarity. -
Page 42: G Key Operator Program List
CHAPTER 5 KEY OPERATOR PROGRAMS This chapter explains the key operator programs for the printer function. Key operators should read this chapter to ensure correct use of the key operator programs. Page KEY OPERATOR PROGRAMS..............5-2 Key operator program list...............5-2 Procedure for using key operator programs...........5-3 Key operator program menu ..............5-4 DESCRIPTION OF SETTING PROGRAMS ..........5-5 Printer settings ..................5-5... -
Page 43: Key Operator Programs
KEY OPERATOR PROGRAMS Key operator programs related to the printer function are explained here. For key operator programs for general use of the machine, see the key operator's guide. NOTE The key operator programs that can be accessed depend upon how the product is configured with optional equipment. -
Page 44: Procedure For Using Key Operator Programs
KEY OPERATOR PROGRAMS Procedure for using key operator programs The procedure for configuring a key operator program is explained below. Press the [CUSTOM SETTINGS] key. Touch the [PRINTER SETTINGS] key. Follow these steps to select the program that PRINTER you wish to use. SETTINGS In the following steps, the setting screens for... -
Page 45: Key Operator Program Menu
KEY OPERATOR PROGRAMS Key operator program menu The key operator programs are accessed via the following menu structure. Refer to this menu when changing the settings explained on the following pages. Level 1 Level 2 Level 3 PROHIBIT NOTICE PAGE PRINTING PRINT DENSITY LEVEL DEFAULT SETTINGS PROHIBIT TEST PAGE PRINTING... -
Page 46: Description Of Setting Programs
DESCRIPTION OF SETTING PROGRAMS The key operator programs related to the printer function are explained here. Printer settings Default settings Interface settings These programs are used to adjust the settings of These programs are used to control data transmitted to various printer functions. -
Page 47: Enable Usb Port
DESCRIPTION OF SETTING PROGRAMS Enable parallel port Port switching method This program is used to enable or disable printing from The machine can use the three ports shown below for the parallel port. printing. This program is used to select when switching Default setting: Enable between ports will take place. -
Page 48: Network Settings
DESCRIPTION OF SETTING PROGRAMS Network settings These programs are set when this product is used as a Reset the NIC network printer. This program is used to reset all setting items of NIC After you complete the setting for one program, you (Network Interface Card) of this product to the factory must exit the key operator programs, turn off the main default settings. -
Page 49: Troubleshooting
CHAPTER 6 TROUBLESHOOTING This chapter provides solutions to problems you may encounter when using the machine. Be sure to read this chapter whenever you encounter a problem. Page TROUBLESHOOTING ...................6-2 Checking the IP address ................6-4... - Page 50 TROUBLESHOOTING The following problems may not be due to a machine failure, so please check again before calling for service. In the event that service is required, turn off the machine main power switch and power switch, unplug the power plug from the outlet.
- Page 51 TROUBLESHOOTING Problem Check Solution or cause printer driver Is there sufficient free space on your hard Delete any unneeded files and applications to increase cannot be installed. drive? free space on your hard drive. Are you using an operating system that is not Make sure your operating system is supported.
-
Page 52: Checking The Ip Address
TROUBLESHOOTING Checking the IP address There are three ways to check the IP address: 1. Using [LIST PRINT] in [CUSTOM SETTINGS] in the operation panel Select NIC PAGE to print a list of the machine settings. The IP address that has been set for the machine can be found in this list. -
Page 53: Appendix
CHAPTER 7 APPENDIX This chapter contains product specifications and other technical information. Page PRINTER SPECIFICATIONS ................7-2 NOTICE PAGE PRINTING ................7-3 PRINT AREA ....................7-4... -
Page 54: Printer Specifications
PRINTER SPECIFICATIONS Memory capacity (standard) Standard 128MB DIMM slots for additional memory One (64 MB to 256 MB memory can be mounted.) Page description language PCL6, PCL5e, PS3 emulation* Resident font For PCL: Outline fonts: 80 Barcorde fonts (option): 28 Bitmap fonts: 1 PostScript compatible fonts (option): 136 Interface... -
Page 55: Notice Page Printing
NOTICE PAGE PRINTING A notice page will be printed when the current print job cannot be run due to a system limitation and an explanation of the limitation is too lengthy to be shown in the message display. A notice page will describe the limitation and other possible ways instead of possibilities to run the job. -
Page 56: Print Area
PRINT AREA The print area of this product is shown below. GThe print area is the entire page excluding a margin of 4.2 mm (11/64") at each edge. The actual print Approx. 4.2mm (11/64") area may vary depending on the printer driver used and the type of software application. - Page 57 OPERATION MANUAL (for printer) ARM550N-EX3-PRINTER...
Need help?
Do you have a question about the AR-M550N and is the answer not in the manual?
Questions and answers