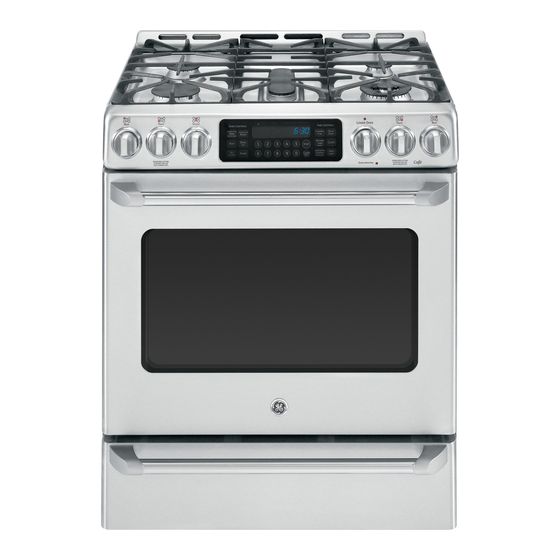
GE P2B930 Owner's Manual And Installation Instructions
Self-cleaning dual fuel convection ranges
Hide thumbs
Also See for P2B930:
- Owner's manual and installation instructions (120 pages) ,
- Owner's manual & installation instructions (64 pages) ,
- Technical service manual (76 pages)
Table of Contents
Advertisement
Available languages
Available languages
Quick Links
GEAppliances.com
0
IIm
8
m
l:n
IIm
U
Safety Instructions
...... 2-5
Operating Instructions
Convection Oven ..........
17-21
Roasting Guide ..............
20
Timed Convection Baking ..... 23
Gas Surface Burners .........
6,7
Griddle .........................
8
Lower Oven Drawer ...........
26
Thermostat ...............
25, 26
Upper Oven ................
9-25
Baking or Roasting ..........
15
Broiling Guide ...............
13
Clock and Timer .............
14
Oven Controls ................
9
Preheating ...................
11
Probe ....................
16, 19
Sabbath Feature ............
24
Self-Cleaning ............
27, 28
Special Features .........
22, 23
Timed Baking and
Roasting Features ...........
21
Care and Cleaning
Aluminum Foil.................
12
Burner Grates .............
31, 32
Burner Caps and Heads ...... 30
Control Panel and Knobs ...... 33
Cooktop Surface ..............
33
Griddle ........................
31
Lift-Off Oven Door .............
34
Lower Oven Drawer .......
36, 37
Oven Air Vents ................
33
Oven Heating Elements .......
34
Oven Light Replacement ...... 36
Oven Racks ...................
34
Sealed Burner Assemblies .... 29
Self-Cleaning ..............
27, 28
Stainless Steel Surfaces .......
35
Installation
Instructions ............
38-52
Anti-Tip Device ................
52
Assemble Surface Burners .... 50
Check Ignition of
Surface Burners ..............
51
Connect Range to Gas ..... 44, 46
Dimensions and
Clearances ................
40, 41
Electrical Connections ...... 46-49
Level the Range ...............
51
LP .............................
44
Accessories
..................
57
Troubleshooting
Tips ......................
53-56
Consumer Support
Consumer Support...Back
Cover
Warranty to Customers
in C(]nc]da ....................
59
Warranty to Customers
in the U.S.A...................
58
P2B930
C2S985
For a Spanish version of this
manual, visit our Website at
GEAppliances.com.
Para consultar
una version
en espafiol de este manual
de instrucciones, visite
nuestro sitio de internet
GEAppliances.com.
Write the model and serial
numbers here:
Model #
Serial #
You can find them on (] label on the
front of the range behind the lower
oven drawer.
49-85182-1
i0-ii
GE
Advertisement
Table of Contents

Related Manuals for GE P2B930


Summary of Contents for GE P2B930
- Page 1 Operating Instructions Anti-Tip Device ....Convection Oven ..17-21 Assemble Surface Burners ..50 Roasting Guide ....P2B930 Check Ignition of Timed Convection Baking ..23 Surface Burners ....C2S985 Gas Surface Burners ..Connect Range to Gas ..44, 46 Griddle ......
- Page 2 IMPORTANT SAFETY INFORMATION. READ ALL INSTRUCTIONS BEFORE USING. I A WARNING I If the information in this manual is not followed exactly, a fire or explosion may result, causing property damage, personal injury or death. - Do not store or use gasoline or other flammable vapors and liquids in the vicinity of this or any other appliance. - WHAT TO DO IFYOU SMELL GAS _:, Do not try to light any appliance.
-
Page 3: Safety Instructions
IMPORTANT SAFETY INFORMATION. READ ALL INSTRUCTIONS BEFORE USING. GEApp,o,,cesco,, IAWARNING ]GENERAL SAFETY INSTRUCTIONS iiiiiil Do not store items of interest to children above a range WARNING or on the backguard of a range-children climbing on the range to reach items could be seriously injured. NEVER use this appliance as a space heater to heat or warm the room. - Page 4 IMPORTANT SAFETY INFORMATION. READ ALL INSTRUCTIONS BEFORE USING. iA WARNING iKEEP FLAMMABLE MATERIALS AWAY FROM THE RANGE Do not store or use flammable materials in an oven or reaching over the range. Clothing in close proximity to near the cooktop, including paper, plastic, pot holders, burners or hot surfaces may ignite causing severe burns.
-
Page 5: Safety Instructions
IMPORTANT SAFETY INFORMATION. READ ALL INSTRUCTIONS BEFORE USING. GEApp,o,,cesco,, lOVEN SAFETY INSTRUCTIONS IA WARNING Stand away from the range when opening the oven Do not leave items such as paper, cooking utensils or food in the oven when not in use. Items stored in an door. - Page 6 Using the gas surface burners. Throughout this manual, features and appearance may vary from your model. Before Lighting a Gas Burner After Lighting a Gas Burner Do not operate the burner for an extended Make sure all burners are in place. period of time without cookware on the Make sure all grates on the range are grate.
- Page 7 GEAppliances.com to Select Flame Size For safe handling of cookware, never let the cookware you are using. flames extend up the sides of the cookware. Flames larger than the bottom of the cookware Watch the flame, not the knob, as you reduce will not result in faster heating of the cookware and could be hazardous.
-
Page 8: Griddle
OFF. NOTE:Do not cleon the griddle in the self- cleaning oven P2B930 Preseasoned Griddle for Model Using the Griddle... -
Page 9: Oven Controls
Using the oven controls. (Throughout this manual, features and appearance may vary from your modeL) GEAppliances.com TIME CONTROLS Features, appearance and pad locations may vary. Oven Control Clock,Timer and Features Bake Pad Oven Light On/Off Pad Touchto selectthe bakefunction. Touchto turn the oven light on or off. Broil HI/LO Pad Delay Start Pad Touchto selectthe broil function. - Page 10 Using the upper oven. To avoid possible burns, place the shelves in the desired position before you tum the oven on. Before you begin... r ,q ll The shelves have stop-locks, so that when To remove a shelf, pull it toward you, tilt the placed correctly on the shelf supports (A front end up and pull it out.
- Page 11 GEAppliances.com If your model has a door latch, do not lock the oven door with the latch during baking or roasting. The latch is used for self-cleaning only. or Roasting to Set the Upper Oven for Baking Your oven is not designed for open-door To change the oven temperature during BAKE cycle, press the Bake pad and then the number cooking.
-
Page 12: Aluminum Foil
Using the upper oven. Aluminum Foil Do not use aluminum foil to line oven bottoms. Foil may be used to catch spills by placing a sheet on a lower rack, several inches below The foil will trap heat below and upset the performance of the oven. -
Page 13: Broiling Guide
GEAppliances.com Broiling Guide Broil Rack The size,weight, thickness, Type or Food Doneness Comments starting temperature and Thickness Setting Position* your preference of doneness Beef Rare - Medium Steaks- Steaks less than will affect broiling times. This Rare !" thick 1" thick are dif- guide is based on meats at (!40°F-!50°F) ficult to cook rare. -
Page 14: Clock And Timer
Using the clock and timer. Not all features are on all models. To Set the Clock [ CLocK ¸¸:¸ The clock must be set to the correct time of day If number pads are not touched within one for the automatic oven timing functions to work minute after you touch the Clock pad, the properly. - Page 15 Using the timed baking and roasting features, unmr o ven o n?_ GEAppliances.com NOTE: Foods that spoil easily-such as milk, eggs, fish, stuffings, poultry and pork-should not be allowed to sit for more than 1 hour before or offer cooking. Room temperature promotes the growth of harmful bacteria.
- Page 16 Using the probe, con s ome mode sI [ACAUTION ] :o prevent burns, do not unplug the probe from the oven outlet until the oven has cooled.Do not store the probe in the oven. If your model has a door latch, do not lock the oven door with the latch while cooking with the probe.The latch is used for self-cleaning only.
- Page 17 oven. Using the convection (upper oven only) OEAppliances.com The convection oven fan shuts off when the oven door is opened. DO NOT leave the door open for long periods of time while using convection cooking. To help you understand the difference between Roasts or poultry should be cooked on rack convection bake and roast and traditional bake position (A).
- Page 18 Using the convection oven.unper oven o n? Cookware for Convection Cooking Before using your convection oven, check Metal and Glass to see ifyour cookware leaves room for air Any type of cookware will work in your circulation in the oven. If you are baking with convection oven.
- Page 19 GEAppliances.com How to Set the Upper Oven for Convection Roasting when Using the Probe (on some models) The display will flash PROBEand the oven IA CAUTIONI Topreventpossible control will signal if the probe is inserted into burns, do not unplug the probe from the oven For best results when roasting large the outlet, and you have not set a probe turkeys and roasts, we recommend...
- Page 20 Using the convection oven.cunner oven Convection Roasting Guide - Suggested Settings Oven Internal Meats Temp. Temp. Beef Rib Roast (4-8 Ibs.) Ro re 325°F 145°F Bone-in and Boneless Medium 325 ° 160°F Rare 425 ° 145°F Beef Tenderloin (2-3 Ibs.) Beef Tenderloin (4-6 Ibs.) Rare 425 °...
-
Page 21: Timed Convection Baking
Using the timed convection baking features, con s ome mode sl GEAppliances.com You will hear a fan while cooking with this feature. The fan will stop when the door is opened but the heat will not turn off NOTE: Foods that spoil easily-such as milk, eggs, fish, stu_ngs, poultry and pork-should not be allowed to sit for more than 1 hour before or after cooking. - Page 22 Special features of your upper oven control. Yournew touch pad control has additional features that you may chooseto use.Thefollowing are the features and how you may activate them. Thespecialfeature modescan only be activated while the displayis showing the time of day. Theyremain in the control's memory until the steps are repeated.
- Page 23 GEAppliances.com Gas/Control Lockout (on some models) Your control will allow you to lock out the When this feature is on and the touch pads are surface burners, oven burners and control touched, the control will beep and the display panel so they cannot be activated. will show LOC.
-
Page 24: Sabbath Feature
Using the Sabbath Feature. (Designed for-use on the .Jewish Sabbath and Holidays) The Sabbath feature can be used for baking/roasting in the upper and lower oven or baking drawer (on some models). It cannot be used for convection, broiling, self-cleaning or Delay Start cooking. CERTIFIED NOTE: The oven light comes on automatically (on some models) when the door is opened and goes... - Page 25 GEAppliances.com How to Exit the Sabbath Feature Tap the DELAYSTARTpad until 12 shdn [-7] Touch the Clear/Off pad. or no shdn appears in the display. 12 shdn CLEAR indicates that the oven will automatically If the oven is cooking, wait for a random turn off after 12 hours, no shdn indicates delay period of approximately 30 seconds that the oven will not automatically turn...
-
Page 26: Lower Oven Drawer
Using the lower oven drawer, con s ome mode sI Thelower oven drawer may be used to bake foods using the same times and temperatures as a standard oven. Foods ideal for baking in the lower oven drawer include pizza,frozen foods,casseroles,biscuits,rollsand many desserts. To Use the Lower Oven Drawer... -
Page 27: Self-Cleaning
Using the self-cleaning upper oven. GEAppliances The oven door must be closed and all controls set correctly for the cycle to work properly. Before a Clean Cycle Forthe first self-clean cycle, we recommend Do not clean the gasket. The fiberglass venting your kitchen with an open window or material of the front frame gasket cannot using a ventilation fan or hood. -
Page 28: Self-Cleaning
Using the self-cleaning upper oven. The oven door must be closed and all controls set correctly for the cycle to work properly. How to Delay the Start of Cleaning SELF Hake sure the clock shows the correct time of The oven shuts off automatically when the CLEAN day. -
Page 29: Sealed Burner Assemblies
Care and cleaning of the range. 6EAppliances.c Be sure electrical power is off and all surfaces are cool before cleaning any part of the range. IAIAD_i_f21 [ALL _l'l_l_H_,-J j lfyour range is removed Forcleaning, servicing or any reason, be sure the anti-tip device is reengaged properly when the range is replaced. Failure to take this precaution could result in tipping of the range and cause injury. -
Page 30: Burner Caps And Heads
Care and cleaning of the range, Burner Caps, Bases and Heads Beforeremoving the burner caps and headsIon Replacement Burner Heads (onsome models) some models),remember their sizeand location. Replace burner heads over the electrodes on Replacethem in the same location after cleaning. the cooktop, in the correct locations according to their size.There is one small, one medium, NOTE:Do not usesteel wool or scouring... -
Page 31: Griddle
GEAppliances.com Lodge ® Reversible Cast-Iron Griddle (on some models) Griddle Precautions: _, Rinsewith hot water (do not use soap),and dry thoroughly. If something has spilled under the griddle, it :., Before cooking, prepare the surface with should be cleaned up as soon as possible to cooking spray or vegetable, oil. - Page 32 NOTE: Use caution when removing the grates by calling !.800.GE.CARES. from the oven after the self-clean cycle has The oven has S rack positions. Place the gray porcelain-coated ended.
-
Page 33: Cooktop Surface
GEAppliances.com Cooktop Surface When the surface has cooled, wash and rinse. To avoid damaging the porcelain-enamel For other spills such as fat spatterings, wash surface of the cooktop and to prevent it from with soap and water once the surface has becoming dull, clean up spills right away. -
Page 34: Lift-Off Oven Door
Care and cleaning of the range, Oven Bottom The oven bottom has a porcelain-enamel To clean up spillovers, use soap and water, an finish. To make cleaning easier, protect the abrasive cleaner or soap-filled scouring pad. oven bottom from excessive spillovers by Rinsewell to remove any soap before self- placing a cookie sheet on the rack below the cleaning. -
Page 35: Stainless Steel Surfaces
GEAppliances.com Cleaning the Door To clean the inside of the door: To clean the outside of the door'. Do not allow excess water to run into any Use soap and water to thoroughly clean the holes or slots in the door. top, sides and front of the oven door. -
Page 36: Oven Light Replacement
Care and cleaning of the range, v'WARNING I Shock Burn Hazard: Before replacing oven light bulb, disconnect the electrical power to the range at the main fuse or circuit breaker panel. Failure to do so may result in electric shock or burn. Oven Light Replacement (on some models) Be sure to let the light cover and bulb cool... -
Page 37: Model
GEAppliances.com Removable Drawer (Lower Oven Drawer Models only) Pressthe tabs on both sides in while NOTE:Formodels with an electric warming pulling the drawer forward and free. drawer or lower oven drawer, before performing any adjustments, cleaning or To replace the drawer: service,disconnect the range electrical Placethe left drawer rail around the inner power supply at the household distribution... -
Page 38: Instructions
I stall ti I structi If you have questions, call 1.800.GE.CARES at: GEAppliances.com visit our Website In the Commonwealth of Massachusetts FOR YOUR SAFETY , This product must be installed by a licensed plumber or gas fitter. Do not store or use combustible materiels, gasoline... - Page 39 Advantium ®or microwave over-the-range ovens are can withstand !80°F without shrinking, warping or designed to be installed above the GE Caf6 range. Surfaces discoloring. Do not install the range over carpeting above a gas range can become hot. Installation of any other unless a sheet of 1/4"...
- Page 40 Installation Instructions DIMENSIONS AND CLEARANCES Provide adequate clearances between the range and adjacent combustible surfaces. These dimensions must be met for safe use of your range. The location of the electrical outlet and pipe opening (see Gas Pipe and Electric Outlet Locations) may be adjusted to meet specific requirements.
- Page 41 Installation Instructions DIMENSIONS AND CLEARANCES (Models CGS985 only) Depth with door closed (includes door handle) 30" ...._'_ 29 ½" "41½" *Height to backguard based on Caf6 style backguard kit installed. "\\ Depth with door open: 46¼"...
- Page 42 Installation Instructions LOCATION Do not locate the range where it may be subject to strong drafts. Any openings in the floor or walJ behind the range should be sealed. Hake sure the openings around the base of the range that supply fresh air for combustion and ventilation...
- Page 43 Installation Instructions Read these instructions completely and carefully. [Z] Gas Supply Requirements Recommended Gas Pipe Outlet Locations NOTE: Make gas connections on the left side of the cutout opening. 30" Recommendedare j :l for through-the-wall " connection of pipe stub/shut-off valve. installation to rear J This area allows flush i wall.
- Page 44 Installation Instructions F_ Electrical Power Supply Requirements Recommended Electrical Outlet Locations NOTE: Make electrical connections on the right side of the cutout opening. Recommendedacceptable electrical outlet area. Orient the electrical receptacle so the length is parallel to the floor. Wall Mounted Product is shipped with O-prong Jplug.
- Page 45 Installation Instructions _ead these instructions completely and carefully. [_] Connect the Range to the Gas Supply Shut off the main gas supply valve before disconnecting the old range and leave it off until the new hookup has been completed. Don't forget to relight the pilot on other gas appliances when you turn the gas back on. Because hard piping restricts movement of the range, the Connect flexible metal appliance connector to the use of a CSAInternational-certified flexible metal appliance...
- Page 46 Installation Instructions [_ Connect the Range to the Electrical Supply Skip to Step 5 if the power cord shipped on the range does not match your wall receptacle. Using an Existing NEMA 14-50R Receptacle recommended but if used, it should be marked for use with Plug the range power cord into a properly grounded nominal 13A"diameter connection openings.
- Page 47 Installation Instructions Read these instructions completely and carefully. [-_ Replace the Power Cord (Optional) Continued Perform this step only if the power cord shipped on the range does not match your wa!! receptacle. _7/] Option 3-Wire Power Cord Installation [A WARNING irhe neutra, or ground wire o f t he Terminal block power cord must be connected to the neutral terminal...
- Page 48 Installation Instructions [] Replace the Power Cord (Optional) Continued Perform this step only if the power cord shipped on the range does not match your wa!! receptacle. 3-Wire Conduit Installation Option [Z] Locate the copper ground strap on the lower back of the range.
- Page 49 Installation Instructions Read these instructions completely and carefully. [] Replace the Power Cord (Optional) Continued Perform this step only if the power cord shipped on the range does not match your wa!! receptacle. 4-Wire Conduit Installation Option Remove the strain relief clamp from the bracket. Assemble the squeeze connector (obtained locally), matching the diameter of your conduit, in the bracket hole.
-
Page 50: Assemble Surface Burners
Installation Instructions Seal the Openings Seal any openings in the wall behind the range and in the floor under the range when hookups are completed. [7]Assemble Surface Burners r-_ caps r-_ Burner Heads (on some models) Place the matching size caps onto the burner bases or Place burner heads over the electrodes on the cooktop, in the heads. - Page 51 Installation Instructions [_ Check Ignition of Surface Burners Quality of Names Operation of all cooktop burners should be checked after the The combustion quality of burner flames needs to be range and gas supply lines have been carefully checked for determined visually.
-
Page 52: Anti-Tip Device
Installation Instructions INSTALLING THE ANTI-TIP DEVICE WHEN ALL HOOKUPS ARE COMPLETED AWARNING Make sure all controls are left in the off position. Make sure the flow of combustion and ventilation ANTI-TIP DEVICE to the range is unobstructed. All ranges can tip. BURNSor other SERIOUSINJURIES result. - Page 53 Before you call for service... GEAppliances.c Troubleshooting Tips Save time and money! Review the charts on the following pages first and you may not need to call for service. Possible Causes What To Do Plug on range is not completely .
- Page 54 Before you call for service... Troubleshooting Tips Possible Causes What To Do Gas/Control lockout or . If LOCON appears in the display,the range control is Control Lockout feature locked. Turn this feature off to use the range. See the is activated Gas/Control Lockout section.
- Page 55 GEAppliances.com Possible Causes What To Do • See the Using the self-cleaning oven section. Oven not clean after Oven controls not properly set. a clean cycle Oven was heavily soiled. , Clean up heavy spillovers before starting the clean cycle. Heavily soiled ovens may need to self-clean again or for a longer period of time.
- Page 56 Before you call for service... Troubleshooting Tips Possible Causes What To Do , This is normal. The convection fan will run until the noise The convection fan may turn on and off automatically. function is over or the door is opened. Convection fan Preheat temperature .
-
Page 57: Accessories
** The XL pan does not fit in 24" wall ovens, 27" drop-ins or 20"/24" ranges. To place your order: call 800.626.2002 (U.S.), 800.661.1616 (Canada) or mail this form to, In the U.S.:GE Ports, P.O.Box 221027, Memphis, TN38122-1027. In Canada: GEPorts, 1 Factory Lone, IVloncton,N.B.EI C 9M3 Broiler Pan Order Form... - Page 58 USA. If the product is located in an area where service by a GE Authorized Servicer is not available, you may be responsible for a trip charge or you may be required to bring the product to an Authorized GE Service Location for service.
- Page 59 GE Dual Fuel Range Warranty. cFor customers Conodol GEAppliances.c Staple your receipt here. All warranty service provided by our Factory Service Centers Proof of the original purchase or an authorized Customer Care ®technician. For service, date is needed to obtain call 1.800.561.3344.
- Page 60 Caution must be exercised, since improper servicing may cause unsafe operation. Contact Us GEAppliances.com If you are not satisfied with the service you receive from GE,contact us on our Website with all the details including your phone number, or write to: General Manager, Customer Relations GEAppliances,Appliance Park...
- Page 61 Superficies de Acero seguridad ....Inoxidable ....Instrucciones d e Funcionamiento Instrucciones de Convecci6n del Homo ..17-21 Instalaci6n .... s8-s2 P2B930 Guia para Dorar Dispositivo Anti-Volcaduras... C2S985 Horneado Por Ensamble Los Ouemadores Convecci6n Por Tiempo ..21 Superficiales ....
- Page 62 INFORMACION IMPORTANTE DE SEGURIDAD. LEA TODAS LASINSTRUCCIONESANTES DE USAR. ADVERTENCIA I Si Icl informclci6n de este manual no se sigue exactamente, se podr6 producir un incendio o explosi6n, ocasionando daSos sobre la propiedad, lesiones o la muerte. - No guarde ni use gasolina u otros vapores inflamables y liquidos cerca de este ni de otros electrodom6sticos. - QUI_ DEBE HACER SI HUELE GAS ning0n _:* No intente iluminar...
- Page 63 GEAppliances.com IA ADVERTENCIA IINSTRUCCIONES GENERALES DE SEGURIDAD iii[iil No deje a los niBossolos o fuera de su radio de ADVERTENClA I atenci6n en el 6rea donde el electrodom6stico se encuentre en uso. Nunca se les deber6 permitir NUNCA use este electrodom@stico para calentar trepar, sentarse o pararse sobre ninguna parte del ambiente.
- Page 64 INFORMACION IMPORTANTE DE SEGURIDAD. LEA TODAS LASINSTRUCCIONESANTES DE USAR. IAADVERTENCIA] MANTENGA LOS MATERIALES INFLAMABLES ALEJADOSDE LACOCINA No guarde ni use materiales inflamables en un homo La ropa que se encuentre cerca de los quemadores o o cerca de la parte superior de la cocina, incluyendo superficiescalientes se podra encender, ocasionando papel, pl6stico, sostenedores de ollas,trapos, cobertores quemaduras graves.
- Page 65 GEAppliances.com D E SEGURIDAD I ADVERTENCIAI INSTRUCCIONES Mant6ngase alejado de la cocina al abrir la puerta del No deje productos tales coma papel, utensilios de cocina ni comida en el homo cuando no est6 en homo. El aire caliente o el vapor que sale puede causar quemaduras en las manos, rostra y/u ojos.
- Page 66 C6mo usar los quemadores superficiales de gas. Es posible que los funciones y apariencias varien con relaci6n a su modelo a Io largo del manual. Antes de Encender un Ouemador de Gas Luego de Encender un Ouemador de Gas No utilice el quemador durante un perbdo de Aseg0rese de que todos los quemadores est6n en su lugar.
- Page 67 GEAppliances.com C6mo Seleccionar el Tamafio de la Llama Observe la llama, no la perilla, a medida que Cuando las llamas sean m6s grandes que reduce el calor. Cuando se desee calentar de la parte inferior del utensilio de cocina, no forma r6pida, el tama_o de la llama de un calentar6n el utensilio m6s r6pido y podr[an quemador de gas deber6 ser equivalente con...
- Page 68 NOTA: N o Iimpiela planchaen elhomo deauto quemador central. Para insertar la plancha, limpieza. retire la parrilla central y reemplace la misma con la plancha. Uso de la Plancha. Plancha Presazonada para los Modelo P2B930 ADVERTENCIAIRiesgodeIncendio Condiciones de Tipo de Comida Configuraci6n de Cocci6n...
- Page 69 Uso de los controles del homo. (Esposible que los funciones y apariencias varien con relaci6n a su moddo a Io largo del manuaL) GEAppliances.com ®®@ Las funciones, apariencia y ubicaciones de las teclas pueden variar. Control del Homo, Reloj, Tempofizador y Funciones Tedade Tiempode Retraso Teclade Homeado Use junto con lasteclas COOKING TIMEffiempo...
- Page 70 Usa del homo superior. Para evitar posibles quemaduras, coloque los estantes en la posici4n deseada antes de encender el homo. Antes de comenzar... Los estantes poseen bloqueadores, de modo Para retirar el estante, empuje el mismo hacia que al colocarlos correctamente sabre los usted, incline el extremo frontal hacia arriba y soportes (A a E)se detendr6n antes de salirse empuje hacia afuera.
- Page 71 Usa del horno superior. GEApplionces.com Si su modelo cuenta con una traba para puerto, no bloquee la puerto con la traba durante el homeado o tostado. La traba se usa para la funci6n de auto limpieza Onicamente. C6mo Configurur el Homo Superior pure Horneudo...
- Page 72 Uso del homo superior. Papel de Aluminio No use papel de aluminio para revestir el Se podr6 usar aluminio para evitar derrames, rondo del homo. El aluminio atrapar6 el calor colocando una hoja sobre un estante inferior, inferior y alterar6 el funcionamiento del horno.
- Page 73 GEAppliances.com Guia para Asar Con- *Posici6n El tamaho, peso, grosor, Comida Comentarios del Es- Preparada Tipo o Grosor figuraci6n temperature inicialy su tante para Asar preferencia de preparaci6n Bife Bistecs - Alto Es dificil cocinar Jugoso, afectardn los tiempos del A punto 1"...
- Page 74 Uso del relojy el temporizodor. No todas los funciones corresponden a todos los modelos. Para Configurar el Reloj Si las teclas num6ricas no setocan dentro del CLocK ]5 i; ¸ El reloj se deber6 configurar en la hora correcta del dia para que las funciones autom@ticas perfodo de un minuto luego de haber tocado del temporizador del homo funcionen de la tecla Clock (Reloj),la pantalla vuelve a la...
- Page 75 Uso de las funciones de horneado y dorado por tiempo (homo superio (micamente) GEAppliances.com NOTA: Los comidas que se ethan o perder rdpidomente, tales como lethe, huevos, pescodo, rellenos, ove y cerdo, no se deberdn dejor reposor por mds de J horo antes y despu_s de Io cocci6n. Lo temperoturo ombiente estimulo el desorrollo de bocterios nocivos.
- Page 76 Uso de la sonda, o/guno mod /o Ii PRECAUCI6N Ii Para evitar quemaduras,no desenchufe/a sonda desdeel enchufe de/homo hasta que este (4timo se haya enfriado. No guarde la sonda dentro del homo. Si su modelo cuenta con una traba para puerta, no bloquee la puerta con la traba durante la cocci6n con la sonda. La traba se usa para la funci6n de auto limpieza 0nicamente.
- Page 77 Uso del homo por convecci6n =od to l GEA,Uiance,.co El ventilador pot convecci6n se apaga cuando la puerto del homo se abre. NO deje la puerto abierta durante periodos prolongados de tiempo mientras usa la cocci6n pot convecci6n. Para ayudarle a entender la diferencia entre en todos sus lados, como si hubiesen sido cocinados en una rotiseria.
- Page 78 Uso del homo por convecci6n =od o l Convecci6n Utensilios de Cocina para Cocci6n por Antes de usar el horno par convecci6n, controle Metal y Vidrio que su utensilio de cocina deje espacio para Cualquier tipo de utensilio de cocina funcionar6 la circulaci6n de aire en el homo.
- Page 79 GE4ppliances.com C6mo Configurar el Horno Superior para Tostar par Convecci6n Cuando se (en algunos modelos) Use la Sonde. La pantalla har6 que titile la palabra PROBE [ PRECAUCI6N I oroev,tor [Sandaly el control del horno dar6 la serial si la For best results when roosting quemaduras, no desenchufe la sonda des@ sonda es enchufada en el enchufe de entrada y...
- Page 80 Uso del homo por convecci6n =od o l Guia de Tostado por Convecci6n - Configuraciones Sugeridas Temper- Temper- Carnes atura atura Horno Interior Bile Asado de Costilla (4 a 8 lb.) 325°F 145°F Jugoso Deshuesada y Con Huesos A Punto 325°F 160°F Bile de Lomo (2 a 3 lb.)
- Page 81 Usodelasfunciones d ehomeado porconvecci6n portiempo, oU no mod /o ; GEAppliances.com Escuchardun ventilador al cocinar con esta funci6n.El mismo se detendrd cuando se abra la puerta, pero el calentador no se apagard NOTA: Los comidas que se echan a pettier rdpidamente, tales como leche, huevos, pescado, rellenos, ave y cerdo, no se deberdn dejar reposar por rods de 1 hora antes y despu@sde la cocci6n.
- Page 82 Funcionesespecialesen el control del homo superior. Su nuevo control de teclas tdctiles cuenta con funciones adicionales que puede elegir usar. Los siguientes son los funciones y c6mo los puede activar. Los modos de funciones especiales s61opueden set activados mientras que la pantalla estd mostrando la hora del dia. Permanecen en la memoria del control hasta que se repiten los pasos.
- Page 83 GEAppliances.com Bloqueo de Control del Gas (en algunos rnodetos) GAs/CONTROL Su control le permitircibloquear los quemadores presionada la tecla Gas/Control Lockout supefficiales,quemadores de homo y el panel de (Control de Bloqueo del Gas)durante 3 LOCKOUT control de modo que no puedan ser activados. segundos,hasta que la pantalla muestre LOCOFF(Bloqueo Desactivado).
- Page 84 Uso del Hodo Sab6tico. (Disehado para usar en et Descanso Judfo y Feriados) La funci6n Sabbath (Sabdtico) se puede usar para homear/ asar en el homo superior e inferior oen el caj6n calentador (an algunos moddos). No se puede usar para la cocci6n par convecci6n, asar, auto limpieza o Delay CERTIFIED Start (Inicio Retrasado).
- Page 85 GEAppliances.com C6mo Salir el Modo Sab6tico CLEAR [Z] Presione la tecla Clear/ Off (Borrar/ Presione la tecla Delay Start (Inicio Dernorado)hasta que 12 shdn (apagar Apagad luego de 12 horas)o no shdn (no apagar) Si el homo est6 cocinando, espere un aparezca en la pantalla.
- Page 86 Uso del caj6n del horno bajo. len olgunos modetosl El coj6n del homo bojo se puede usor pora homeor comidos usondo los mismos tiempos y tempemturos queen un homo normal Los comidos ideoles pora homeor en el coj6n del homo inferior incluyen pizza, cozuelos de comidos congelodos, golletos, orrollodos y muchos postres.
- Page 87 Use del horno superior con auto limpieza . GEAppliances.c Lapuerto del homo deberdastorcerraday todos los controlesconfiguradosde forma correctapara qua el ciclofuncione adecuadamente. Antes de un Ciclo de Limpieza Para el primer ciclo de limpieza, o limpiadores tales como Soft Scrub@. recomendamos ventilar su cocina con una Enjuague bien con agua caliente y seque.
- Page 88 Cuidadoy limpieza de la cocina. La puerta del horno deber6 estar cerrada y todos los controles configurados de forma correcta para que el ciclo funcione adecuadamente. Coma Retrasar el Inicio de la Limpieza SELF En modelos sin traba en la puerta, la puerta AsegOrese que el reloj marque la hora correcta del d[a.
- Page 89 GEAppliances.com AsegOrese de que la corriente eldctrica estd apagada y que todas los superficies estdn frias antes de limpiar cualquier porte de la cocina. I- ADVERTENClA Isi/a cocina es retirada para s u /impie a, servuo tOcnico o cualquier otto raz6n, asegOrese de que el dispositivo anti-volcaduras vuelva a set colocado de forma correcta cuando la cocina sea instalada nuevamente.
- Page 90 Cuidadoy limpieza de la cocina. Tapas, Bases y Cabezas de Ouemadores Antes de retirar las topos y cabezas de los Reemplazo de lasCabezas de los quemadores (en algunos modelos),recuerde su Quemedores (en algunos modelos) tamaflo y ubicaci6n. Reemplace los mismos en Reemplace lascabezasde losquemadores sabrelos la mtsma ubicaci6n luego de la limpieza, electrodesen la partesuperiorde la cocina,en las...
- Page 91 GEAppliances.com Lodge ® Reversible y Planchas para Chef de Hierro Forjado (en algunos modelosl Precauciones de la Plancha: Enjuague con agua caliente (no use jab6n) y seque totalmente. Si alga se derram6 debajo de la plancha, Antes de cocinar, prepare la supe_cie con se deberd limpiar tan pronto coma sea espray de cocina o aceite vegetal.
- Page 92 Ilamando al Coloque carla parrilla en los estantes del la auto limpieza de las parrillas. 1.800.GE.CARES. horno de lado a lado. Siga estas instrucciones Coloque cada parrilla en los sobre c6mo colocar el homo superior para su estantes del homo de lado a lado.
- Page 93 GEAppliances.com Superficie de la Parte Superior de la Cocina A fin de evitar daflos sabre la superficie Cuando fria, la superficie est6 lave y enjuague. esmaltada de porcelana sabre la parte superior Para otros derrames tales coma salpicaduras de la cocina y para evitar que quede sin brillo, de grasa, lave con agua yjab6n una vez que la limpie los derrames de inmediato.
- Page 94 Cuidadoy limpieza de la cocina. Parte Inferior del Horno La parte inferior del horno posee un acabado de @cido(tales como tomate, chucrut y de porcelana esmaltada. Para facilitar la salsas con vinagre o jugo de lim6n) pueden limpieza, proteja el fondo del homo de ocasionar fisuras y da_os sobre la superficie derrames excesivos colocando una hoja de de porcelana esmaltada y se deberdn limpiar...
- Page 95 GEAppliances.com Limpieza de la Puerta Para limpiar el exterior de la puerta: Para limpiar el interior de la puerta: agua Use agua yjab6n para limpiar No permita que el excedente de entre a ning0n agujero o ranuras de la puerta. completamente la parte superior, los lados y el frente de la puerta del horno.
- Page 96 Cuidadoy limpieza de la cocina. I ADVERTENCI AIi niesgo de escarga El ctrica oIncendio- Antes de reempla ar laI mpara de del homo, desconecte la conexi6n eldctrica del homo del fusible principal o del panel del disyuntor. Si esto no se cumple, se podrd producir una descarga eldctrica o incendio.
- Page 97 GEAppliances.com Caj6n E×traible (561o Modelos con Caj6n del Homo Inferior) Para retirar el caj6n: NOTA:Para modelos con un caj6n calentador eldctrico o un caj6n del homo E_] Empujeel caj6n hacia afuera hasta que se detenga. inferior, antes de realizar cualquier ajuste, limpieza o servicio tdcnico, desconecte el Presione las leng0etas sobre ambos lados suministro de corriente eldctrica de la cocina...
- Page 98 JInstrucciones Cocina J de Instalaci6n Ante cualquier duda, Ilame al 1.800-GE-CARES o visite nuestro sitio web en: GEAppliances.com I En el Commonwealth de Massachusetts PARA SU SEGURIDAD • Este producto debe ser instalado por un plomero No guarde ni use materiales combustibles, gasolina u licenciado o un mec6nico gasista..
- Page 99 No instale la marca cocina sobre alfombras, a menos que haya una hoja de Caf6 Advantium® de GE o los hornos microondas de de contrachapado de un grosor de 1A"o un aislante calidad excepcional est6n diseffados para su instalaci6n similar entre la cocina y la alfombra.
- Page 100 Instrucciones de Instalaci6n DIMENSIONES Y ESPAClOS Deje el espacio adecuado entre la cocina y las superficies combustibles adyacentes. Estas dimensiones se deber6n cumplir para un uso seguro de su cocina. La ubicaci6n del tomacorriente de electricidad y la abertura de la tuberia (consulte Ubicaciones del Gas y el Tomacorriente El_ctrico) se podr6n ajustar para cumplir con los requisitos especificos.
- Page 101 Instrucciones de Instalaci6n (Modelos fmicamente) DIMENSIONES Y ESPACIOS CGS985 Profundidad con la puerta cerrada (incluye la manija de la puerta) 30" ...._P"_---29 ½" ......"41V2" *Altura de la parte trasera basada en el kit instalado de la parte trasera estilo Caf6. Profundidad con la puerta abierta: 46½"...
- Page 102 Instrucciones de Instalaci6n UBICAClON No ubique le cocina donde pueda haber corrientes de aire fuertes. Cualquier eberturo en el piso o le pored detr6s de le cocina deber6n ester selledas. Aseg6rese de que los ebertures alrededor de la base de la cocina que brinden aire fresco para la combusti6n y ventilaci6n no est6n obstruides par alfombras ni piezas de carpinterie.
- Page 103 Instrucciones de Instalaci6n Lea estas instrucciones en su totalidad y atentamente. FT]Requisitos del Suministro de Gas Ubicaciones Recomendadas para la Salida de la Tubefia de Gas NOTA: Haga conexiones de gas del lado izquierdo de la abertura del disyuntor. 30" conexi6n a travds de la _'31 pared del tuba de escape/...
- Page 104 Instrucciones de Instalaci6n Requisitos de Suministro de Corriente El_ctrica Ubicaciones de Salida El_ctrica Recomendada NOTA: Haga conexiones el_ctricas del lado derecho de la abertura del Area recomendada para una disyuntor. salida ddctrica aceptable. Oriente el receptdculo ddctrico de modo que la Iongitud sea paralda al sudo.
- Page 105 Instrucciones de Instalaci6n Lea estas instrucciones en su totalidad y atentamente. [_] Conecte la Cocina al Suministro de Gas Cierrela vdlvula principal de suministro de gas antes de desconectarsu vieja cocinay deje la misma apagada hasta que la nueva conexi6n se haya completado. No olvide volver a encenderel piloto en otros electrodomdsticosa gas cuando vuelva a encenderel gas. la rosca interna de NPT de la v61vula de cierre manual, Debido a que las tuber[as duras restringen el movimiento de la cocina, se recomienda el usa del conector para...
- Page 106 Instrucciones de Instalaci6n r-_ conecte la cocina al suministro de Electricidad Saltee el Paso 5 si el cable de corriente entregado con la cocina no coincide con su receptdculo de pared. Uso de un Recept_culo NEMA 14-50R Existente Enchufe el cable de corriente de la cocina en un Se requiere el usa de un cable para la cocina de 40 amperes con un rango minimo de 125/250 voltios.
- Page 107 Instrucciones de Instalaci6n Lea estas instrucciones en su totalidad y atentamente. 151Reemplace el Cable de Corriente (Opcionall ContinUa Realiceeste paso s61osi el cable de corriente entregado con la cocina no coincide con su receptdculo de pared. Opci6n de Instalaci6n del Cable de Corriente de 3 Cables ADVERTENCIA IEIcable neutra/ Bloque terminal...
- Page 108 Instrucciones de Instalaci6n [_] Reemplace el Cable de Corriente (Opcionall ContinUa Realice este paso s61osi el cable de corriente entregado con la cocina no coincide con su receptdculo de pared. Opci6n de Instalaci6n del Tubo de 3 Cables Ubique la cinta de conexi6n a tierra de cobre en la parte trasera de la cocina.
- Page 109 Instrucciones de Instalaci6n Lea estas instrucciones en su totalidad y atentamente. Reemplace el Cable de Corriente (Opcionall ContinQa Realice este paso s61o si el cable de corfiente entregado con la cocina no coincide con su receptdculo de pared. 4-Wire Conduit Installation Option Retire la abrazadera del amortiguador de refuerzo del soporte.
- Page 110 Instrucciones de Instalaci6n [] SELLADO DE ABERTURAS Sellecualquier abertura en la pared, detr6s de la cocina yen el piso debajo de la cocina cuando las conexiones se hayan completado. ENSAMBLE LOS OUEMADORES SUPERFICIALES FG--1 Tapas Cabezas del quemador (en algunos modelos) Coloque las tapas de tamafio coincidente en las bases o Coloque lascabezas de los quemadores sabre loselectrodos cabezas de los quemadores.
- Page 111 Instrucciones de Instalaci6n [_] CONTROLE EL ENCENDIDO DE LOS 0UEMADORES SUPERFICIALES Calidad de las Llamas El funcionamiento de todos los quemadores del horno y parte superior de la cocina se deben controlar una vez La calidad de combusti6n de las llamas del quemador se que la cocina y las I[neas de suministro de gas hayan deber6 determinar visualmente.
- Page 112 Instrucciones de Instalaci6n I-_IlNSTALACI6N DEL DISPOSITIVO ANTI- CUANDO TODAS LAS CONEXIONES SE VOLCADURAS HAYAN COMPLETADO Aseg6rese de que todos los controles queden en la A ADVERTENCIA posici6n de apagado. Aseg6rese de que el flujo de la DISPOSITIVO ANTI-VOLCADURAS combusti6n y el aire de ventilaci6n a la cocina est_n desobstruidos.
- Page 113 Antes de Solicitar el Servicio T6cnico... GEApp,iancesco Consejos para la Soluci4n de Problemas lAhorre tiempo y dinero! Primero revise los cuodros que aparecen en los siguientes pdginos yes posible que no necesite solicitor reporociones. Causas Posibles Ou_ Hacer Los quemadores no se El enchufe en la cocina no est6 Aseg0rese de que el cable de electricidad est6 enchufado encienden o no queman...
- Page 114 Antes de Solicitar el Servicio T cnico... i_6_ Causas Posibles Qu_ Hacer Se activ6 la funci6n de Si aparece LOC ON {BloqueoActivado) en la pantalla, el Gas/Control Lockout control de la cocina est6 bloqueado. Apague esta funci6n (Bloqueo del Control de pare user la cocina.
- Page 115 GEAppliances.com Qu_ Hacer Causas Posibles El homo no limpia Los controles del horno no est_n LeG I(] secci6n horno superior con funci6n de (]uto limpiez(]. luego de un ciclo de correctamente configurados. limpieza El horno estaba demasiado sucio. Limpie derr(]mes excesivos (]ntes de inici(]r el ciclo de limpiez(].
- Page 116 Antes de Solicitar el Servicio T cnico... Consejos para la Soluci6n de Problemas Causas Posibles Ou6 Hacer Ruido del ventilador Elventilador de convecci6nse Esto es normol. Elventilodor de conveccibn funcionor6 puede apagar o encender de forma hasto que la funcibn finalice o la puerto se abra.. autom6tica.
- Page 117 • F6cil de limpiar • Garant[a de un aflo iOferta de tiempo limitado! iEnvio sin cargo! Cuando solicite la bandeja para asar dentro de los :30d[as de haber adquirido su producto de cocina GE. Pequefia Grande* Extra grande** WB48X10057 N °...
- Page 118 Cu(]lquier p(]rte de I(]cocin(] que f(]lle debido (] un defecto en los m(]teri(]les o I(]f(]bric(]ci6n. Dumnte Desde io feChode Io est(] g(]r(]ntk] limit(]d(]de un (]rio. GE t(]mbi6n proveer_, sin costa, todo el tmb(]jo y el servicio en compm original el hog(]r rel(]cion(]do con el reempDzo de I(] p(]rte que presente defectos.
- Page 119 Garantia de la Cocina a Gas de GE . iporo d/entes enConodOI Todo el servicio de gorantia es provisto par nuestros Centros Abroche su recibo aquL Para Servicio de Fabricoci6n, o un tdcnico autorizodo de Servicio al acceder al servicio tdcnico Cliente (Customer Core@).
- Page 120 El servicio de reparaci6n de expertos de GEest6 a s61oun paso de su puerta, iCon6ctese a trav6s de Internet y programe su servicio a su conveniencia las 24 horas del dia cualquier dia del aflo! O Ilame a1800.GE.CARES (800./432.2737) d urante el horario comercial habitual.
Need help?
Do you have a question about the P2B930 and is the answer not in the manual?
Questions and answers