Haier HLP140E User Manual
Electric vented tumble dryer wall-mountable space saving 120 volt
Hide thumbs
Also See for HLP140E:
- Service manual (20 pages) ,
- User manual (17 pages) ,
- User manual (10 pages)

Related Manuals for Haier HLP140E


Summary of Contents for Haier HLP140E
- Page 1 Space Saving 120 Volt Electric Vented Tumble Dryer Wall-mountable Dryer Please read this manual User's Manual carefully before using. Retain it for future reference. HLP140E Quality Innovation Style...
-
Page 2: Unpacking Your Dryer
Staple your r eceipt to your m anual. You w ill need it to obtai n warranty service. Please register online at www.prodregister.com/Haier WARNING As dr y cleaning solvents, gasolin e, vegetabl e and cooki n g oil are highl y hazar dous material s, items soaked in or spotted with such shoul d not be used i n the dryer. -
Page 3: Safety Instructions
SAFETY INSTRUCTIONS WARNING To reduce the risk of fire, electric shock, or injury to persons when using your appliance, follow basic precautions, including the following: 1. Read all instructions before using the appliance. 2. Do not dry articles that have been previously cleaned in, washed in, soaked in, or spotted with gasoline, dry-cleaning solvents, or other flammable or explosive substances, as they give off vapors that could ignite or explode. -
Page 4: Electrical Requirements
SAFETY INSTRUCTIONS Electrical Requirements Grounding Instructions: This appliance must be grounded. It is equipped with a 3-wire cord having a grounded plug. The plug must be plugged into an outlet which is properly installed and grounded. Warning! Improper use of the grounded wire can result in the risk of electric shock. Consult a qualified electrician if necessary. -
Page 5: Table Of Contents
Table of Contents Unpacking Your Dryer ………………………………………………… Product Registration .………………………………………………...…1 Safety Instructions………………………………………………...…….2 Electrical Requirements …………………………………………….. Parts and Features………………………………………………..……5 Set Up INSTRUCTIONS ………………………………………….……6-8 -Location of Your Dryer ……………………………………………6 -Assemble Dryer for Installation…………………………..……… 7 -Venting the Dryer……………………………………………………8 INSTALLATION INSTRUCTIONS……………………………....9-11 -Wall Mounting Instructions…………………………………………9 -10 -Completing Instillation …………………………………....11 OPERATING INSTRUCTIONS…………………………………………12-17... -
Page 6: Parts And Features
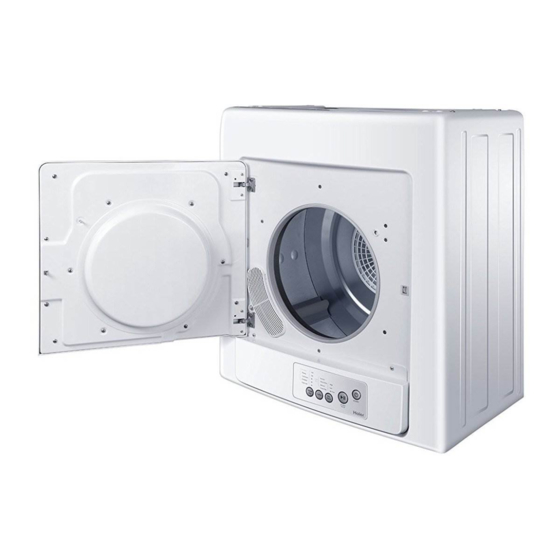
Front View Status Normal Heavy High Cooling Power End Cycle Delicate On/Off Clean Lint Timed Dry Air-Dry Start Pause Cycles Temp Time HLP140E Dryer Hanging Wall Hook Hose Clamp Exhaust Housing Power Cord Exhaust Vent Back Cover Casing Spacer Back View... -
Page 7: Set Up Instructions
SET UP INSTRUCTIONS Tools and Parts Required for Installation: Philips Head Screw Driver Flat Head Screw Driver Electric Drill and 1/8 inch drill bit Stud finder (optional) (6) Wood screws for mounting plywood Plywood board; size 30 (h) by 24(w) inches or wood slats Venting materials: 4 inch diameter metal exhaust rigid ducting and fittings or UL flexible metal dryer vent hose, that should not exceed 6 feet. -
Page 8: Assemble Dryer For Installation
SET UP INSTRUCTIONS Assemble Dryer for Installation Screw mounting hook bracket and wall spacer to dryer with screws provided. 1.Attach Hanging hook bracket using 2.Attach the 2 wall spacers to the bottom the 4 screws. of the dryer, using the 2 screws. 3.Attach Exhaust Housing Connect vent housing to dryer using hose clamp provided to the exhaust pipe. -
Page 9: Venting The Dryer
SET UP INSTRUCTIONS 5. Venting The Dryer Proper venting of the dryer is very important. Determine the best and safest ducting for the dryer. WARNING! Use a metal or UL vent. Do not use plastic ducting. Do not crimp or use excessive ducting. Clean old ducts before installing this dryer. -
Page 10: Installation Instructions
INSTALLATION INSTRUCTIONS Wall Mounting Instructions Location for installation and options for various walls 1.There are 2 mounting options- either using wood slats or a whole plywood board. The dryer installation to the wall should be able to accommodate the weight of the unit of 52 lbs. plus about 10 lbs. - Page 11 Plywood board Use wood screws for supporting the dryer 24 inches 6.Mark the required dryer bracket position and holes using the template provided. HLP140E Mounting template Center and level template Drill holes for dryer Mounting bracket mounting bracket Mounting bracket 6 inches 7.
-
Page 12: Completing Instillation
INSTALLATION INSTRUCTIONS 8. Putting Dryer on wall. Lift the dryer (with the help of an assistant) and insert the hanging hook onto the 2 mounting brackets on the wall. The wall spacer will distance the dryer from the bottom. Hang dryer onto mounting brackets on the wall 9. -
Page 13: Operating Instructions
On/Off Timed Dry Clean Filter Air-Dry Start Pause Cycles Temp Time HLP140E Choose Drying Cycle When in Timed Dry- Use When in Timed Dry- Use the Normal Normal drying the Dry Time button to Temp button to manually Heavy Huge and heavy garments... -
Page 14: Quick Start
OPERATING INSTRUCTIONS Quick Start Normal , Heavy and Delicate Cycle Laundry Loads 1.Connect AC plug to 120 Volt outlet. 2.Load your dryer with clothing; Note Do not overload the Dryer It is suggested that 2/3 the capacity of drum be filled to allow for tumbling and proper drying. -
Page 15: Quick Start
OPERATING INSTRUCTIONS Quick Start Normal , Heavy and Delicate Cycle Laundry Loads 3. Set Cycle and Start To start drying a laundry load using Auto Dry with presets for Temperature and Time, there are 3 easy steps: Power 1. Turn ‘Power ON’ 2. -
Page 16: Timed Dry
OPERATING INSTRUCTIONS Timed Dry Cycle Manual Status Normal High Heavy Cooling Power End Cycle Delicate On/Off Clean Filter Timed Dry Air-Dry Start Pause Cycles Temp Time The Timed Dry Cycle is for manual selecting Dry times and Temperatures. 2. Choose dry Cycle – Power Cycles On/Off... - Page 17 CAUTION! The tumble dryer is intended only for drying textile material washed in water. Disconnect this appliance from the power supply before attempting any user maintenance other than cleaning the lint trap. Connect to individual AC power outlet . Do not allow children to play on or in the dryer. Only place damp clothes in your dryer .
-
Page 18: Drying Tips And Precautions
Drying Tips and Precautions Delicate clothes especially those with ribbon or lace, should be placed in a nylon mesh bag before drying to prevent tangling. Clothes with zippers Zippers, buckles, buttons and fasteners should be closed or clothing should be turn inside out to reduce the impact of noise between metal and the drum. -
Page 19: Care And Cleaning Guide
Care And Cleaning Guide Clean buildup such as lint on filters after each use, otherwise it will affect the performance of your dryer. Cleaning of Lint trap and Filters The lint filter must be always used for drying. The filter is in the rear It must be cleaned each time before or after each use. -
Page 20: Troubleshooting
Check your problem by using the chart below (If problems occur, please pull out the plug before examining) and try the solutions for your problem. If the dryer still does not work properly, contact Haier customer service center or the nearest authorized service center. Possible Remedy... -
Page 21: Limited Warranty
BY AN AUTHORIZED HAIER CUSTOMER TECHNICIAN. If it is determined that repair is not appropriate or replacement parts are unavailable for repair, Haier will exchange the product with a refurbished or new product the same or similar to the original at its discretion. -
Page 22: Limited Warranty
State to State. Haier America, New York, NY 10018 To have your product serviced, please contact Haier America Customer Service Hot Line 24 hours a day, 7 days a week. In the U.S.A., call 1-877-337-3639. - Page 23 Mount the Haier Dryer over any of Haier's 6 Portable Washers Both Washer and Dryer Use Standard 120 Volt Outlets: You Can Install Them Anywhere! PLUGS INTO ANY HOUSEHOLD OUTLET • – • No Special wiring required • Easy Installation...
- Page 24 IMPORTANT Do Not Return This Product To The Store If you have a problem with this product, please contact the ‘Haier Customer Satisfaction Center’ at 1-877-337-3639. DATED PROOF OF PURCHASE REQUIRED FOR WARRANTY SERVICE IMPORTANT Ne pas Réexpédier ce Produit au Magasin Pour tout problème concernant ce produit, veuillez contacter le service des...
Need help?
Do you have a question about the HLP140E and is the answer not in the manual?
Questions and answers
how to I replace the belt