Table of Contents
Advertisement
Quick Links
Advertisement
Table of Contents

Related Manuals for First Alert 4800


Summary of Contents for First Alert 4800
- Page 1 Indoor/Outdoor Analog Wired Cameras and DVR Model 4800 USER'S MANUAL...
- Page 2 ©2010 Lehigh Consumer Products, LLC All rights reserved. Distributed by Lehigh Consumer Products, LLC, Macungie, PA 18062. Due to continuing product development, the product inside the packaging may look slightly different than the one on the package. Lehigh Consumer Products, LLC is a subsidiary of Jarden Corporation (NYSE: JAH). To obtain warranty service, contact the Consumer Affairs Division at 1-800-323-9005, Monday through Friday, 7:30 a.m.
-
Page 3: Table Of Contents
1 Safety ... 1 Safety Precautions ... 1 FCC Compliance ... 1 Disposal ... 2 2 Getting to Know Your 4800 DVR ... 3 Check Package Contents... 3 Product Features ... 3 Product Overview ... 4 DVR Front Panel ... 4 DVR Rear Panel... - Page 4 Table of Contents Model 4800 User's Manual Password Setting... 29 Advanced Settings ... 30 Adduser... 30 Deluser... 30 Authority Manage... 31 Record... 32 Video Channel... 33 Record Schedule ... 33 Record Quality ... 34 Record Frame Rate ... 34 Record Source... 35 OSD Setting ...
- Page 5 7 Mobile Phone Support ... 87 Windows Mobile... 87 Symbian S60 3rd Phone... 89 Sample Installation Process ... 89 Menu Buttons and Program Interface ... 90 Setup ... 91 Symbian Supported Mobile Phones... 92 Apple iPhone ... 94 Table of Contents Model 4800 User's Manual...
- Page 6 Table of Contents Model 4800 User's Manual 8 Troubleshooting ... 96 9 Technical Information ... 98 Warranty...100 Product Limited Warranty... 100 Warranty Exclusions ... 100 Obtaining Service ... 101...
-
Page 7: Safety
AFETY RECAUTIONS Do not drop, puncture, or disassemble the cameras or DVR. Do not tug on the power adapter. Use the plug to remove it from the wall. Do not expose the cameras or DVR to high temperatures. ... -
Page 8: Disposal
Safety Model 4800 User's Manual ISPOSAL These symbols indicate that it is prohibited to dispose of these batteries in the household waste. Take spent batteries that can no longer be charged to the designated collection points in your community. -
Page 9: Getting To Know Your 4800 Dvr
Congratulations on purchasing your First Alert Security product. First Alert has been helping families and businesses stay safe for over 50 years. By having a First Alert Security System, you’re taking the first step in protecting your home or business from damage or theft. We’re watching, even when you’re not. -
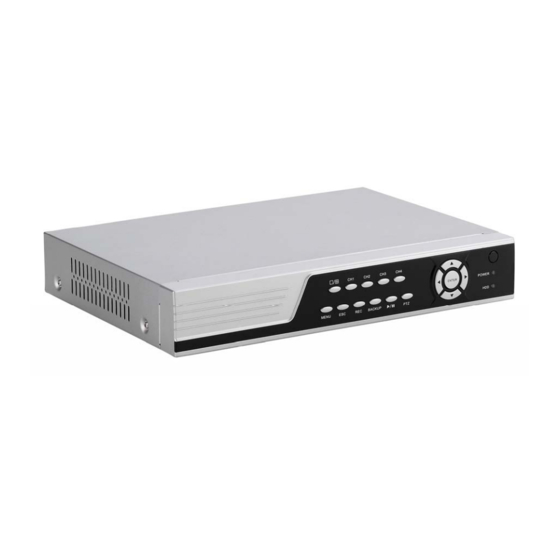
Page 10: Product Overview
Navigation Cursor movement: buttons Confirm/select operation ENTER Infrared sensor for remote control IR Window Power LED POWER HDD status LED = up, = down, = left, * Cameras supplied with 4800 system are not equipped with PTZ feature. = right... -
Page 11: Dvr Rear Panel
Alarm input (1-4, 5-6, Ground) – external sensor devices ALARM IN Alarm output (7-8) – external alarm devices ALARM OUT PTZ camera control (9-12) RS-422/RS-485 Power switch Power Power input DC 12V Cooling fan air intake Getting to Know Your 4800 DVR Model 4800 User's Manual... -
Page 12: Remote Control
Switch between quad and split-screen displays Open PTZ control window PTZ* Adjust brightness Adjust contrast Play in slow mode/rewind Play/Pause Stop Fast forward Go to next frame * Cameras supplied with 4800 system are not equipped with PTZ feature. -
Page 13: Setting Up
NSTALLING A Install a hard disk drive (HDD) in the DVR following the instructions provided by the HDD manufacturer. Connect the data and power cables to the appropriate sockets. data input socket power input socket Format the HDD using the DVR before attempting to record because the standard PC formatting is not compatible. -
Page 14: Basic Hardware Installation
Connect the PTZ control jacks to the corresponding RS422/RS485 TX+ and TX-interfaces on the rear panel of the DVR. See the PTZ camera manual for descriptions of protocols, baud rates, and IDs. (OPTION)* * Cameras supplied with 4800 system are not equipped with PTZ feature. -
Page 15: Mounting A Camera
Plug the power connector from the splitter to the power input on the rear panel of the DVR. Plug the 12V DC power supply adapter to the splitter. Plug the power supply cord into an electrical outlet. thumb screw lock nut AMERAS AND Setting Up Model 4800 User's Manual... - Page 16 Setting Up Model 4800 User's Manual video BNC connector power connector to DVR video input BNC cable to DVR DC input splitter cable 12V DC power supply...
-
Page 17: Getting Started
This chapter provides information about the main operating menus and tool bar options. The menus are used to configure the system and control the various functions of the DVR. The user selects options from a series of menus and executes the actions using the DVR keypad, the mouse or the remote control. -
Page 18: Dvr Front Panel
Getting Started Model 4800 User's Manual The Main Menu has four windows evenly distributed over the screen. Use the Main Menu to access menu options and switch channel views, displaying either all channel feeds simultaneously or a full-screen view of a selected channel. -
Page 19: Status Bar
Alarm input status for each of the four windows and indicates alarm output. When alarm output is activated, color changes to red. HDD usage (percentage). Number of remote users accessing the system via the network/Internet (NET:X). Current date/time in YYYY-MM-DD HH-MM-SS format. Getting Started Model 4800 User's Manual Status Bar... -
Page 20: Tool Bar
Search, playback, and backup recorded files Access PTZ menu* Access current alarm information and cancel alarm notification View single window View quad window Adjust window layout/position * Cameras supplied with 4800 system are not equipped with PTZ feature. Tool Bar... -
Page 21: Tool Bar Menu Options
Recording modes are displayed in the top right corner of the menu. Manual recording mode is indicated onscreen with the grey icon. See the Chapter 5, DVR Settings for descriptions of the record settings. Getting Started Model 4800 User's Manual... -
Page 22: Video Playback
Getting Started Model 4800 User's Manual IDEO LAYBACK To playback a recorded video, click the Record Search icon on the Tool Bar. Use the Video Playback menu to select the date/time and channel you wish to view. See Chapter 5, DVR Settings for descriptions of the playback settings. - Page 23 In Playback Mode, the playback control panel and the date/time of the played file display. Fast rewind Pause Stop Fast/Slow Forward (available speeds: 1x, 8x, 16x, 1/2x, 1/4x, and 1/8x) Frame-by-frame view Toggle single camera view and 4 camera view Getting Started Model 4800 User's Manual...
-
Page 24: Video Backup
Getting Started Model 4800 User's Manual IDEO ACKUP To backup a video, click the Playback icon on the Tool Bar. To backup the recorded footage, indicate which cameras and time interval you want to save to an external source. Set the start and end time as described in Video Playback in this chapter. -
Page 25: Ptz Control (Option)
The PTZ menu displays in the top right corner of the screen. Use the navigation buttons to determine the rotation of the camera. Click the drop-down menu button function panel. Model 4800 User's Manual * Cameras supplied with 4800 system are not equipped with PTZ feature. Getting Started to display the... - Page 26 Getting Started Model 4800 User's Manual Menu functions may vary depending on the make and model of the PTZ camera used. For a detailed description of available options, refer to the PTZ camera user's manual. Toggle the panel view for the options Toggle available on a PTZ camera.
- Page 27 5. Click the clear button CREEN ODES Use the screen view button on the Tool Bar to switch between single- and quad-screen views. to start. to run track. Click again to stop running. to clear the track sequence. Getting Started Model 4800 User's Manual...
-
Page 28: Screen Layout Adjustment
Getting Started Model 4800 User's Manual CREEN AYOUT DJUSTMENT Use the screen layout on the Tool Bar to access the Position screen. Use the buttons to reposition the layout of a full image or a single-view. Shrink/enlarge the window image vertically (creates a black margin at the top and bottom). -
Page 29: Channel Status Display
Getting Started Model 4800 User's Manual HANNEL TATUS ISPLAY Status icons display on the top-right corner of each channel image. Channel has detected motion in motion detection mode. Channel is in the scheduled recording mode. Channel is in the motion-detection triggered recording mode. -
Page 30: Dvr Settings
This chapter provides an overview of the DVR system configuration menu and instructions for setting operating parameters. YSTEM ONFIGURATION Click the System Configuration button on the Tool Bar to access the system configuration menu (see the menu hierarchy on the next page). To display the Tool Bar, right-click anywhere on the window or press ENTER on the front panel of the DVR or remote control. - Page 31 Setting Manual Record Record Search Tool Bar Video Clear Alarm 1/4 CH Position Alarm Maintenance Save Model 4800 User's Manual Language Video Standard Video Channel VGA Setting Record Schedule Time Format Record Quality Time Setting Record Rate Password Record Source...
-
Page 32: System
DVR Settings Model 4800 User's Manual YSTEM The System Configuration window provides access to seven sub-menus used to set the DVR system. A section describing each sub-menu and their available options follows. System Click the System button on the System Configuration menu to access the System settings sub-menu. -
Page 33: Language
Note: Set the video standard to NTSC. If the system is set to PAL, the screen will keep rolling and images will be unviewable. VGA S ETTING ORMAT Select the time format (options: 12-hour or 24-hour). The change takes effect after saving and exiting. DVR Settings Model 4800 User's Manual... -
Page 34: Time Setting
DVR Settings Model 4800 User's Manual ETTING Adjust the current date and time set on the DVR. Click the >> button to open a dialog box and change the year, month, date, hours, minutes, and seconds. Click OK to confirm the setting or click CANCEL to reject the change. -
Page 35: Password Setting
Note: The default password for Admin is 888888. The default password for User is 666666. We recommend you select and enter a new password at system start up. Keep a copy of the password in a secure location. DVR Settings Model 4800 User's Manual... -
Page 36: Advanced Settings
DVR Settings Model 4800 User's Manual DVANCED ETTINGS The Advanced Settings menu (lower right-hand corner) has three options: Adduser, Deluser, and Authority Manage. DDUSER Click Adduser to add a new user to the system. Use the keypad to input user information. -
Page 37: Authority Manage
DVR Settings Model 4800 User's Manual UTHORITY ANAGE Use the Authority Manage window to set a local and remote authority to access selected system features. By default, only the administrator account is allowed to modify DVR settings. In the authority options window, click the box next to an option to issue that authority to the user (check mark displays when selected). -
Page 38: Record
DVR Settings Model 4800 User's Manual ECORD The Record window provides access to eight sub-menus used to set the record parameters. A section describing each sub-menu and their available options follows. Record Click the Record button on the System Configuration menu to access the Record Settings sub-menu and adjust settings related to recording CCTV images to the HDD. -
Page 39: Video Channel
The recording type for each event/type is color-coded: White: recording will not be performed during this time Blue: recording full-time Green: recording triggered by motion-detection Red: recording triggered by an alarm DVR Settings Model 4800 User's Manual... -
Page 40: Record Quality
DVR Settings Model 4800 User's Manual Yellow: recording triggered by an alarm or motion detection. Select a color option button before highlighting time cells. Click on the hour in the graph or click and drag an area in any direction to highlight several cells. Press OK to confirm the settings. -
Page 41: Record Source
Position the mouse over the required field and use the arrows to increase/decrease the values. In case of a limited upload bandwidth, optimize the Sub Code values for the IE client viewer and mobile streaming. DVR Settings Model 4800 User's Manual... -
Page 42: Video
Camera Channel PTZ Protocol PTZ Baud Rate PTZ ID Color Setting Motion Detection Mosaic Motion Handling Advanced Setting Vido Loss Handling Channel Name Setting * Cameras supplied with 4800 system are not equipped with PTZ feature. -
Page 43: Camera Channel
PTZ B Select the PTZ device baud rate and make sure it is consistent with the baud rate of the installed PTZ cameras (options: 1200, 2400, 4800, or 9600 bps). The changes take effect when you save and exit the menu. -
Page 44: Motion Detection
DVR Settings Model 4800 User's Manual Place the cursor over a field and click the arrows to increase/decrease the values (1–16). The live feed from the camera lets you view the adjustments. Right-click anywhere in the window to return to the Camera Setting window. -
Page 45: Mosaic
DVR Settings Model 4800 User's Manual OSAIC Sometimes certain zones within the camera view should not be monitored for privacy protection. For example, if the view shows the windows of an apartment building in the monitored zone, choose to not record the apartment. The zone options are: ON or OFF. -
Page 46: Advanced Settings
DVR Settings Model 4800 User's Manual The following example shows a camera view with and without privacy zones. Select OFF in the Mosaic field to remove a privacy zone(s) or cancel the option. To undo a privacy area, click the >> button and right-click in the grayed-out zone (red border if it is active) to remove the red border. -
Page 47: Video Loss Handling
DVR and a PC via the Internet.) Select to send an email, when video loss is detected, to the EMAIL indicated address(es), including a snapshot of the event. (See information on setting up the list of email addresses.) DVR Settings Model 4800 User's Manual... -
Page 48: Channel Name Settings
DVR Settings Model 4800 User's Manual Note: These options only apply to previously selected camera channels (listed by the column of check boxes). HANNEL ETTINGS Click the >> button to display the channel name. Enter or change the channel name using... -
Page 49: Net
Network PPPoE Setting IP Address PPPoE IP Subnet Mask DNS Address Gateway DDNS HTTP Port Auto Register Command Port File Sharing Media Port Mobile Port Next Page Email Setting DVR Settings Model 4800 User's Manual... -
Page 50: Network
DVR Settings Model 4800 User's Manual ETWORK The DVR supports several two options for online viewing after an IP address is set: DHCP (automatic mode). Acquire the IP address using the DHCP client model. Static IP (manual mode). Indicate the IP address using the Static IP model (enter ... -
Page 51: Next Page
DVR Settings Model 4800 User's Manual The Next Page menu (lower right-hand corner) has eight sub-menus: PPPoE Setting, PPPoE IP, ONS Address, DDNS, Auto Register, File Sharing, Mobile Port and Email Setting. ETTING Use the arrow keys to activate/deactivate (ON/OFF) the PPPoE setting. The changes take effect when you save. -
Page 52: Pppoe Ip
DVR Settings Model 4800 User's Manual E IP PPPoE IP values are based on your Internet account. Contact your Internet Service Provider for details. DNS A DDRESS Place the cursor over a value and use the pop-up keypad to enter your DNS address. -
Page 53: Ddns
DVR Settings Model 4800 User's Manual DDNS Click the arrow to turn the DDNS option ON or OFF. When ON, click the >> button access the DDNS settings window and set the DDNS Server, User Name and Password. Contact your Internet Service Provider for details. -
Page 54: File Sharing
DVR Settings Model 4800 User's Manual HARING Access live video feed or shared video files via a network or the Internet. To activate this feature, click the checkbox. To prevent file sharing, click the checkbox again to turn this option off. - Page 55 Click the DEL button to remove an address from the list. Click DEL ALL to remove all addresses from the list. Click OK to save the changes. Click CANCEL to exit the window without saving. DVR Settings Model 4800 User's Manual...
-
Page 56: Alarm
DVR Settings Model 4800 User's Manual LARM The Alarm window provides access to four sub-menus used to set the alarm functions. A section describing each sub-menu and their available options follows. Alarm Click the Alarm button on the System Configuration menu to access the Alarm Settings sub-menu. -
Page 57: Alarm Input Channel
Note 2: For alarm triggered PTZ, make sure the preset point is set and the correct PTZ channel number is selected.* Model 4800 User's Manual * Cameras supplied with 4800 system are not equipped with PTZ feature. DVR Settings... -
Page 58: Advanced Settings
DVR Settings Model 4800 User's Manual DVANCED ETTINGS The Advanced Settings menu has three options: Event Handling, Alarm Setting, and Alarm Zoom Out. VENT ANDLING Select to send email (checkbox) when an alarm is triggered. LARM ETTING Click the arrow key to turn the Alarm Setting ON or OFF. Alarm Setting allows for... -
Page 59: Alarm Zoom Out
DVR Settings Model 4800 User's Manual Click the >> button to access the Alarm Schedule window. The cells represent the days of the week from Sunday to Saturday (vertically) and the hours of the day from 0 to 24 (horizontally). -
Page 60: Maintenance
DVR Settings Model 4800 User's Manual AINTENANCE The Maintenance window provides access to seven sub-menus used to set the maintenance functions. A section describing each sub-menu and their available options follows. Maintenance Click the Maintenance button on the System Configuration menu to access the Maintenance sub-menu to view system and event logs, versions of software and hardware, and to work with the HDD settings. -
Page 61: Log View
(i.e., F:\XXXXX.tar.gz). If no USB connection is found, a pop-up window indicates that a device is not available. Follow the prompts to upgrade the software. After completing the upgrade, click CONFIRM to restart the system. DVR Settings Model 4800 User's Manual... -
Page 62: Hdd Manage
DVR Settings Model 4800 User's Manual HDD M ANAGE Click the >> button to view the HDD Manage window used to format and set up the DVR hard-disk drive (HDD). Note: Before recording video and audio feeds, the HDD must be formatted using the DVR. -
Page 63: Hdd Capacity
This field shows the current hardware version of the DVR. OFTWARE ERSION This field shows the current software version of the DVR. OFTWARE ELEASE This field shows the release date of the current software version. DVR Settings Model 4800 User's Manual... -
Page 64: Save
DVR Settings Model 4800 User's Manual The Save window provides access to four options. A section describing each sub-menu and their available options follows. Click the Save Settings button on the System Configuration menu to access the Save Settings sub-menu. -
Page 65: Restore Defaults
PAL/NTSC system, and network settings) will be overridden by the factory default settings. OGOUT Click the LOGOUT button to log out of the system. Log in again (user name and password) to operate the DVR. DVR Settings Model 4800 User's Manual... -
Page 66: Web Browser Operation
NABLING OWNLOAD OF AN The Model 4800 is designed to operate with Internet Explorer (IE). To access the DVR via a web browser. You will need to install a special ActiveX component for web access. If the IE settings prohibit downloading unsigned ActiveX components, enable this function manually as described below. -
Page 67: Web Browser Login Screen
Enter User Name and Password. Check the “Automatically Open All Previews” option to view all cameras after Login. Press RESET to reset entered values. Press LOGIN to display the main remote access window. ROWSER INDOW Web Browser Operation Model 4800 User's Manual... - Page 68 Web Browser Operation Model 4800 User's Manual The central position of the window is the camera view. If you selected “Automatically Open All Previews” at Login, all available camera feeds display. A one-camera view displays by default with live feed. (There may be up to a two second delay from actual live events depending on the connection.) Recorded...
-
Page 69: Tools Bar
Click the Server tab to open the Server menu to adjust network settings. Most settings are self-explanatory and correlate to the settings on the DVR. Web Browser Operation Model 4800 User's Manual * Cameras supplied with 4800 system are not equipped with PTZ feature. - Page 70 Web Browser Operation Model 4800 User's Manual There are four subsections in the Server menu: Device Configuration: Enter the device name and choose the Signal Standard (NTSC/PAL/SECAM). Values for Channel Count, Alarm Input, Device Serial Number, Device Type, Hard Disk Count and Alarm Output are not changeable and provide reference information about the DVR.
-
Page 71: Channel
Web Browser Operation Model 4800 User's Manual Click CONFIRM to save changes and exit. Click CANCEL to exit without saving changes. Click RESTORE DEFAULT to reset values to parameters before changes were made. Click SAVE PARAMETERS to save change. Click EXIT to close the window without saving changes. -
Page 72: Font
Web Browser Operation Model 4800 User's Manual Click FONT to display a dialog window and modify the font size. Check the Motion Detect box to initiate the motion detection feature on the DVR for the selected camera. Use the Setup and Action buttons to adjust the motion detection zone and the alarm type. - Page 73 Web Browser Operation Model 4800 User's Manual CTION Click ACTION to open a pop-up window with method options when motion is detected: Sound Alarm, Send to Center, Email Notify. Check the Trigger Alarm Output to display the Output 1 checkbox. To choose which channel will start recording an alarm, check the appropriate boxes on the list under the Trigger Record option.
- Page 74 Web Browser Operation Model 4800 User's Manual When the motion detection alarm is triggered, and the remote notification is activated, a message displays at the top right corner of the window with information such as: “Device Alarm: Motion Detection, Channel 1.”...
- Page 75 Motion or alarm Yellow No recording White Recording full-time Recording triggered by motion detection Recording triggered by an alarm Recording triggered by both alarm and motion detection No recording performed during this time Web Browser Operation Model 4800 User's Manual...
-
Page 76: Serial
The RS485 Configuration settings are: Channel: Dropdown menu (options: All Channels or Channels 1 to 4). Baud Rate: Dropdown menu (options: 1200, 2400, 4800, or 9600). Parity: Dropdown menu (options: None, Odd, or Even). Decoder: Dropdown menu (options: Samsung, Panasonic, PelcoD, PelcoP, etc). -
Page 77: Alarm
Alarm Input: Dropdown menu (options: Alarm Input 1 to 4). Alarm Type: Dropdown menu (options: Open and Close, referring to N.O./N.C.). Enable: Check the box to enable the Alarm Schedule. Click ALARM SCHEDULE to display a schedule window. Web Browser Operation Model 4800 User's Manual... - Page 78 Web Browser Operation Model 4800 User's Manual Use the Alarm Schedule window to enable/disable alarm output on a weekly basis. The table represents days of the week (Sunday to Saturday vertically) and hours of the day (0 to 24 horizontally). Color encoding has two options: white = alarm is disabled, and red = enabled alarm.
-
Page 79: User
Click SAVE PARAMETERS to save change. Click EXIT to close the window without saving changes. Click the USER tab to open the User menu to adjust user account and authority settings. Web Browser Operation Model 4800 User's Manual * Cameras supplied with 4800 system are not equipped with PTZ feature. - Page 80 Click CONFIRM to save changes and exit. Click CANCEL to exit without saving changes. Click RESTORE DEFAULT to reset values to parameters before changes were made. Click SAVE PARAMETERS to save change. Click EXIT to close the window without saving changes. * Cameras supplied with 4800 system are not equipped with PTZ feature.
-
Page 81: Device
(Idle if not upgrading). The Progress Bar shows the current upgrade process. Time Synchronization adjusts the system time in the YYYY-M(M)-D(D) HH:MM:SS format. Click SYNCHRONIZE to sync the system time to local PC time. Web Browser Operation Model 4800 User's Manual... -
Page 82: Email Notification
Web Browser Operation Model 4800 User's Manual MAIL OTIFICATION Email Notify is similar to that present in the Net tab of the DVR settings (see Chapter 5, Email Settings). You can indicate multiple email addresses of the people who should be notified in case of an alarm, and the sender’s details. Indicate Server Address and Server Port, as well as User Name, Password and Email Address of the Addresser (Sender). -
Page 83: Talkback
Click the PLAYBACK tab on the Tool Bar to view recorded files stored on the PC or on the DVR. On the Playback window, the left half contains the controls, and the right half provides options for working with recorded files. Web Browser Operation Model 4800 User's Manual... -
Page 84: Search
Web Browser Operation Model 4800 User's Manual Target: Dropdown menu (options: Remote Device (DVR) and Local Host (PC)). Channel: Dropdown menu (options: Channels 1 to 4). Kind: Dropdown menu (options: All Records, Normal Record, Triggered by Alarm and Motion Detection). -
Page 85: Download
Use the menu bar to control the playback of selected files. Play Pause Stop Frame by frame step (press Play to resume) Fast forward (2X, 4X, 8X, 16X). From 16X gradually reduce Web Browser Operation Model 4800 User's Manual... -
Page 86: Device Log
Web Browser Operation Model 4800 User's Manual EVICE Click the DEVICE LOG tab on the Tool Bar to view a log of recorded files. speed using the Fast Rewind button. Rewind (Normal, 1/2, 1/4, 1/8, 1/16). You cannot directly go back to Normal fast rewind. -
Page 87: All Query Kinds
(or select the date and time from a drop-down calendar). UERY IND BY Select Query Kind By Type to activate view logs according to type. Depending on the selection, you can also modify the Sub Type values. Web Browser Operation Model 4800 User's Manual... - Page 88 Web Browser Operation Model 4800 User's Manual Four types are available: All, Operation, Exception, and Alarm. The subtype field is inactive. Operation There are 32 subtype field options available.
-
Page 89: Query Kind By Time And Type
This query combines Time and Type with the Begin and End Time. Click QUERY to submit a request and view the log. (It may take several minutes depending on the number of entries and the connection.) Web Browser Operation Model 4800 User's Manual... -
Page 90: Local Storage
Dropdown menu to indicate the recorded file time (options: 5, 10, 15, 30, or 60 minutes) Set local storage drive (State, Label (disc or hard drive), Capacity, and Free Space ) * Cameras supplied with 4800 system are not equipped with PTZ feature. -
Page 91: Screen View Buttons
DVR and depend on the model of the PTZ camera used (refer to the PTZ user manual for more information.) See the table below for a general description of common features. Web Browser Operation Model 4800 User's Manual * Cameras supplied with 4800 system are not equipped with PTZ feature. - Page 92 Web Browser Operation Model 4800 User's Manual Control the direction of the PTZ movement (see PTZ Navigation manual for scanning mode information). Buttons Set the turning speed of PTZ camera. Speed Click to zoom in/out. Zoom Click to make the image brighter or darker (disabled if Iris camera has automatic iris adjustment).
-
Page 93: Mobile Phone Support
The Model 4800 DVR can transmit live feed from CCTV cameras to a mobile phone, so that you can access your surveillance system from virtually anywhere in the world. Currently, this feature is supported for phones with Windows CE Mobile, Symbian S60 3rd Edition OS, and the Apple iPhone. - Page 94 Click to connect to the system and watch the live feed from a CCTV Connect camera. Click to modify settings. Setting Control the direction of a PTZ camera view* Zoom in/out Iris control Focus control Snapshot * Cameras supplied with 4800 system are not equipped with PTZ feature.
-
Page 95: Symbian S60 3Rd Phone
Note: Before using this feature, apply for Internet service (e.g., 3G or 3.5G) for your mobile phone. Contact your mobile service provider for details. AMPLE NSTALLATION ROCESS Mobile Phone Support Model 4800 User's Manual... -
Page 96: Menu Buttons And Program Interface
All menus and buttons are hidden. Take a snapshot of the camera view. Snap Button Bring up the connectivity setup Setting Button screen. Exit QQEye Exit Function Button * Cameras supplied with 4800 system are not equipped with PTZ feature. -
Page 97: Setup
. DVR IP address Server Address 7050 Server Port Admin Username Default Admin password 888888 Password Click DONE to save and return to the main window. Click CANCEL to discard the changes. Mobile Phone Support Model 4800 User's Manual... -
Page 98: Symbian Supported Mobile Phones
Mobile Phone Support Model 4800 User's Manual YMBIAN UPPORTED OBILE Symbian mobile phones tested for remote access compatibility with Model 4800 DVR. LG KT610 LG KS10 LG KT615 Nokia 3250 Nokia 5320 XpressMusic Nokia 5500 Sport Nokia 5630 XpressMusic Nokia 5700... - Page 99 Samsung I7110 Samsung INNOV8 Samsung SGH-G810 Samsung SGH-i400 Samsung SGH-i450 Samsung SGH-i520 Samsung SGH-i550 Samsung SGH-i560 Samsung SGH-L870 Mobile Phone Support Model 4800 User's Manual S60 3rd_INIT 09-Apr-06 S60 3rd_INIT 27-Sep-06 S60 3rd_FP1 08-Jan-07 S60 3rd_INIT 12-Feb-07 S60 3rd_FP2 11-Feb-08...
-
Page 100: Apple Iphone
Play button - press to connect to DVR and view live feed Switch between channels Control PTZ camera direction* Set PTZ*, Focus, and Iris Setting menu to connect to Take a photo snapshot * Cameras supplied with 4800 system are not equipped with PTZ feature. - Page 101 Click the settings icon to open the setting menu. Server IP: DVR IP address Port: Mobile Port (default: 7050) Username: Login User Name (Admin) Password: Default: 888888 6. Click BACK to save settings and return to the main window. Mobile Phone Support Model 4800 User's Manual...
-
Page 102: Troubleshooting
Problem DVR fails to start after being connected to the power supply DVR restarts repeatedly DVR crashed when recording or playing recorded information Updating operation fails Mouse does not work Recording function does not work properly Image on the monitor appears in black and white rather than color Nothing displayed on the... - Page 103 Troubleshooting Model 4800 User's Manual Problem Color quality is low in both real-time and recorded images Mosaic on the PC monitor during playback Displayed date and time are not correct Forgot password Solution Check adjustment of the output/input video parameters on the DVR menu.
-
Page 104: Technical Information
NSTC/PAL Video Format H.264 Baseline Compression BNC 4 CH Input / 1 Output Video Input Motion detection, Sensor Input, Relay Output , Video Loss Alarm Type 4 CH Input / 1 CH Output Sensor In/Out Each Channel: NTSC (30 fps); PAL (25 fps) Display Frame Rate NTSC: CIF (352x240), half D1 (704x240), D1 (704x480) Playback Resolution... - Page 105 Troubleshooting Model 4800 User's Manual CAMERA Image Device Resolution Effective Pixels Lens White Balance Signal/Noise Ratio Gain Control Backlight Compensation Viewing Angle Color Indoor/Outdoor Number of Infrared LEDs Night Vision Distance Operating Temperature Dimensions CMOS 400 TV lines NTSC: 656 x 492 6.0mm...
-
Page 106: Warranty
IMITED ARRANTY BRK Brands, Inc., (“BRK”) the maker of First Alert® brand products warrants that for a period of one year from the date of purchase (the “Warranty Period”), this product will be free from defects in material and workmanship. BRK, at its sole option, will repair or replace this product or any component of the product found to be defective during the Warranty Period. -
Page 107: Obtaining Service
Warranty Model 4800 User's Manual software via its website. This warranty does not cover any alteration or damage to any other software that may be or may become resident on the users system as a result of installing the software provided. This warranty is in lieu of other warranties, expressed or implied, and BRK neither assumes nor authorizes any person to assume for it any other obligation or liability in connection with the sale or service of the product.
Need help?
Do you have a question about the 4800 and is the answer not in the manual?
Questions and answers