Table of Contents
Advertisement
Advertisement
Table of Contents

Related Manuals for Ken A Vision kena T-1050


Summary of Contents for Ken A Vision kena T-1050
- Page 1 ® kena Instruction Manual T-1050...
-
Page 3: Table Of Contents
Table of Contents Introduction / Diagram Package Contents Operational Requirements Optional Accessories to Order Specifications Quick Start Guide 1. Install the Software ® 2. Turn on kena 3. Launch kena Program Set-up of the kena Digital Microscope 9-11 Using the Camera 12-13 Camera Head “On”... -
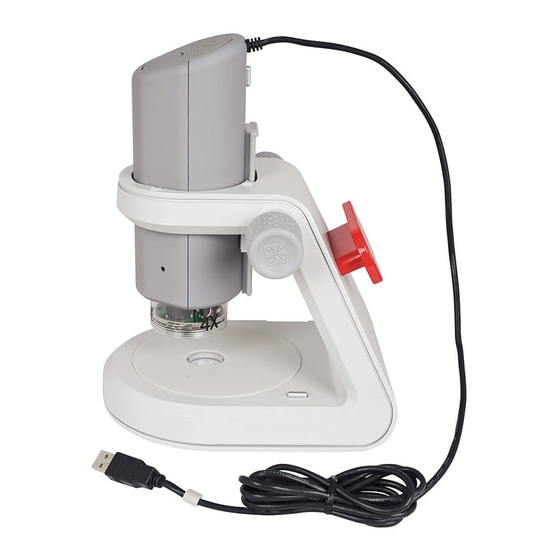
Page 4: Introduction / Diagram
Introduction / Diagram ® The kena Digital Microscope is a durable product created by Ken-A-Vision, with over 65 years of experience incorporated into every product shipped. Thank you for purchasing the finest educational tool for your classroom viewing! Please review the diagram and the list of items contained in this package. Diagram 1. -
Page 5: Package Contents
Package Contents • Instruction Manual • Warranty Card • Storage Bag • Hardware o Base Unit o Camera Head with Factory-installed USB Cable o Touch Tube Device • CD o Applied Vision™ 4 (AV4) Software o AV4 Software Instruction Manual Applied Vision™... -
Page 6: Specifications
Specifications Features: Resolution: 640(H) X 480(V) (adjustable in software) Magnification: Camera = 10x equivalent lens Objectives = 2x, 4x and 10x Focusing: Single combined coarse and fine adjustment knobs Lighting: ® Ken-A-Vision Cool Lighting (LED), above and below stage Stage: Silicone surface (slides stay in place, no stage clips needed) Size &... -
Page 7: Quick Start Guide
Quick Start Guide ® It's as simple as 1, 2, 3 to begin using your new kena digital microscope! Although this guide will get you up and running, it is recommended you read the complete manual. 1. Install the Software Close all windows or other programs before running the installation program. - Page 8 NOTE: Viewing transparent specimens requires installing 4 AA batteries (not included) for lower light illumination (transmitted light). To install the batteries, open the door on the left side of the base unit and insert the batteries. Close the battery door. Once the batteries are installed, press the silver lower LED light button located on the right side of the base unit.
-
Page 9: Set-Up Of The Kena Digital Microscope
Set-up kena Digital Microscope ® kena can be set up in a matter of minutes. To get the most out of this amazing teaching tool, follow these step-by-step directions: 1. After unpacking the box, unwrap kena from the protective plastic bag. 2. - Page 10 v. The stage is designed with a revolutionary, factory-installed silicone pad, which does not require standard stage clips and is easy to clean. c. The Touch Tube is used to easily determine focusing distance when using the camera head off of the base. ®...
- Page 11 NOTE: The camera is not on unless you have accessed it by launching the software program. 8. When launching AV4 software, immediately the software may prompt you to look for an update. Answer "yes" and if you are connected to the internet, the software will automatically go to the Ken-A-Vision Web site and download the latest AV4 release in a matter of minutes.
-
Page 12: Using The Camera
Using the Camera Changing Magnification Turn the turret so that the 2x objective is aligned with the indented indicator on the camera head. You will hear a "click". Practice turning this turret to the predefined settings of 2x, 4x, and 10x. ®... -
Page 13: Using Kena "On" The Base As A Stereo Microscope
7. If desired, rotate 4x and 10x lens in place. NOTE: Depth of field decreases as magnification increases. 6. Begin by turning the focus knobs counter clockwise so the turret is nearly touching the slide. Slowly begin turning clockwise raising the turret away from the slide while watching the image on your computer screen. -
Page 14: Storing And Servicing Your Kena
6. Make sure the turret is adjusted to 2x to begin your exploration. 7. Approach the object with the camera head. Adjust the focus. Press the capture button to record the image. 8. Fine focus your kena with two different approaches: a. -
Page 15: Troubleshooting
Troubleshooting This section provides many useful tips on how to solve common problems while setting up or using the kena digital microscope: The software is not packed or is lost. • Download it at www.ken-a-vision.com I can't see an image. The screen is black. •... - Page 16 5615 Raytown Road • Kansas City, MO 64133 U.S.A. Tel.: 816-353-4787 • Fax: 816-358-5072 email:info@ken-a-vision.com • www.ken-a-vision.com INS-KENA v3...
Need help?
Do you have a question about the kena T-1050 and is the answer not in the manual?
Questions and answers