
Subscribe to Our Youtube Channel
Related Manuals for Grundig DMS600B


Summary of Contents for Grundig DMS600B
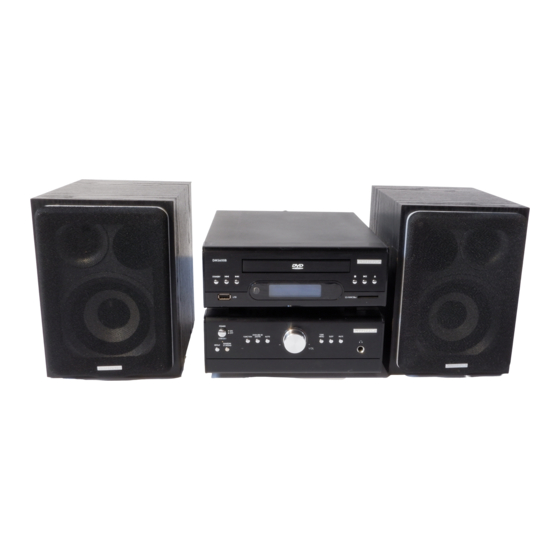
- Page 1 DMS600B DVD MICRO SYSTEM The Gold Technical Support Line:1902 215 259 Personal Product Support (Charges will apply at $2.95 per minute) DMS600B...
- Page 2 DMS600B...
-
Page 3: Introduction
Infringement of these laws may result in prosecution. If in doubt, seek advice before making your recording. Australia. Grundig Warranty: 1800 509 394 New Zealand Grundig Warranty: 0800 450 259... -
Page 4: Safety Instructions
DMS600B Safety Instructions Power source Electrical information Safety considerations This appliance must only be connected to a ■ Position the power lead and other connected 230V-240V AC, 50Hz mains supply. leads, so that they are not likely to be walked on, pinched or where items can be placed on or Electrical information against them. -
Page 5: Table Of Contents
DMS600B Contents Introduction ............ 3 Safety Instructions .......... 4 Contents ............5 Location of controls ........6 Getting Started ..........9 Connections ..........10 Setting up the Speakers ........ 12 Setting the clock ..........13 Compatible discs & Region codes ...….. 15 DVD Features .......... -
Page 6: Location Of Controls
DMS600B Location of controls Front Speaker 12. Power switch button Standby button 13. Repeat button Previous / Tuning - button 14. Random / ST/MONO button USB socket 15. Standby LED Next / Tuning + button 16. Function button DVD drawer 17. - Page 7 DMS600B Location of controls Rear Digital Optical Output Socket to Connect to Conrtrol Amplifier Compartment Cr, Y, Cb Video Output Audio Output (Left and Right) Digital Coaxial Output FM and AM aerial terminal Socket to Connect to DVD Player Auxiliary Input (Left and Right) Speaker Connectors Fuse Socket Mains Cable...
- Page 8 DMS600B Location of controls Remote Control STANDBY BUTTON STOP BUTTON OPEN/CLOSE BUTTON PLAY/PAUSE BUTTON SEARCH BACKWARD BUTTON SEARCH FORWARD BUTTON NEXT BUTTON PREVIOUS BUTTON OSD BUTTON 10. NUMERICAL BUTTONS 11. ANGLE BUTTON 12. AUDIO BUTTON 13. TITLE BUTTON 14. MENU BUTTON 15.
-
Page 9: Getting Started
DMS600B Getting Started Using the Remote Control Remove your Ministry of Sound DMS600B To use the remote control, point it at the front of carefully from the box. You may wish to store the unit, towards the sensor situated to the left of the packaging for future use. -
Page 10: Connections
DMS600B Connections Aerial Connections Connections to TV FM Aerial Before making/removing any connections Connect the plug on the supplied FM pigtail ensure that you have unplugged the unit from aerial to the centre pin of the 75-ohm socket on the mains supply. the rear of the unit. - Page 11 DMS600B Connections Speaker Connections Connecting to External Audio Source When connecting the speakers please ensure Connect an external audio source using the that the positive terminal on the speaker is AUX cable connect one of 3.5mm plug to connected to the positive terminal on the unit external audio source, connect the other 3.5mm and the negative terminal on the speaker is plug to the Audio input sockets on the front of...
-
Page 12: Setting Up The Speakers
DMS600B Setting up the Speakers Positioning For the best possible sound both of the speakers should be the same distance from the listening position (A). The speakers can be placed from 1.0 to 15.0 metres (A) from the listening position. Master volume To adjust output level of the speaker channels use the VOL +/- buttons on the remote or the... -
Page 13: Setting The Clock
DMS600B Setting the clock To view the set sleep time remaining The internal clock operates in 24-hour mode. 1. Press the SLEEP button once, the LCD The clock can be set when the system is display shows the time remaining. powered on or when in standby mode. -
Page 14: Setting The Timer
DMS600B Setting the timer To check your timer setting Setting the timer function 1. Press and hold the TIMER button until the The timer, when set, will automatically switch LCD display shows ‘Timer On Set’. your System ‘on’ from standby then and ‘off’ at 2. -
Page 15: Compatible Discs & Region Codes
DMS600B Compatible discs & region codes Compatible discs Region code Your DVD player can play discs that are marked All DVD-Video discs carry a region mark on the with the following logos: case somewhere that indicates which region(s) of the world the disc is compatible with. You’re 8cm/12cm DVD Video Discs. -
Page 16: Dvd Features
DMS600B DVD Features Glossary of disc terms DVD discs offer many advantages over VHS Title (DVD) tapes and VCD video discs, which include: The longest sections of a picture or a music piece on a DVD. For example on a movie DVD, Parental control the main feature movie would be one title. -
Page 17: Basic Playback
DMS600B Basic Playback The basic playback controls for playing DVD, DVD-disc menus CD’s are covered here. Further functions are Many DVD-Video discs contain menus from detailed later. which you can select what you want to watch. They may give access to additional features, Switching on such as subtitle and audio language selection, If the player isn’t already on, press the POWER... -
Page 18: Setup Menu
DMS600B Setup Menu ■ Select YUV (Cr Y Cb) if the DVD player is To enter the setup menu press the SETUP connected to the TV using component cables. button on the remote control. To access each ■ When connecting using a composite cable, submenu one of the icons along the top of the any of the above selections can be used. - Page 19 DMS600B Setup Menu Default Password SYSTEM SETUP SYSTEM SETUP TV SYSTEM TV SYSTEM AUTO PLAY AUTO PLAY VIDEO VIDEO TV TYPE TV TYPE ------- PASSWORD PASSWORD RATING RATING DEFAULT DEFAULT RESTORE EXIT SETUP EXIT SETUP Press ENTER when this option is selected to The password option is used in conjunction with restore the player to its factory default settings.
- Page 20 DMS600B Setup Menu Subtitle language LANGUAGE SETUP OSD language LANGUAGE SETUP OSD LANGUAGE CHINESE LANGUAGE SETUP ENGLISH AUDIO LANG JAPAN ENGLISH OSD LANGUAGE SUBTITLE LANG FRENCH GERMAN SPANISH AUDIO LANG MENU LANG SPANISH PORTUGUESE SUBTITLE LANG EXIT SETUP FRENCH GERMAN ITALIAN MENU LANG EXIT SETUP...
- Page 21 DMS600B Setup Menu AUDIO SETUP Audio out AUDIO SETUP AUDIO OUT SPDIF/OFF SPDIF/RAW EXIT SETUP SPDIF/PCM ■ If SPDIF Off is selected there will be no output from the digital coaxial and optical outputs. ■ If SPDIF / RAW is selected the output from the digital coaxial and optical outputs will be of RAW format.
- Page 22 DMS600B Setup Menu VIDEO SETUP Brightness VIDEO SETUP VIDEO SETUP BRIGHTNESS BRIGHTNESS CONTRAST CONTRAST SATURATION SATURATION EXIT SETUP EXIT SETUP Contrast When highlighted use the UP/DOWN When highlighted use the UP/DOWN directional keys to adjust the hue of the video directional keys to adjust the brightness of the output.
- Page 23 DMS600B Setup Menu SPEAKER SETUP Downmix mode SPEAKER SETUP LT/RT DOWNMIX STEREO EXIT SETUP The downmix specifies what sounds are heard from which speakers as follows: ■ LT/RT: Choose this setting if the disc is recorded using the Dolby pro logic audio format. ■...
- Page 24 DMS600B Setup Menu Dual mono DIGITAL SETUP OP mode DIGITAL SETUP OP MODE DYNAMIC RANGE DIGITAL SETUP DUAL MONO STEREO EXIT SETUP MONO L OP MODE LINE OUT MONO R DYNAMIC RANGE R F REMOD MIX MONO DUAL MONO EXIT SETUP This option sets the L and R mono output mode.
-
Page 25: Dvd Player Operation
DMS600B DVD Player Operation shown on the TV screen. If the PLAY/PAUSE is Before using the DVD player please ensure that pressed now playback will commence from the the TV connected to the player is turned on and beginning of the disc. the AV channel is selected. -
Page 26: Dvd Player Functions
DMS600B DVD Player Functions Subtitle language Repeat Press the SUBTITLE button repeatedly to cycle Press the REPEAT button to cycle through the through all of the available subtitle languages for repeat modes as follows: the disc. ■ Repeat Chapter: repeat the current playing Please note: The subtitle languages available chapter. -
Page 27: Cd Player Functions
DMS600B CD Player functions Previous/Next Insert a CD disc Press NEXT button repeatedly during playback Presumed the POWER ON/OFF switch on the to skip to the next track. front of the unit is set to ON position. Press the Press PERVIOUS button repeatedly during STANDBY button on the front of the unit or the playback to skip to previous tracks. - Page 28 DMS600B CD Player functions Repeat playback Press the REPEAT button to cycle through the following modes: ■ Repeat 1: repeat the current track. ■ Repeat All: repeat all tracks. Note: Skip track is not allowed when repeat 1 is set. Random playback Press the RANDOM button on the front of the unit to turn random playback ON or OFF.
-
Page 29: Mp3/Jpeg Cd Functions
DMS600B MP3/JPEG CD Functions File selection Introduction to MP3/JPEG Use the UP/DOWN DIRECTIONAL buttons to Playback select the required directory (the left hand pane). This system will play MP3 or JPEG files that are Press the ENTER button to display the files in recorded onto a blank CD. - Page 30 DMS600B MP3/JPEG CD Functions Search Forwards/Backwards Press the SEARCH FORWARD repeatedly during playback to cycle through the different speeds (i.e. 2x normal speed, 4x normal speed etc.) for search forward as follows: To resume normal playback press the PLAY/ PAUSE button. Press the SEARCH BACKWARD repeatedly during playback to cycle through the different speeds (i.e.
-
Page 31: Usb/Sd/Mmc Operation
DMS600B USB/SD/MMC Operation This unit is equipped with a USB socket Using a SD/MMC card (suitable for the connection of MP3 players/USB Carefully insert a suitable memory card (SD or memory sticks) and a memory card slot (suitable MMC type) in to the memory card socket located for SD and MMC type cards.) on the front of the unit. -
Page 32: Radio Functions
DMS600B Radio functions Storing memory presets Switching on e.g. to store 98.8 to memory preset 3 Presuming the POWER ON/OFF switch on the To store a station into a memory preset and hold front of the unit is set to ON position. Press the the MEM button for 3 seconds. -
Page 33: Listening To An External Source
DMS600B Listening to an external source To listen to an external source, connect the source as shown in page 11. Press the FUNCTION button on the front of the unit or on the remote control until AUX shown on the display... -
Page 34: Care And Maintenance
DMS600B Care and maintenance Handling discs Never use chemicals such as record sprays, antistatic sprays, benzene, or thinners to clean the discs. These chemicals can irreparably damage the disc's surface. Discs should be returned to their cases after use. This avoids serious scratches that could cause the laser pickup to skip. -
Page 35: Troubleshooting
DMS600B Troubleshooting In case of any problem listed as below, try to settle it by referring to the following remedies. If the problem remains, contact the nearby maintenance department for repair. Soundless: ■ Make sure that the DVD player is connected well to other system such as the power amplifier or television. -
Page 36: Technical Specifications
DMS600B Technical specifications ■ DVD SECTION Power Supply ........AC 230-240V ~ 50Hz Front socket………………….…..……USB2.0 and SD Play type……………………….….….DVD, MPEG2, MPEG1, VCD1.0, 1.1 and 2.0 (mini laser video compact disc) CD, CD-R, MP3 , JPEG, Video format…………………….….….MPEG2 for DVD, and MPEG1 for VCD Audio format…………………….……..AC-3, analogue stereo, virtual surround Signal output:- video system……..….NTSC or PAL Signal output:- Video......1.0Vp-p... -
Page 37: Guarantee
If the guarantee is required please contact the GRUNDIG Helpline 1800 509 394 within Australia or 0800 450 259 within New Zealand. Have you receipt of purchase on hand. - Page 38 DMS600B...
- Page 39 DMS600B...
- Page 40 DMS600B PO BOX 6287 Silverwater NSW 1811 Grundig Warranty line: 1800 509 394 (Australia) 0800 450 259 (New Zealand) Product Registration www.grundig.net.au...
Need help?
Do you have a question about the DMS600B and is the answer not in the manual?
Questions and answers