Table of Contents
Advertisement
Advertisement
Table of Contents

Related Manuals for Grundig Ovation CDS 6580 A SPCD


Summary of Contents for Grundig Ovation CDS 6580 A SPCD
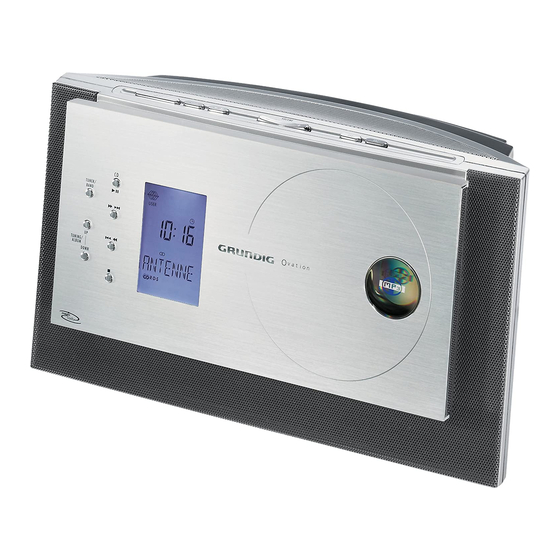
- Page 1 HIFI MICRO SYSTEM Ovation CDS 6580 A SPCD...
-
Page 2: Table Of Contents
CONTENTS ____________________________________________ Set-up and safety Magic Fidelity. The sound concept from Ovation Overview The hi-fi system controls The hi-fi system displays The remote control Connection and preparation Settings Setting the time Tuning and storing radio position Resetting the hi-fi system General functions Tuner mode Selecting the TUNER input source... -
Page 3: Set-Up And Safety
The sound concept from Ovation. Magic Fidelity is a new, three-channel active loudspeaker system developed and patented by Grundig, which produces powerful and brilliant sound. A bass speaker as well as two medium and treble speakers, each in their own casing, create an outstanding sound experience. -
Page 4: Overview
OVERVIEW ____________________________________________ The hi-fi system controls Controls on the front Tuner mode Switches on the hi-fi system with the input source TUNER/BAND »TUNER«, selects the input source »TUNER«; selects the waveband »FM« or »MW«. Press and hold down to start the station search; TUNING/ALBUM press briefly to change the frequency in small UP –... - Page 5 OVERVIEW ____________________________________________ In MP3/WMA and CD-DA mode: pressing briefly $ s 6 selects the next file or the next track; holding down searches for a particular passage. In MP3/WMA and CD-DA mode: pressing briefly 5 a a a selects the previous file or the previous track; hold- ing down searches backwards for a particular passage.
- Page 6 OVERVIEW ____________________________________________ Controls on the top General information Switches the device to and from standby mode. ON/OFF The device is only fully disconnected from the mains after the plug has been pulled out. For setting the sleep timer. SLEEP Interrupts the alarm function. SNOOZE –...
- Page 7 OVERVIEW ____________________________________________ Controls on the sides Socket for mains cable (left side of the device). AC ~ The only way to isolate the hi-fi system from the mains supply is to pull the plug out. Audio signal input for an external device on the right hand side.
-
Page 8: The Hi-Fi System Displays
OVERVIEW ____________________________________________ The hi-fi system displays In standby mode: displays the time. 000:000 In tuner mode: displays the preset station. In MP3/WMA mode: displays the total number of albums and files, and the USER CLASSIC JAZZ ROCK elapsed playing time of the current file. In CD-DA mode: displays the total ALBUM FILE... - Page 9 OVERVIEW ____________________________________________ In MP3/WMA and CD-DA mode: all RANDOM files or tracks are played back in ran- dom order. USER CLASSIC JAZZ ROCK In tuner mode: a stored radio station is PROG selected or played. ALBUM FILE 000 : 000 In MP3/WMA and CD-DA mode: a track memory is created or played back.
-
Page 10: The Remote Control
OVERVIEW ____________________________________________ The remote control Switches the hi-fi system to standby mode and ON/OFF from standby mode to the last signal source selected. Switches the hi-fi system on with the »CD« input source, selects the »CD« input source; In MP3/WMA and CD-DA mode: starts and pauses CD playback. - Page 11 OVERVIEW ____________________________________________ In tuner mode: switches the display between fre- DISPLAY quency, station name, station type, radio text and time/day. In CD-DA mode: switches the display between elapsed playing time and time/day. In MP3/WMA mode: switches the display between file number/elapsed playing time, file name/ID3 tag information (ticker text) and time/day.
-
Page 12: Connection And Preparation
CONNECTION AND PREPARATION Connecting the antenna Plug the rooftop antenna cable into the »FM ANTENNA« antenna socket on the hi-fi. Note: If no rooftop antenna is available, use the auxiliary antenna supplied. This antenna provides reasonably good reception of local FM (VHF) stations. Do not shorten the auxiliary antenna. Insert the wire frame antenna cable into the »MW ANTEN- NA«... - Page 13 CONNECTION AND PREPARATION Inserting batteries in the remote control Open the battery compartment by pushing down its lid. When inserting the batteries (2 x 1.5 V, R 6/UM 3/AA), observe the polarity marked on the base of the battery com- partment.
-
Page 14: Additional Information For Units Sold In The Uk
“E”, earth symbol “ ”, coloured green, or green & yel- low. Replacement mains lead sets can be obtained from your local dealer, or by contacting Grundig Consumer Relations (01788 570088) Moulded 3-pin lead set, suitable for UK use: Ref: Leadset UK... -
Page 15: Settings
SETTINGS ______________________________________________ Setting the time A demo programme starts when you connect the hi-fi system to the mains for the first time. To end the demo programme switch the hi-fi system to stand-by mode by pressing »ON/OFF« briefly. Now the time and day displays will flash, indicating that they need to be set. -
Page 16: Setting And Storing Radio Stations
SETTINGS ______________________________________________ Setting and storing radio stations Automatic station search After the hi-fi system has been connected to the mains for the first time, the device in tuner mode searches for the 40 stations with the best reception and stores them. After connection, switch on the hi-fi system by pressing PROG »TUNER/BAND«. -
Page 17: Resetting The Hi-Fi System
SETTINGS ______________________________________________ Storing stations on station positions Press »TUNER/BAND« to select the frequency band (FM or MW). Press »UP TUNING/ALBUM DOWN« to select the station you want to store. Press »PROG./RAND./ TIME« to activate the memory func- PROG tion. FANTASY –... -
Page 18: General Functions
GENERAL FUNCTIONS ________________________ Switching the hi-fi system on and off Switch the hi-fi system on from standby mode by pressing »ON/OFF«. – The last input source used is automatically selected. Note: The following buttons on the hi-fi or the remote control can also be used to switch on the system: »TUNER/BAND«... -
Page 19: Selecting Sound Effects
GENERAL FUNCTIONS ________________________ Selecting sound effects You can select from the sound settings USER, CLASSIC, POP, JAZZ and ROCK. The basic setting is USER. PROG JAZZ Select the sound setting by pressing »DSC«. «, »POP C«, »JAZZ – Display: »USER «, »CLASSIC FANTASY V«... -
Page 20: Tuner Mode
TUNER MODE _______________________________________ Selecting the Tuner input source Press »TUNER/BAND« to select the input source. – The most recently selected station is activated (Last Station PROG Memory). ENERGY – Display: e.g. »FM 100.60« or »ENERGY«. Selecting a preset position Press »TUNER/BAND« to select the frequency band (FM or MW). -
Page 21: Rds Station Service
TUNER MODE _______________________________________ RDS station service RDS (Radio Data System) is an information system which is trans- mitted additionally by most FM stations. When the hi-fi system is receiving an RDS station, the station name, for example »FANTASY«, and » «... - Page 22 TUNER MODE _______________________________________ Station types (PTY) To call up the current station type, press »PTY« on the remote control. PROG – Display: the current station type, e.g. »NEWS«, and »PTY«. NEWS – If no station type code is transmitted, »NO PTY« appears in the display.
- Page 23 CD MODE ______________________________________________ The hi-fi system is suitable for music CDs bearing the logo shown here (CD-DA), and for CD-Rs and CD-RWs with audio data or MP3/WMA formats. In MP3/WMA mode, the terms “album” and “file” are very impor- tant. “Album” corresponds to a folder on a PC, “file” to a file on a PC or a CD-DA track.
-
Page 24: Cd Mode
CD MODE ______________________________________________ Inserting a CD Open the CD tray on the hi-fi by lifting up the front panel. – Display: »OPEN«. Place the CD in the compartment with the printed side facing OPEN outwards. Close the CD compartment and return the front panel to its original position. -
Page 25: Selecting Another File Or Track
CD MODE ______________________________________________ Selecting another file or track During playback, keep pressing » « or » « until 5 aa a $s 6 0 : 01 you see the number of the file or track you want in the display. –... -
Page 26: Repeating All The Files On An Album (Mp3/Wma Only)
CD MODE ______________________________________________ Repeating a file or a title (Repeat One) Press »CD II« to start playback. Press » « or » $s 6 « to select the file or track. 5 aa a Select the repeat function by pressing »INTRO/REP./TIMER« 1 : 15 until »... -
Page 27: Playing Back Files Or Tracks In Random Order (Random)
CD MODE ______________________________________________ Playing back files or tracks in random order (Random) Press »CD II« to start playback. Press »PROG./RAND./TIME« to select the function. 2 : 16 RANDOM – Display: »RANDOM«. 008 034 – The files or tracks on the CD are played back in random order. -
Page 28: Creating A Track Memory
CD MODE ______________________________________________ Creating a track memory You can create a track memory of up to 60 files on different albums (MP3/WMA) or up to 60 tracks (CD-DA) for the current CD in any order you choose and then play them back in that sequence. A file or track may be stored more than once. - Page 29 CD MODE ______________________________________________ Checking the track memory Press »PROG./RAND./TIME« repeatedly when in stop 010 004 PROG mode. – The sequence of the stored files or tracks is displayed. MP3 P-04 Adding files or tracks In the stop position, select the file or track with » «...
-
Page 30: Timer Mode
TIMER MODE ________________________________________ Your hi-fi system has three timer modes: – The switch-on timer, which switches the hi-fi system on at the set time and wakes you with an alarm or music. – The reminder timer, reminding you by sounding the signal tone at a preset time. - Page 31 TIMER MODE ________________________________________ Interrupting the alarm During the alarm, press »SNOOZE« on the remote control. – The alarm signal (signal tone, radio station or CD) stops. – The alarm goes off again at 5-minute intervals (alarm duration – 60 minutes). Cancelling the alarm for the day Switch the hi-fi system off by pressing »ON/OFF«...
-
Page 32: Reminder Timer
TIMER MODE ________________________________________ Reminder timer Press »NAP« to call up the function. 09 : 34 – Display: »NAP 10« (minimum time setting), »NAP« flashes. Enter the reminder time (in 10 minute intervals from 10 to 120 minutes) with »NAP«. – Display: »NAP«. –... - Page 33 INFORMATION _____________________________________ Cleaning the CD unit If the device is unable to scan CDs perfectly, use a standard, com- mercially available cleaning CD to clean the laser optics. Other cleaning methods may damage the laser optics. To clean CDs use a lint-free cloth and wipe them in a straight line from the centre of the disc outwards.
-
Page 34: Information
INFORMATION _____________________________________ General information on laser devices Your system is a CLASS 1 LASER PRODUCT. This means that the laser is designed in such a way as to ensure that the maximum permissible emission value cannot be exceeded under any circumstances. CLASS 1 Caution: LASER PRODUCT... - Page 35 Grundig Multimedia B.V. Atrium, Strawinskylaan 3105 NL-1077 ZX Amsterdam http://www.grundig.com • • 08/20...
Need help?
Do you have a question about the Ovation CDS 6580 A SPCD and is the answer not in the manual?
Questions and answers
How to operate auxiliary
To operate the auxiliary function on the Grundig Ovation CDS 6580 A SPCD:
1. Turn off the hi-fi system before connecting any external device.
2. Connect the external device's audio output to the hi-fi system's »AUX« socket using a 3.5 mm stereo jack plug.
3. Turn on the hi-fi system.
4. Select the AUX input source on the hi-fi system (exact button not specified in the context, but typically labeled as "AUX" or "SOURCE").
5. Play audio from the connected external device. The sound will be output through the hi-fi system speakers.
This answer is automatically generated