Table of Contents
Advertisement
Quick Links
QSD42908 Net DVR
User's Manual
8015 E. Crystal Dr
Anaheim, CA 92807
http://www.q-see.com
Customer Service:
Phone: 877-998-3440 x 538
Email: cs@dpsi-usa.com
Phone: 877-998-3440 x 539
Email: ts@dpsi-usa.com
QSD42908 User's Manual
V2.1
Contact Us:
Q-See Products
Website:
Tech Support:
Fax:
714-998-3509
Rev 100707D
1
Advertisement
Table of Contents

Related Manuals for Q-See QSD42908 Net


Summary of Contents for Q-See QSD42908 Net
- Page 1 QSD42908 User’s Manual QSD42908 Net DVR User’s Manual V2.1 Contact Us: Q-See Products 8015 E. Crystal Dr Anaheim, CA 92807 Website: http://www.q-see.com Customer Service: Phone: 877-998-3440 x 538 Email: cs@dpsi-usa.com Tech Support: Phone: 877-998-3440 x 539 Email: ts@dpsi-usa.com Fax: 714-998-3509...
-
Page 2: Table Of Contents
QSD42908 User’s Manual Index Chapter 1 Product Introduction...................... 5 Summary ........................5 Features ......................... 5 Chapter 2 Installation ........................7 Checking the DVR and Its Accessories................. 7 Hard Drive (HDD) Installation ..................7 Rear Panel Description ....................8 Chapter 3 Operational Instructions .................... - Page 3 QSD42908 User’s Manual Chapter 6 Utilities ........................76 Restore Parameters ...................... 76 Upgrade ........................77 Hard Disk Management ....................78 Stop Alarm Out ......................78 Reboot ......................... 78 Power Off ........................78 View Log ........................79 System Information ..................... 81 Chapter 7 Firmware Upgrade ......................
- Page 4 DISCLAIMER: The contents of this Manual are subject to change without notice; we are also not responsible for typing errors or errors of omission. Contact Us: Q-See Products 8015 E. Crystal Dr Anaheim, CA 92807 Website: http://www.q-see.com...
-
Page 5: Chapter 1 Product Introduction
QSD42908 User’s Manual Chapter 1: Product Introduction 1.1 Summary The QSD42908 network digital video recorder is an excellent digital surveillance product. It uses embedded MCU and Linux, combining the most advanced technology in the Information Industry such as video and audio encoding/decoding, hard disk recording and TCP/IP. The firmware is burned into flash memory, which is more stable and reliable. - Page 6 QSD42908 User’s Manual Network function Supports TCP, UTP, RTP, Multicast, DHCP, etc. Supports ADSL (PPPoE) dialup function. Remote parameters setup. Remote playback, download the recorded files in DVR. Remotely upgrade DVR firmware. Remotely control PTZ. Supports Internet Explore for network control Remotely get alarm information of DVR.
-
Page 7: Chapter 2 Installation
QSD42908 User’s Manual Chapter 2: Installation Warning: Before you install the DVR, please make sure the power of DVR is switched off. 2.1 Checking the DVR and Its Accessories When you get the product, check that all the items are included in your product package. -
Page 8: Rear Panel Description
QSD42908 User’s Manual 2.3 Rear Panel Description Fig 2-1 QSD42908 Rear panel 1- Video Out 6- Power Switch 10- RS 232 Port 2- Video In 7- Alarm In/Out 11- Ethernet Port 3- Audio In 8- Spot Out 12- RS 485 Port 4- Audio Out 9- VGA Video Out 13- Power In... -
Page 9: Chapter 3 Operational Instructions
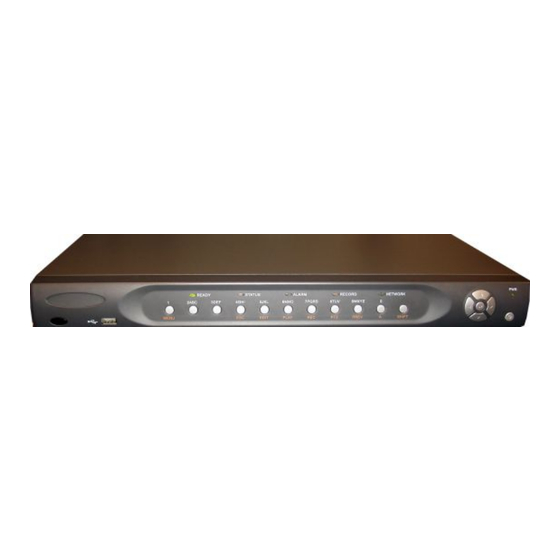
QSD42908 User’s Manual Chapter 3 Operational Instructions 3.1 Front Panel Fig 3-1 Front Panel Form 3-1 Items on Front Panel Index Type Name Description Light IR receiver for remote control. USB Port Numeric Input number, lower case, upper case character and Keys symbols. - Page 10 QSD42908 User’s Manual SHIFT 2. 【IRIS-】in PTZ control.. Multi screen preview switch; Switch menu mode to preview; 【FOCUS-】in PTZ control. Input switch (number, lower case, upper case and symbol); 【FOCUS+】in PTZ control; In preview mode, display or hide the channel status bar.
-
Page 11: Ir Remote Control
QSD42908 User’s Manual 3.2 IR Remote Control Fig 3-2 IR Remote Control Layout Form 3-2 Functions of Remote Control Index Name Description POWER Turnoff device. Enable/Disable IR remote control Numeric Keys Same as numeric keys of front panel. EDIT Same as EDIT key of front panel. Same as A key of front panel. -
Page 12: Powering Down The Dvr
QSD42908 User’s Manual Reserved Same as【F1】key of front panel. IRIS, FOCUS ZOOM for lens Lens control control. Same as【F2】key of front panel. Loading the batteries into the IR controller 1. Remove the battery cover. 2. Insert the battery. Make sure that the poles (+ and -) are correctly positioned. 3. -
Page 13: Menu Description
QSD42908 User’s Manual 3.3 Menu Description 3.3.1 Menu Options Menu Name Function Menu Name Function Unit name Select camera Device ID Camera name Require password Color setup Screen saver Date - screen position View tampering area and response Video standard Enable scalar setup Display... -
Page 14: Menu Operation
QSD42908 User’s Manual 3.3.2 Menu Operation How to enter into menu mode l Press【MENU】key to enter into DVR main menu. l Press【PLAY】short key to enter into playback menu. l Press【REC】short key to enter into manual record menu. l Press【PTZ】short key to enter into PTZ control interface. Notes: You must input user name and password. - Page 15 QSD42908 User’s Manual Fig 3.4 Camera input adjustments Each menu contains different kinds of items. There is a small highlighted frame called the “Active Frame” which is used to point to the selected item. This “Active 【 ↑】 【 ↓】 【 ←】 【 →】 ) Frame”...
- Page 16 QSD42908 User’s Manual Edit Box: This is for you to input characters. Press【EDIT】key to enter into edit status, you can input text in the box: a) Press【A】key to select number, upper case, lower case or symbols; 【→】 【←】 b) Use keys to move cursor;...
-
Page 17: Input Text
QSD42908 User’s Manual 3.4 Input text In the menu interface, if you are in edit status (for example, in the “camera name” edit box), at the bottom of screen, the input status is appeared: Here you can press numeric keys to input digital numbers. Press【A】key to change input methods. -
Page 18: Chapter 4 Basic Operation Guide
QSD42908 User’s Manual Chapter 4 Basic Operation Guide 4.1 Power on Note: Please make sure the power supply is the correct one for the DVR and the AC adapter is connected correctly. Before switching DVR on, please connect one monitor to VOUT or VGA interface, otherwise you can not see graphic user interface and can not operate the DVR. - Page 19 QSD42908 User’s Manual Fig 4.1 Recording status Form 4-1 Camera record status Icon Icon Color Status Description White No video signal Yellow Video input Pink Manual recording Green Real time recording Blue Motion detection recording External alarm recording...
- Page 20 QSD42908 User’s Manual Fig 4.2 Alarm status Form 4.2 Camera alarm status Icon Icon Color Status Description White Video signal lost Yellow View tampering alarm Pink Motion & External alarm Green No alarm Blue Motion alarm External alarm Press numeric keys to switch to individual camera view. For example, press【2】 key to view 2 camera.
-
Page 21: User Name And Password
QSD42908 User’s Manual 4.3 User name and password Note: When DVR is delivered from factory, there is only one default administrator named “admin”, and password is “12345”. The administrator’s name can not be modified, while the password can be modified. The administrator can create 15 users and define their user rights. - Page 22 QSD42908 User’s Manual Fig 4.5 Main menu Step 2: Select the user name by using 【↑】 , 【↓】 then move the “Active Frame” to “Password” icon by using【à】/【ß】keys. As fig 4.6 shows: Fig 4.6 Change users’ password...
-
Page 23: Ptz (Pan/Tilt/Zoom) Control
QSD42908 User’s Manual Step 3: Input new password Use numeric keys to input new password. The password can be blank. It also can be 16 numerals. Press【ENTER】to exit edit box, and move to “Verify” item to verify password. Note: In edit box, use 【à】 / 【 ß】 to move cursor and 【EDIT】 key to delete the numeral in front of the cursor. -
Page 24: Select Channel
QSD42908 User’s Manual Select Channel In PTZ control mode, you can press numeric keys to select channel. For example; press【2】key to select the PTZ camera on channel 2. After you select the PTZ camera, you can use the control keys to control it. PTZ Control Keys Description 【↑】,【↓】,【←】,【→】;... -
Page 25: Manual Record
QSD42908 User’s Manual Exit PTZ Control Mode Press【ESC】or【ENTER】to exit and return preview mode. 4.5 Manual Record Note: In order to record the user must have recording rights, DVR has HDD, and HDD is formatted. In preview mode, press【REC】key, in the pop-up login dialog box, select a user name and input the correct password, you will enter into the “Manual Record”... -
Page 26: Playback
QSD42908 User’s Manual Start/Stop: “ü” means you can start corresponding channel recording. “×” means you can stop recording. Start All: Press this button to start all channels recording. Stop All: Press this button to stop all channel recording. Press【ESC】key to enter into preview mode. Press【MENU】key to enter into main menu. - Page 27 QSD42908 User’s Manual Description Select a Channel: Move the “Active Frame” to “chan”, press “edit” button, then use【↑】or【↓】key to select a channel. Rec Type: Use【↑】or【↓】to select recorded file type. The file type options are “All”, “All Time”, “Motion Detect”, “Alarm” and “Manual”. Time Section: You can define the search time section.
- Page 28 QSD42908 User’s Manual At the bottom of image, there is an information bar and the following information is included: Volume, Play Progress, Play Speed, Played Time and File Total Time. Display/Hide information bar: 【MENU】 Open/Close sound: 【PLAY】 Adjust play progress: 【←】(Backward),【→】(Forward). The unit is “%”. Adjust play speed: Normal speed is “1x”.
- Page 29 QSD42908 User’s Manual Fig 4.11 Play back control bar There is an additional bar that appears. We call it the control bar. Control Bar Functions: You can click these buttons to skip backward or forward 3% at a time : You can click these buttons to select the play speed : Click this button to pause.
-
Page 30: Backup Recorded Files
QSD42908 User’s Manual 4.7 Backup Recorded Files Note: The user must have “Playback” rights. Please connect backup devices before you start to backup. In the playback interface, you can backup the recorded files. In the preview mode, press 【PLAY】 key, in the login dialog box, select username and input the correct password, you can will into the playback interface. - Page 31 QSD42908 User’s Manual Fig 4.12 Playback list Step 3: Select backup device Please confirm the backup device: USB flash memory, USB HDD, USB DVD/CD-RW, and select the corresponding backup device. Step 4: Start and finish backup Move “Active Frame” to “Save” button and press【ENTER】key to start backup. When backup starts, corresponding message box will pop-up to indicate the result.
-
Page 32: Shutting Down The Dvr
QSD42908 User’s Manual Playback the video segment You can use our file player software to playback the video segment on a PC. You can find the player software on the included CD. Exit playback interface Please refer to chapter 4.6. 4.8 Shutting Down the DVR Note: Do not switch off the power directly by turning off the power switch or unplugging the cable, this can damage the HDD. -
Page 33: Chapter 5 Parameters Setup Guide
QSD42908 User’s Manual Chapter 5 Parameters Setup Guide Only the users that have “Parameters Setup” right need to read this chapter. When the following parameters are modified and saved, you must reboot the DVR to make the new parameters take into effective. Other parameters do not require a reboot. l Any network parameters l Resolution and record schedule l External alarm sensor type... - Page 34 QSD42908 User’s Manual Fig 5.1 Enter into user menu Move “Active Frame” to “User” icon, press【ENTER】key to enter into “User Management” menu. Shown as fig 5.2 Fig 5.2 User management In the user name list box, by default only “admin” exists. You can use【→】 key, to move “Active Frame”...
-
Page 35: Add And Delete User
QSD42908 User’s Manual Fig 5.3 Error In this case, press【ENTER】to return password edit box, and input the new password again. Add and Delete User Enter into “User Management” interface. Add user The steps are as follows: Step 1: Enter into “User Management” menu shown in fig 5.4 Please refer to Chapter 5.1 Fig 5.4 user management... - Page 36 QSD42908 User’s Manual Step 2: Add new user name In the “User Management” menu, move “Active Frame” to “Add” button and press 【ENTER】, in the pop-up dialog box input the new user name (refer to chapter 3.4), press【ENTER】and return to “User Management” menu. Totally 15 users can be added.
- Page 37 QSD42908 User’s Manual Fig 5.6 Setup user rights Operational rights are divided into “Local” and “Remote”. You can assign the necessary rights to the user. Use【à】 【ß】key to move the “Active Frame” to the corresponding rights items, press 【 ENTER】 or 【EDIT】 key to enable or disable the item. “ü”means the assigned user has that right.
- Page 38 QSD42908 User’s Manual “Remote” (through network or internet): PTZ Control: Remotely control PTZ cameras; Record: Remotely start/stop manual recording; Set parameters Setup: Remotely setup the DVR parameters; Log: Remotely view the log on DVR; Utilities: Remotely upgrade firmware, format the HDD, reboot the DVR and shut down DVR, etc.
-
Page 39: Unit Name And Device Id
QSD42908 User’s Manual Unit Name and Device ID Unit name In the “Display” menu, shown as fig 5.8: Fig 5.8 Display menu There is an item called “Unit Name”. The default unit name is “Embedded Net DVR”. Move “Active Frame” to unit name edit box, press【EDIT】key to enter into edit status, you can modify the unit name. -
Page 40: Video Output Standard And Vga Setup
QSD42908 User’s Manual Video Output Standard and VGA Setup Video output standard There is one VOUT BNC connector on the rear panel of the DVR. It is used to connect with an analog monitor and can support PAL or NTSC video output. You can modify the video output standard to match video input. - Page 41 QSD42908 User’s Manual The steps of camera name setup: Step 1: Select one camera. Step 2: Move “Active Frame” to camera name edit box, press 【 EDIT】 key to enter into edit status, you can input digital number, uppercase and lowercase characters (refer to Chapter 3.4).
- Page 42 QSD42908 User’s Manual Fig 5.10 Date/time setup Date OSD Position In “Camera” menu you can adjust the position where you want the Date to display, move active frame to “Position” on the right side of “Date OSD” and press the【ENTER】 button. Then you will see the picture below. Use 【↑】 【↓】 【←】 【→】 to adjust the position of the date.
-
Page 43: Video Parameters Setup
QSD42908 User’s Manual Video Parameters Setup For different cameras and different backgrounds, in order to get the best video image, you may need to adjust video parameters such as brightness, saturation, contrast and hue, etc. You can setup each camera individually, and you can also copy the video parameters of one camera to any other cameras. -
Page 44: Mask Area Setup
QSD42908 User’s Manual Step 4: You can copy the video parameters of the current camera to any other cameras. Or you can repeat set 2 and step3 to adjust for any other camera. After adjusting, in “Image Setup” menu, press “Confirm” button to save parameters and make them effective. - Page 45 QSD42908 User’s Manual 【←】key to shrink the red panel. This red area is the mask area. After you setup the red mask area, press【EDIT】key to save the mask area. The maximum mask area size is 8*8 panels and the minimum size is only one panel. You can setup 4 mask areas at most.
-
Page 46: View Tampering Alarm
QSD42908 User’s Manual View Tampering Alarm If you enable this function, when someone blocks the camera spitefully, DVR will send a warning alarm. Step 1: Enter into “Camera” menu: Step 2: Select camera: Please use【á】 【â】keys to select one camera. Step 3: Select sensitivity: move active frame to sensitivity item right beside the “View tampering”... -
Page 47: Video Loss Alarm
QSD42908 User’s Manual Step 6: Alarm schedule setup: When a view tampering alarm occurs, the DVR will handle the alarm based on the schedule. You can set 4 periods for each day of the week. You can also copy the schedule of any one day to other days.. Note: Time periods can not be repeated. - Page 48 QSD42908 User’s Manual Fig 5.16 Video signal loss handle setup Step 4: Setup alarm schedule: You can setup a working schedule. The DVR will only respond when the video loss occurs during the schedule. Note: The 4 time periods can not be repeated. Please reboot DVR to make parameters effective.
-
Page 49: Motion Detection
QSD42908 User’s Manual 5.10 Motion Detection If you enable this function, when there is motion detected by a camera, the DVR will send an alarm. Step 1: Enter into “Camera” menu: Step 2: Select camera: Use【á】 【â】key to select a camera after pressing【edit】key. Step 3: Select motion detection sensitivity: On the right side of “Motion Det. - Page 50 QSD42908 User’s Manual The whole screen is divided into 22*18 panes (NTSC: 22*15). There is one yellow panel on the upper left side. The motion area setup steps are the same as that of mask area setup (refer to chapter 5.7). The only differences are that you can use the【PTZ】key to set the whole screen as motion sensitive, and multiple motion areas can be setup.
- Page 51 QSD42908 User’s Manual Fig 5.18 Motion alarm handle setup Step 6: Motion alarm record channel setup: When a motion alarm occurs, you can trigger related camera to start to record. In “Motion Alarm Handle” menu, you can select one or more recording channels.
-
Page 52: Preview Properties
QSD42908 User’s Manual Step 9: Save motion alarm setup: Press “Confirm” button to return to “Image Setup” menu. In the “Image Setup” menu, press “Confirm” button to save the current camera parameters. Step 10: Save all cameras: You can repeat step 2 to step 8 to setup motion detection parameters for other cameras. -
Page 53: Recording Setup
QSD42908 User’s Manual Step 2: Preview properties: Preview mode: For preview mode item, you can use 【 ↑】 【↓】 key to select one mode. If DVR has only 1 channel, you can select only “1 Screen” option. If DVR has 4 channels, there are “1 Screen”... - Page 54 QSD42908 User’s Manual Fig 5.20 Recording channel configuration “Recording” menu description: If HDD Full: There are two options: “Overwrite” and “Stop recording”. If you select “Overwrite” option, when both HDDs in DVR are full, DVR will overwrite the earliest recorded files and continue recording.
- Page 55 QSD42908 User’s Manual The maximum bit rate selection is related to resolution. If you select high resolution, you must select high bit rate. For CIF resolution, the typical maximum bit rate is 384K-768Kbps. Of course, you will select the proper max bit rate based on the camera, background and image quality required.
- Page 56 QSD42908 User’s Manual Step 4: Copy to other days You can repeat step 2 and step 3 to setup for other days. You can also copy the current day to other days. Step 5: Save Press “Confirm” to return to “Recording” menu. Press “Confirm” again to save the parameters and return to the main menu.
-
Page 57: External Alarm Input And Relay Output
QSD42908 User’s Manual 5.13 External Alarm Input and Relay Output For QSD42908 there are 16 alarm in and 4 relay out ports. In “Alarms” menu, you can setup each external alarm input. In main menu, move the “Active Frame” to “Alarms” icon and press【ENTER】key to enter into alarms menu as shown in fig 5.22 5.22 Alarms setup External alarm input setup:... - Page 58 QSD42908 User’s Manual Fig 5.23 Alarm in handling setup Step 4: Alarm trigger record channel setup You can select channels to record for each alarm input. In the sub menu, you can use 【ENTER】or【EDIT】key to enable record channel. “×” means disabled and “ü means enabled. Note: In order to trigger the channel to record, in “Recording”...
- Page 59 QSD42908 User’s Manual Step 8: PTZ Linkage Move the “Active Frame” to the “PTZ Linkage” button, press【ENTER】key to enter the “PTZ Linkage” setup menu as shown in fig 5.24 Fig 5.24 PTZ linkage setup First select a camera, then select one of following PTZ linkage options: Preset: Set the flag as “ü”...
- Page 60 QSD42908 User’s Manual Alarm relay output setup Step 1: In “Alarms” menu, use【↑】 【↓】keys to select one alarm output. Step 2: Select delay time The delay time is when the alarm ends, the alarm output will continue output time. The delay time options are: 5 Seconds, 10 Seconds, 30 Seconds, 1 Minute, 2 Minutes, 5 Minutes, 10 Minutes and Manual Stop.
- Page 61 QSD42908 User’s Manual Step 6: Save setup When you finish setup, in the “Alarms” menu, press the “Confirm” button to save all parameters. Note: If any schedule is modified, you must reboot the DVR to make it effective. Exceptions The exceptions that can currently be handled include: hard disk full, hard disk error, illegal access, IP address conflict, network failure, and NTSC/PAL difference.
-
Page 62: Network Parameters
QSD42908 User’s Manual 5.14 Network Parameters If you want to access the DVR over a network you must setup network parameters. Note: If any network parameter is modified, you must save and reboot the DVR to make it effective. In main menu, move the “Active Frame” to the “Network” icon and press【ENTER】, you will enter into “Network”... - Page 63 QSD42908 User’s Manual Remote Host IP and Port: If you set this IP and port, when there is an alarm and exception happens, the DVR will send information to that host IP. The center with this IP can receive alarm and exception information from the DVR.
- Page 64 QSD42908 User’s Manual PPPoE: DVR supports PPPoE dail-up function. Example: To use PPPoE function Step 1: Enter into “Network” menu. Step 2: Select NIC type. Step 3: Input port number: In the port edit box, use numeric keys to input port number. The port number must be more than 2000.
-
Page 65: Accessing The Dvr Over A Network
QSD42908 User’s Manual 5.15 Accessing the DVR over a network To access the DVR through a computer you need to make sure the default gateway on the DVR is the same IP address as your router, and the first three sets of numbers of the DVR IP address are the same as the first three sets of numbers of router’s address. -
Page 66: Accessing The Dvr From A Remote Computer
QSD42908 User’s Manual 5.16 Accessing the DVR from a remote computer To access the DVR from a remote computer, in addition to the above steps, you will also need to forward ports 80 and 8000 on the router the DVR is attached to, to the IP address of the DVR. -
Page 67: Ptz (Pan, Tilt, Zoom)
QSD42908 User’s Manual 5.17 PTZ (Pan, Tilt, Zoom) There is one RS-485 port on the DVR rear panel used for PTZ camera control. You can setup RS-485 parameters to match your PTZ protocol. In main menu, move the “Active Frame” to PTZ icon and press【ENTER】key, you will enter into PTZ menu as shown in fig 5.29 Fig 5.29 PTZ parameters setup PTZ menu description... - Page 68 QSD42908 User’s Manual please plus or minus one compared with Camera ID. For example, if camera ID is 2, the DVR PTZ address is set as ID 3. Preset setup: Preset is using one number to represent the camera’s position, zoom, focus and iris.
- Page 69 QSD42908 User’s Manual Add preset number: You can input preset number (among 1-128) in the edit box. Then press the “Adjust” button to enter into PTZ control interface. In PTZ control interface, you can use direction keys to adjust PTZ position, and use 【 IRIS+】 【IRIS-】 【FOCUS+】 【FOCUS-】 【ZOOM+】 【ZOOM-】keys to adjust iris, focus and zoom.
- Page 70 QSD42908 User’s Manual In the “Sequence” setup menu, first input the sequence number. The sequence is from 1 to 16. Each sequence is made up of cruise points, and each cruise point includes a preset number, dwell time and dwell speed. Dwell time is the time staying at that preset number. Dwell speed is the speed that the PTZ camera is moved to that preset number.
-
Page 71: Rs232 Setup
QSD42908 User’s Manual Note: Please make sure the PTZ camera you are using can support the cruise function. 5.18 RS232 setup There is one RS-232 port on the DVR rear panel. In main menu, move “Active Frame” to “RS232” icon and press the【ENTER】key, you will enter into “RS232” setup menu: RS232 menu description RS-232 parameters: Including baud rate, data bit, stop bit, parity, flow control, etc. - Page 72 QSD42908 User’s Manual net. Username, password and Verify password: Only used when work mode is “PPP”. Used for login when remote PC dials up through PSTN. Phone: Only used when work mode is “PPP” and PPP mode is “Active”. It is the phone number of remote PC.
- Page 73 QSD42908 User’s Manual Step 3: Save setup: In “Recording” menu, press “Confirm” button to save parameters. Step 4: Setup Modem used on DVR side: Use DCE cable to connect Modem with PC serial port. You can use HyperTerminal or NetTerm to setup modem: AT&F ---- Retore default parameters (Generally, Modem is hard flow control) AT&S0=1 ---- Set Modem as answer ATE0 ---- Not display the input characters...
- Page 74 QSD42908 User’s Manual...
- Page 75 QSD42908 User’s Manual Step 3: Establish the dialup connection Select the Modem connected with PC just like the dialup network connection, input the telephone number connected with DVR’s modem. Input the username and password. They must be the same as that used in DVR PPP setup. Step 4: During the dialup connection, it will give the message of “verification of username and password”, after successfully verification;...
-
Page 76: Chapter 6 Utilities
QSD42908 User’s Manual Chapter 6 Utilities There are many tools in the “Utilities” menu. Including “SavePara”, “RestorePara”, “Upgrade”, “Hard Disk”, “Stop Alarm Out”, “Reboot”, “Power Off”, “View Log” and “System Info”. Enter into “Utilities” menu as shown in fig 6.1 Fig 6.1 Utilities Restore Parameters Restore factory parameters for the DVR. -
Page 77: Upgrade
QSD42908 User’s Manual Upgrade You can use this function to upgrade the firmware. Press “Upgrade” icon, in the pop-up dialog box you can select either “FTP” or “USB” upgrade mode as shown in fig 6.3 Fig 6.3 Upgrade If you select “FTP” mode, you will enter into “FTP Upgrade” menu: Fig 6.4 FTP IP setup Input the ftp server IP and press【ENTER】key. -
Page 78: Hard Disk Management
QSD42908 User’s Manual Hard Disk Management fig 6.5 Hard Disk setup Check HDD work status Capacity, Free space, Stand by or not, Normal status or not. Format HDD Before formatting stop all recording. After formatting, you must reboot DVR, otherwise DVR will not work correctly. -
Page 79: View Log
QSD42908 User’s Manual View Log To view the log recorded on the DVR HDD. In the “Utilities” menu, press “View Log” to enter into “Log” menu as shown in fig 6.6 Fig 6.6 View log If you want to view the log based on the default option, just press 【 ENTER】 key. The DVR will list all matched information. - Page 80 QSD42908 User’s Manual For exception major type, the minor type includes: Video Signal Loss, Illegal Access, Hard Disk Error, Hard Disk Full, IP Conflict, DCD Lost. For example: The steps of viewing alarm log. Step 1: For “Query” item, select “By Type” to active “Major Type” and “Minor Type” items. Step 2: For “Major Type”...
-
Page 81: System Information
QSD42908 User’s Manual Step 3: Input start time and stop time. Step 4: Move the “Active Frame” to “Search Log” button and press【ENTER】key to start searching. Step 5: After finishing search, the DVR will list the matched log information. Step 6: Press “Return” button to return to “Utilities” menu.. System Information Press the “System Info”... -
Page 82: Chapter 7 Firmware Upgrade
QSD42908 User’s Manual Chapter 7 Firmware Upgrade The DVR firmware is stored in FLASH ROM. You can use the DVR upgrade function to write the firmware file (digicap) into FLASH. There are two cases where you need to upgrade DVR firmware. One is to update old firmware, the other is when the code in DVR FLASH has crashed. - Page 83 QSD42908 User’s Manual Fig 7.2 setup parameters Select “Users/rights” under the “Security” menu item. The following dialog box will be displayed. Fig 7.3 Setup username Create new user. Click “new user’. New user dialog box is displayed. Input user name “target”.
-
Page 84: Upgrade Mode
QSD42908 User’s Manual Fig 7.9 Setup home directory 7. Next time, you do not need to setup again, just double click and open “wftpd32.exe” to upgrade the DVR/DVS firmware. 7.2 Upgrade Mode Use client software to upgrade the firmware file. You do not need to use ftp server software. - Page 85 QSD42908 User’s Manual Fig1 Fig 2 2) Put in the name “hikvision”. And do step 1 again. Then enter into fig 4 and select COM1 and click “OK” to enter into fig 5. Fig3 Fig 4...
- Page 86 QSD42908 User’s Manual 3) Modify the bits per second to ‘115200’. and modify the flow control to “None”. Then click “apply” and “ok” to enter into the hyper terminal main interface. Fig 5 Step 2: Then reboot the device and press any button in the pc keyboard again and again until the HIK # comes out in the Hyper Terminal interface, shown as fig 6, then input “print”...
- Page 87 QSD42908 User’s Manual Fig 6 Fig 7...
- Page 88 QSD42908 User’s Manual Step 3: Input the command “save” and press the enter button. Shown as fig 8. Fig 8 Step 4: Input the command “update” and press the enter button, then the space button. After that the update will start. Shown as fig 9. fig 9...
- Page 89 QSD42908 User’s Manual Step 5: After the update finishes, please input the command “reset” and press the enter button. The device will reset. Shown as fig 10. Fig 10...
-
Page 90: Appendix A: Mouse Control Function
QSD42908 User’s Manual Appendix A: Mouse Control Function 1. In the preview interface Double-click the left key 1. Switch to the most pictures when viewing single picture. 2. Switch to full screen mode when viewing multi-pictures. Back to previous multi-pictures when you double click again Scroll wheel forward Switch to previous screen... - Page 91 QSD42908 User’s Manual 5. Test input interface Click the left key 1. pop up soft keyboard 2. Input text 3. Save and exit Click the right key Cancel the text and exit the edition Scroll wheel forward Cursor goes to the front character 6.
-
Page 92: Appendix B: Hdd Capacity Calculation
QSD42908 User’s Manual Appendix B: HDD Capacity Calculation To calculate total capacity needed by each DVR according to video recording (video recording type and video file storage time). Step 1: Use Formula (1) to calculate storage capacity that is the capacity of each channel needed for every hour: unit Mbyte. -
Page 93: Appendix C: Dvr Connect Cable Definition
QSD42908 User’s Manual Appendix C: DVR Connect Cable Definition 1 How to Make a RS-485 Connect Cable Material and tool One twist cable (8 pins), one standard RJ45 connector and one tool special for RJ45. RJ45 introduction Pin definition Make the connect cable according the following; to left point of RJ45 head, 1 and 2 cables are the anode and cathode line for sending, 3... -
Page 94: How To Make A Rs-232 Connect Cable
QSD42908 User’s Manual 2 How to Make a RS-232 Connect Cable QSD42908 has standard DB9 RS-232 interface, like PC COM port. Pin definition I means DVR input and O means DVR output. Pin index Name Description Carrier Detect Receive Data Transfer Data Terminal Device Ready Ground... - Page 95 QSD42908 User’s Manual (2) Use the following method to make the cross network cable when DVR is directly connected with client-end PC. The corresponding relationship of cross cable...
-
Page 96: Appendix D: Specifications
QSD42908 User’s Manual Appendix D: Specifications Model QSD42908 Compression standard H.264 Preview resolution PAL:704*576(4CIF) NTSC704*480(4CIF) Recording resolution PAL:352*288(CIF) NTSC352*288(CIF) Video input 8 channels BNC ( 1.0 Vp-p ,75 Ohm) Video out 1 channel BNC (1.0Vp-p ,75 Ohm) Video spot 1 channel BNC (1.0Vp-p , 75 Ohm) Frame rate PAL: 15FPS, NTSC: 20FPS Audio compression standard... -
Page 97: Appendix E: Troubleshooting
QSD42908 User’s Manual Appendix E: Troubleshooting Failure Possible reasons After plugging in power, turning on the power switch, Power cable is damaged “POWER” light in front Panel does not turn on, and fan Power supply is damaged does not work. After plugging in power, turning on the power switch, Front panel cable is damaged “POWER”... -
Page 98: Appendix F: Product Service & Warranty
In order to provide various services to you, please complete registration procedure after you purchase the product. Cut off or copy User’s Information Card and fax or mail it to us after the card is filled in. Contact Us: Q-See Products 8015 E. Crystal Dr Anaheim, CA 92807 Website: http://www.q-see.com... -
Page 99: Appendix G: Customer Information Card
QSD42908 User’s Manual Appendix G: Customer Information Card User’s Name Mr./Mrs. Company Name Postal Address Postal code Phone Number E-mail Model Number of Product Serial Number of Product Purchase Date Distributor Notes:... - Page 100 QSD42908 User’s Manual Contact Us: Q-See Products 8015 E. Crystal Dr Anaheim, CA 92807 Website: http://www.q-see.com Customer Service: Phone: 877-998-3440 x 538 Email: cs@dpsi-usa.com Tech Support: Phone: 877-998-3440 x 539 Email: ts@dpsi-usa.com Fax: 714-998-3509...
Need help?
Do you have a question about the QSD42908 Net and is the answer not in the manual?
Questions and answers