Table of Contents

Subscribe to Our Youtube Channel
Related Manuals for Fluke 78


Summary of Contents for Fluke 78
- Page 1 ® Automotive Meter Users Manual For IEC 61010 CAT II Meters Only PN 666625 November 1998 Rev.1, 9/00 © 1998, 2000 Fluke Corporation. All rights reserved. Printed in U.S.A. All product names are trademarks of their respective companies.
-
Page 3: Table Of Contents
Table of Contents Title Page What is in the Manual....................1 Using the Meter Safely ....................1 Getting Acquainted with the Meter ................4 Rotary Switch ......................4 Input Jacks ....................... 6 Thermocouple Adapter ..................... 6 Display........................8 RPushbutton....................... 10 Standby (Sleep) Mode.................... - Page 4 Users Manual Hz s How to Use DC-Coupled HZ to Check BP/MAP Sensors ......26 Hz d How to Use AC-Coupled Hz on a Crankshaft Position Sensor ....28 m How to Measure Dwell on Conventional Ignitions ........... 30 % How to Measure Duty Cycle on a Feedback Carburetor........32 °C °F How to Measure Temperature on a Coolant Temperature Sensor....
- Page 5 List of Tables Table Title Page Symbols ..........................1 Measurement Unit Symbols ....................8 Pushbutton Operations ...................... 11 Replacement Parts and Accessories ................. 45...
- Page 6 Users Manual...
- Page 7 List of Figures Figure Title Page Rotary Switch ........................5 Input Jacks ......................... 7 Display ..........................9 Interpreting the Bar Graph ....................13 Measuring No-Load Voltage of Battery ................15 Testing Diodes in Alternator Rectifier Bridge ..............17 Isolating Circuit Causing Current Drain................19 Testing Continuity in a Switch ....................
- Page 8 Users Manual Holster and Flex-Stand ....................... 41 Fuse Test..........................43 Fuse and Battery Replacement ..................44 Replacement Parts ......................45...
- Page 9 MAF Sensor Magnetic Pickups MAP & BP Sensors 0 Sensors Throttle Position Sensors STARTING SYSTEM Battery Connectors Interlocks (neutral safety switch) Solenoids Starters * Used with Fluke 80i-410 or 80i-1010 current clamp. ** With optional RPM 80 Inductive Pickup accessory.
- Page 10 CHARGING SYSTEM Alternators Computerized Regulators Connectors Diodes, (AC Ripple) Diode Rectifier Regulators BODY ELECTRIC Compressor Clutch Lighting Circuits Relay and Motor Diodes Transmissions * Used with Fluke 80i-410 or 80i-1010 current clamp. ** With optional RPM 80 Inductive Pickup accessory.
-
Page 11: Input Jacks
TO AVOID ELECTRICAL SHOCK, REMOVE TEST LEADS BEFORE OPENING CASE. F 15A 600V MIN INTERRUPT RATING 10 000A BATTERY TYPE 9V NEDA 1604 INPUT JACKS 6F22 006P 300V FLUKE CORPORATION MADE IN USA U.S. PATENTS: 4,556,867 4,532,470 FUSED BACK FRONT... -
Page 13: What Is In The Manual
What is in the Manual Warning Fluke Corporation P.O. Box 9090 Everett WA 98206-9090 Fluke Europe B.V. P.O. Box 1186 5602 B.D. Eindhoven, The Netherlands Read "Using the Meter Safely" before using Using the Meter Safely the meter. Note Use the meter as described in this manual. Otherwise the The automotive tests included in this manual are safety features provided by the meter might be impaired. - Page 14 Users Manual Read First: Safety Information Do not operate the meter around explo- sive gas, vapor or dust. This meter complies with EN 61010-1:1993, ANSI/ISA S82.01-1994 and CAN/CSA C22.2 Do not apply more than the rated volt- No. 1010.1-92 Overvoltage Category II. Use age, as marked on the meter, between the meter only as specified in this Users terminals or between any terminal and...
- Page 15 Using the Meter Safely Use only a single 9 V battery, properly To avoid false readings, which could installed in the meter case, to power the lead to possible electric shock or per- meter. sonal injury, replace the meter’s battery as soon as the low battery indicator (N) Follow all equipment safety procedures.
-
Page 16: Getting Acquainted With The Meter
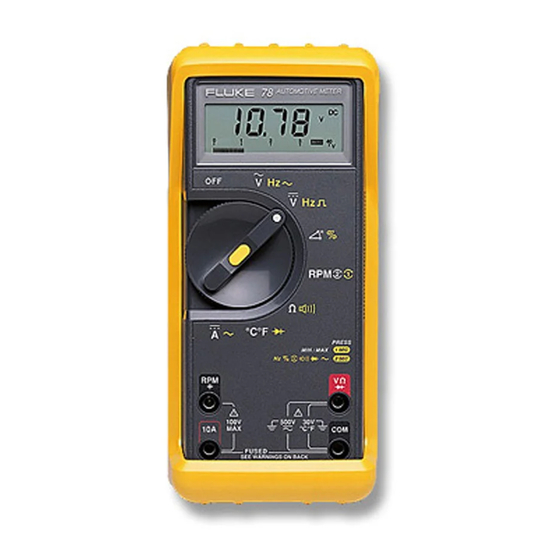
Users Manual Each switch setting has a primary AND an alternate func- Getting Acquainted with the Meter tion. Primary functions are in white; alternate functions Rotary Switch are in yellow. Turn the rotary switch (Figure 1) from OFF to another To toggle between a primary and alternate function, hold switch setting to turn the meter ON. - Page 17 Getting Acquainted with the Meter VOLTS AC OR AC-COUPLED HZ VOLTS DC OR DC-COUPLED HZ DWELL OR DUTY CYCLE PUSHBUTTON (See Table 3) RPM (WITH OPTIONAL RPM 80) RESISTANCE OR CONTINUITY TEST TEMPERATURE OR DIODE TEST AMPS DC OR AC mt01f.eps Figure 1.
-
Page 18: Input Jacks
Input Jacks thermocouple to measure temperature. If the adapter Warning gets lost or damaged, replace the adapter with a Fluke- specified part (see Table 4) to ensure optimum perform- To avoid personal injury or equipment dam- ance of the thermocouple. - Page 19 Getting Acquainted with the Meter VOLTS, OHMS, DIODE TEST, DWELL, DUTY CYCLE, TEMPERATURE, CONTINUITY AND HZ 300V FUSED AMPS (10 A CONTINUOUS, 20 A FOR <30 SEC) COMMON (RETURN) JACK FOR VOLTS, OR COMMON FOR RPM OHMS, DIODE TEST, TEMPERATURE, DWELL. DUTY CYCLE, CONTINUITY, AND HZ mt02f.eps Figure 2.
-
Page 20: Display
Users Manual Table 2. Measurement Unit Symbols Display Symbol Meaning Readings are shown on a liquid crystal display (LCD). Symbols on the display indicate what the meter is doing. Alternating current or voltage See Figure 3 and Table 2. Direct current or voltage If a measurement is too large to be displayed, OL (over- Volts load) is shown on the display and the whole bar graph... - Page 21 Getting Acquainted with the Meter (CELSIUS) (OVERLOAD) (FAHRENHEIT) REPLACE BATTERY CONTINUITY TEST AUTOMOTIVE METER AND DIODE TEST AC DC MEASUREMENT UNITS BAR GRAPH POLARITY OR Mk Hz (See Table 2) TRIGGER SLOPE FOR 4000 AUTO DUTY CYCLE AND DWELL MEASUREMENT RANGE OR RANGE FLOOR MAXIMUM READING BOTH FLASH FOR...
-
Page 22: Rpushbutton
Users Manual R Pushbutton The meter acknowledges a 2 second press by a click, a single beep, and a double beep. The display briefly The pushbutton selects different operations, depending on shows "- - - -". the position of the rotary switch AND how long you hold it down. -
Page 23: Pushbutton Operations
Getting Acquainted with the Meter Table 3. Pushbutton Operations Switch Press and Hold Press and Hold Momentary Press (<1 sec) Position for 1 sec for 2 sec Manually changes range. Toggles in and Toggles between out of MIN MAX volts AC and AC- In MIN MAX, press to display maximum, minimum, or present readings. -
Page 24: Bar Graph
RPM, duty cycle, dwell, temperature or frequency in the VDC mode. When measuring frequency in the VAC mode When using Fluke accessories (like a dc current clamp or the meter displays frequency on the digital display and pressure sensor), you may want to lock the meter in a mil- shows the voltage of the input signal on the bar graph. - Page 25 Getting Acquainted with the Meter AUTO AUTO 2 V DC ON 4 V RANGE 2O V DC ON 40 V RANGE AUTO AUTO 250 V DC ON 300 V RANGE OVERLOAD mt04f.eps Figure 4. Interpreting the Bar Graph...
-
Page 26: Typical Testing Applications
Users Manual Touch the probes to the circuit. This puts the meter in Typical Testing Applications parallel with the circuit. Voltage must be measured How to Measure Voltage with the meter in parallel with the circuit. Voltage is the difference in electrical potential (charge) Read the voltage. - Page 27 Typical Testing Applications AUTOMOTIVE METER A fully charged battery typically shows about 12.6 V. See other typical values in table below (at 27 C/80 F): AUTO Voltage % Charge 12.60 V 12.45 V 12.30 V 12.15 V LIGHT CIRCUIT PRESS MIN / MAX 1 SEC 2 SEC...
-
Page 28: L How To Test Diodes
Users Manual L How to Test Diodes Reverse the probes and measure the voltage across the diode again. Caution If the diode is good, OL is displayed. To avoid possible damage to the meter or to the equipment under test, disconnect circuit If the diode is shorted, near 0 V drop is displayed power and discharge all high voltage capaci- in both directions, and the beeper sounds con-... - Page 29 Typical Testing Applications Insert the test leads as shown. Turn the rotary switch to diode test. AUTOMOTIVE METER Press the pushbutton for 2 seconds to toggle to the diode test function. Touch the red test probe to a diode contact and touch the black to ground. Typical voltage drop is 0.5-0.8 V and causes the meter to beep.
-
Page 30: N, Adhow To Measure Current
Users Manual Turn off power to the circuit and break the circuit. (To How to Measure Current measure current without breaking the circuit, use a current clamp.) Warning To avoid electric shock or personal injury Insert the test leads into the 10 A and COM jacks. Never attempt an in-circuit current meas- Turn the rotary switch to . - Page 31 Typical Testing Applications Warning Do not attempt this test on a lead-acid battery that has recently AUTOMOTIVE METER been recharged. Explosive gases might be present. Caution AUTO Do not crank the engine or operate accessories that draw more than 10 A. You could blow the fuse in the meter.
-
Page 32: How To Test Continuity
Users Manual Press R for 2 seconds. How to Test Continuity The meter toggles to the continuity test function, and Caution is displayed. To avoid possible damage to the meter or to the equipment under test, disconnect circuit Touch the probes to the circuit. power and discharge all high voltage capaci- Continuity exists if resistance is less than about 30 tors before measuring resistance, testing for... - Page 33 Typical Testing Applications Insert test leads in the jacks shown. Turn rotary switch to continuity test. AUTOMOTIVE METER Press pushbutton for 2 secs. is displayed. Clip leads to switch as shown. Press brake pedal and listen for tone. If tone sounds, stoplight switch is good.
-
Page 34: J How To Measure Resistance
Users Manual J How to Measure Resistance Notes on Measuring Resistance: The resistance shown on the display is the total Resistance hinders the flow of current. resistance through all possible (parallel) paths between the probes. This means that the resis- Caution tance displayed for an in-circuit resistor can To avoid possible damage to the meter or to... - Page 35 Typical Testing Applications AUTOMOTIVE METER AUTO RADIATOR PRESS MIN / MAX 1 SEC 2 SEC BLACK 300V FUSED TEMPERATURE SENSOR mt09f.eps Figure 9. Measuring Resistance to Check Coolant Temperature Sensor...
-
Page 36: Rpm Ut How To Measure Rpm With The Rpm80 Inductive Pickup (Optional)
Users Manual RPM tu How to Measure RPM with the RPM80 Spread the spark plug wires apart. Clamp the induc- tive pickup to a plug wire near the spark plug. (In Inductive Pickup (Optional) general, the longest wire works best.) Make sure that The RPM80 Inductive Pickup converts the magnetic field the jaws are closed completely and the side labeled created by the current in the spark plug wire to a pulse... - Page 37 Typical Testing Applications Warning The ignition system can create a potential shock hazard. AUTOMOTIVE METER turn the engine off before connecting or removing the pickup. RPM 2 Caution The Pickup might be hot if it has been near the exhaust manifold and the TRIGGER engine has been running.
-
Page 38: Hz S How To Use Dc-Coupled Hz To Check Bp/Map Sensors
Users Manual Hz s How to Use DC-Coupled HZ to Check With the ignition KEY ON but the ENGINE OFF, pump the vacuum up with a hand vacuum pump. BP/MAP Sensors Use the dc-coupled Hz function for "pulsed-dc" tests on Watch the frequency change on the display. - Page 39 Typical Testing Applications HARNESS CONNECTOR AUTOMOTIVE METER SIGNAL AUTO GROUND TL26 CLIPS Press for JUMPER WIRES 2 seconds VACUUM PUMP PRESS BLACK MIN / MAX 1 SEC 2 SEC BP/MAP SENSOR 300V FUSED mt11f.eps Figure 11. Checking Barometric Pressure/Manifold Absolute Pressure Sensor...
-
Page 40: Hz D How To Use Ac-Coupled Hz On A Crankshaft Position Sensor
Users Manual Hz d How to Use AC-Coupled Hz on a Crank- KEY-ON-ENGINE-OFF. Disable the engine ignition. Crank the motor while watching the display. shaft Position Sensor Use the ac-coupled Hz function on parts like crankshaft Note position or vehicle speed sensors. When measuring frequency, the meter displays frequency on the digital display and shows the The following procedure demonstrates how to measure... - Page 41 Typical Testing Applications AUTOMOTIVE METER AUTO Press for 2 seconds JUMPER WIRES SIGNAL PRESS MIN / MAX 1 SEC 2 SEC GROUND 300V FUSED mt12f.eps Figure 12. Using AC Coupled-Frequency on a Crankshaft Position Sensor...
-
Page 42: How To Measure Dwell On Conventional Ignitions
Users Manual r How to Measure Dwell on Conventional Igni- Clip the black lead to ground and the red lead to the distributor side (-) of the coil as shown in Figure 13. tions Dwell is the number of degrees of distributor rotation that Start the car. - Page 43 Typical Testing Applications NUMBER OF CYLINDERS AUTOMOTIVE METER MOMENTARY PRESS TO SELECT NUMBER OF CYLINDERS IGNITION SWITCH AND CIRCUIT PRESS MIN / MAX 1 SEC BLACK 2 SEC 300V BREAKER-POINT FUSED ASSEMBLY BATTERY COIL CONDENSER mt13f.eps Figure 13. Measuring Dwell on a Conventional Ignitions...
-
Page 44: How To Measure Duty Cycle On A Feedback Carburetor
Users Manual x How to Measure Duty Cycle on a Feedback Connect the black test lead to ground and the red lead to the green mixture control test connector (GM Carburetor cars) at the base of the carburetor. Duty cycle is the percentage of time (0-99.9%) a voltage is positive or negative. - Page 45 Typical Testing Applications AUTOMOTIVE METER 12 V SUPPLY SIGNAL JUMPER Press for WIRES 2 seconds PRESS MIN / MAX 1 SEC 2 SEC BLACK 300V FUSED CHASSIS GROUND mt14f.eps Figure 14. Measuring Duty Cycle on a Feedback Carburetor...
-
Page 46: C F How To Measure Temperature On A Coolant Temperature Sensor
Temperature Sensor Excessive voltage and strong, low-frequency and radio- The Fluke 80BK Thermocouple Adapter that comes with the meter is suitable for making temperature measure- frequency fields can reduce the accuracy of temperature ments from -40 C (or F) to 260 C (500 F) in teflon- readings. - Page 47 Typical Testing Applications Warning AUTOMOTIVE METER To avoid electrical shock, do not use the thermocouple when voltages exceeding 30 V ac rms or 30 V dc are present. Note The thermocouple, adapter and meter must be at the same temperature for accurate measurements. If at different temperatures, plug together and wait up to 15 minutes.
-
Page 48: How To Store Minimum And Maximum Measurements
Users Manual When the meter is in the desired range, press R How to Store Minimum and Maximum for 1 second to select MIN MAX. Measurements MAX lights on the LCD, indicating MIN MAX is se- The MIN MAX function stores the lowest and highest lected, and the maximum reading is displayed. - Page 49 How to Store Minimum and Maximum Measurements Turn off engine and insert test leads in the jacks shown. Set rotary switch to volts dc. The meter defaults to the 40 V range. AUTOMOTIVE METER Press the pushbutton 5 times to step to the 4 V range. Connect the test leads to the sensor as shown.
-
Page 50: How To Use The Bar Graph To Test A Throttle Position Sensor
Users Manual With KEY-OFF/ENGINE-OFF, disconnect the TPS’s How to Use the Bar Graph to Test a electrical connector. Then connect the test leads to Throttle Position Sensor the sensor as shown. The bar graph shows readings relative to the full-scale Slowly open the throttle while watching the bar graph. - Page 51 How to Use the Bar Graph to Test a Throttle Position Sensor AUTOMOTIVE METER AUTO 5 V SUPPLY SIGNAL GROUND PRESS TPS CONNECTOR MIN / MAX 1 SEC 2 SEC BLACK 300V FUSED mt17f.eps Figure 17. Using Bar Graph to Observe Sweep of Throttle Position Sensor (TPS)
-
Page 52: How To Lock The Meter In A Measurement Range
Users Manual When the desired range is selected, press R for 1 How to Lock the Meter in a Measurement second to lock the meter in that range. Range Note The measurement range determines the highest input the meter can measure. Most meter functions have more than This also puts you in MIN MAX mode, in which one range. - Page 53 F 15A 600V MIN INTERRUPT RATING 10 000A 9V NEDA 1604 6F22 006P PRODUCT S ERVICE JOHN FLUKE MFG. CO., INC. MADE IN USA U.S. PATENTS: 4,556,867 4,532,470 METER IN HOLSTER FACE DOWN HOLSTER WITH FLEX-STAND HOLSTER WITH FLEX-STAND FOR PROTECTION...
-
Page 54: Maintenance
(U) appears. cessories are listed in Table 4. To avoid electric shock or personal injury To contact Fluke, call one of the following telephone num- Do not allow water to get inside case bers: Remove any input signals prior to re-... - Page 55 Accessories and Parts AUTOMOTIVE METER <0.5 AUTO mt19f.eps Figure 19. Fuse Test...
- Page 56 Users Manual 6F 22 9 V NEDA 1604 9 V F15 A, 600 V Minimum Interrupt Rating 10 kA (Fluke PN 820829) mt20f.eps Figure 20. Fuse and Battery Replacement...
-
Page 57: Replacement Parts And Accessories
TL24** Silicone Insulated Test Leads TL26** 5-Way Multipoint Test Lead Set To ensure safety, replace the R1 fusible resistor only with this Fluke- mt21f.eps specified part. Figure 21. Replacement Parts ** Accessory that is normally available through your local distributor. -
Page 58: Specifications
>28°C). When measuring temperature, 0.04% + 0.1°C Inductive Pickup Input: Magnetic field from sparkplug per °C Output: Pulse to trigger Fluke 78 Relative Humidity 0% to 95%, to 30°C (86°F) Thermocouple Type: K (Chromel vs. Alumel) 0% to 75%, to 40°C (104°F) Not suitable for immersion in liquid 0% to 45%, to 55°C (131°F) - Page 59 Specifications Function Range Resolution Accuracy Burden Voltage (Typical) AC Volts* 4.000 V 0.001 V (2.5% + 2) (45 Hz to 1 kHz) 40.00 V 0.01 V (2.5% + 2) 300.0 V 0.1 V (2.5% + 2) 300 V (2.5% + 2) 1.5dB typical DC Volts* 400.0 mV...
- Page 60 Users Manual Common Mode Rejection Ra- Normal Mode Rejection Function Overload Input Impedance Ratio , Hz 300 V >10 M <150 pF >60 dB, dc to 60 Hz 300 V >10 M <150 pF >120 dB at dc, 50 Hz or 60 Hz >60 dB at 50 Hz or 60 300 V >10 M...
- Page 61 Specifications Function Range Resolution Accuracy Frequency 99.9 0.01 Hz (0.01% + 2) (1 Hz to 20 kHz) 999.9 0.1 Hz (0.01% + 2) 9.999 0.001 kHz (0.01% + 2) 20.00 kHz 0.01 kHz (0.01% + 2) V-Hz maximum) >20.00 kHz to 99.99 kHz 0.01 kHz Usable 500.0 kHz...
- Page 62 Users Manual...
Need help?
Do you have a question about the 78 and is the answer not in the manual?
Questions and answers