Table of Contents
Advertisement
Available languages
Available languages
W10162170A
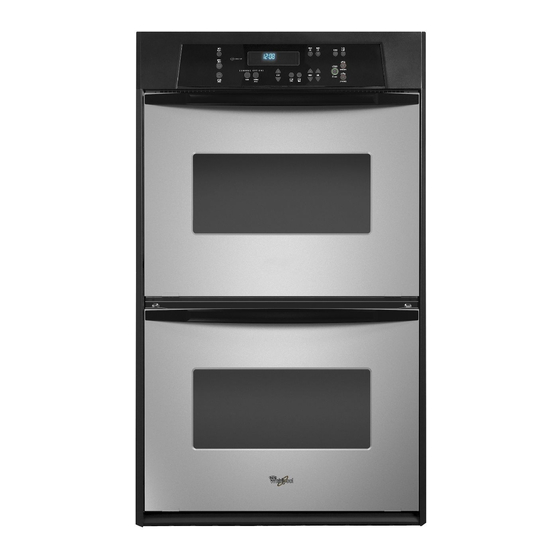
BUILT-IN ELECTRIC
OVEN
For questions
about features, operation/performance,
parts,
accessories
or service, call: 1-800-253-1301
or visit our website
at...www,whirlpool.eom
In Canada, call for assistance,
installation
or service, call:
1-800-807-6777
or visit our website at...
www.whirlpool.ca
FOURELECTRIQUE
ENCASTRE
Au Canada,
pour assistance,
installation
ou service, composer
le
1-800-807-6777
ou visitez notre site web h
www.whirlpool,ca
Table of Contents/Table
des matieres ............. 2
Models/ModUles
RBD245
RBS245
RBD275
RBS275
RBD305
RBS305
Advertisement
Table of Contents

Related Manuals for Whirlpool RBD245PRS02


Summary of Contents for Whirlpool RBD245PRS02
- Page 1 BUILT-IN ELECTRIC OVEN For questions about features, operation/performance, parts, accessories or service, call: 1-800-253-1301 or visit our website at...www,whirlpool.eom In Canada, call for assistance, installation or service, call: 1-800-807-6777 or visit our website at... www.whirlpool.ca FOURELECTRIQUE ENCASTRE Au Canada, pour assistance,...
-
Page 2: Table Of Contents
TABLEOF CONTENTS TABLE DESMATIERES SleCURITle DU FOUR ..............OVEN SAFETY ................PARTS AND FEATURES ..............PIECES ET CARACTI:!:RISTIOUES ..........COMMANDE I_LECTRONIQUE DU FOUR ......... 18 ELECTRONIC OVEN CONTROL ........... Display ..................Affiehage ..................Start ....................Mise en marche ................Upper Off/Cancel, Lower Off/Cancel or Off/Cancel ....5 Upper Off/Cancel (Four superieur - Arr_t/annulation), Clock .................... -
Page 3: Ovensafety
OVENSAFETY Your safety and the safety of others are very important. We have provided many important safety messages in this manual and on your appliance. Always read and obey all safety messages. This is the safety alert symbol. This symbol alerts you to potential hazards that can kill or hurt you and others. All safety messages will follow the safety alert symbol and either the word "DANGER"... -
Page 4: Parts Andfeatures
The California Safe Drinking Water and Toxic Enforcement Act requires the Governor of California to publish a list of substances known to the State of California to cause cancer, birth defects, or other reproductive harm, and requires businesses to warn of potential exposure to such substances. -
Page 5: Electronicovencontrol
ELECTRONICOVENCONTROL TIMER TIMER OVEN AUTO CLEAN (UPPER) CLOCK LIGHT © ©® @© UPPER CUBAI(E OVEN _? RE/,, ....COOKING OPTIONS Q© HOUR TEMP _SSEC _ ......COOK STOP LOWER RAKE CUSTOM OVEN TIME TIME OFE/CANCRL A. Auto clean F. Clock K. -
Page 6: Fahrenheit And Celsius
All Tones The Control Lock shuts down the control panel pads to prevent All of the above tones are preset on, but can be turned off. unintended use of the ovens. To Turn Off/On: Press and hold STOP TIME for 5 seconds, and a When the control is locked, only the CLOCK, TIMER SET, TIMER tone will sound. -
Page 7: Ovenuse
OVENUSE Odors and smoke are normal when the oven is used the first few BAKEWARE times, or when it is heavily soiled. Hot air must be able to circulate around food to cook evenly, so allow 2" (5 cm) of space around bakeware and oven walls. Use During oven use, the heating elements will not remain on, but will the following chart as a guide. -
Page 8: Meat Thermometer
Before baking and roasting, position racks according to the "Positioning Racks and Bakeware" section. When roasting, it is not necessary to wait for the oven preheat conditioning time to Onmodels without atemperature probe, useameat thermometer end before putting food in unless recommended in the recipe. -
Page 9: Timed Cooking
For best results, use a broiler pan and grid. They are BROILING CHART designed to drain juices and help avoid spatter and smoke. For best results, place food 3" (7 cm) or more from the broil element. Times are guidelines only and may need to be adjusted If you would like to purchase a broiler pan, one may be for individual foods and tastes. -
Page 10: Ovencare
4. Press t heHOUR andMIN "+"or "-" keypads toenter t he 2. Press BAKE or CUSTOM BROIL. length o ftime tocook. Press the TEMP "+" or "-" arrow pad to enter a temperature 5. Press S TART. other than the one displayed. The start t ime, t hestoptime countdown and"TIMED"... -
Page 11: General Cleaning
To Self-Clean: Before self-cleaning, make sure the door is closed completely or it will not lock and the cycle will not begin. IMPORTANT: Before cleaning, make sure all controls are off and 1. Press AUTO CLEAN. the oven is cool. Always follow label instructions on cleaning products. -
Page 12: Oven Lights
OVEN RACKS AND ROASTING RACKS For normal range use, it is not suggested to remove the oven Cleaning Method: door. However, if removal is necessary, make sure the oven is off • Self-Cleaning cycle: and cool. Then, follow these instructions. The oven door is heavy. See "Self-Cleaning Cycle"... -
Page 13: Troubleshooting
TROUBLESHOOTING Try the solutions suggested here first in order to avoid the cost of an unnecessary service call. Nothing will operate Self-Cleaning cycle will not operate • Has a household fuse blown, or has a circuit breaker • Is the oven door open? tripped? Close the oven door all the way. -
Page 14: Assistance Or Service
For further assistance Referrals to local dealers, repair parts distributors, If you need further assistance, you can write to Whirlpool service companies. Whirlpool designated service technicians Canada LP with any questions or concerns at: are trained to fulfill the product warranty and provide after- Customer Interaction Centre warranty service, anywhere in the United States. - Page 15 YOU SPECIFIC LEGAL RIGHTS, AND YOU MAY ALSO HAVE OTHER RIGHTS WHICH VARY FROM STATE TO STATE OR PROVINCE TO PROVINCE. If outside the 50 United States and Canada, contact your authorized Whirlpool dealer to determine if another warranty applies. If you need service, first see the "Troubleshooting"...
-
Page 16: Slecuritle Du Four
SECURITE DU FOUR Votre securite et celle des autres est tres importante. Nous donnons de nombreux messages de s6curit6 importants dans ce manuel et sur votre appareil m6nager. Assurez-vous toujours lire tous les messages de s6curit6 et de vous y conformer. Ce symbole d'alerte de s6curit6 vous signale les dangers potentiels de d6c_s et de blessures graves &... -
Page 17: Pieces Et Caracti:!:Ristioues
• PIECESETCARACTERISTIQUES Ce manuel couvre plusieurs modeles differents. Le four que vous avez achete peut avoir certaines ou toutes les caracteristiques indiqu6es. Les emplacements et les apparences des caracteristiques illustrees ici peuvent ne pas correspondre a ceux de votre modele. lilt °... -
Page 18: Commande I_Lectronique Du Four
CO1VIMANDE ELECTRONIQUE DU FOUR AUTO CLEAN TIMER TIMER OVEN (UPPER) CLOCK LIGHT ©® @© ¢UBAKE UPPER OVEN COOKING OPTIONS LOWER OVEN K. Cuisson minut_e A. Autonettoyage F. Horloge L. Heure B. Affichage de la temp6rature du four sup6neur G. Lampe du four H. -
Page 19: Fahrenheit Et Celsius
Appuyer sur TIMER OFF (arr_t minuterie) a tout moment pour Tous les signaux sonores annuler la minuterie et/ou arr_ter les signaux de rappel. Noter qu'il ne faut pas appuyer sur les touches Off/Cancel Tousles signaux sonores ci-dessus sont prer6gl6s a marche, (arr_t/annulation) car le four correspondant s'eteindra. -
Page 20: Utilisation Bu Four
UTILISATION D U FOUR USTENSILES DE CUISSON Les odeurs et la fum6e sont normales Iorsque le four est utilise pour les premieres fois, ou Iorsqu'il est tr_s sale. L'air chaud doit pouvoir circuler autour de I'aliment pour le cuire Lors de I'utilisation du four, les el6ments chauffants ne resteront uniformement. -
Page 21: Thermometre & Viande
USTENSILES RECOMMANDATIONS CUISSON/ RleSULTATS • Suivre les instructions du fabricant. Plats en gr_s/ Pierre de cuisson • CroQtes croustillantes • Peut necessiter de reduire la Plats en verre, vitroc_ramique temperature de cuisson de ou c_ramique 25°F (15°C). allant au four •... -
Page 22: Cuisson Au Gril Et Cuisson Au Gril Personnalisee
Apres la cuisson au gril, retirer la lechefrite Iors de Pr_chauffage I'enlevement de I'aliment. Des residus de graisse cuiront sur Apres que I'on a appuye sur START, le four commence un la lechefrite si on laisse celle-ci dans un four encore chaud, prechauffage de conditionnement minute. -
Page 23: Cuisson Minutee
TABLEAU DE CUISSON AU GRIL R_glage d'une dur6e de cuisson : Pour obtenir les meilleurs resultats, placer I'aliment a au moins 1. Sur les modeles A double four seulement, appuyer sur 3" (7 cm) de I'el6ment de cuisson au gril. Les durees de cuisson UPPER OVEN (four superieur) ou LOWER OVEN (four indiqu6es sont seulement des recommandations et peuvent _tre... -
Page 24: Entretien Du Four
ENTRETIEN DU FOUR Comment fonctionne le programme IMPORTANT : Le chauffage et le refroidissement de la porcelaine sur I'acier dans le four peuvent causer une decoloration, perte de fini luisant, des fissures minuscules et des sons saccades. Le programme d'autonettoyage utilise des temperatures tres elevees, en brQlant les saletes pour les red@re en cendre. -
Page 25: Nettoyage Gen6Ral
4. Appuyer sur START (mise en marche). Nettoyant tout-usage pour appareil menager - Piece n° 31662B (non inclus) : L'heure de mise en marche est automatiquement calculee et affichee. Voir la section "Assistance ou service" pour placer une commande. La porte se verrouillera automatiquement et "LOCKED"... -
Page 26: Porte Du Four
Fermer la porte du four le plus completement possible. Remplacement Avant le remplacement, s'assurer que le four est eteint et froid. Soulever la porte du four tout en la retenant de chaque c6te avec les deux mains. 1. Deconnecter la source de courant electrique. Continuer de maintenir la porte du four ferm6e et I'eloigner du 2. -
Page 27: Assistance Ouservice
References aux marchands Iocaux, aux distributeurs pieces de rechange et aux compagnies de service. Les techniciens de service designes par Whirlpool Canada LP sont formes pour remplir la garantie des produits et fournir un service apres la garantie, partout au Canada. -
Page 28: Garantie
& moins que ces dommages soient dus a des vices de materiaux ou de fabrication et soient signales a Whirlpool dans les 30 jours suivant la date d'achat.
Need help?
Do you have a question about the RBD245PRS02 and is the answer not in the manual?
Questions and answers