Festool RAS 115.04 E Instruction Manual
Hide thumbs
Also See for RAS 115.04 E:
- Instruction manual (19 pages) ,
- Instruction manual (20 pages) ,
- Original operating manual/spare parts list (87 pages)
Table of Contents
Advertisement
Available languages
Available languages
Quick Links
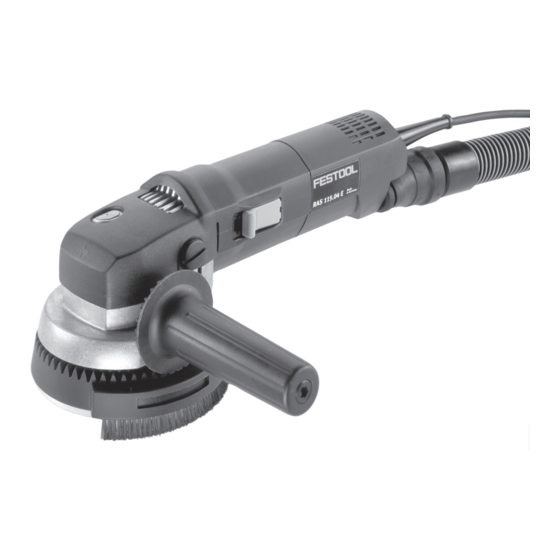
RAS 115.04 E
Instruction manual
Page 2 - 7
IMPORTANT: Read and understand all instructions
before using.
Guide d'utilisation
Page 8 - 13
IMPORTANT: Lire et comprendre toutes les instructions
avant de démarrer les travaux.
Manual de instrucciones
Página 14 - 20
IMPORTANTE: Lea y comprende todas las instrucciones
antes de usar.
1
Advertisement
Chapters
Table of Contents

Related Manuals for Festool RAS 115.04 E


Summary of Contents for Festool RAS 115.04 E
- Page 1 RAS 115.04 E Instruction manual Page 2 - 7 IMPORTANT: Read and understand all instructions before using. Guide d’utilisation Page 8 - 13 IMPORTANT: Lire et comprendre toutes les instructions avant de démarrer les travaux. Manual de instrucciones Página 14 - 20 IMPORTANTE: Lea y comprende todas las instrucciones antes de usar.
-
Page 2: Table Of Contents
tool. Keep cord away from heat, oil, sharp Contents edges or moving parts. Damaged or entangled Safety rules ..........2 cords increase the risk of electric shock. Technical data ......... 3 e) When operating a power tool outdoors, Symbols ..........3 use an extension cord suitable for outdoor Intended use ........... -
Page 3: Technical Data
• Arsenic and chromium from chemically-treated cannot be controlled with the switch is dangerous lumber. and must be repaired. The risk from these exposures varies, depending c) Disconnect the plug from the power on how often you do this type of work. source before making any adjustments, changing accessories, or storing power tools. -
Page 4: Electrical Connection And Operation
(2.1). This lets you optimize the sanding speed to Electrical connec- suit the material (see "Working with the tool"). tion and operation Constant speed The mains voltage must correspond The pre-selected speed remains constant whether to the voltage on the rating plate! the tool is in operation or in neutral position. -
Page 5: Fitting Tool Inserts
For dust extraction, the suction hose (27 mm dia.) – Release the tool with the spindle stop pressed of a Festool dust extractor should be inserted into by turning the special spanner. the connection socket (6.3) at the end of the ro- Please note: Always screw the sanding pad onto tary sander housing. -
Page 6: Attaching The Abrasive
Festool accessories and tools! Working with the tool The accessory and tool order number can be found Always secure the workpiece in in the Festool catalog or on the Internet under such a manner that it cannot move while being www.festool-usa.com. sanded. -
Page 7: Warranty
You are entitled to a free extended warranty (1 Also excluded are “wearing parts”, such as carbon year + 2 years = 3 years) for your Festool power brushes, vanes of air tools, rubber collars and tool. Festool shall be responsible for all shipping seals, sanding discs and pads, and batteries. -
Page 8: Régles De Sécurité
élevé de choc électrique au cas où votre corps Table des matières serait relié à la terre. c) N’exposez pas l’outil électroportatif à la Régles de sécurité ........8 pluie ou à l’humidité. La pénétration d’eau dans Caractéristiques techniques ....10 un outil électroportatif augmente le risque d’un Symbole .......... - Page 9 ment. Une clé ou un outil se trouvant sur une g) Utilisez les outils électroportatifs, les ac- partie en rotation peut causer des blessures. cessoires, les outils à monter etc. conformé- ment à ces instructions et aux prescriptions e) Ne surestimez pas vos capacités. Veillez en vigueur pour ce type d’appareil.
-
Page 10: Caractéristiques Techniques
Pour enclencher, poussez l‘interrupteur vers l‘avant Caractéristiques techniques (1.1 ). Une pression sur l‘arrière de l‘interrupteur Puissance absorbée ......500 W suffi t pour arrêter l‘appareil. Vitesse à vide ....1500 - 4000 tr/min Câble de rallonge Patin de ponçage, Ø ..... 115 mm (4.5 in.) Arbre porte outil ........M 14 Si une rallonge électrique est nécessaire, elle doit présenter une section suffi... -
Page 11: Réglages De L'outil
(6.3) situé au bout du capot d‘aspiration de la ponceuse rotative. Reliez le tout à un aspirateur Festool. Le cadre brosse (6.2) est décalé avec la poignée – Dévissez la vis (4.1) du levier de serrage et (6.1). -
Page 12: Montage Des Disques
à celle prescrite sur la plaque signalétique Travailler avec l'outil de la ponceuse rotative. Cette consigne s’applique à tous les accessoires Festool. Fixez la pièce à usiner de ma- Les patins STF D 115 sont équipés d‘un pas de vis nière à... -
Page 13: Accessoires Et Outils
Accessoires et outils défaut de matériau et de fabrication pendant un Pour des raisons de sécurité, an à compter de la date d’achat. Festool ne donne il faut utiliser exclusivement des accessoires et aucune garantie supplémentaire, implicite ou ex- outils d’origine Festool! plicite, sur les instruments portables électriques... -
Page 14: Normas De Seguridad
expuesto a una sacudida eléctrica es mayor si su Contenido cuerpo tiene contacto con tierra. Normas de seguridad ......14 c) No exponga las herramientas eléctricas a la lluvia y evite que penetren líquidos en su Datos técnicos ........15 interior. -
Page 15: Datos Técnicos
pieza rotante puede producir lesiones al ponerse realizar. El uso de herramientas eléctricas para a funcionar. trabajos diferentes de aquellos para los que han sido concebidas puede resultar peligroso. e) Sea precavido. Trabaje sobre una base fi rme y mantenga el equilibrio en todo mo- 5) Mantenimiento mento. -
Page 16: Símbolos
sobrecalentamiento. Una caída excesiva del vol- Símbolos taje reduce la potencia y puede conducir a falla voltios del motor. amperios En la tabla de abajo indica el diámetro correcto del hertzios cable para la RAS 115.04 E, a saber, en función vatios de la longitud de cable. -
Page 17: Ajustes En La Máquina
sujeción antes de que se apriete el tornillo de volver a funcionar. Si la máquina está en marcha sujeción.. (marcha en vacío) el tiempo de enfriamiento se reduce. b) Colocar la empuñadura giratoria La empuñadura giratoria adicional se puede fi jar, si Ajustes en la máquina así... -
Page 18: Montaje De Las Herramientas De Trabajo
Festool al acoplamiento (6.3) en el ex- tes de gancho y lazo como las hojas de lijar tremo del fi nal del cuerpo de la esmeriladora. Stickfi x y el vellón de lijado. La corona del cepillo (6.2) se puede ajustar me- Simplemente oprima la lija sobre el plato de lijado diante la empuñadura giratoria adicional (6.1). -
Page 19: Mantenimiento Y Cuidados
¡Siempre desenchufe el enchufe por el costo del envío de la herramienta a Festool. macho del tomacorriente antes de realizar traba- Festool pagará el embarque de regreso al cliente jos en la máquina! - Page 20 Canadá no permiten las limitaciones en cuanto a la duración de las garantías implícitas, de modo EN NINGÚN CASO FESTOOL SE HARÁ RES- que la limitación arriba indicada puede que no le PONSABLE POR LOS DAÑOS SECUNDA RIOS afecte.
Need help?
Do you have a question about the RAS 115.04 E and is the answer not in the manual?
Questions and answers