Thermador ME271 Use And Care Manual
Hide thumbs
Also See for ME271:
- Use and care manual (52 pages) ,
- Installation manual (52 pages) ,
- Design manual (28 pages)
Table of Contents
Advertisement
Quick Links
Download this manual
See also:
Installation Manual
Advertisement
Table of Contents

Related Manuals for Thermador ME271


Summary of Contents for Thermador ME271
- Page 1 USE AND CARE MANUAL Built-in Ovens Model: ME271 ME301 ME272 ME302 MED272 MED302 MEW301 MEM271 MEM301 MEMC301 MEMW271 MEMW301 MEMCW301...
- Page 2 This Thermador Appliance is made by BSH Home Appliances Corporation 5551 McFadden Ave. Huntington Beach, CA 92649 Questions? 1-800-735-4328 www.thermador.com We look forward to hearing from you!
-
Page 3: Table Of Contents
About This Manual ........How This Manual is Organized ..........Safety ............Getting Started ..........Parts and Accessories ............... Parts ......................Accessories ....................Inserting Rack ....................Control ..................Before Using the Oven for the First Time ......Operation ........... About the Appliance .............. - Page 4 Convection Roast ..............Broil ................... Convection Broil ..............Pizza ..................Speed Convection ..............Proof ..................Warm ..................Dehydrate .................. Cleaning and Maintenance ....... 41 Cleaning ..................Avoid These Cleaners ................. Cleaning Guide .................... Maintenance ................Replacing an Oven Light ................Removing the Oven Door ................
-
Page 5: About This Manual
About This Manual How This Manual You can get the most out of your new oven by reading this manual from beginning to end. This way you will systematically get to know your appliance and become familiar with its operation and features. is Organized The manual consists of the following sections: _ The "Safety"... -
Page 6: Safety
Safety Important Safety Instructions READ AND SAVE THESE INSTRUCTIONS Warning: When properly cared for, your new appliance has been designed to be safe and reliable. Read all instructions carefully before use. These precautions will reduce the risk of burns, electric shock, fire and injury to persons. - Page 7 Important Safety Instructions READ AND SAVE THESE INSTRUCTIONS Smother flames from food fires other than grease fires with baking soda. Never use water on cooking fires. Have an appropriate fire extinguisher available, nearby, highly visible and easily accessible near the oven. WARNING - TO REDUCE THE RISK OF PERSONAL INJURY IN THE EVENT OF A GREASE FIRE, OBSERVE THE FOLLOWING:...
- Page 8 Important Safety Instructions READ AND SAVE THESE INSTRUCTIONS Do not allow anyone to climb, stand, lean, sit, or hang on any part of an appliance, especially a door, warming drawer or storage drawer. This can damage the appli- ance, and the unit may tip over, potentially causing severe injury. Do not allow children to use this appliance unless closely supervised by an adult.
-
Page 9: Getting Started
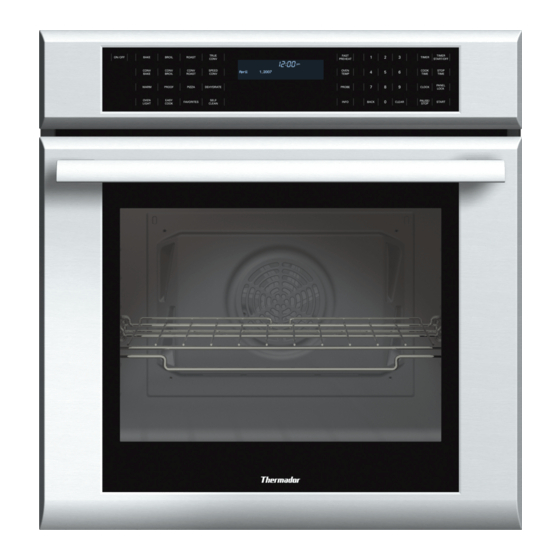
Getting Started Parts and Accessories Parts* Control Panel DoorLock Convection Fan Door Gasket Rack Position Guides with 6 Rack Positions Oven Bottom Door Hinge Oven Vent * Picture shows double oven. Your appliance may vary slightly. Cooling Fan The cooling fan runs during all cooking modes. The fan can be heard when it is run- ning, and warm air may be felt as it is released from the oven vent. -
Page 10: Accessories
Convection Fan The convection fan operates during all convection modes. When the oven is oper- ating in a convection mode, the fan turns off automatically when the door is opened. The convection fan may also run during self-clean. Oven Bottom The oven bottom conceals the lower heating element. -
Page 11: Inserting Rack
Inserting Rack Flat Rack The rack is designed with a stop so it will stop before coming completely out of the oven and not tilt. Caution: To avoid burns, place oven racks in desired positions before turning oven on. Always use oven mitts when the oven is warm. If a rack must be moved while the oven is hot, do not let oven mitts contact hot heat- ing elements. - Page 12 Telescopic Rack Inserting telescopic rack into oven: 1. Hold the rack on a slight angle. 2. Engage the rear hooks in the acces- sory brackets. 3. Hold the rack straight. 4. Push the rack in until it is even with the front hooks.
-
Page 13: Control
Control* Numeric Touchpads Cooking Mode Display Touchpads Touchpads TIMER - Press to set the timer. You only have to press lightly on the touchpads to operate them. The touchpads will not work if you press several of them at once, such as when cleaning them. ON/OFF - Turns the oven on and off. -
Page 14: Before Using The Oven For The First Time
Display Symbols I-->1 Cooking Mode Symbol - Shows the cooking Cook Time Symbol - Used in conjunction with elements that are active for the mode that is Cook Time mode. Shows the amount of time selected. The symbol will also display a fan if that the oven mode will run before turning off the convection fan is utiliFed in the selected automatically. -
Page 15: Operation
Operation About the Appliance Your new oven combines popular functions, premium cooking results and simple operation. The "Easy Cook" function makes it possible to select the desired food type using the display menu. The oven then starts automatically, using the correct cooking mode and temperature. -
Page 16: Setting The Language
Theclockis nowsetandoperating. Themenuitem"Setdate"is displayed: Tosetthe date: 1. Settheclockasdescribed a bove. 2. Enter thecurrent y ear;forinstance, for2007pressthekeys 2 0 0 7. 3. Press CLOCK. 4. Enter thecurrent m onth (1-12). 5. Press CLOCK. 6. Enter thecurrent d ayofthemonth. 7. Press CLOCK. Thedatehasbeenset.Dateandtimearedisplayed: Note: Press BACK to return to the previous screen. -
Page 17: Selecting The Upper Or Lower Oven
Theavailable languages a redisplayed: 4. Use the numeric keys to select your preferred language. The display from step 2 appears in the language you selected. Note: Press INFO to exit user settings. Press BACK to return to the previous screen. For more information on user settings, see "User Settings". -
Page 18: Heating Time Limitation
Heating Time Limitation The maximum heating time is limited. If you forget to turn off the oven, it turns off automatically after a set period of time (see table below), unless using Easy Cook mode or Cook Time. The maximum time allowed for Dehydrate mode is 48 hours. The maximum time for Sabbath mode is 74 hours. -
Page 19: Fast Preheat
2. Set a new time. The old time is erased when the first number for the new time is entered. 3. Press TIMER START/OFE The timer starts. Note: _ The maximum time the timer can be set is 24 hours. _ The timer does not change when other settings are changed. -
Page 20: Special Features
Special Features The special features provide you with additional conveniences when cooking. Learn more about these special features in the following sections. _ Cook Time _ Stop Time Probe Easy Cook Favorites _ Sabbath Mode Cook Time Use the COOK TIME feature to operate the oven mode for a set period of time. The oven starts immediately and then turns off automatically when the set time is up. -
Page 21: Stop Time
Stop Time Use Stop Time to delay the start of a Cook Time. Enter the time that you want the mode to end. The oven calculates the proper start time. It starts and stops auto- matically. Caution: To maintain food safety, do not leave food in the oven for more than one hour before or after cooking. -
Page 22: Easy Cook
Easy Cook Easy Cook contains functions with pre-programmed settings. The heating mode, temperature and cooking time are automatically activated based on the items you choose in the menus. However, it is possible to change temperature and cooking time manually. Caution: To maintain food safety, do not leave food in the oven for more than one hour before or after cooking. - Page 23 A submenu a ppears: 3. Select t hetypeoffoodyouwant t o cook.Forinstance, press1 forRibEye Roast. A submenu a ppears: 4. Choose thelevel o fdoneness. Thesuggested w eight a ppears inthedisplay (ifapplicable): 5. Usethenumeric keystosettheweight, f orinstance press3 5 for3.5Ibs. Thesetweight a ppears inthedisplay: 6.
-
Page 24: Favorites
Favorites Use Favorites to store the settings for your favorite dishes. There are four memory settings available for this feature. The temperature, cook- ing mode and cooking time are activated automatically based on the stored items. However, it is possible to change temperature and cooking time manually. Note: it is only possible to store settings after cooking. -
Page 25: Sabbath Mode
Sabbath Mode Sabbath Mode is for religious faiths with "no work" requirements on the Sabbath. Sabbath Mode must be activated in the user settings (default setting: On). To set Sabbath Mode: 1. Press and hold BAKE for five seconds. 2. Press COOK TIME. The 1 symbol for the cooking time, the suggested time (27 hours) and the temperature appear:... -
Page 26: User Settings
Theadjusted probe temperature a ppears inthedisplay: 6. Press START. Once the probe temperature is reached, the oven turns off and a beep sounds. Open the oven door to turn off the beep. The Probe icon disappears when the probe is removed. The probe temperature can be changed at any time by pressing PROBE and en- tering the new temperature. - Page 27 Tochangethe settings: Theovenmust b eturned offwithnotimerrunning inordertoaccess the"User Set- tings" menu. 1. Press INFO. A menu appears: 2. Press 2 for"custom". Thefirstmenuappears: 3. Select t hedesired menuitem. Note: _ Press INFO to exitusersettings. _ Press BACK to return to theprevious m enu. _ Torevert b acktothedefault s ettings, select "...
-
Page 28: Getting The Most Out Of Your Appliance
Getting the Most Out of Your Appliance General Tips Pan Placement Baking results are better if pans are placed in the center of the oven. If baking more than one pan on a rack, allow at least 1" to 1 W' of air space around the pan. When baking four cake layers at the same time, stagger pans on two racks so that one pan is not directly above the other. -
Page 29: Bake
Bake Bake is cooking with dry, heated air. Both the upper and lower el- ements cycle to maintain the oven temperature. The Bake mode can be used to prepare a variety of food items, from pastries to casseroles. Refer to recipe or package directions for oven temperature and baking time. -
Page 30: Convection Bake
Convection Bake Convection Bake is similar to Bake. Heat comes from the upper and lower heating elements. The main difference in convection baking is that the heat is circulated throughout the oven by the convection fan. The Convection Bake mode is well suited for cakes, bar cookies and breads to take advantage of the bottom heat, yielding a better crust on baked items. -
Page 31: True Convection
True Convection True Convection cooks with heat from a third element behind the back wall of the oven. The heat is circulated throughout the oven by the convection fan. True Convection is well suited for cooking individual serving-sized foods such as cookies and biscuits. -
Page 32: Roast
Roast Roast uses both the upper and lower elements to maintain the oven temperature. Roasting uses more intense heat from the up- per element than the lower element. This results in more browning of the exterior while the inside remains especially moist. Roast is best suited for large cuts of meat and poultry. -
Page 33: Broil
Convection Roast Chart Food Item Rack Oven Time Internal Weight Pos. Temp. (min/Ib)* Temp. Beef Rib Eye Roast (boneless) Medium rare 3.0-5.5 27-31 Medium 3.0-5.5 30-38 Rump, eye, tip, sirloin (boneless) Medium rare 3.0-6.0 18-33 Medium 3.0-6.0 30-35 Pork Tenderloin Roast 15-24 (medium rare) 2.0-3.0... - Page 34 _ Donotcoverthebroil g ridwithfoil.Itisdesigned t odrain fatsandoilsaway from thecooking surface toprevent s moking a ndspattering. Turn meats once during the recommended cook time (see Broil Chart for exam- ples). _ When top browning casseroles, use only metal or glass ceramic dishes such as Corningware ®...
-
Page 35: Convection Broil
Convection Broil Convection Broil is similar to Broil. It combines intense heat from the upper element with heat circulated by a convection fan. Convection Broil mode is well suited for cooking thick, tender cuts of meat, poultry and fish. Convection Broil is not recommended for browning breads, casseroles and other foods. -
Page 36: Pizza
Pizza In the Pizza mode, heat from the lower and upper elements is cir- culated throughout the oven by the convection fan. Use the Pizza mode for fresh or frozen pizza. Tips For a crispy crust, place pizza directly on the rack. For a softer crust, use a pizza pan. -
Page 37: Speed Convection
Speed Convec- Speed Convection uses all heating elements as well as the con- vection fan to evenly distribute heat throughout the oven cavity. tion The main difference between speed convection and other convec- tion modes is that it does not require preheating. Speed Convection is well suited for frozen convenience foods such as fish sticks and chicken nuggets. -
Page 38: Warm
Warm In Warm, the upper and lower elements maintain a low tempera- ture in the oven cavity in order to keep food at serving tempera- ture. Use the Warm mode to keep cooked foods hot until ready to serve. _ Warm mode temperatures are 140 °F - 220 °F. Foods that must be kept moist should be covered with a lid or aluminum foil. - Page 39 Dehydrate Chart Food Item Preparation Approx. Test for done- drying ness time (hrs) Fruit 11-15 Apples Dipped in 1Acup lem- Slightly pliable. on juice and 2 cups water, W' slices. Bananas 11-15 Dipped in _ cup lem- Slightly pliable. on juice and 2 cups water, W' slices.
- Page 40 Food Item Preparation Approx. Test for done- drying ness time (hrs) Vegetables 15-17 Peppers Wash and towel dry. Leathery with Remove membrane of no moisture in- side. peppers, coarsely chopped about 1" pieces. Mush_oms 7-12 Wash and towel dry. Tough and Cut off stem end.
-
Page 41: Cleaning And Maintenance
Cleaning and Maintenance Cleaning Self-Clean During Self-Clean, the oven is heated to a very high temperature. Soil is burned off at this temperature. ATTENTION: Wipe out excessive spillage before self-cleaning the oven. ATTENTION: Do not clean parts or accessories in the Self-Clean oven. To set the Self-Clean mode: 1. -
Page 42: Cleaning Guide
Cleaning Guide Part Recommendations Flat Rack and Telescopic Wash with hot soapy water. Rinse thoroughly and Rack dry, or gently rub with cleansing powder or soap- filled pads as directed. DO NOT clean the rack in the self-cleaning oven. Broil Pan and Grid Wash with hot soapy water. -
Page 43: Maintenance
Maintenance Replacing an Oven Light Caution: Make sure the appliance and lights are cool and power to the ap- ® pliance has been turned off before replacing the light bulb(s). Fail- ure to do so could result in electrical shock or burns. The lenses must be in place when using the appliance. -
Page 44: Removing The Oven Door
3. Pull t he halogen bulbfromitssocket. 4. Replace t hehalogen bulb. G rasp the newbulbwitha clean,drycloth. 5. Puttheglasscoverbackonbyinsert- ingit intothelower mounting clipand pressing upward until i t locksintoplace. 6. Turnpower b ackonatthemainpower supply (fuseor breaker b ox). Removing the Oven Door Caution: When removing the door:... - Page 45 To remove the oven door: 1. Be sure to read the above WARNING before attempting to remove the door. 2. Open the door completely. 3. Flip levers on hinges toward you. 4. Close door carefully until it stops. It will be about half way closed.
-
Page 46: Service
Service Before Calling Service Troubleshooting Chart Oven Problem Possible Causes and Suggested Solutions Oven door is locked and will not open, Turn the oven off at the circuit breaker and wait five minutes. Turn breaker even after cooling, back on. The oven should reset itself and will be operable. Oven is not heating. -
Page 47: Data Plate
Oven Problem Possible Causes and Suggested Solutions Warm air or steam escapes from oven It is normal to see or feel steam or warm air escaping from the oven vent. vent. Do not block the vent. Cooling fan runs even when the oven is This is normal. -
Page 48: Statement Of Limited Product Warranty
Please make sure to return your registration card; while not necessary to effectuate warranty coverage, it is the best way for Thermador to notify you in the unlikely event of a safety notice or product recall. How Long the Warranty Thermador warrants that the Product is free from defects in materials and work- manship for a period of twelve (12) months from the date of purchase. - Page 49 Exclusions The warranty coverage described herein excludes all defects or damage that are not the direct fault of Thermador, including without limitation, one or more of the following: Use of the Product in anything other than its normal, customary and intended...
- Page 50 Noattempt t oalter,modify or amend thiswarranty s hallbeeffective unless autho- rizedinwriting byanofficer ofBSH.
- Page 51 3con 5551 McFadden Avenue, Huntington Beach, CA 92649 • 800-735-4328 • www.thermador.com Material 9000119715 ° T061186 ° Rev B ° 11/06 © BSH Home Appliances Corporation, 2007 ° All rights reserved Litho in USA...
Need help?
Do you have a question about the ME271 and is the answer not in the manual?
Questions and answers