Table of Contents
Advertisement
_7
_
LAWN & GARDEN EQUIPMENT
U
MANUAL
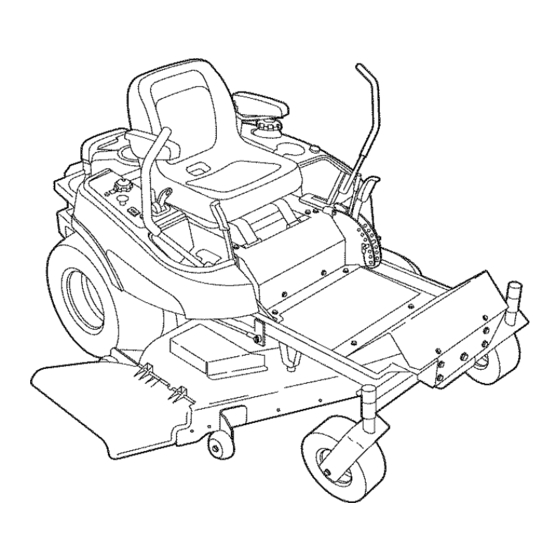
1 8HP
Zero-Turn
Riders
Mfg, No.
Description
2690487
Massey Ferguson ZT 1844
5900608
Snapper ZT18441KHC
19HP
Zero-Turn
Riders
Mfg. No.
Description
5900609
Snapper ZT19441KWV
20HP
Mfg, No.
2690449
2690483
2690451
2690452
2690484
2690477
2690488
5900610
5901166
Zero-Turn
Riders
Description
Simplicity 20HP Kohler Champion Zero-Turn Rider with 44" Mower
Simplicity 20liP Kohler Champion Zero-Turn Rider with 44" Mower (AU/NZ)
Simplicity 20liP Briggs Champion Zero-Turn Rider with 50" Mower
Simplicity 20liP Briggs Champion Zero-Turn Rider with 50" Mower (CE)
Simplicity 20liP Briggs Champion Zero-Turn Rider with 50" Mower (AU/NZ)
Massey Ferguson ZT 2050
Massey Ferguson ZT 2050 (CE)
Snapper ZT20801BV
Snapper EZT2OSOl BV (CE)
Form No. 5100725
Revision 01
Rev.Date 10/2006
TP 100-7294-01-CH-SMN
Advertisement
Table of Contents
Troubleshooting

Related Manuals for Simplicity Snapper 5900610


Summary of Contents for Simplicity Snapper 5900610
- Page 1 Description 2690449 Simplicity 20HP Kohler Champion Zero-Turn Rider with 44" Mower 2690483 Simplicity 20liP Kohler Champion Zero-Turn Rider with 44" Mower (AU/NZ) 2690451 Simplicity 20liP Briggs Champion Zero-Turn Rider with 50" Mower 2690452 Simplicity 20liP Briggs Champion Zero-Turn Rider with 50" Mower (CE) 2690484 Simplicity 20liP Briggs Champion Zero-Turn Rider with 50"...
- Page 2 Copyright © 2006 Briggs & Stratton Corporation Milwaukee, WI, USA. All rights reserved. The Simplicity logo is a trademark of Briggs & Stratten The Snapper logo is a trademark of Briggs & Stratton Corporation Milwaukee, WI, USA. Corporation Milwaukee, WI, USA.
-
Page 3: Table Of Contents
Table of Coflteflts Safety Rules & information ......... identification Numbers ........Safety DecaJs ............Safety interlock System ........Safety icons ............Features & Controls .......... Control Functions ..........Operation ............General Operating Safety ........Checks Before Starting ......... Starting the Engine ..........Stopping the Bider &... -
Page 4: Safety Rules & Information
SsfetyRules & information Operating Safety Congratulations on purchasing a superior-quality piece of lawn and garden equipment. Our products are designed and manufactured to meet or exceed all industry standards for safety. Do not operate this machine unless you have been trained. Reading and understanding this operator's manual is a way to train yourself. - Page 5 SafetyRules & information Slope Operation Operation on slopes can be dangerous. Using the unit on a slope that is too steep where you do not have adequate wheel traction (and control) can cause sliding, loss of steering, control, and possible rollover. You should not operate on a slope greater than a 3.5 foot rise over a 20 foot length (10 degrees).
- Page 6 $sfetyRules & InformUofl Retaining Wails, D rop-offs, andWater Retaining walls and drop-offs around steps and water are a common hazard. Give yourself a minimum of two mower widths of clearance around these hazards and hand-trim with a walk behind mower or string trimmer. Wheels dropping over retaining walls, edges, ditches, embankments, or into water can cause rollovers, which may result in serious injury, death, or drowning.
- Page 7 Sa{ety Rules & Ifl{ormUofl Read these safety rules and follow them closely. Failure to obey these rules could result in loss of control of unit, severe personal injury or death to you, or bystanders, or damage to property or equipment. This mowing deck is capable of amputating hands and feet and throwin og o_ects, The triangle...
- Page 8 SafetyRules andIflformaUon SLOPE OPERATION ,WARNING Slopes are a major factor related to loss-of-control and Never operate on slopes greater than 17.6 tip-over accidents, which can result in severe injury or percent (10 °) which is a rise of 3-1/2 feet (106 death.
- Page 9 SafetyRules & IflformUofl SERVICE AND MAINTENANCE line clamps further than necessary. Ensure clamps grip hoses firmly over the filter after installation. Safe Handling of Gasoline 12. Do not use gasoline containing METHANOL, 1. Extinguish all cigarettes, cigars, pipes, and other gasohol containing more than 10% ETHANOL, sources of ignition.
-
Page 10: Identification Numbers
E. Manufacturer's Address Vibration @ Wheel: XXX rrJs_ Vibration @ Seat: XXX m/s _ R Year of Manufacture Simplicity Mfg, Inc, G. CE Compliance Logo fPo_ Washington, WI USA 53074-0997 H. Mass of Unit in Kilograms I. Sound Power in Decibels *** J. -
Page 11: Safety Decajs
$a{etyDecaJs SAFETY DECALS This unit has been designed and manufactured to provide you with the safety and reliability you would expect from an industry leader in outdoor power equipment manufacturing. Although reading this manual and the safety instructions it contains will provide you with the necessary basic knowledge to operate this equipment safely and effectively, we have placed several safety labels on the unit to remind you of this important... -
Page 12: Safety Interlock System
SafetyIflterlock System NORTH AMERICAN EXPORT MODELS ONLY: MODELS ONLY: SAFETY iNTERLOCK SAFETY iNTERLOCK SYSTEM SYSTEM This unit is equipped with safety interlock switches. This unit is equipped with safety interlock switches. These safety systems are present for your safety, do These safety systems are present for your safety, do qot attempt to bypass safety switches, and never not attempt to bypass safety switches, and never... -
Page 13: Safety Icons
SafetyIcofls CE SAFETY iCONS Safety Icons The alert symbol _ is used to identity safety information about hazards that can result in personal Warning: Read Operator's Manual. Read and understand the injury. A signal word (DANGER, WARNING, or Operator's Manual before using .. -
Page 14: Features & Controls
Features & Centrols CONTROL FUNCTIONS The information below briefly describes the function of individual controls. Starting, stopping, driving, and mowing require the combined use of several controls applied in specific sequences. To learn what combination and sequence of controls to use for various tasks see the OPERATION section. Choke Ground Speed... - Page 15 Features & Centrols Hour Meter Fuel Tank The hour meter measures the number of hours the key has been in the RUN position. Fuel Level Gauge Note: The hour meter will register the passage of time To remove the cap, turn counterclockwise. The fuel when the key is in the RUN position, even if the engine gauge is mounted in the fuel tank and indicates the...
-
Page 16: Operation
Operation GENERAL OPERATING SAFETY CHECKS BEFORE STARTING • Check that crankcase is filled to full mark on Before first time operation: dipstick. See the engine Operator's Manual for Be sure to read all information in the Safety and instructions and oil recommendations. Operation sections before attempting to operate •... -
Page 17: Starting The Engine
OperaUofl ,WARNING DO NOTTOW RIDER ® Towing the unit will cause hydraulic pump if you do not understand how a specific control and wheel motor damage. Do not use functions, or have not yet thoroughly read the another vehicle to push or pull this unit. FEATURES &... -
Page 18: Zero Turn Driving Practice
Operation ZERO TURN Smooth Travel DRWING PRACTICE The lever controls of the Zero Turn rider are The lever controls of the Zero Turn rider are responsive. responsive, and learning to gain a smooth and The BEST method of efficient control of the rider's forward, reverse, and handling the ground turning movements will take some practice. - Page 19 Operatiofl PracticeTurning Practice Turning Around a Corner in Place While traveling forward bring one handle gradually To turn in place, "Zero Turn," gradually move one back toward neutral. Repeat several times. ground speed control lever forward from neutral and one lever back from neutral simultaneously. Repeat NOTE: To prevent pivoting directly on the tire tread, it several times.
-
Page 20: Mower Removal & Installation
Operation Figure g. Mower Belt Routing A. Arbor Pulleys Figure 10. Release Belt Tension B. Back-Side idlers A. Belt Tension Release Lever B, Guard Notch C. PTO Pulley D. Belt Tension Release Lever MOWER REMOVAL AND INSTALLATION NOTE: Perform mower installation and removal on a hard flat surface such as a concrete floor. -
Page 21: Mowing
Operatiofl MOWING Before mowing, set the cutting height as described in the Troubleshooting, Adjustments & Service section. 1. Engage the parking brake. Make sure the PTO switch is disengaged and the motion control lever is in the NEUTRAL position. 2. Start the engine (see STARTING THE ENGINE). 3. -
Page 22: Mowing Methods
Operation When and How Often to Mow The time of day and condition of the grass greatly affect the results you'll get when mowing. For the best results, follow these guidelines: 1. Mow when the grass is between three and five inches high. -
Page 23: Attaching A Trailer
OperaUofl ATTACHING A TRAILER Proper IVluIching Mulching consists of a mower deck which cuts and The maximum weight of a towed trailer should be less recuts clippings into tiny particles and which then than 200 Ibs (91 kg). Secure the trailer with a blows them down INTO the lawn. -
Page 24: Regular Iviaintenance
RegWr Maintenance MAINTENANCE SCHEDULE & PROCEDURES The following schedule should be followed for normal care of your rider and mower.You will need to keep a record of your operating time. Determining operating time is easily accomplished by observing the elapsed time recorded by the hour meter. -
Page 25: Lubrication
RegWr Maintenance LUBRICATION Lubricate the unit at the following lubrication points shown in Figure 16. Oil: Grease: discharge chute hinge • control handle pivots front caster yokes • front caster wheel axles rear suspension pivots (select models) Generally, all moving metal parts should be oiled roller straps (deck lift pivots) where contact is made with other parts. -
Page 26: Servicing The Mower Blades
RegWr Maintenance WARNING For your personal safety, do not handle the sharp mower blades with bare hands. Careless or improper handling of blades may result in serious injury. WARNING For your personal safety, blade mounting capscrews must each be installed with a •... -
Page 27: Checking Tire Pressures
RegWr Maintenance CHECKTIRE PRESSURES Tire pressure should be checked periodically, and maintained at the levels shown in the chart. Note that these pressures may differ slightly from the "Max inflation" stamped oil the side-wall of the tires. The pressures shown provide proper traction, improve cut quality, and extend tire life. -
Page 28: Check/Fill Transmission Oil
RegWr Mai.te.a.ce CHECK/FILL TRANSMISSION OIL Oil Type: 20W-50 conventional detergent motor oil. 1. Check the oil level when the unit is cold. The inspection port is located on the inside of the right tank cover. The oil level should be within 1/2" (1.3 cm) of the horizontal level mark (D, Figure 22). -
Page 29: Battery Maintenance
Regular Maintenance BATTERY MAINTENANCE STORAGE Cleaning the Battery and Cables Before you store your unit for the off-season, read the Maintenance and Storage instructions in the Safety 1. Disconnect the cables from the battery, negative Rules section, then perform the following steps: cable first (B, Figure 22). -
Page 30: Troubleshooting, Adjustments & Service
TreublesbeeUflg, Adjustments, & Service TROUBLESHOOTING _WARNING While normal care and regular maintenance will To avoid serious injury, perform maintenance extend the life of your equipment, prolonged or on the tractor or mower only when the engine constant use may eventually require that service be is stopped and the parking brake engaged. -
Page 31: Troubleshooting The Mower
TroubJeshooUflg, Adjustmflts, & Service RidepTpoubleshooting Continued. PROBLEM CAUSE REMEDY Engine runs, but rider will Hydraulic release valve(s) 1. Turn valve(s) clockwise to close. not drive, in "open" position. Belt is broken. 2. See Drive Belt Replacement. Drive belt slips. 3. See problem and cause below. Brake is not fully released. -
Page 32: Common Cutting Problems
Treublesbeetiflg, Adjustments, & Service TROUBLESHOOTING COMMON CUTTING PROBLEMS PROBLEM CAUSE REMEDY Streaking, Blades are not sharp. 1. Sharpen your blades. Blades are worn down to far, 2. Replace your blades. Engine speed is too slow. 3. Always mow at full throttle. 4. -
Page 33: Seat Adjustment
TroubleshooUflg, Adjustmflts, & Service SEAT ADJUSTMENT The seat and ground speed control levers should be adjusted so that operator's elbows are supported by the arm rests when his/her hands are on the controls, and the ground speed control levers can be moved through their full range of motion without contacting the operator's legs. -
Page 34: Speed Balancing Adjustment
TreublesheeUflg, Adjustments, & Service SPEED BALANCING ADJUSTMENT ,WARNING DO NOT adjust the rider for a faster overafl speed forward or reverse than it was designed for. If the rider veers to the right or left when the ground speed control levers are in the maximum forward or reverse position, the top speed of each of these levers can be balanced by turning the adjustment bolt(s) (A &... -
Page 35: Parking Brake Adjustment
TroubleshooUflg, Adjustmflts, & Service PARKING BRAKE ADJUSTMENT 1. Disengage the PTO, stop the engine, block the front wheels, remove the ignition key, and engage the parking brake. 2. Elevate the rear end of the unit and remove the rear wheels. 3. -
Page 36: Suspension Adjustment
TreublesheeUflg, Adjustments, & Service SUSPENSION ADJUSTMENT (SELECT MODELS) The shock assembly can be adjusted to vary the amount of pre-load applied to the springs. This allows the operator to customize the ride according to operator's weight and operating conditions. LESS PRE-LOAD: Light operator weight Softer, more cushioned ride Best for relatively flat terrain... -
Page 37: Pto Clutch Adjustment
TroubleshooUflg, Adjustmflts, & Service Figure 30. Adjust PTO Clutch A. Window EL Adjustment Nut C..016"-.018" (0,40-0,45mm) Feeler Gauge Figure 29. PTO Clutch Adjustment A. Adjustment Window (Qty. 3, one shown) B. Adjustment PTO CLUTCH ADJUSTMENT ,WARNING Check the PTO clutch adjustment after every 100 To avoid serious injury, perform adjustments hours of operation. -
Page 38: Mower Deck Leveling
TreublesheeUflg, Adjustments, & Service MOWER DECK LEVELING Perform these adjustments on a flat level surface. S_DE-TO-SIDELEVELING 1. With the mower installed, place the rider on a smooth, level surface such as a concrete floor. Turn the front wheels so they are straight. 2. -
Page 39: Roller Bar Leveling
TroublesbooUflg, Adjustmflts, & Service ROLLER BAR LEVELING (SELECT MODELS) The rollers on this Zero Turn unit are not intended to ride on the ground. DO NOT adjust rollers to ride on the ground. Rollers riding on the ground will damage turf and or unit. -
Page 40: Hydraulic Pump Drive Belt Replacement
TreublesheeUflg, Adjustments, & Service HYDRAULIC PUMP DRIVE BELT REPLACEMENT 1. Park the rider on a smooth, level surface such as a concrete floor. Disengage the PTO, engage the parking brake, turn off the engine, and remove the ignition key. 2. Remove the PTO drive belt (see MOWER BELT REPLACEMENT for removal instructions). -
Page 41: Specifications
For applicable manuals currently available for your model contact our Customer Publications Department (Simplicity) / 866-313-6882 (Snapper). Have the information listed in the box below available when phoning in your request. Technical manuals can be downloaded from www.simplicitymfg.com... - Page 42 Notes www.simplicitymfg.com I www.snapper.com...
- Page 43 Product Q uick Specs: ENGINE: BELTS AND BLADES: TRACTOR 18 HP* Kohler Make Kohler Pump Drive Belt 5022931 Model Courage 18 44" MOWER Oil Capacity 1.6 qt. ( 1.5L) w/Filter Deck Drive Belt 5023256 19 HP* Kawasaki Mower Blade 1704100 Make Kawasaki 50"...
Need help?
Do you have a question about the Snapper 5900610 and is the answer not in the manual?
Questions and answers