Table of Contents

Related Manuals for Samsung HCN5527W


Summary of Contents for Samsung HCN5527W
- Page 1 Owner's Instructions...
- Page 2 l Warninq ! Important Safety Instructions CAUTION CAUTION: TO REDUCE THE RISK OF ELECTRIC SHOCK, DO NOT REMOVE COVER (OR BACK). NO USER SERVICEABLE PARTS INSIDE. REFER SERVICING TO QUALIFIED SERVICE PERSONNEL. dangerous to make any kind of contact with any inside part of This symbol indicates high voltage is present inside, It is this product.
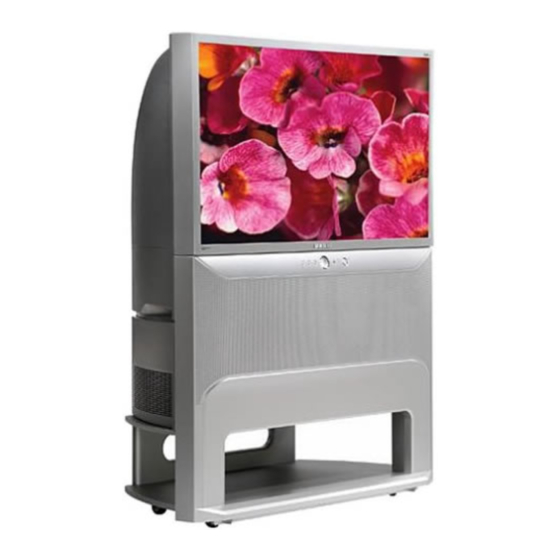
- Page 3 Thank Choosing Samsung you for choosing Thank Samsung! Your new Samsung Projection TV represents the latest in television technolog_ We designed it with easy to use on screen menus and dosed captioning capabilities, making it one of the best products in its class.
-
Page 4: Leads
• Protect the power cord. Power supply cords should be routed so that they won't be walked or pinched by objects placed on or against them. Pay particular attention to cords at plugs, con venience receptacles, and the point where they exit from the unit. •... - Page 5 Be careful in the selection and duration of television formats used for Uneven vie_ving. CRT aging as a result of' format selection and use, as well as other burned in images, is not covered by your Samsung limited warranty.
-
Page 6: Table Of Contents
CONTENTS Chapter 1: Your ....List of Features .......... Familiarizing Yuurself with Yuur New TV ...... Front Panel Buttons ....... Fi-ont/Side Panel Jacks ......Using the Component Shelf ......Rear Pane[ Jacks (Depending oil the model) ..... Remote Control ........Chapter 2: Installation .... - Page 7 CONTENTS Chapter 3: Operation (Cont.) ..3.16 Sound Control ......... 3.16 Adjusting the Vulume ......3.16 Using Mute ........3.16 Customizing the Sound ......3.17 Using Automatic Sound Settings ....3.18 Setting the Clock ........3.19 Option 1: Setting the Clock Manually ....3.19 Option 2: Using the Local PBS Channel to Automatically Set the TV Clock ........
-
Page 8: 1: Your New Tv
Your NEW TV List Features Your Samsung TV vvas designed with the latest tecbnolog_v This TV is a high perfurmance unit that includes the following special features: Easy to use remote control Easy to use on screen menu system Automatic... -
Page 9: Front Panel Buttons
Your NEw TV Familiarizing Yourself with Front Panel Buttons The buttons on the front panel control your TV_ bask features, including the on screen menu. Tu use the more advanced features, must use the remote control. HCN42%W HCN436W • • •... -
Page 10: Using The Component Shelf
YOUR NEW TV Front or Side Panel Jacks You {tall use the front or side pane[jacks to connect an A/V component that is used only occasionally, such as a camcorder or video game. (For infurmation ollconnecting equipment, see pages 2.1 2.10.) O PERFECT FOCUS... -
Page 11: Rear Pane
Your NEw TV Rear Panel Jacks (Depending on the model) Use the zear parle] jacks to connect an A/V component that _vi[] be connected continu ously, such as a VCR or a DVD player. Because there are two sets of input jacks, you can connect two diffVrent A/V components (i.e., a VCR and a DVD, 2 VCRs, etc.) For more... -
Page 12: Remote Control
Your NEw TV Remote Control You can use the remote control up to about 23 fi_et from the ']'V_When ush]g the remote, always point it directly at the TV You can also use your remote control to operate your VCR and cable box. See page 4.20 for details. - Page 13 Press to automatically return to a preferred charnel after a user preset time delay. Used during set up of this Samsung remote control, so that S.Mode it will work compatibly with Adjust the TV sound by selecting other devices (VCR,cable box, one of the preset factory settings DVD.)
-
Page 14: Connecting Vhf And Uhf Antennas
INSTALLATION Connecting Antennas If youz antenna has a set of leads that look like this, see "Antennas with 300 ohm Flat _vin Leads," below. If youz antenna has one lead that looks like this, see "Antennas with 75 ohm Round Leads,"... -
Page 15: Antennas With 75 Ohm Round Leads
INSTALLATION Antennas with 75-ohm Round Leads Plug the antenna lead into the AN%A or ANT-B terminal o Separate Antennas If you have two separate antennas foz your TV (one VHF and one UHF), you must combine the two antenna signals befoze connecting the antennas to the T_ This pzoceduze requh-es a... -
Page 16: All Channels
INSTALLATION Cable with a Cable that Descrambles All Channels terminal might be Iabeled" ANT OUT'r Connect the other end of ] this cable to th_ or ANT_Bterminal on the rear of the TV, Connecting a Cable that Descrambles Some Channels If your cable box descrambles orgy some channels (such as premium... - Page 17 INSTALLATION Connect a coaxial cable nr_[_] betweentheANTENNA Incoming OUT terminal on the Cable 1 cable box and the B: !N Splitter RF (A/B) 8whch terminal on the A/B Cable Box Connect another cable between the other OUT terminaJ on the splitter Irrupting and the A- IN terminal on ¢,a_e...
-
Page 18: Vcr
INSTALLATION Connecting a VCR These instructions assume that you have already connected your TV to an antenna or a cable TV system (according to the instructions on pages 2.1 2.3). Skip step 1 if you have not yet connected to an antenna or a cable system. -
Page 19: Connecting A Second Vcr To Record From The Tv
Connecting a Second Record from Yuur TV can send out signals of its picture and sound to be recorded by a second VCR. To do this, connect your second VCR as follows: W RearPanel Connect a set of audio canes between [he AUDIO OUT acks on the TV and the AUD 3 INjacKs onme ICR. - Page 20 INSTALLATION Connecting a Camcorder Tile side panel jacks on your TV make it easy to cormect a eamcorder to your TV[ They allow you to view the cameorder tapes without ushlg a VCR. TV Side Panel Locate the A/V outpuk _CKS on me camcorder, [hey are USUallyfound on the side or rear of the camcome_ Connect an audio cable between the...
-
Page 21: Connecting A Dvd Player, Dtv Set Top Box
Connecting a DVD Player, Set-Top (480i, 480p, 1080i) The rear panel jacks on your TV make it easy to connect a DVD player (or DTV Set Tap Box) to your TV_ Connecting to Y, PB,P. TVRearPanel Connect a set of audio cables between the DVDaudio injacks on the IX/and the AUDIO OUTjacks on the DVD player or DTV Set Top Box,... -
Page 22: Connecting A Dtv Set Top Box
INSTALLATION Connecting a DTV Set-Top Connecting to Y, PB, PR (480p, 1080i) Connect the Y, P, and P video outputs of' the set top box to their corresponding inputs on the T_ Next, connect the Left and Right audio from the set top box to the corresponding L and R terminaIs on the T_ (The connections for a typical set top box are shown below.) - Page 23 INSTALLATION Connecting to DVI (Digital Visual Interface)(480p, 720p, 1080i) By inputting a high bandwidth Digital Content Protection high definition picture source to the DVI INPUT jack on the TV_ high definition pktures can be displayed oil the screen in their digital form. (This DVI INPUT jack is for use in the future when High bandwidth Digital Content Protection...
-
Page 24: Installing Batteries In The Remote Control
INSTALLATION Installing Batteries in the Remote Control Make sure to match the "+" and "--" ends of the batteries with diagram inside the compartment. Remove the batteries and store them in a cool, dry place if you won't be using the remote control for a... -
Page 25: 3: Operation
OPERATION Turning Press the Power button, You can also use the POWER button on the tbont panel. Plug & Play Feature When the TV is initiaI[y powered five basic customer settings proceed automatically subsequently: Setting the language, Ant. input check, and Auto program/Setting the Clock. - Page 26 OPERATION ¸4¸¸¸¸ Make sure that the antenna i_IT is Connected to the TV. And then press the VOL+ or VOL- button to activate "Auto Program" or press the MENU button to skip, (refer to _Auto program" Press the VOL+ or VOL- button to move to the hour Qr minute, Set the hour or minute by pressing the...
- Page 27 OPERATION Using Perfect Focus Feature use the Perfect Focus feature to When the picture size is distorted after moving the TV set adjust for the optimum picture size set in the Factory. You can also select Perfbct Focus by pressing the Perfect Focus button.
-
Page 28: Adjusting Manual Convergence
OPERATION Adjusting Manual Convergence If' the color appears spread out or "smeared" on the screen, the convergence probably needs alignment. Be sure to use the remote control for tile convergence adjustments. Fh-st steps: Press the Menu button. Language : Enfllisll Press the Cl.lv button to setect ?Function", then... -
Page 29: Adjust Red Convergence
OPERATION Adjust Convergence White" Red" is highlighted, press R=_u_m_==_, the VOL+ button A crosshair pattern Will appear on the screen After moving the cursor to the 2.&&5:P_t_ aajust Using pOSlbOn you want • uG_e_'a ± t_ IMwva the number buttons 2{upl, 4(leftl 6{rtghtL 8taowm on me remote control aejust Red Convergence by pressing the'gOt +1MOLJ0B/x... -
Page 30: Viewing The Menus And On Screen Displays
OPERATION Viewing Menus On-Screen Displays Viewing Menus The on-screen menus disappear f_'om the screen after thirty seconds. With the power on press the Menu button The" Picture" menu appears on the screen, tts left side has hve icons: Picture, Sound, -91 You can also use the Menu, CHANNEL, and VOLUME buttons Press the CH/N or CH V button to the move items in the menu... -
Page 31: Selecting A Menu Language
OPERATION Selecting a Menu Language Press the Me_ button. Press the CH v button to select" Function", then press the VOL + b_tton. Press the CI-Iv button to select'! Language",then press the VOL+ or VOL. button to select the Ian Press the Menu button to .. -
Page 32: Memorizing The Channels
OPERATION Memorizing Channels Your TV can memorize and store all of the available channels for both "off' air" (antenna) cable chanrle[s. After the available channels are memorized, use the CH A and CH V tons to scan through the channels. This eliminates the need to change channels by entming... - Page 33 OPERATION Storing Channels in Memory (Automatic Method) First.select the correc[ s_gnaIsource rANT. STD HRC,tRCI, See steps 1-2 on previous page, Press the Menu button Press the CH v button to select ° Channel' men press the VOL+ button Press the CH v button to select"...
-
Page 34: Changing Channels
OPERATION Changing Channels Using Channel Buttons Press the CH/X or CHV button to change channels. W'hen you press GHA or CHv, the TV changes channels in sequence. You will see all the chan- nels that the TV has memorized. (The TV must have nmmorized at least three channels.) You will not see channels... -
Page 35: Selecting Youi- Favorite Channels
OPERATION Selecting Your Favorite Channels You can store up to ten of your favorite channels for each available input source (such as TV and CATV). Then, when you press the Fav.CH button oil the remote control, the TV displays only the favorite channels you previously stored, allowing you to quicMy and easily flnd fre... -
Page 36: Adding And Erasing Channels (Manual Method)
OPERATION Adding Erasing Channels (Manual Method) Press the Menu button. B_ess the CH V button to select" Channel", then press me VO[ + button B_ess the CH V button [o select" Add/Erase ther Dress the VOL + button _ Idlmw _Se]_t J_dt B_ess the VOL + button... -
Page 37: Labeling The Channels
OPERATION Labeling Channels Use this feature to assign an easy to remember label to any channel (i.e., "CBS", "ESPN", "PBS2", CNN1% etc.) A [abel consists of four fietds, where each field is a letter, a num bet, "*", or a blank. When the DISPLAY button is pressed, the channel label will appear next to the channel number. -
Page 38: Picture Control
OPERATION Picture Control You can use the on screen menus to change the contrast, brightness, tint, color, and sharpness according to personal preference. (Alternatively, you can use one of" the "automatk" settings. See next page.) Customizing Picture Press the Menu button, Mode : Custom The"... -
Page 39: Using Automatic Picture Settings
OPERATION Using Automatic Picture Settings Your TV has three automatic picture settings ("Dynamic", "Standard" and "Movie") that are preset at the factory. Yuu can activate either Dynamic, Standard or Movie by pressing RMode (or by maMng a selection from the menu). ©z, you can select "Custom"... -
Page 40: Selecting The Coloi- Tone
OPERATION Selecting Color Tone Press the Menu button. They Picture" icon will be highlighted, Then press t_e VOL÷ button, Press the CNV button to select" Color Tone" Press the VOL ÷ or VOL- button to select" Normal" i ?Warm1"; "Warm2", "Coot2" Press the Menu button to exit. -
Page 41: Customizing The Sound
OPERATION Customizing Sound The sound settings can be adjusted to suit your personal perfbrences. Alternatively, you can use one of the "automatic" settings. See next page.) Press the Men u button+ Press the CH v button to select _Sound"; the press the VOL÷... -
Page 42: Using Automatic Sound Settings
OPERATION Using Automatic Sound Settings Yuur TV has four automatic sound settings ("Standard," "Music," "Movie," and "Speech") that are preset at the factor_ You can activate either Standard, Music, Movie oi- Speech by press ing the &MODE button (or by making a selection from the menu). -
Page 43: Setting The Clock
OPERATION Setting Clock Setting the clock is necessary in order to use the various timer features of' the TV. Also, you can check the time while watching the TV[ (Just press Display) Option 1: Setting Clock Manually Press the Menu button Englsfl Press the OHv button to... -
Page 44: Option 2: Using The Local Pbs Channel To Automatically Set The Tv Clock
OPERATION Option 2: Using Local Channel to Automatically Clock Press the MENU, Press the CH v button to select" Function", then press the VOL_ button i!!!!!!!_iiiiiiiiiiiiiil;_tiiiiiiiiiiiiiiiiii!_iiiiiiiii ¸¸2¸¸¸¸¸¸¸¸ ¸ > Press the CH x/button to select" Auto clock set" menu, then Press the 1/01. -
Page 45: Viewing An External Signal Source
OPERATION Press the CH v button to select _Time Zone" While "Time Zone° is selecb T_rne Zone :EAST ed, then press the VOL+or VOL- to change the Time zone, _t[[[[[[[[[[[[[[[[[[ Sequence: A/L, EAST,CEN,, MTN., PAC.,ALAS., HAW. Press the CH V button to select"... -
Page 46: Chapter 4: Special Features
SPECIAL FEATURES Fine Tuning Channels Use fine tuning to manually adjust a particular channel for optimal reception. Select the aooroBrla[e char_No Press the Menu button Press the CH v button [o select the "Channel" [nep Dress the VOL + button Press the CH V button to select Finelune _l_em... -
Page 47: Digital Noise Reduction
SPECIAL FEATURES Digital Noise Reduction If' the broadcast signal received by your TV is weak, can activate the Digital Noise Reduction feature to help reduce any static ghosting that may appear on tile screen. Press the Menu button. Mod_ : custom Press the CH v button tO select"... -
Page 48: Changing The Screen Size
SPECIAL FEATURES Changing Screen Size Wide (16:9) Wide Panorama Zoom Cinema Wide Panorama g_ 3- Cinema • Wide: Sets the picture to 16:9 wide mode. • Panorama: Use this mode tbr the wide aspect ratio of a panoramic picture. • DVD: Magnifies the size of the picture and moves... - Page 49 SPECIAL FEATURES Using R.surf feature This feature aRovv,s you to set the TV to return to a particular channel after a certain amount of' time. For example, you may be channel when commercials start. You can set watching the R.Surf to "5 minutes", then svv,[tch channels.
-
Page 50: Setting The On/Off Timer
SPECIAL FEATURES Setting On/Off Timer -q Before using the timer, you must set the TV's clock. (See "Setting the Clock" on page 3.19) Press the Menu button, Languag e : English Press the CH v button to When any of the tilners are set, the select _Function", then "Timer"... -
Page 51: Setting The Sleep Timer
SPECIAL FEATURES r15 deactivate the "On time," select "Off" during this step. Press the VOL + button to seiect" On/Off," Press the CIt A or OHv button button to turn the on-timer" On," (Repeatedly pressing the ell A or OHx/button If no tunction buttons (including... -
Page 52: Extra Sound Settings
VOL + button to seiec[ 0n ° , Press the Menu button to eXit Surround Your Samsung TV can create a "surround" ef'fi_ct such that the sound seems to come from aI[ directions. - Page 53 SPECIAL FEATURES Choosing a Multi-Channel Sound (MTS) Soundtrack Depending on the particular program being broadcast, you can listen to stereo, mono, or a Separate Audio Program. (SAP audio is usually a foreign language translation. Sometimes has unrelated information like news weather.) Quick way to access...
- Page 54 SPECIAL FEATURES Viewing Closed Captions YourTV decodes and displays the closed captions that are broadcast with certain TV shows. These captions are usually subtitles fur the hearing impaired or foreign language trans lations. All VCRs record the closed caption signal from television programs, so home record ed video tapes also provide...
-
Page 55: Viewing Picture In Picture
SPECIAL FEATURES Viewing Picture-in-Picture You can use the PIP feature to simultaneously watch two video sources. Note: The PIP feature does not work with Component 1, Component2, Component3 mode. When PIP is selected in the Zoom mode, the Mode is automatically converted into the Normal mode. - Page 56 SPECIAL FEATURES Selecting a Signal Source (Antenna or Cable) for PIP Press the Menu eu[mn. Press the CH V button to select" PIF men Dress the VOL+ button. Press the CH v button [o select" ANT/CATV2 If an antenna is connectec me semng is "ANT.
- Page 57 SPECIAL FEATURES Swapping Contents of the PIP Image Main Image <1 Quick way to access swapping: Simply press the "Swap" button Press the Menu button, the remote control. Press the Cltv button to select _PIP", then Dress me VOL+ button, Press the CH v button to select"Swap, men press...
- Page 58 SPECIAL FEATURES Changing PIP Channel Quick way to access PIP C] [: Simply press the (PIP) "CI [" button on the remote control. Press the CH V button to select" Channel," then press the VOL+ or VOL button to change the channel that appears in the PtP window, exit.
-
Page 59: Using The Vchip
SPECIAL FEATURES Using the V-Chip The VChip feature automatically locks out programming that is deemed inappropriate children. The user must fh-st enter a PIN (personal ID number) before any of the V Chip restrictions can be set up or changed. Note : When the Vchip feature is active, the PIP and channel... -
Page 60: How To Enable/Disable The Vchip
SPECIAL FEATURES to Enable/Disable V-Chip Press the Menu button, Press the CH v button to select _Function", then press the VOL+ button, Press the CH V button to select" V-Chip," then press the VOL+ button, The" Enter Pin" screen witt appear, Enter your 4-digi PIN number, To enable the V_Chipfeature... - Page 61 SPECIAL FEATURES Press the CH V button to seiect the "V-Chip". then Dress the VOL ÷ Button The" Enter Pin" screer wiII appear. Enter your 4-dt_" t PiN number. Press the CH v button to V43_ _LeCk : NO select the "TV Guidelines" TV Gm_ellnes men Dress the VOI + DulleR, _ 8_14_t...
- Page 62 _PECIAL FEATURES How to set the FV D. L. S and V sub-ratings: First select one of these TV-Ratings: TV_Y7[V-PG IV-14 or TV-MA (See Step 4, on previous paget Next Nhite the TV-Rating is selec[eo (BLUE).repeatedly press the VOL + button. This will cycle mrougn me avau- able sub-ratings {F_Z L .
- Page 63 SPECIAL FEATURES Press the CH v button to select th e "V-chip" _thee p[ess the VOL + butten. The" Enter Pin" Screen wilt appear. Enter you[ 4-digit PIN number The "V-Chip" screen witl appear, Press the CH v butto_ select" MPAA rating" _then press the VOL + button.
-
Page 64: Viewing The Demonstration
SPECIAL FEATURES Viewing Demonstration Tu become familiaz with the various menus pzovided by youz television, can view the built-in demonstzation. Press the Menu batten. Picture icon witI be highlighted (blinking), Press the CI.IV button to select _Demonstration", then Each of the menu opi ons _soBpayed m turn. -
Page 65: Vcr Or Dvd
Press the "MODE" button to switch the remote control to the "VCR" (or DVD) mode. On yOU r Samsung remote control, press set. -, Make sureyou enter 3digits of ii i i::iil thecode, even ifthe f.'st digit isa Enter3digitsoftheVCR orDVD codelisted on page4.22 for "0."... - Page 66 "Cable" mode. Onyour Samsung remote control, press SET. Make sure you enter 3 digits the code, even if the first digit is a Enter 3 digits of the cable box code Iieted below for Your brand of "0."...
-
Page 67: Cable Box
Codes R1.H 006, 079 000, 005, 007,008, 028, Admiml Aiwa 035, 037, 054, 069 009, 014, 046, 060 Akai 017,022, 023, 027, 030 Samsung 007, 013, 022,032,042,077 Lloyd Ser_ui Audio Dynamics 014, 016 Logik Bell & How_l 002, 012 Broksor_... -
Page 68: Chapter 5: Troubleshooting
TROUBLES}lOOTING If the TV seems to have a problem, first try this list of possible problems and solutions. If none of these troubleshooting tips apply, then call your nearest service center. Identifying Problems Problem Possible Solution Poor picture. Try another channel. -
Page 69: Appendix
APPENDIX Cleaning Maintaining Your With proper care, your TV unit will give you many years of service. Please follo_v these guidelines to get the maximum performance from your T_/_ Placement Do not place the TV near extremely hot, cold, humid oi- dusty places. - Page 70 MEMO AppI NI/]X...
- Page 71 MEMO...
- Page 72 SERVICE DIVISION 400 Valley Road, Suite 201_ Motmt Arlington, NJ 07856 TEL : 1-800-SAMSUNG (1-800-726-7864) Www.gamsungu.qa.COln BP68-00054A-02...
Need help?
Do you have a question about the HCN5527W and is the answer not in the manual?
Questions and answers