Samsung PCL6215R Service Manual
Projection tv receiver
Hide thumbs
Also See for PCL6215R:
- Owner's instructions manual (67 pages) ,
- Instructions manual (67 pages)
Advertisement
Quick Links
Download this manual
See also:
Instruction Manual
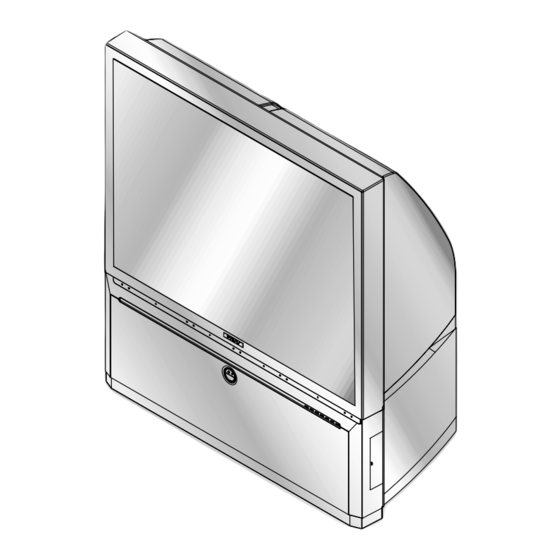
PROJECTION TV RECEIVER
PROJECTION TV RECEIVER
Chassis :
P55A(N) REV.1
Model :
HCN4226WX/XAA
HCN4226W3S/XAA
ST54T8PCS/XAX
HCN4727W5S/XAA
1.
Precautions
2.
Reference Information
3.
Specifications
4.
Alignment and Adjustments
5.
Troubleshooting
6.
Exploded View and Parts List
7.
Electric Parts List
8.
Block Diagrams
9.
Wiring Diagram
10.
Schematic Diagrams
C O N T E N T S
Advertisement

Related Manuals for Samsung PCL6215R


Summary of Contents for Samsung PCL6215R
- Page 1 PROJECTION TV RECEIVER Chassis : P55A(N) REV.1 Model : HCN4226WX/XAA HCN4226W3S/XAA ST54T8PCS/XAX HCN4727W5S/XAA PROJECTION TV RECEIVER C O N T E N T S Precautions Reference Information Specifications Alignment and Adjustments Troubleshooting Exploded View and Parts List Electric Parts List Block Diagrams Wiring Diagram Schematic Diagrams...
- Page 2 Follow these safety, servicing and ESD precautions to prevent damage and protect against potential hazards such as electrical shock and X-rays. 1. Be sure that all of the built-in protective devices are replaced. Restore any missing protective shields. 2. When reinstalling the chassis and its assemblies, be sure to restore all protective devices, including: nonmetallic control knobs and compartment covers.
- Page 3 9. High voltage is maintained within specified 15. Observe the original lead dress, especially limits by close-tolerance, safety-related near the following areas: Antenna wiring, components and adjustments. If the high sharp edges, and especially the AC and high voltage exceeds the specified limits, check voltage power supplies.
- Page 4 6. Insulation Checking Procedure: Disconnect the 1. Servicing precautions are printed on the power cord from the AC source and turn the cabinet. Follow them. power switch ON. Connect an insulation resistance meter (500V) to the blades of the AC 2.
- Page 5 1. Some semiconductor (“solid state”) devices 5. Use only a grounded-tip soldering iron when are easily damaged by static electricity. Such soldering or unsoldering ESDs. components are called Electrostatically Sensitive Devices (ESDs); examples include 6. Use only an anti-static solder removal device. integrated circuits and some field-effect Many solder removal devices are not rated as transistors.
- Page 6 Ω Ω Ω...
- Page 8 Most large-screen video display devices that are using CRT (including CDT) usually apply the Dynamic Focus (hereinafter D/F) circuit. As CRT has non-spherical surface (perfect spherical surface = 1, non-spherical surface R>1), the distance that the electron beam emitted from the electron gun reaches to the center of CRT is different from the one that the electron beam reaches to the corners.
- Page 13 1. Turn on the TV, and then select “STANDARD”on the picture adjustment mode. 2. Turn off the TV (STAND-BY). 3. Enter the service mode by pressing the remote control keys in the following sequence : Note : If necessary, re-do steps 1~3. Initial display when the service mode is switched.
- Page 14 DVI connection item is corresponded to DVI application model.
- Page 22 ↔ ↔ ↔ ↔ ↔ ↔ → ↔ ↔ ↔ ↔ ↔ ↔ ↔ ↔ ↔ ↔ ↔...
- Page 24 2. In the stand-by mode, press the remote-control keys in the following sequence : 1. Warm up the TV for at least 30 minutes. 2. Select the “ STANDARD” Video mode. 3. Select SBT by pressing the Volume keys. 3. Turn to the Video Mode (No Signal) using a 4.
- Page 25 Note : The F.S. Circuit check must be performed after servicing. 1. Do this adjustment after the static focus 1. Turn on the TV. adjustment and the tilt adjustment. 2. Select the “STANDARD” video mode. 2. Select the “STANDARD” video mode. (Contrast:100, Brightness:50) 3.
- Page 26 1. Select the “STANDARD” video mode. 2. Warm up the set at least for 10 minutes. 3. Enter the Convergence mode by pressing the remote control buttons in the following sequence 4. Set the Beam Alignment Adjustment CY to Zero magnetic field area. 5.
- Page 27 3. PWM IC OSC Sync Lock A PWM type IC needs sync lock for PWM pulse For the existing high voltage REG circuit (input and horizontal scan line. voltage variation type), a dynamic REG response The standard time constant of OSC circuit is is not provided.
- Page 28 5. Output Circuit about 1V. A PWM modulation type REG detects static, dynamic high voltage fluctuation for only The voltages, which are detected form an error Ton Time (when the current of the output TR detection circuit of PWM IC (Differential AMP) collector flows) each 1H, and modulates the and Dead Time, each is applied to PWM width of PWM pulse.
-
Page 36: Cancel Key
1. R-SELECT Press to select RED color. 2. G-SELECT Press to select GREEN color. 3. B-SELECT Press to select BLUE color. 4. R-MUTE Press to mute RED color. 5. G-MUTE Press to mute GREEN color. 6. B-MUTE Press to mute BLUE color. 7. - Page 37 14. MOVE CURSOR FORWARD Press to move the cursor right or down. 15. MOVE CURSOR REVERSE Press to move the cursor left or up. 16. CONVERGENCE PICTURE MOVE BUTTON 17. CONVERGENCE MOVE BUTTON Press to move the convergence left ( ) or right ( 18.
- Page 38 20. Move Convergence Pattern P55A Service Manual After pressing the R.surf button, use the Channel Up/Down and Volume +/- buttons to move the Convergence Pattern up/down/left/right. 21. Convergence Pattern Tilt Control Button After pressing the ANT A/B button, use the Channel Up/Down and Volume +/- buttons to create a tilt to the Convergence Pattern.
-
Page 39: Special Notes
Special Notes ✏ A sensor is attached on the center of each side of the Convergence Mode pattern (see figure below). The sensors are required for normal Perfect Focus function. ✏ Use a screen jig to do the convergence adjustments correctly (Especially, perform correct convergence adjustments on the center of each side where a sensor is located.) ✏... - Page 40 4. To adjust GREEN, first press the and the keys, and then press the key. Press to move the cursor right or down. 5. The key moves the cursor horizontally or vertically. When the key is pressed once again, the cursor moves horizontally. 6.
- Page 41 7. Use the key for overall balance. 8. After the Line Shift is cancelled by pressing the key, use the Channel and Volume keys (Up/Down)to make big adjustments.
- Page 42 9. After the green convergence adjustments are completed, press the key to save the data. 10. Superimpose the Red and Green colors by pessing the and the keys. 11. To adjust RED, redo steps 5~7. When the cursor moves vertically 12.
-
Page 43: Left, Right
15. After the color adjustments are completed, pree the ( ) key to save the data. The corser moves to center, and then automatically moves up and to the left about five seconds later. 1. After the adjustment is completely saved, press the perfecr Focus key to perform Auto Convergence (Factory Mode). - Page 44 2. After the Convergence Adjustments are completde, press the key to exit. 3. DTV Convergence adjustment must be done same as the above Normal Mode Convergence Adjustment (Use a 16 : 9 screen jig for DTV) When Convergence Adjustment is not normally done or the convergence center is misaligned with the sensing point, any adjustment error happens.
- Page 50 Abnomal Check the input Nomal voltage of main CNZ02 and sub CN803 Check the voltage of CNZ03 Check the output from on the CG-AMP board and CG-MDL and FD855S, the waveform of CNZ01 FD802S on the SUB PCB Nomal Abnomal Check FD101S,FD102S Check connectors MAIN ↔...
- Page 51 Check the output Abnomal Nomal volume level of MAIN CN601 Check SPEAKER Check the input/output circuits of IC601 Abnomal Nomal Check ICD603 Check the circuits related to IC601 Abnomal Nomal Check IC602 Check the circuits related to IC601 Abnomal Nomal Check IC605 Check the circuits related to IC602...
- Page 52 Check the operating status of remote control and POWER S/W Check the input voltage of PWE CORD Check the remote control and CONTROL ASSY Check the input voltage Check the Standby voltage of ICS802 Check the input Check the circuits inside D/W-MDL Check IC831,PC801S Check MICOM VCC voltage/waveform of...
-
Page 56: Electrical Parts List
Electrical Parts List You can search for the updated part code through ITSELF web site. URL : http://itself.sec.samsung.co.kr 7. Electrical Parts List 7-1 HCN4226WX/XAA Loc. No. Code No. Description ; Specification Remark Loc. No. Code No. Description ; Specification Remark ASSY COVER FRONT ...3 T0081... - Page 57 ...3 T481 AA26-00091A TRANS-HV-STORAGE;4mH,-,14P,830uH,180V,10 ..4 R125 2001-000258 R-CARBON;1.8KOHM,5%,1/8W,AA,TP,1.8X3.2MM ...3 T444S AA26-00100A TRANS FBT;FFA97513L,CT29A7DR,0.3mH,-,-,- ..4 R125 2001-000258 R-CARBON;1.8KOHM,5%,1/8W,AA,TP,1.8X3.2MM ...3 T431 AA26-50001U TRANS-HORIZ.DRIVE;-,-,-,28mH,-,-,105uH,- ..4 R125 2001-000331 R-CARBON;12KOHM,5%,1/8W,AA,TP,1.8X3.2MM ...3 T461 AA26-50001V TRANS-HORIZ.DRIVE;-,-,-,6.0mH,-,-,113uH, ..4 R125 2001-000331 R-CARBON;12KOHM,5%,1/8W,AA,TP,1.8X3.2MM ...3 LR401S AA27-30003M COIL LINEARITY;-,5uH,OWA14x15,USRC0.1x60 Samsung Electronics...
- Page 58 ..4 DZ016 0403-001327 DIODE-ZENER;MTZJ18A,16.22-17.06V,500mW,D ..4 R125 2001-000761 R-CARBON;430OHM,5%,1/8W,AA,TP,1.8X3.2MM ..4 DZ016 0403-001327 DIODE-ZENER;MTZJ18A,16.22-17.06V,500mW,D ..4 R125 2001-000786 R-CARBON;47KOHM,5%,1/8W,AA,TP,1.8X3.2MM ..4 DZ016 0403-001328 DIODE-ZENER;MTZJ22A,20.15-21.20V,500mW,D ..4 R125 2001-000800 R-CARBON;5.1KOHM,5%,1/8W,AA,TP,1.8X3.2MM ..4 DZ016 0403-001329 DIODE-ZENER;MTZJ24B,22.61-23.77V,500mW,D ..4 R125 2001-000800 R-CARBON;5.1KOHM,5%,1/8W,AA,TP,1.8X3.2MM ..4 DZ016 0403-001329 DIODE-ZENER;MTZJ24B,22.61-23.77V,500mW,D ..4 R125 2001-000812 R-CARBON;5.6KOHM,5%,1/8W,AA,TP,1.8X3.2MM Samsung Electronics...
- Page 59 ..4 C598 2201-000146 C-CERAMIC,DISC;0.1NF,5%,50V,SL,TP,5X3.5M ..4 F101 2901-000297 FILTER-EMI ON BOARD;-,3A,-,-,3.5x5,TP,- ..4 C598 2201-000180 C-CERAMIC,DISC;10NF,10%,50V,Y5V,TP,7X3MM ..4 F101 2901-000299 FILTER-EMI ON BOARD;-,6A,UL/CSA,-,9x7.5, ..4 C598 2201-000180 C-CERAMIC,DISC;10NF,10%,50V,Y5V,TP,7X3MM ..4 G101 3301-000287 CORE-FERRITE BEAD;AA,3.5x1.0x6.0mm,1500, ..4 C598 2201-000017 C-CERAMIC,DISC;1NF,10%,50V,Y5P,TP,5X3.5M ..4 G101 3301-000287 CORE-FERRITE BEAD;AA,3.5x1.0x6.0mm,1500, Samsung Electronics...
- Page 60 6042-000002 EYELET;ID1.5,OD2,L2.8,NI+SN,BSP3-1/2H S.N.A ..4 EY63 6042-000001 EYELET;ID2.2,OD2.7,L3.1,NI+SN,BSP3-1/2H S.N.A ..4 EY153 6042-000002 EYELET;ID1.5,OD2,L2.8,NI+SN,BSP3-1/2H S.N.A ..4 EY62 6042-000001 EYELET;ID2.2,OD2.7,L3.1,NI+SN,BSP3-1/2H S.N.A ..4 EY111 6042-000002 EYELET;ID1.5,OD2,L2.8,NI+SN,BSP3-1/2H S.N.A ..4 EY61 6042-000001 EYELET;ID2.2,OD2.7,L3.1,NI+SN,BSP3-1/2H S.N.A ..4 EY11 6042-000002 EYELET;ID1.5,OD2,L2.8,NI+SN,BSP3-1/2H S.N.A ..4 EY60 6042-000001 EYELET;ID2.2,OD2.7,L3.1,NI+SN,BSP3-1/2H S.N.A Samsung Electronics...
- Page 61 0402-001296 DIODE-RECTIFIER;FMP-3FU,1.5KV,5A,TO-3PF, ...3 SG301 4715-001050 SURGE ABSORBER;2.4kV,20%,1500A,-,DISC-RA ..4 T0060 BH61-70003A SPRING ETC;CVT4857,STS304-W1/2H,W3.8,-,L S.N.A ...3 SG562 AA27-00084A COIL;S-23,-,-,-,-,-,-,S-23,5000Mohm MIN, ..4 T0090 0502-001230 TR-POWER;FJL6920YDTU,N,200000MW,TO-264 F ...3 SG532 AA27-00084A COIL;S-23,-,-,-,-,-,-,S-23,5000Mohm MIN, ..4 CIS BH62-00038B HEAT SINK-FBT;COMMANDO,A1050S,T2.0,85*80 S.N.A ...3 SG502 AA27-00084A COIL;S-23,-,-,-,-,-,-,S-23,5000Mohm MIN, Samsung Electronics...
- Page 62 2001-000734 R-CARBON;4.7KOHM,5%,1/8W,AA,TP,1.8X3.2MM ..4 C701 2401-000302 C-AL;100uF,20%,25V,GP,TP,6.3x11,5 ..4 R125 2001-000734 R-CARBON;4.7KOHM,5%,1/8W,AA,TP,1.8X3.2MM ..4 C701 2401-000302 C-AL;100uF,20%,25V,GP,TP,6.3x11,5 ..4 R125 2001-000938 R-CARBON;68OHM,5%,1/8W,AA,TP,1.8X3.2MM ..4 C701 2401-000430 C-AL;10uF,20%,250V,GP,TP,10x16mm,5m ..4 R125 2001-000995 R-CARBON;820OHM,5%,1/8W,AA,TP,1.8X3.2MM ..4 C701 2401-000430 C-AL;10uF,20%,250V,GP,TP,10x16mm,5m ..4 R125 2001-000995 R-CARBON;820OHM,5%,1/8W,AA,TP,1.8X3.2MM ..4 C701 2401-000430 C-AL;10uF,20%,250V,GP,TP,10x16mm,5m Samsung Electronics...
- Page 63 ..4 RZ130 2003-002171 R-METAL OXIDE(S);150ohm,5%,2W,AG,TP,3.9x ..4 R125 2001-000563 R-CARBON;27KOHM,5%,1/8W,AA,TP,1.8X3.2MM ..4 RZ131A 2003-002171 R-METAL OXIDE(S);150ohm,5%,2W,AG,TP,3.9x ..4 R125 2001-000232 R-CARBON;1.3KOHM,5%,1/8W,AA,TP,1.8X3.2MM ..4 RZ131 2003-002171 R-METAL OXIDE(S);150ohm,5%,2W,AG,TP,3.9x ..4 R125 2001-000908 R-CARBON;62KOHM,5%,1/8W,AA,TP,1.8X3.2MM ..4 RZ130A 2003-002171 R-METAL OXIDE(S);150ohm,5%,2W,AG,TP,3.9x ..4 R125 2001-000908 R-CARBON;62KOHM,5%,1/8W,AA,TP,1.8X3.2MM ..4 RFZ50 2008-000261 R-FUSIBLE(S);150ohm,5%,1W,AF,TP,3.9x10mm Samsung Electronics...
- Page 64 BP97-00208A ASSY SMD;0 S.N.A ..5 R952 2007-000074 R-CHIP;100ohm,5%,1/10W,TP,1608 ..4 Q01 0501-000342 TR-SMALL SIGNAL;KSC1623-Y,NPN,200mW,SOT- ..5 R969 2007-000074 R-CHIP;100ohm,5%,1/10W,TP,1608 ..4 PCB AA41-00853A PCB-SERSOR;SVP-42W5HRC,FR-4,2L,A,1.6T,24 S.N.A ..5 R970 2007-000074 R-CHIP;100ohm,5%,1/10W,TP,1608 ..4 D01 BP32-00001A SENSOR PHOTO;BCS5030G1,-40 TO +85,0.42 U ..5 R972 2007-000074 R-CHIP;100ohm,5%,1/10W,TP,1608 Samsung Electronics...
- Page 65 0501-000280 TR-SMALL SIGNAL;KSA1182,PNP,150mW,SOT-23 ..5 C120 2203-000440 C-CERAMIC,CHIP;1nF,10%,50V,X7R,TP,1608,- ..5 Q03 0501-000280 TR-SMALL SIGNAL;KSA1182,PNP,150mW,SOT-23 ..5 C120 2203-000440 C-CERAMIC,CHIP;1nF,10%,50V,X7R,TP,1608,- ..5 Q10 0501-000342 TR-SMALL SIGNAL;KSC1623-Y,NPN,200mW,SOT- ..5 C120 2203-000440 C-CERAMIC,CHIP;1nF,10%,50V,X7R,TP,1608,- ..5 Q04 0501-000342 TR-SMALL SIGNAL;KSC1623-Y,NPN,200mW,SOT- ..5 C120 2203-000444 C-CERAMIC,CHIP;1nF,10%,50V,X7R,TP,2012,- ..5 Q409 0505-000110 FET-SILICON;2N7002,N,60V,115MA,7.5OHM,0. 7-10 Samsung Electronics...
- Page 66 2007-000078 R-CHIP;1Kohm,5%,1/10W,TP,1608 ..5 C120 2203-000041 C-CERAMIC,CHIP;0.01NF,0.25PF,50V,C0G,TP, ..5 R40 2007-000078 R-CHIP;1Kohm,5%,1/10W,TP,1608 ..5 C120 2203-000041 C-CERAMIC,CHIP;0.01NF,0.25PF,50V,C0G,TP, ..5 R128 2007-000079 R-CHIP;1.8Kohm,5%,1/10W,TP,1608 ..5 C120 2203-000041 C-CERAMIC,CHIP;0.01NF,0.25PF,50V,C0G,TP, ..5 R81 2007-000080 R-CHIP;2Kohm,5%,1/10W,TP,1608 ..5 C120 2203-000041 C-CERAMIC,CHIP;0.01NF,0.25PF,50V,C0G,TP, ..5 R75 2007-000080 R-CHIP;2Kohm,5%,1/10W,TP,1608 ..5 C120 2203-000181 C-CERAMIC,CHIP;100nF,+80-20%,25V,Y5V,TP, Samsung Electronics 7-11...
- Page 67 2402-001042 C-AL,SMD;100uF,20%,16V,GP,TP,6.6x6.6x5.4 ..4 R024 2004-001390 R-METAL(S);1Kohm,2%,1/2W,AA,TP,2.4x6.4mm ..5 C14 2402-001042 C-AL,SMD;100uF,20%,16V,GP,TP,6.6x6.6x5.4 ..4 R024 2004-001970 R-METAL(S);1.8Kohm,1%,1/2W,AA,TP,6.5x2.5 ..5 C06 2402-001042 C-AL,SMD;100uF,20%,16V,GP,TP,6.6x6.6x5.4 ..4 R024 2004-001970 R-METAL(S);1.8Kohm,1%,1/2W,AA,TP,6.5x2.5 ..5 C03 2402-001042 C-AL,SMD;100uF,20%,16V,GP,TP,6.6x6.6x5.4 ..4 R024 2004-001970 R-METAL(S);1.8Kohm,1%,1/2W,AA,TP,6.5x2.5 ..5 C01 2402-001042 C-AL,SMD;100uF,20%,16V,GP,TP,6.6x6.6x5.4 ..4 R024 2004-001970 R-METAL(S);1.8Kohm,1%,1/2W,AA,TP,6.5x2.5 7-12 Samsung Electronics...
- Page 68 2401-002459 C-AL;220uF,20%,25V,LZ,TP,10x16,5 ..5 R776 2007-000070 R-CHIP;0ohm,5%,1/10W,TP,1608 ..4 C701 2401-002459 C-AL;220uF,20%,25V,LZ,TP,10x16,5 ..5 R775 2007-000070 R-CHIP;0ohm,5%,1/10W,TP,1608 ..4 C701 2401-002459 C-AL;220uF,20%,25V,LZ,TP,10x16,5 ..5 R791 2007-000070 R-CHIP;0ohm,5%,1/10W,TP,1608 ..4 C701 2401-002463 C-AL;470uF,20%,16V,GP,TP,8x11.5,5 ..5 R97C 2007-000070 R-CHIP;0ohm,5%,1/10W,TP,1608 ..4 C701 2401-002463 C-AL;470uF,20%,16V,GP,TP,8x11.5,5 ..5 R904 2007-000070 R-CHIP;0ohm,5%,1/10W,TP,1608 Samsung Electronics 7-13...
- Page 69 2007-000084 R-CHIP;4.7Kohm,5%,1/10W,TP,1608 ..5 C120 2203-000206 C-CERAMIC,CHIP;100nF,10%,50V,X7R,TP,2012 ..5 R604 2007-000084 R-CHIP;4.7Kohm,5%,1/10W,TP,1608 ..5 C120 2203-000206 C-CERAMIC,CHIP;100nF,10%,50V,X7R,TP,2012 ..5 R611 2007-000084 R-CHIP;4.7Kohm,5%,1/10W,TP,1608 ..5 C120 2203-000206 C-CERAMIC,CHIP;100nF,10%,50V,X7R,TP,2012 ..5 R688 2007-000084 R-CHIP;4.7Kohm,5%,1/10W,TP,1608 ..5 C120 2203-000206 C-CERAMIC,CHIP;100nF,10%,50V,X7R,TP,2012 ..5 R750 2007-000084 R-CHIP;4.7Kohm,5%,1/10W,TP,1608 ..5 C120 2203-000206 C-CERAMIC,CHIP;100nF,10%,50V,X7R,TP,2012 7-14 Samsung Electronics...
- Page 70 ..5 ER13 2007-000070 R-CHIP;0ohm,5%,1/10W,TP,1608 ..5 L602 2703-000398 INDUCTOR-SMD;10uH,10%,3.2x2.5x2.2mm ..5 ER19 2007-000070 R-CHIP;0ohm,5%,1/10W,TP,1608 ..5 L603 2703-000398 INDUCTOR-SMD;10uH,10%,3.2x2.5x2.2mm ..5 ER18 2007-000070 R-CHIP;0ohm,5%,1/10W,TP,1608 ..5 G101 3301-001324 CORE-FERRITE BEAD;AB,15OHM,2X1.25X0.9MM, ..5 ER17 2007-000070 R-CHIP;0ohm,5%,1/10W,TP,1608 ..5 PCB AA41-00597F PCB-MAIN;HCM4215W,FR-4,2L,F,1.6T,245X245 S.N.A ..5 SR03 2007-000074 R-CHIP;100ohm,5%,1/10W,TP,1608 Samsung Electronics 7-15...
- Page 71 2007-000092 R-CHIP;15Kohm,5%,1/10W,TP,1608 ..5 C120 2203-000181 C-CERAMIC,CHIP;100nF,+80-20%,25V,Y5V,TP, ..5 ER24 2007-000097 R-CHIP;47Kohm,5%,1/10W,TP,1608 ..5 C120 2203-000181 C-CERAMIC,CHIP;100nF,+80-20%,25V,Y5V,TP, ..5 ER25 2007-000097 R-CHIP;47Kohm,5%,1/10W,TP,1608 ..5 C120 2203-000181 C-CERAMIC,CHIP;100nF,+80-20%,25V,Y5V,TP, ..5 FR77 2007-000097 R-CHIP;47Kohm,5%,1/10W,TP,1608 ..5 C120 2203-000181 C-CERAMIC,CHIP;100nF,+80-20%,25V,Y5V,TP, ..5 PR02 2007-000097 R-CHIP;47Kohm,5%,1/10W,TP,1608 ..5 C120 2203-000181 C-CERAMIC,CHIP;100nF,+80-20%,25V,Y5V,TP, 7-16 Samsung Electronics...
- Page 72 2203-002494 C-CERAMIC,CHIP;470nF,10%,16V,X7R,TP,2012 ...3 SWY03 3404-001006 SWITCH-TACT;12V,50mA,160gf,6x6mm,SPST ..5 C120 2203-002494 C-CERAMIC,CHIP;470nF,10%,16V,X7R,TP,2012 ...3 SWY04 3404-001006 SWITCH-TACT;12V,50mA,160gf,6x6mm,SPST ..5 C120 2203-002494 C-CERAMIC,CHIP;470nF,10%,16V,X7R,TP,2012 ...3 CN906 3711-000447 CONNECTOR-HEADER;BOX,3P,1R,2.5MM,ANGLE,- ..5 C120 2203-002494 C-CERAMIC,CHIP;470nF,10%,16V,X7R,TP,2012 ...3 CN906 3711-000479 CONNECTOR-HEADER;BOX,5P,1R,2.5mm,ANGLE,- ..5 C120 2203-002494 C-CERAMIC,CHIP;470nF,10%,16V,X7R,TP,2012 ...3 CN906 3711-003353 CONNECTOR-HEADER;BOX,11P,1R,2.5mm,ANGLE, Samsung Electronics 7-17...
- Page 73 2203-000257 C-CERAMIC,CHIP;10nF,10%,50V,X7R,TP,1608 ..4 IC01 1002-001333 IC-A/D&D/A CONVERTER;GM7030,10BIT,PQFP,1 ..4 C120 2203-000257 C-CERAMIC,CHIP;10nF,10%,50V,X7R,TP,1608 ..4 IC112 1103-000180 IC-EEPROM;24C16,2Kx8Bit,SOP,8P,150MIL,10 ..4 C120 2203-000257 C-CERAMIC,CHIP;10nF,10%,50V,X7R,TP,1608 ..4 T0123 1203-001419 IC-VOLTAGE REGULATOR;4931,TO-252,3P,6.6x ..4 C120 2203-000257 C-CERAMIC,CHIP;10nF,10%,50V,X7R,TP,1608 ..4 IC05 1203-001824 IC-VOL. DETECTOR;7042,SOT-89,3P,-,PLASTI ..4 C120 2203-000257 C-CERAMIC,CHIP;10nF,10%,50V,X7R,TP,1608 7-18 Samsung Electronics...
- Page 74 AA65-30111A CLAMPER CORE-WIRE;ALL MODEL,NYLON,V0,-,WS.N.A T0066 AA96-00156A ASSY POWER CORD;-,EP2/YES(US),H/C100MM,K ...3 3811-000401 WIRE-PVC CU;BCWA,300V,ROLL,17/0.16mm,#22 S.N.A ...3 T0077 AA39-10007Y CBF POWER CORD;-,EP2/YES,SPT-2 18AWGx2C, ...3 AA61-20284A HOLDER;P-CORD,PP,-,-,-,BLK,VO,KE-002 S.N.A ...3 AA63-10002B BAND-TIE;NYLON66 V2,L140,NTR S.N.A ...3 T0121 3301-001201 CORE-FERRITE;AE,21x11x32mm,1500,280G BP39-00047A LEAD CONNECTOR;P55A/HCM4215W,UL2547#26,U Samsung Electronics 7-19...
- Page 75 Electrical Parts List You can search for the updated part code through ITSELF web site. URL : http://itself.sec.samsung.co.kr 7-2 HCN4226W3S/XAA Loc. No. Code No. Description ; Specification Remark Loc. No. Code No. Description ; Specification Remark ASSY SKD PART ...3 T0081 6003-001019 SCREW-TAPTITE;RH,+,B,M4,L12,ZPC(BLK),SWR...
- Page 76 0402-000546 DIODE-RECTIFIER;TVR10G,400V,1.0A,DO-41,T ..5 R125 2001-000449 R-CARBON;2.2KOHM,5%,1/8W,AA,TP,1.8X3.2MM ..5 T0083 0402-000546 DIODE-RECTIFIER;TVR10G,400V,1.0A,DO-41,T ..5 R125 2001-000508 R-CARBON;220KOHM,5%,1/8W,AA,TP,1.8X3.2MM ..5 T0083 0402-000546 DIODE-RECTIFIER;TVR10G,400V,1.0A,DO-41,T ..5 R125 2001-000515 R-CARBON;220OHM,5%,1/8W,AA,TP,1.8X3.2MM ..5 T0083 0402-000546 DIODE-RECTIFIER;TVR10G,400V,1.0A,DO-41,T ..5 R125 2001-000522 R-CARBON;22KOHM,5%,1/8W,AA,TP,1.8X3.2MM ..5 DZ016 0403-000704 DIODE-ZENER;TZP7.5B,7.5V,7.5-8.4V,1W,DO- ..5 R125 2001-000577 R-CARBON;2KOHM,5%,1/8W,AA,TP,1.8X3.2MM Samsung Electronics 7-21...
- Page 77 2008-000290 R-FUSIBLE(S);2.4ohm,5%,2W,AF,TP,3.9x10mm ..5 C701 2401-002144 C-AL;47uF,20%,16V,GP,TP,5x11,5 ..5 R486 2008-001018 R-FUSIBLE(S);0.47ohm,10%,2W,AF,TP,3.9x10 ..5 C701 2401-002216 C-AL;2200uF,20%,35V,GP,TP,16x25,7.5 ..5 R838 2008-001053 R-FUSIBLE;22ohm,5%,1/2W,AF,TP,2.5x6.5mm ..5 C701 2401-002216 C-AL;2200uF,20%,35V,GP,TP,16x25,7.5 ..5 R437 2008-001087 R-FUSIBLE(S);1.8ohm,5%,2W,AG,TP,3.9x12mm ..5 C701 2401-000050 C-AL;10uF,20%,16V,GP,TP,5x11,2.5 ..5 R485 2008-001137 R-FUSIBLE(S);3.3ohm,5%,1W,AF,TP,3.9x10mm ..5 C701 2401-002288 C-AL;470uF,20%,25V,WT,TP,10x20,5 7-22 Samsung Electronics...
- Page 78 6042-000002 EYELET;ID1.5,OD2,L2.8,NI+SN,BSP3-1/2H S.N.A ..5 EY131 6042-000002 EYELET;ID1.5,OD2,L2.8,NI+SN,BSP3-1/2H S.N.A ..5 EY94 6042-000002 EYELET;ID1.5,OD2,L2.8,NI+SN,BSP3-1/2H S.N.A ..5 EY128 6042-000002 EYELET;ID1.5,OD2,L2.8,NI+SN,BSP3-1/2H S.N.A ..5 EY93 6042-000002 EYELET;ID1.5,OD2,L2.8,NI+SN,BSP3-1/2H S.N.A ..5 EY129 6042-000002 EYELET;ID1.5,OD2,L2.8,NI+SN,BSP3-1/2H S.N.A ..5 EY92 6042-000002 EYELET;ID1.5,OD2,L2.8,NI+SN,BSP3-1/2H S.N.A ..5 EY13 6042-000002 EYELET;ID1.5,OD2,L2.8,NI+SN,BSP3-1/2H S.N.A Samsung Electronics 7-23...
- Page 79 2303-000002 C-FILM,PPF;8.2nF 5% 400V TP 19X18X7,7.5m ..5 CIS 0205-001027 OIL-SILICON;G746,-,- S.N.A ..5 C438 2303-000002 C-FILM,PPF;8.2nF 5% 400V TP 19X18X7,7.5m ..5 T0090 0502-001100 TR-POWER;2SC4125,NPN,70W,TO-3PML,BK,8- ..5 R440 2008-000282 R-FUSIBLE;0.47ohm,5%,1W,AA,TP,3.9x12mm ..5 Q409 0505-001722 FET-SILICON;IRFS640B,N,200V,18A,0.18OHM, ..5 R831 2003-000512 R-METAL OXIDE(S);15Kohm,5%,3W,AA,TP,6x16 ..5 T0081 6003-000333 SCREW-TAPTITE;RH,+,2S,M3,L10,ZPC(YEL),SW S.N.A 7-24 Samsung Electronics...
- Page 80 1204-001912 IC-DECODER;SDA5550M,P-MQFP,100P,-,PLASTI ..6 C120 2203-000189 C-CERAMIC,CHIP;100nF,+80-20%,25V,Y5V,TP, ..6 R981 2007-000070 R-CHIP;0ohm,5%,1/10W,TP,1608 ..6 C120 2203-000221 C-CERAMIC,CHIP;100nF,20%,50V,Y5V,TP,3216 ..6 R964 2007-000070 R-CHIP;0ohm,5%,1/10W,TP,1608 ..6 C120 2203-000236 C-CERAMIC,CHIP;0.1NF,5%,50V,C0G,TP,1608 ..6 R960 2007-000070 R-CHIP;0ohm,5%,1/10W,TP,1608 ..6 C120 2203-000236 C-CERAMIC,CHIP;0.1NF,5%,50V,C0G,TP,1608 ..6 R959 2007-000070 R-CHIP;0ohm,5%,1/10W,TP,1608 ..6 C120 2203-000236 C-CERAMIC,CHIP;0.1NF,5%,50V,C0G,TP,1608 Samsung Electronics 7-25...
- Page 81 0401-000133 DIODE-SWITCHING;RLS4148,100V,200MA,SOD-8 ..6 SR32 2007-000074 R-CHIP;100ohm,5%,1/10W,TP,1608 ..6 FD02 0401-000133 DIODE-SWITCHING;RLS4148,100V,200MA,SOD-8 ..6 SR33 2007-000074 R-CHIP;100ohm,5%,1/10W,TP,1608 ..6 FD07 0401-000133 DIODE-SWITCHING;RLS4148,100V,200MA,SOD-8 ..6 SR34 2007-000074 R-CHIP;100ohm,5%,1/10W,TP,1608 ..6 FD08 0401-000133 DIODE-SWITCHING;RLS4148,100V,200MA,SOD-8 ..6 SR35 2007-000074 R-CHIP;100ohm,5%,1/10W,TP,1608 ..6 FD09 0401-000133 DIODE-SWITCHING;RLS4148,100V,200MA,SOD-8 ..6 SR47 2007-000074 R-CHIP;100ohm,5%,1/10W,TP,1608 7-26 Samsung Electronics...
- Page 82 2007-001167 R-CHIP;75ohm,5%,1/10W,TP,1608 ..6 C120 2203-000491 C-CERAMIC,CHIP;2.2nF,10%,50V,X7R,TP,1608 ..6 SR36 2007-001167 R-CHIP;75ohm,5%,1/10W,TP,1608 ..6 C120 2203-000491 C-CERAMIC,CHIP;2.2nF,10%,50V,X7R,TP,1608 ..6 SR37 2007-001167 R-CHIP;75ohm,5%,1/10W,TP,1608 ..6 C120 2203-000575 C-CERAMIC,CHIP;220NF,10%,25V,X7R,TP,2012 ..6 SR38 2007-001167 R-CHIP;75ohm,5%,1/10W,TP,1608 ..6 C120 2203-000575 C-CERAMIC,CHIP;220NF,10%,25V,X7R,TP,2012 ..6 SR39 2007-001167 R-CHIP;75ohm,5%,1/10W,TP,1608 ..6 C120 2203-000575 C-CERAMIC,CHIP;220NF,10%,25V,X7R,TP,2012 Samsung Electronics 7-27...
- Page 83 0505-000110 FET-SILICON;2N7002,N,60V,115MA,7.5OHM,0..6 PC32 2402-000179 C-AL,SMD;47uF,20%,16V,GP,TP,6.6x6.6x5.4 ..6 IC104 0801-002345 IC-CMOS LOGIC;7S04,INVERTER,SOT-353,5P,4 ..6 SC18 2402-000179 C-AL,SMD;47uF,20%,16V,GP,TP,6.6x6.6x5.4 ..6 IC104 0801-002345 IC-CMOS LOGIC;7S04,INVERTER,SOT-353,5P,4 ..6 SC16 2402-000179 C-AL,SMD;47uF,20%,16V,GP,TP,6.6x6.6x5.4 ..6 IC104 0801-002345 IC-CMOS LOGIC;7S04,INVERTER,SOT-353,5P,4 ..6 SC11 2402-000179 C-AL,SMD;47uF,20%,16V,GP,TP,6.6x6.6x5.4 ..6 IC08 1001-000164 IC-ANALOG MULTIPLEX;74HC4052,CMOS,SOP,16 7-28 Samsung Electronics...
- Page 84 2007-000080 R-CHIP;2Kohm,5%,1/10W,TP,1608 ..6 C120 2203-000181 C-CERAMIC,CHIP;100nF,+80-20%,25V,Y5V,TP, ..6 R57 2007-000080 R-CHIP;2Kohm,5%,1/10W,TP,1608 ..6 C120 2203-000181 C-CERAMIC,CHIP;100nF,+80-20%,25V,Y5V,TP, ..6 R63 2007-000080 R-CHIP;2Kohm,5%,1/10W,TP,1608 ..6 C120 2203-000181 C-CERAMIC,CHIP;100nF,+80-20%,25V,Y5V,TP, ..6 R109 2007-000082 R-CHIP;3.3Kohm,5%,1/10W,TP,1608 ..6 C120 2203-000181 C-CERAMIC,CHIP;100nF,+80-20%,25V,Y5V,TP, ..6 R66 2007-000084 R-CHIP;4.7Kohm,5%,1/10W,TP,1608 ..6 C120 2203-000181 C-CERAMIC,CHIP;100nF,+80-20%,25V,Y5V,TP, Samsung Electronics 7-29...
- Page 85 2301-000192 C-FILM,PEF;1nF,5%,50V,TP,5.3x10mm,5mm ..6 F103 2901-000226 FILTER-EMI SMD;25V,0.3A,-,100pF,3.2x1.25 ..5 C689 2305-000665 C-FILM,MPEF;100nF,5%,63V,TP,7.5x4.0x5.0m ..6 F103 2901-000226 FILTER-EMI SMD;25V,0.3A,-,100pF,3.2x1.25 ..5 C687 2305-000665 C-FILM,MPEF;100nF,5%,63V,TP,7.5x4.0x5.0m ..6 F103 2901-000229 FILTER-EMI SMD;50V,0.3A,-,22000pF,4.5x3..5 C682 2305-000665 C-FILM,MPEF;100nF,5%,63V,TP,7.5x4.0x5.0m ..6 F103 2901-000229 FILTER-EMI SMD;50V,0.3A,-,22000pF,4.5x3..5 C701 2401-000025 C-AL;100uF,20%,16V,GP,TP,6.3x11,5 7-30 Samsung Electronics...
- Page 86 2401-002619 C-AL;47uF,20%,25V,GP,TP,5x11,5 ..6 R795 2007-000070 R-CHIP;0ohm,5%,1/10W,TP,1608 ..5 C701 2401-002619 C-AL;47uF,20%,25V,GP,TP,5x11,5 ..6 R794 2007-000070 R-CHIP;0ohm,5%,1/10W,TP,1608 ..5 C701 2401-002619 C-AL;47uF,20%,25V,GP,TP,5x11,5 ..6 R729 2007-000070 R-CHIP;0ohm,5%,1/10W,TP,1608 ..5 C701 2401-002619 C-AL;47uF,20%,25V,GP,TP,5x11,5 ..6 R145 2007-000070 R-CHIP;0ohm,5%,1/10W,TP,1608 ..5 C701 2401-002619 C-AL;47uF,20%,25V,GP,TP,5x11,5 ..6 R143 2007-000070 R-CHIP;0ohm,5%,1/10W,TP,1608 Samsung Electronics 7-31...
- Page 87 2007-000090 R-CHIP;10Kohm,5%,1/10W,TP,1608 ..6 C120 2203-000206 C-CERAMIC,CHIP;100nF,10%,50V,X7R,TP,2012 ..6 R747 2007-000090 R-CHIP;10Kohm,5%,1/10W,TP,1608 ..6 C120 2203-000206 C-CERAMIC,CHIP;100nF,10%,50V,X7R,TP,2012 ..6 R746 2007-000090 R-CHIP;10Kohm,5%,1/10W,TP,1608 ..6 C120 2203-000206 C-CERAMIC,CHIP;100nF,10%,50V,X7R,TP,2012 ..6 R744 2007-000093 R-CHIP;20Kohm,5%,1/10W,TP,1608 ..6 C120 2203-000206 C-CERAMIC,CHIP;100nF,10%,50V,X7R,TP,2012 ..6 R743 2007-000093 R-CHIP;20Kohm,5%,1/10W,TP,1608 ..6 C120 2203-000206 C-CERAMIC,CHIP;100nF,10%,50V,X7R,TP,2012 7-32 Samsung Electronics...
- Page 88 ..4 C689 2202-000205 C-CERAMIC,MLC-AXIAL;22pF,5%,50V,SL,TP,1..3 0202-000187 SOLDER-WIRE FLUX;-,RS60S,D1.2,63Sn/37Pb S.N.A ..4 C689 2202-000205 C-CERAMIC,MLC-AXIAL;22pF,5%,50V,SL,TP,1..3 CN906 3711-003043 CONNECTOR-HEADER;BOX,4P,1R,2.5MM,STRAIGH ..4 C689 2202-000205 C-CERAMIC,MLC-AXIAL;22pF,5%,50V,SL,TP,1..3 CN906 3711-003043 CONNECTOR-HEADER;BOX,4P,1R,2.5MM,STRAIGH ..4 C689 2202-000205 C-CERAMIC,MLC-AXIAL;22pF,5%,50V,SL,TP,1..3 CN906 3711-003043 CONNECTOR-HEADER;BOX,4P,1R,2.5MM,STRAIGH ..4 CZ113 2202-000561 C-CERAMIC,MLC-RADIAL;0.68NF,5%,50V,C0G,T Samsung Electronics 7-33...
- Page 89 AA96-50311L ASSY H/S;-,AMP,AA62-30175D ,TDA6111Q,HE S.N.A ..4 R370 2001-001065 R-CARBON(S);110KOHM,5%,1/2W,AA,TP,2.4X6..3 IC531 AA96-50311L ASSY H/S;-,AMP,AA62-30175D ,TDA6111Q,HE S.N.A ..4 R369A 2001-001065 R-CARBON(S);110KOHM,5%,1/2W,AA,TP,2.4X6..3 IC501 AA96-50311L ASSY H/S;-,AMP,AA62-30175D ,TDA6111Q,HE S.N.A ..4 R367 2001-001065 R-CARBON(S);110KOHM,5%,1/2W,AA,TP,2.4X6..4 T0074 1201-001131 IC-VIDEO AMP;6111,SIP,9P,-,SINGLE,-,PLAS ..4 R368 2001-001065 R-CARBON(S);110KOHM,5%,1/2W,AA,TP,2.4X6. 7-34 Samsung Electronics...
- Page 90 ..4 L501 2701-000114 INDUCTOR-AXIAL;10uH,10%,2.5x3.4mm ..4 PCB AA41-00600E PCB-CRT;HCM4215W,FR-1,1L,E,1.6T,245X197( S.N.A ..4 SG561 4715-001036 SURGE ABSORBER;500V,20%,-,-,TP ..4 T0083 0402-000243 DIODE-RECTIFIER;RC2-V1,2000V,0.2A,DO-201 ..4 SG563 4715-001036 SURGE ABSORBER;500V,20%,-,-,TP ...3 T0076 BP39-00004B LEAD CONNECTOR-ASSY;P55A/HCM4215W,UL3239 ..4 SG533 4715-001036 SURGE ABSORBER;500V,20%,-,-,TP ...3 T0076 BP39-00004C LEAD CONNECTOR-ASSY;P55A/HCM4215W,UL3239 Samsung Electronics 7-35...
- Page 91 6003-001023 SCREW-TAPTITE;RWH,+,B,M3,L10,ZPC(YEL),SW S.N.A ...3 CN906 3711-002643 CONNECTOR-HEADER;BOX,4P,1R,2.5mm,STRAIGH T0105 BP94-00239A ASSY PCB MISC-DY-JACK;DP,HCM4215W3S/XAA, ...3 AA69-01396B BAG PE;SKD CHASSIS,LDPE,T0.03,130,130,NO S.N.A ...3 0202-000187 SOLDER-WIRE FLUX;-,RS60S,D1.2,63Sn/37Pb S.N.A ...3 BP97-00166A ASSY SMD;HCM4215WJX/XAA,DVI-AUTO,P55A S.N.A ...3 GT13 AA60-40012D PIN-GT,ASSY;T1.6,6-12.5-,NYLON66 S.N.A ..4 DD512 0401-000133 DIODE-SWITCHING;RLS4148,100V,200MA,SOD-8 7-36 Samsung Electronics...
- Page 92 ..4 0202-001167 SOLDER-CREAM;RX3603-2330HO,S45A,PASTE,SNS.N.A ..4 C120 2203-000181 C-CERAMIC,CHIP;100nF,+80-20%,25V,Y5V,TP, ...3 CN906 3711-003641 CONNECTOR-HEADER;BOX,12P,1R,2.5mm,STRAIG ..4 C120 2203-000181 C-CERAMIC,CHIP;100nF,+80-20%,25V,Y5V,TP, ...3 T0121 3301-001201 CORE-FERRITE;AE,21x11x32mm,1500,280G ..4 C120 2203-000181 C-CERAMIC,CHIP;100nF,+80-20%,25V,Y5V,TP, ...3 AA63-10002A BAND-TIE;NYLON66 V2,L100,NTR S.N.A ..4 C120 2203-000181 C-CERAMIC,CHIP;100nF,+80-20%,25V,Y5V,TP, ...3 IC112 1103-001211 IC-EEPROM;24C16-PC27 C,2048x8Bit,DIP,8P, Samsung Electronics 7-37...
- Page 93 S.N.A ..5 AA61-00812A SPRING ETC-WIRE;PROJ,STS,3.6 S.N.A ...3 BP61-00091A HOLDER-CRT;PJTV,PCABS GF20%,BLUE S.N.A ...3 BP61-00079A HOLDER-DY;,PJTV,T0.5,NYLON66 V2 S.N.A ...3 T0078 AA27-00249A DEFLECTION YOKE;-,DPD-5292AA,S/S,7,29.1 ...3 T0117 AA26-30006F TRANS FBT-ANODE CAP ASS’Y;-,FWZ-50A001C, T0261 BP98-00085A ASSY K/D-CRT-G;HCM4215W3S/XAA ...3 AA03-00201A CRT MONO;P16LSG03HKA,FREE,3.30mH,2.20mH, S.N.A 7-38 Samsung Electronics...
- Page 94 Electrical Parts List You can search for the updated part code through ITSELF web site. URL : http://itself.sec.samsung.co.kr 7-3 ST54T8PCS/XAX Loc. No. Code No. Description ; Specification Remark Loc. No. Code No. Description ; Specification Remark ASSY SKD PART ...3 AA61-20129A HOLDER-WIRE;-,NYLON-66,-,-,-,NTR,DAFC-25...
- Page 95 2401-003076 C-AL;3300UF,20%,50V,WT,BK,18X35.5MM,7.5 ..5 D479 0401-000005 DIODE-SWITCHING;1N4148,100V,200mA,DO-35, ..4 C701 2401-003076 C-AL;3300UF,20%,50V,WT,BK,18X35.5MM,7.5 ..5 DR401S 0401-000005 DIODE-SWITCHING;1N4148,100V,200mA,DO-35, ..4 T0121 3301-001201 CORE-FERRITE;AE,21x11x32mm,1500,280G ..5 DR402S 0401-000005 DIODE-SWITCHING;1N4148,100V,200mA,DO-35, ..4 FP801S 3601-000300 FUSE-CARTRIDGE;250V,6.3A,SLOW-BLOW,GLASS ..5 D301 0401-000005 DIODE-SWITCHING;1N4148,100V,200mA,DO-35, ..4 CN906 3711-003043 CONNECTOR-HEADER;BOX,4P,1R,2.5MM,STRAIGH ..5 D385 0401-000005 DIODE-SWITCHING;1N4148,100V,200mA,DO-35, 7-40 Samsung Electronics...
- Page 96 2003-000586 R-METAL OXIDE(S);22Kohm,5%,2W,AF,TP,4x12 ..5 R422 2001-000028 R-CARBON(S);100OHM,5%,1/2W,AA,TP,2.4X6.4 ..5 R429 2003-000586 R-METAL OXIDE(S);22Kohm,5%,2W,AF,TP,4x12 ..5 R493 2001-000052 R-CARBON(S);3.3KOHM,5%,1/2W,AA,TP,2.4X6..5 R310 2003-001024 R-METAL OXIDE(S);150ohm,5%,2W,AF,TP,3.9x ..5 R836 2001-000052 R-CARBON(S);3.3KOHM,5%,1/2W,AA,TP,2.4X6..5 R463 2003-001024 R-METAL OXIDE(S);150ohm,5%,2W,AF,TP,3.9x ..5 RS808 2001-000066 R-CARBON(S);10KOHM,5%,1/2W,AA,TP,2.4X6.4 ..5 R460 2003-002044 R-METAL OXIDE(S);100ohm,5%,1W,AF,TP,2.5x Samsung Electronics 7-41...
- Page 97 3301-000287 CORE-FERRITE BEAD;AA,3.5x1.0x6.0mm,1500, ..5 C598 2201-000551 C-CERAMIC,DISC;0.47NF,10%,1KV,Y5P,TP,6.3 ..5 G101 3301-000287 CORE-FERRITE BEAD;AA,3.5x1.0x6.0mm,1500, ..5 C598 2201-000551 C-CERAMIC,DISC;0.47NF,10%,1KV,Y5P,TP,6.3 ..5 G101 3301-000287 CORE-FERRITE BEAD;AA,3.5x1.0x6.0mm,1500, ..5 C598 2201-000551 C-CERAMIC,DISC;0.47NF,10%,1KV,Y5P,TP,6.3 ..5 G101 3301-000287 CORE-FERRITE BEAD;AA,3.5x1.0x6.0mm,1500, ..5 C598 2201-000551 C-CERAMIC,DISC;0.47NF,10%,1KV,Y5P,TP,6.3 ..5 G101 3301-000287 CORE-FERRITE BEAD;AA,3.5x1.0x6.0mm,1500, 7-42 Samsung Electronics...
- Page 98 6042-000002 EYELET;ID1.5,OD2,L2.8,NI+SN,BSP3-1/2H S.N.A ..5 EY138 6042-000002 EYELET;ID1.5,OD2,L2.8,NI+SN,BSP3-1/2H S.N.A ..5 EY26 6042-000002 EYELET;ID1.5,OD2,L2.8,NI+SN,BSP3-1/2H S.N.A ..5 EY155 6042-000002 EYELET;ID1.5,OD2,L2.8,NI+SN,BSP3-1/2H S.N.A ..5 EY25 6042-000002 EYELET;ID1.5,OD2,L2.8,NI+SN,BSP3-1/2H S.N.A ..5 EY154 6042-000002 EYELET;ID1.5,OD2,L2.8,NI+SN,BSP3-1/2H S.N.A ..5 EY24 6042-000002 EYELET;ID1.5,OD2,L2.8,NI+SN,BSP3-1/2H S.N.A ..5 EY153 6042-000002 EYELET;ID1.5,OD2,L2.8,NI+SN,BSP3-1/2H S.N.A Samsung Electronics 7-43...
- Page 99 ..5 Q409 0505-000109 FET-SILICON;2N7000,N,60V,200mA,5ohm,400m ..6R906 2007-000084 R-CHIP;4.7Kohm,5%,1/10W,TP,1608 ..5 Q409 0505-000109 FET-SILICON;2N7000,N,60V,200mA,5ohm,400m ..6R908 2007-000084 R-CHIP;4.7Kohm,5%,1/10W,TP,1608 ..5 IC904 1203-001943 IC-VOL. DETECTOR;7025,TO-92,3P,-,PLASTIC ..6R955 2007-000084 R-CHIP;4.7Kohm,5%,1/10W,TP,1608 ..5 X901 2801-004071 CRYSTAL-UNIT;6MHZ,30PPM,28-AAM,20PF,40OH ..6R954 2007-000084 R-CHIP;4.7Kohm,5%,1/10W,TP,1608 ..5 CN901 3703-001175 CONNECTOR-BACK PANEL;64P,2R,MALE,ANGLE,A ..6R928 2007-000084 R-CHIP;4.7Kohm,5%,1/10W,TP,1608 7-44 Samsung Electronics...
- Page 100 1203-000293 IC-POSI.FIXED REG.;7808,TO-220,3P,-,PLAS ..6ER05 2007-000070 R-CHIP;0ohm,5%,1/10W,TP,1608 ..5 T0123 1203-002003 IC-VOLTAGE REGULATOR;278R09,TO-220,4P,-, ..6ER06 2007-000070 R-CHIP;0ohm,5%,1/10W,TP,1608 ..5 T0081 6003-000334 SCREW-TAPTITE;RH,+,2S,M3,L6,ZPC(YEL),SWR ..6ER13 2007-000070 R-CHIP;0ohm,5%,1/10W,TP,1608 ..5 AA62-00066B HEAT SINK;D2,D3,AL ,T1.0,89,70,-,AA62-00 S.N.A ..6ER19 2007-000070 R-CHIP;0ohm,5%,1/10W,TP,1608 ..5 T0123 1203-001978 IC-VOLTAGE REGULATOR;KA278RA05,TO-220F,4 ..6ER18 2007-000070 R-CHIP;0ohm,5%,1/10W,TP,1608 Samsung Electronics 7-45...
- Page 101 2203-000181 C-CERAMIC,CHIP;100nF,+80-20%,25V,Y5V,TP, ..6FR60 2007-000090 R-CHIP;10Kohm,5%,1/10W,TP,1608 ..6C120 2203-000181 C-CERAMIC,CHIP;100nF,+80-20%,25V,Y5V,TP, ..6FR22 2007-000090 R-CHIP;10Kohm,5%,1/10W,TP,1608 ..6C120 2203-000181 C-CERAMIC,CHIP;100nF,+80-20%,25V,Y5V,TP, ..6FR09 2007-000090 R-CHIP;10Kohm,5%,1/10W,TP,1608 ..6C120 2203-000181 C-CERAMIC,CHIP;100nF,+80-20%,25V,Y5V,TP, ..6FR58 2007-000092 R-CHIP;15Kohm,5%,1/10W,TP,1608 ..6C120 2203-000181 C-CERAMIC,CHIP;100nF,+80-20%,25V,Y5V,TP, ..6ER24 2007-000097 R-CHIP;47Kohm,5%,1/10W,TP,1608 ..6C120 2203-000181 C-CERAMIC,CHIP;100nF,+80-20%,25V,Y5V,TP, ..6ER25 2007-000097 R-CHIP;47Kohm,5%,1/10W,TP,1608 ..6C120 2203-000181 C-CERAMIC,CHIP;100nF,+80-20%,25V,Y5V,TP, 7-46 Samsung Electronics...
- Page 102 3703-001124 CONNECTOR-BACK PANEL;32P,2R,MALE,ANGLE,A ..6C120 2203-002494 C-CERAMIC,CHIP;470nF,10%,16V,X7R,TP,2012 ..5 CN906 3711-003601 CONNECTOR-HEADER;BOX,12P,1R,2.5mm,ANGLE, ..6C120 2203-002494 C-CERAMIC,CHIP;470nF,10%,16V,X7R,TP,2012 ..5 BP97-00513D ASSY SMD;,P55A,CG MOD S.N.A ..6C120 2203-002494 C-CERAMIC,CHIP;470nF,10%,16V,X7R,TP,2012 ..6D13 0401-000160 DIODE-SWITCHING;ISS314,30V,100mA,USC,TP ..6C120 2203-002494 C-CERAMIC,CHIP;470nF,10%,16V,X7R,TP,2012 ..6D12 0401-000160 DIODE-SWITCHING;ISS314,30V,100mA,USC,TP ..6C120 2203-002494 C-CERAMIC,CHIP;470nF,10%,16V,X7R,TP,2012 ..6D11 0401-000160 DIODE-SWITCHING;ISS314,30V,100mA,USC,TP Samsung Electronics 7-47...
- Page 103 2007-000124 R-CHIP;2.2Kohm,5%,1/10W,TP,1608 ..6R62 2007-000078 R-CHIP;1Kohm,5%,1/10W,TP,1608 ..6R120 2007-000124 R-CHIP;2.2Kohm,5%,1/10W,TP,1608 ..6R64 2007-000078 R-CHIP;1Kohm,5%,1/10W,TP,1608 ..6R90 2007-000133 R-CHIP;330Kohm,5%,1/10W,TP,1608 ..6R68 2007-000078 R-CHIP;1Kohm,5%,1/10W,TP,1608 ..6R89 2007-000133 R-CHIP;330Kohm,5%,1/10W,TP,1608 ..6R58 2007-000078 R-CHIP;1Kohm,5%,1/10W,TP,1608 ..6R88 2007-000133 R-CHIP;330Kohm,5%,1/10W,TP,1608 ..6R56 2007-000078 R-CHIP;1Kohm,5%,1/10W,TP,1608 ..6R87 2007-000133 R-CHIP;330Kohm,5%,1/10W,TP,1608 ..6R52 2007-000078 R-CHIP;1Kohm,5%,1/10W,TP,1608 ..6R108 2007-000381 R-CHIP;13Kohm,5%,1/10W,TP,1608 7-48 Samsung Electronics...
- Page 104 2001-000660 R-CARBON;33KOHM,5%,1/8W,AA,TP,1.8X3.2MM ..6C120 2203-000357 C-CERAMIC,CHIP;0.15NF,5%,50V,C0G,TP,1608 ..5 R125 2001-000734 R-CARBON;4.7KOHM,5%,1/8W,AA,TP,1.8X3.2MM ..6C120 2203-000357 C-CERAMIC,CHIP;0.15NF,5%,50V,C0G,TP,1608 ..5 R125 2001-000734 R-CARBON;4.7KOHM,5%,1/8W,AA,TP,1.8X3.2MM ..6C120 2203-000440 C-CERAMIC,CHIP;1nF,10%,50V,X7R,TP,1608,- ..5 R125 2001-000734 R-CARBON;4.7KOHM,5%,1/8W,AA,TP,1.8X3.2MM ..6C120 2203-000575 C-CERAMIC,CHIP;220NF,10%,25V,X7R,TP,2012 ..5 R125 2001-000739 R-CARBON;4.7MOHM,5%,1/8W,AA,TP,1.8X3.2MM ..6C120 2203-000575 C-CERAMIC,CHIP;220NF,10%,25V,X7R,TP,2012 ..5 R125 2001-000739 R-CARBON;4.7MOHM,5%,1/8W,AA,TP,1.8X3.2MM Samsung Electronics 7-49...
- Page 105 0403-001016 DIODE-ZENER;RLZ6.2B,5.96-6.27V,500MW,LL- ..5 C701 2401-000962 C-AL;22uF,20%,50V,GP,TP,5x11,5 ..6DZ016 0403-001016 DIODE-ZENER;RLZ6.2B,5.96-6.27V,500MW,LL- ..5 C701 2401-000962 C-AL;22uF,20%,50V,GP,TP,5x11,5 ..6DZ016 0403-001117 DIODE-ZENER;RLZ12B,5%,500mW,LL-34,TP ..5 C701 2401-000962 C-AL;22uF,20%,50V,GP,TP,5x11,5 ..6DZ016 0403-001117 DIODE-ZENER;RLZ12B,5%,500mW,LL-34,TP ..5 C701 2401-000962 C-AL;22uF,20%,50V,GP,TP,5x11,5 ..6DZ016 0403-001117 DIODE-ZENER;RLZ12B,5%,500mW,LL-34,TP ..5 C701 2401-001192 C-AL;33uF,20%,50V,GP,TP,6.3x11,5 ..6Q703 0501-000344 TR-SMALL SIGNAL;KSC1623-G,NPN,200mW,SOT- 7-50 Samsung Electronics...
- Page 106 2007-001167 R-CHIP;75ohm,5%,1/10W,TP,1608 ..6R630 2007-000078 R-CHIP;1Kohm,5%,1/10W,TP,1608 ..6R137 2007-001167 R-CHIP;75ohm,5%,1/10W,TP,1608 ..6R629 2007-000078 R-CHIP;1Kohm,5%,1/10W,TP,1608 ..6R138 2007-001167 R-CHIP;75ohm,5%,1/10W,TP,1608 ..6R628 2007-000078 R-CHIP;1Kohm,5%,1/10W,TP,1608 ..6R702 2007-001167 R-CHIP;75ohm,5%,1/10W,TP,1608 ..6R603 2007-000078 R-CHIP;1Kohm,5%,1/10W,TP,1608 ..6R792 2007-001167 R-CHIP;75ohm,5%,1/10W,TP,1608 ..6R106 2007-000078 R-CHIP;1Kohm,5%,1/10W,TP,1608 ..6R613 2007-001179 R-CHIP;8.2Kohm,5%,1/10W,TP,1608 ..6R633 2007-000078 R-CHIP;1Kohm,5%,1/10W,TP,1608 ..6R606 2007-001179 R-CHIP;8.2Kohm,5%,1/10W,TP,1608 Samsung Electronics 7-51...
- Page 107 2203-000206 C-CERAMIC,CHIP;100nF,10%,50V,X7R,TP,2012 ..4 RZ131A 2003-002171 R-METAL OXIDE(S);150ohm,5%,2W,AG,TP,3.9x ..6C120 2203-000206 C-CERAMIC,CHIP;100nF,10%,50V,X7R,TP,2012 ..4 RZ131 2003-002171 R-METAL OXIDE(S);150ohm,5%,2W,AG,TP,3.9x ..6C120 2203-000206 C-CERAMIC,CHIP;100nF,10%,50V,X7R,TP,2012 ..4 RZ130A 2003-002171 R-METAL OXIDE(S);150ohm,5%,2W,AG,TP,3.9x ..6C120 2203-000206 C-CERAMIC,CHIP;100nF,10%,50V,X7R,TP,2012 ..4 RFZ50 2008-000261 R-FUSIBLE(S);150ohm,5%,1W,AF,TP,3.9x10mm ..6C120 2203-000206 C-CERAMIC,CHIP;100nF,10%,50V,X7R,TP,2012 ..4 RFZ51 2008-000261 R-FUSIBLE(S);150ohm,5%,1W,AF,TP,3.9x10mm 7-52 Samsung Electronics...
- Page 108 ...3 CN906 3711-002648 CONNECTOR-HEADER;BOX,9P,1R,2.5mm,STRAIGH ..4 R125 2001-000290 R-CARBON;10KOHM,5%,1/8W,AA,TP,1.8X3.2MM ...3 CN906 3711-003052 CONNECTOR-HEADER;BOX,10P,1R,2.5MM,STRAIG ..4 R125 2001-000429 R-CARBON;1KOHM,5%,1/8W,AA,TP,1.8X3.2MM ...3 CN906 3711-003052 CONNECTOR-HEADER;BOX,10P,1R,2.5MM,STRAIG ..4 R125 2001-000429 R-CARBON;1KOHM,5%,1/8W,AA,TP,1.8X3.2MM ...3 CN906 3711-003973 CONNECTOR-HEADER;BOX,11P,1R,2.5mm,STRAIG ..4 R125 2001-000429 R-CARBON;1KOHM,5%,1/8W,AA,TP,1.8X3.2MM ...3 CN906 3711-003973 CONNECTOR-HEADER;BOX,11P,1R,2.5mm,STRAIG ..4 R125 2001-000429 R-CARBON;1KOHM,5%,1/8W,AA,TP,1.8X3.2MM Samsung Electronics 7-53...
- Page 109 2201-000983 C-CERAMIC,DISC;1NF,10%,2KV,Y5P,TP,9X5MM, ..4 DZ016 0403-000334 DIODE-ZENER;UZ2.7BSA,2.7V,2.54-2.75V,500 ..4 C598 2201-000983 C-CERAMIC,DISC;1NF,10%,2KV,Y5P,TP,9X5MM, ..4 R566 2001-001049 R-CARBON(S);1.3KOHM,5%,1/2W,AA,TP,2.4X6..4 C565 2305-000149 C-FILM,MPEF;100nF,5%,100V,TP,12x12.5x6.5 ..4 R536 2001-001049 R-CARBON(S);1.3KOHM,5%,1/2W,AA,TP,2.4X6..4 C535 2305-000149 C-FILM,MPEF;100nF,5%,100V,TP,12x12.5x6.5 ..4 R506 2001-001049 R-CARBON(S);1.3KOHM,5%,1/2W,AA,TP,2.4X6..4 C505 2305-000149 C-FILM,MPEF;100nF,5%,100V,TP,12x12.5x6.5 ..4 R125 2001-000007 R-CARBON;3KOHM,5%,1/8W,AA,TP,1.8X3.2MM 7-54 Samsung Electronics...
- Page 110 AA61-00793E HOLDER-SIDE AV;47H1,ABS HB,GRAY,SV-704P S.N.A ..4 RZ123 2003-002157 R-METAL OXIDE;220OHM,5%,2W,AG,TP,6X16MM ..4 T0150 AA64-02085F DOOR-AV;H1,ABS HB,GRAY,SV-704P ..4 RZ113 2003-002157 R-METAL OXIDE;220OHM,5%,2W,AG,TP,6X16MM ..4 AA64-02086F INLAY-AV;W3,PS SHEET,T0.5,P54A XAC S.N.A ..4 RZ112 2003-002157 R-METAL OXIDE;220OHM,5%,2W,AG,TP,6X16MM ...3 AA97-07429A ASSY AUTO-A/V FRONT;HCM4215WX/XAA,P55A S.N.A Samsung Electronics 7-55...
- Page 111 AA67-10008A LENS;-,DELTA,RED,PJT,-,77,79,- ...3 BP61-00079A HOLDER-DY;,PJTV,T0.5,NYLON66 V2 S.N.A ...3 AA61-00845A CASE-COUPLER,R;DP,PROJ,AA61-00806B S.N.A ..4 AA61-00806B CASE-COUPLER,R;PROJ,ALDC,T8,BLK S.N.A ..4 AA63-10007C BAND-PP;W18,CLEA,1G S.N.A ...3 T0107 AA91-00735A ASSY-BRKT,CRT;DP,AA91-00722A,PROJ ..4 T0107 AA91-00722A ASSY-BRKT,CRT;,SECC T1.6,PROJ ..5 T0072 AA61-00473B BRACKET-CRT;53,SECC,T1.6,-,-,-,- S.N.A ..5 AA61-00615B BRACKET-EARTH;54J8,PBS,T0.5,-,-,-,- S.N.A 7-56 Samsung Electronics...
- Page 112 Electrical Parts List You can search for the updated part code through ITSELF web site. URL : http://itself.sec.samsung.co.kr 7-4 HCN4727W5S/XAA Loc. No. Code No. Description ; Specification Remark Loc. No. Code No. Description ; Specification Remark ASSY SKD PART ...3 BP61-00075A HOLDER-JERSEY,ASSY;W3,ABS V0,GRAY,63-000...
- Page 113 0403-001375 DIODE-ZENER;RLZ3.6B,3.6-3.845V,500mW,LL- ..6 R941 2007-000123 R-CHIP;1.5Kohm,5%,1/10W,TP,1608 ..6 DZ016 0403-001375 DIODE-ZENER;RLZ3.6B,3.6-3.845V,500mW,LL- ..6 R914 2007-000123 R-CHIP;1.5Kohm,5%,1/10W,TP,1608 ..6 DZ016 0403-001375 DIODE-ZENER;RLZ3.6B,3.6-3.845V,500mW,LL- ..6 R988 2007-000290 R-CHIP;100ohm,5%,1/8W,TP,2012 ..6 DZ016 0403-001375 DIODE-ZENER;RLZ3.6B,3.6-3.845V,500mW,LL- ..6 R962 2007-000583 R-CHIP;22Kohm,1%,1/10W,TP,1608 ..6 DZ016 0403-001375 DIODE-ZENER;RLZ3.6B,3.6-3.845V,500mW,LL- ..6 R961 2007-000939 R-CHIP;47Kohm,1%,1/10W,TP,1608 7-58 Samsung Electronics...
- Page 114 2305-000011 C-FILM,MPEF;470nF,5%,250V,TP,21.5X13.0X7 ..6 SR10 2007-000074 R-CHIP;100ohm,5%,1/10W,TP,1608 ..5 FC59 2305-000704 C-FILM,MPEF;100nF,5%,250V,TP,16.5x10.3x5 ..6 SR11 2007-000074 R-CHIP;100ohm,5%,1/10W,TP,1608 ..5 FC58 2309-000138 C-FILM,PE-PPF;100nF,5%,50V,TP,20x16x8.5, ..6 SR02 2007-000074 R-CHIP;100ohm,5%,1/10W,TP,1608 ..5 EX01 2801-004019 CRYSTAL-UNIT;20.25MHz,30ppm,28-AAM,13pF, ..6 FR71 2007-000074 R-CHIP;100ohm,5%,1/10W,TP,1608 ..5 T0122 2802-001177 RESONATOR-CERAMIC;2.696MHZ,0.4%,BK,10X4..6 FR74 2007-000074 R-CHIP;100ohm,5%,1/10W,TP,1608 Samsung Electronics 7-59...
- Page 115 2007-000097 R-CHIP;47Kohm,5%,1/10W,TP,1608 ..6 C120 2203-000181 C-CERAMIC,CHIP;100nF,+80-20%,25V,Y5V,TP, ..6 FR63 2007-000118 R-CHIP;390ohm,5%,1/10W,TP,1608 ..6 C120 2203-000181 C-CERAMIC,CHIP;100nF,+80-20%,25V,Y5V,TP, ..6 FR70 2007-000124 R-CHIP;2.2Kohm,5%,1/10W,TP,1608 ..6 C120 2203-000206 C-CERAMIC,CHIP;100nF,10%,50V,X7R,TP,2012 ..6 FR47 2007-000124 R-CHIP;2.2Kohm,5%,1/10W,TP,1608 ..6 C120 2203-000206 C-CERAMIC,CHIP;100nF,10%,50V,X7R,TP,2012 ..6 FR46 2007-000124 R-CHIP;2.2Kohm,5%,1/10W,TP,1608 ..6 C120 2203-000257 C-CERAMIC,CHIP;10nF,10%,50V,X7R,TP,1608 7-60 Samsung Electronics...
- Page 116 2203-005384 C-CERAMIC,CHIP;4700nF,+80-20%,10V,Y5V,TP ..6 D02 0401-000160 DIODE-SWITCHING;ISS314,30V,100mA,USC,TP ..6 C120 2203-005809 C-CERAMIC,CHIP;1000nF,10%,16V,X7R,TP,201 ..6 D03 0401-000160 DIODE-SWITCHING;ISS314,30V,100mA,USC,TP ..6 FC09 2402-000170 C-AL,SMD;1uF,20%,50V,GP,TP,4.3x4.3x5.4, ..6 D04 0401-000160 DIODE-SWITCHING;ISS314,30V,100mA,USC,TP ..6 PC18 2402-000173 C-AL,SMD;4.7uF,20%,35V,GP,TP,4.3x4.3x5..6 D05 0401-000160 DIODE-SWITCHING;ISS314,30V,100mA,USC,TP ..6 FC60 2402-000173 C-AL,SMD;4.7uF,20%,35V,GP,TP,4.3x4.3x5..6 D09 0401-000160 DIODE-SWITCHING;ISS314,30V,100mA,USC,TP Samsung Electronics 7-61...
- Page 117 2007-000078 R-CHIP;1Kohm,5%,1/10W,TP,1608 ..6 R26 2007-001167 R-CHIP;75ohm,5%,1/10W,TP,1608 ..6 R37 2007-000078 R-CHIP;1Kohm,5%,1/10W,TP,1608 ..6 R116 2007-001179 R-CHIP;8.2Kohm,5%,1/10W,TP,1608 ..6 R110 2007-000078 R-CHIP;1Kohm,5%,1/10W,TP,1608 ..6 RN04 2011-000585 R-NETWORK;47OHM,5%,1/16W,L,CHIP,8P,TP ..6 R11 2007-000078 R-CHIP;1Kohm,5%,1/10W,TP,1608 ..6 RN05 2011-000585 R-NETWORK;47OHM,5%,1/16W,L,CHIP,8P,TP ..6 R101 2007-000078 R-CHIP;1Kohm,5%,1/10W,TP,1608 ..6 RN06 2011-000585 R-NETWORK;47OHM,5%,1/16W,L,CHIP,8P,TP 7-62 Samsung Electronics...
- Page 118 2203-001071 C-CERAMIC,CHIP;0.056NF,5%,50V,C0G,TP,160 ..5 R125 2001-000812 R-CARBON;5.6KOHM,5%,1/8W,AA,TP,1.8X3.2MM ..6 C120 2203-001071 C-CERAMIC,CHIP;0.056NF,5%,50V,C0G,TP,160 ..5 R125 2001-001000 R-CARBON;82KOHM,5%,1/8W,AA,TP,1.8X3.2MM ..6 C120 2203-001071 C-CERAMIC,CHIP;0.056NF,5%,50V,C0G,TP,160 ..5 R801 2001-001077 R-CARBON(S);150OHM,5%,1/2W,AA,TP,2.4X6.4 ..6 C120 2203-001083 C-CERAMIC,CHIP;0.005nF,0.1pF,50V,NP0,TP, ..5 R674 2001-001103 R-CARBON(S);20KOHM,5%,1/2W,AA,TP,2.4X6.4 ..6 C120 2203-001083 C-CERAMIC,CHIP;0.005nF,0.1pF,50V,NP0,TP, ..5 R677 2001-001103 R-CARBON(S);20KOHM,5%,1/2W,AA,TP,2.4X6.4 Samsung Electronics 7-63...
- Page 119 ..6 IC106 1001-001177 IC-VIDEO SWITCH;TEA6425D,VIDEO SWITCH ,S ..5 C701 2401-002075 C-AL;4.7uF,20%,50V,GP,TP,5x11,5 ..6 IC106 1001-001177 IC-VIDEO SWITCH;TEA6425D,VIDEO SWITCH ,S ..5 C701 2401-002075 C-AL;4.7uF,20%,50V,GP,TP,5x11,5 ..6 IC605 1001-001178 IC-AUDIO SWITCH;TEA6422D,AUDIO SWITCH ,S ..5 C701 2401-002075 C-AL;4.7uF,20%,50V,GP,TP,5x11,5 ..6 IC704 1002-001048 IC-A/D&D/A CONVERTER;PCF8591T,8BIT,SOP,1 7-64 Samsung Electronics...
- Page 120 2007-000078 R-CHIP;1Kohm,5%,1/10W,TP,1608 ..6 R606 2007-001179 R-CHIP;8.2Kohm,5%,1/10W,TP,1608 ..6 R106 2007-000078 R-CHIP;1Kohm,5%,1/10W,TP,1608 ..6 C120 2203-000140 C-CERAMIC,CHIP;1.5nF,10%,50V,X7R,TP,1608 ..6 R631 2007-000078 R-CHIP;1Kohm,5%,1/10W,TP,1608 ..6 C120 2203-000140 C-CERAMIC,CHIP;1.5nF,10%,50V,X7R,TP,1608 ..6 R636 2007-000078 R-CHIP;1Kohm,5%,1/10W,TP,1608 ..6 C120 2203-000181 C-CERAMIC,CHIP;100nF,+80-20%,25V,Y5V,TP, ..6 R635 2007-000078 R-CHIP;1Kohm,5%,1/10W,TP,1608 ..6 C120 2203-000181 C-CERAMIC,CHIP;100nF,+80-20%,25V,Y5V,TP, Samsung Electronics 7-65...
- Page 121 AA96-00243E ASSY H/S;-,SOUND,AA62-00045A,FMG-G26S S.N.A ..6 C120 2203-005590 C-CERAMIC,CHIP;330NF,10%,16V,X7R,TP,2012 ..5 0205-000129 GREASE-SILICON;SC102,JAPAN S.N.A ..6 C120 2203-005590 C-CERAMIC,CHIP;330NF,10%,16V,X7R,TP,2012 ..5 T0083 0402-000231 DIODE-RECTIFIER;FMG-G26S,600V,4A,TO-220F ..6 L701 2703-000398 INDUCTOR-SMD;10uH,10%,3.2x2.5x2.2mm ..5 T0081 6003-000335 SCREW-TAPTITE;RH,+,2S,M3,L8,ZPC(YEL),SWR S.N.A ..6 L707 2703-000398 INDUCTOR-SMD;10uH,10%,3.2x2.5x2.2mm ..5 AA62-00045A HEAT SINK-PS;-,-,T1.0,-,-,DREAM,-,-,-,-, S.N.A 7-66 Samsung Electronics...
- Page 122 0403-000720 DIODE-ZENER;MTZJ9.1B,9.1V,8.57-9.01V,500 ..5 R125 2001-000577 R-CARBON;2KOHM,5%,1/8W,AA,TP,1.8X3.2MM ..5 DZ016 0403-000720 DIODE-ZENER;MTZJ9.1B,9.1V,8.57-9.01V,500 ..5 R125 2001-000577 R-CARBON;2KOHM,5%,1/8W,AA,TP,1.8X3.2MM ..5 DZ016 0403-000720 DIODE-ZENER;MTZJ9.1B,9.1V,8.57-9.01V,500 ..5 R125 2001-000613 R-CARBON;3.9KOHM,5%,1/8W,AA,TP,1.8X3.2MM ..5 DZ016 0403-000734 DIODE-ZENER;TZP15B,15V,14.7-16.5V,1W,DO- ..5 R125 2001-000613 R-CARBON;3.9KOHM,5%,1/8W,AA,TP,1.8X3.2MM ..5 DZ016 0403-001167 DIODE-ZENER;MTZJ30D,30V,29.02-30.51V,500 ..5 R125 2001-000734 R-CARBON;4.7KOHM,5%,1/8W,AA,TP,1.8X3.2MM Samsung Electronics 7-67...
- Page 123 2008-000253 R-FUSIBLE(S);0.47ohm,5%,1W,AF,TP,3.9x10m ..5 C701 2401-000365 C-AL;100uF,20%,50V,WT,TP,10x12.5mm, ..5 R441 2008-000253 R-FUSIBLE(S);0.47ohm,5%,1W,AF,TP,3.9x10m ..5 C701 2401-000480 C-AL;10uF,20%,50V,GP,TP,5x11,5 ..5 R442 2008-000253 R-FUSIBLE(S);0.47ohm,5%,1W,AF,TP,3.9x10m ..5 C701 2401-000603 C-AL;1UF,20%,50V,GP,TP,5X11,2 ..5 R442A 2008-000253 R-FUSIBLE(S);0.47ohm,5%,1W,AF,TP,3.9x10m ..5 C701 2401-000660 C-AL;2.2uF,20%,50V,GP,TP,5x11,5 ..5 R440 2008-000282 R-FUSIBLE;0.47ohm,5%,1W,AA,TP,3.9x12mm ..5 C701 2401-000698 C-AL;2200uF,20%,16V,WT,TP,12.5x25,5 7-68 Samsung Electronics...
- Page 124 6042-000001 EYELET;ID2.2,OD2.7,L3.1,NI+SN,BSP3-1/2H S.N.A ..5 EY111 6042-000002 EYELET;ID1.5,OD2,L2.8,NI+SN,BSP3-1/2H S.N.A ..5 EL01 6042-000001 EYELET;ID2.2,OD2.7,L3.1,NI+SN,BSP3-1/2H S.N.A ..5 EY11 6042-000002 EYELET;ID1.5,OD2,L2.8,NI+SN,BSP3-1/2H S.N.A ..5 EY39 6042-000001 EYELET;ID2.2,OD2.7,L3.1,NI+SN,BSP3-1/2H S.N.A ..5 EY109 6042-000002 EYELET;ID1.5,OD2,L2.8,NI+SN,BSP3-1/2H S.N.A ..5 EL16 6042-000001 EYELET;ID2.2,OD2.7,L3.1,NI+SN,BSP3-1/2H S.N.A ..5 EY108 6042-000002 EYELET;ID1.5,OD2,L2.8,NI+SN,BSP3-1/2H S.N.A Samsung Electronics 7-69...
- Page 125 ..4 R125 2001-000221 R-CARBON;1.2KOHM,5%,1/8W,AA,TP,1.8X3.2MM ..5 0 AA41-00598D PCB-SUB;HCM4215W,CEM-1,1L,D,1.6T,330X245 S.N.A ..4 R125 2001-000221 R-CARBON;1.2KOHM,5%,1/8W,AA,TP,1.8X3.2MM ..5 R024 2004-005051 R-METAL(S);2.2KOHM,1%,1/2W,AA,TP,2.4X6.4 ..4 R125 2001-000241 R-CARBON;1.5KOHM,5%,1/8W,AA,TP,1.8X3.2MM ..5 RS801S 3601-000102 FUSE-AXIAL LEAD;125V,1A,FAST-ACTING,GLAS ..4 R125 2001-000241 R-CARBON;1.5KOHM,5%,1/8W,AA,TP,1.8X3.2MM ..5 R840 2001-001045 R-CARBON(S);1.2KOHM,5%,1/2W,AA,TP,2.4X6..4 R125 2001-000258 R-CARBON;1.8KOHM,5%,1/8W,AA,TP,1.8X3.2MM 7-70 Samsung Electronics...
- Page 126 AA96-50311L ASSY H/S;-,AMP,AA62-30175D ,TDA6111Q,HE S.N.A ..4 R370 2001-001065 R-CARBON(S);110KOHM,5%,1/2W,AA,TP,2.4X6..3 IC531 AA96-50311L ASSY H/S;-,AMP,AA62-30175D ,TDA6111Q,HE S.N.A ..4 R369A 2001-001065 R-CARBON(S);110KOHM,5%,1/2W,AA,TP,2.4X6..3 IC561 AA96-50311L ASSY H/S;-,AMP,AA62-30175D ,TDA6111Q,HE S.N.A ..4 R367 2001-001065 R-CARBON(S);110KOHM,5%,1/2W,AA,TP,2.4X6..4 T0074 1201-001131 IC-VIDEO AMP;6111,SIP,9P,-,SINGLE,-,PLAS ..4 R368 2001-001065 R-CARBON(S);110KOHM,5%,1/2W,AA,TP,2.4X6. Samsung Electronics 7-71...
- Page 127 ..4 L501 2701-000114 INDUCTOR-AXIAL;10uH,10%,2.5x3.4mm ..4 PCB AA41-00600E PCB-CRT;HCM4215W,FR-1,1L,E,1.6T,245X197( S.N.A ..4 SG561 4715-001036 SURGE ABSORBER;500V,20%,-,-,TP ..4 T0083 0402-000243 DIODE-RECTIFIER;RC2-V1,2000V,0.2A,DO-201 ..4 SG563 4715-001036 SURGE ABSORBER;500V,20%,-,-,TP ...3 T0076 BP39-00004B LEAD CONNECTOR-ASSY;P55A/HCM4215W,UL3239 ..4 SG533 4715-001036 SURGE ABSORBER;500V,20%,-,-,TP ...3 T0076 BP39-00004C LEAD CONNECTOR-ASSY;P55A/HCM4215W,UL3239 7-72 Samsung Electronics...
- Page 128 ..4 RZ123 2003-002148 R-METAL OXIDE;3.9OHM,2%,2W,AF,TP,3.9X10M ..4 CIS BP62-00002A HEAT SINK;COMMANDO,A1050P,T2.0,W62.0,H14 S.N.A ..4 RZ124 2003-002148 R-METAL OXIDE;3.9OHM,2%,2W,AF,TP,3.9X10M ..4 CIS BP62-00008A HEAT SINK;COMMANDO CG AMP,AL6063,T2.0,W1 S.N.A ..4 RZ125 2003-002148 R-METAL OXIDE;3.9OHM,2%,2W,AF,TP,3.9X10M ..4 CIS BP73-00002A SILICON/RUBBER;COMMANDO CG AMP,SILICON , S.N.A Samsung Electronics 7-73...
- Page 129 3301-001593 CORE-FERRITE BEAD;AB,200OHM,2.0X1.2X1.3M ..4 DR902 2007-000102 R-CHIP;100Kohm,5%,1/10W,TP,1608 ..4 G101 3301-001593 CORE-FERRITE BEAD;AB,200OHM,2.0X1.2X1.3M ..4 C120 2203-000041 C-CERAMIC,CHIP;0.01NF,0.25PF,50V,C0G,TP, ..4 G101 3301-001593 CORE-FERRITE BEAD;AB,200OHM,2.0X1.2X1.3M ..4 C120 2203-000041 C-CERAMIC,CHIP;0.01NF,0.25PF,50V,C0G,TP, ..4 G101 3301-001593 CORE-FERRITE BEAD;AB,200OHM,2.0X1.2X1.3M ..4 C120 2203-000041 C-CERAMIC,CHIP;0.01NF,0.25PF,50V,C0G,TP, ..4 DR705 2007-000070 R-CHIP;0ohm,5%,1/10W,TP,1608 7-74 Samsung Electronics...
- Page 130 ..4 AA63-10007C BAND-PP;W18,CLEA,1G S.N.A ...3 T0107 AA91-00735A ASSY-BRKT,CRT;DP,AA91-00722A,PROJ ..4 T0107 AA91-00722A ASSY-BRKT,CRT;,SECC T1.6,PROJ ..5 T0072 AA61-00473B BRACKET-CRT;53,SECC,T1.6,-,-,-,- S.N.A ..5 AA61-00615B BRACKET-EARTH;54J8,PBS,T0.5,-,-,-,- S.N.A ..5 AA61-00812A SPRING ETC-WIRE;PROJ,STS,3.6 S.N.A T0027 BP98-00175A ASSY K/D-CRT G;HCN4727WSC/XAA,P55A ...3 AA03-00201A CRT MONO;P16LSG03HKA,FREE,3.30mH,2.20mH, S.N.A Samsung Electronics 7-75...
- Page 131 MEMO 7-76 Samsung Electronics...
Need help?
Do you have a question about the PCL6215R and is the answer not in the manual?
Questions and answers