Table of Contents
Advertisement
Advertisement
Table of Contents

Related Manuals for Emtec Movie Cube S120H


Summary of Contents for Emtec Movie Cube S120H
- Page 1 Home Multimedia Center Movie Cube S120H User’s Manual (Version 1.0)
-
Page 2: Table Of Contents
Table of Contents 1. Introduction.......................... 4 1.1 Preface........................4 1.2 Packing List......................... 5 1.3 Cautions ........................5 1.4 Connection ........................7 1.5 Power On / Off ......................11 1.6 Menu Language ......................11 1.7 HDD Format......................12 2. About the Player ........................ 14 2.1 Remote Control...................... - Page 3 10.3 Copyrights and Trademarks..................52 10.4 Warranty........................52 10.5 License information....................53 3 / 57...
-
Page 4: Introduction
1. Introduction 1.1 Preface Thank you very much for purchasing the product. We hope you will enjoy using it as a great home entertainment partner. This player has the following functionality. A/V Output HDMI V1.3 for high-definition video and digital audio Composite &... -
Page 5: Packing List
You can find forums on the Internet where users respond to most of your questions on all models of Movie Cube such as www.mhdworld.com 1.2 Packing List Part Quantity Player A/V cable USB cable Scart in adaptor Remote Control AC/DC adaptor Quick Installation Guide User Manual (printed) Driver CD (with User Manual) - Page 6 (1) This player may not cause harmful interference; (2) This player could accept some interference received including interference that may cause undesired operation. 1.3.4 Repair If the player has a problem, you should take it to an appointed repair center and let the specialists do the repair, never repair the player yourself, you might damage the player or endanger yourself or your data.
-
Page 7: Connection
1.4 Connection 1.4.1 Connecting the Power Supply (1) Follow the picture and connect the AC adaptor to the player’s DC IN jack; (2) Follow the picture and plug in the AC adaptor to the power outlet. 1.4.2 Connecting to a PC (1) Make sure the player is powered on;... - Page 8 1.4.3 Connecting a USB Device (1) Make sure the player is powered on; (2) Plug in the USB stick or USB HDD etc. to the USB HOST port of this player. In this way, you can browse contents on the USB device. 1.4.4 Connecting to a TV 1.4.4.1 A/V OUT (1) Follow the picture and plug in the 3 color connector to the player’s A/V OUT jack;...
- Page 9 1.4.4.2 Y/Pb/Pr Component OUT (1) Follow the picture and plug in the 3 color connector to the player’s Y/Pb/Pr jack; (2) Follow the picture and plug in the 3 color connector to the TV’s Y/Pb/Pr jack. (3) Select the appropriate TV input source. Audio Connection while using Y/Pb/Pr Video out: First method: use the audio output from the A/V OUT jack;...
- Page 10 1.4.5 Connecting to a Digital Amplifier (1) Follow the picture and plug in the RCA connector on your coaxial cable to the player’s S/PDIF Coaxial jack. Or if you use optical fiber, please plug in the Toslink connector on your optical fiber to the player’s S/PDIF Optical jack;...
-
Page 11: Power On / Off
1.4.7 Connecting to a WLAN (1) Make sure the player is powered on; (2) Plug the Wireless LAN USB Adapter (i.e. Wi-Fi USB Dongle) to the USB HOST port of the player. Note: The Wi-Fi Dongle is an optional accessory sold separately. (Please refer to ‘3.3 Changing Network Settings’... -
Page 12: Hdd Format
1.7 HDD Format For users who wish to install a new SATA HDD into the player, please refer to the following procedures to format the hard disk on the player before usage. Step 1: Select OK on the Warning page, press ENTER to confirm. Note: This page can be also accessed via Setup->System->HDD Format menu. - Page 13 The formatting procedure will be finished within a few minutes. And then you can use the hard disk properly on the player. Note: HDD format will remove all data stored on the hard disk drive. Please take care and backup your data in advance! 13 / 57...
-
Page 14: About The Player
2. About the Player 2.1 Remote Control All procedures in this manual can be carried out using the remote control buttons. See the following for details on each button and its function: shift 2. home 3. menu 4. setup (display) 5. - Page 15 Name Function shift shift button: Press to shift the resolution, setup, repeat, and goto buttons to be zoom, display, * timer, and browser. home home button: Press to view the home screen. menu menu button: Press to activate tools menus: Press in the browser menu to rename and delete files.
- Page 16 Press to mute audio output, and press again to resume. numeric buttons numeric buttons: Press to enter channel numbers or numeric input when changing settings. * time shift * EPG <green> green button: Confirm to add files to the playlists under browser menu. button: Select files in file copy or browser menu.
- Page 17 goto (browser) goto button: Press to jump to a specific point on a title. Specify the point using Title, Chapter and Time. browser button: Press to browse music, photo, and movie files on USB, HDD, and NET. music music button: Press to start playing music in the playlist.
-
Page 18: Front Panel
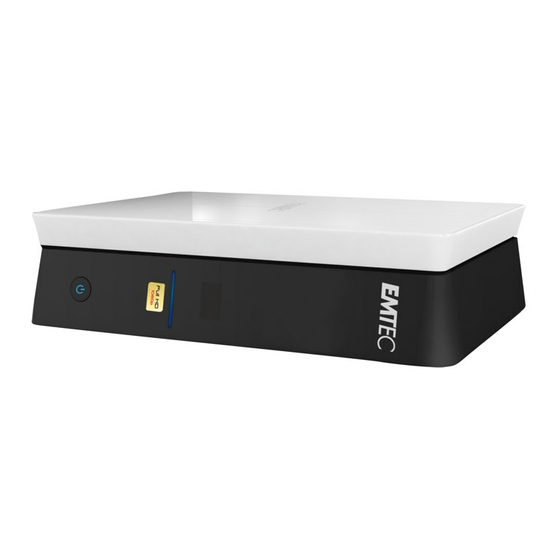
2.2 Front Panel 1. Infrared receiver window 2. Working indicator 3. Power button & indicator 2.3 Rear Panel 1. Air Flow hole 2. USB DEVICE port 3. USB HOST port x 2 4. S/PDIF COAXIAL jack 5. S/PDIF OPTICAL jack 6. -
Page 19: Setup Menu
3. Setup Menu The Setup menu allows you to personalize and configure the preferences for your player. To select a Setup option: Select the Setup icon on the home screen, or press the SETUP button on the remote control. Use the LEFT/RIGHT navigational buttons to select an option, and then press ENTER. There are five Setup options, including Audio, Video, Network, System, and MISC. - Page 20 Aspect Ratio Pan Scan 4:3: Display a wide picture on the entire screen and cuts off the redundant portions. Select when a standard 4:3 TV is connected. Letter Box 4:3: Display a wide picture with two black borders on the top and bottom of 4:3 screen.
-
Page 21: Changing Network Settings
3.3 Changing Network Settings Use this menu to configure Ethernet and WLAN (Wireless Local Area Network) settings. Wired LAN Setup DHCP IP (AUTO) Select to obtain IP address automatically. FIX IP (MANUAL) Select to manually input the IP Address, Subnet Mask, Default Gateway, and DNS Server IP Address. - Page 22 Get Connection Mode Choose between Infrastructure (AP) and Peer to Peer (Ad Hoc). Press ENTER to go to next step, and press RETURN to cancel. Infrastructure (AP) Infrastructure mode is used to connect computers with wireless network adapters, also known as wireless clients, to an existing wired network with the help from wireless router or access point.
- Page 23 Input WEP / WPA Key Encryption keys can be inputted via the virtual keyboard. Press the navigational buttons to select, ENTER to input, CAPS to switch between uppercase and lowercase, <- to delete a character, -> to insert a space, shift to make more symbols available, and OK to confirm. Test connection The testing process will take for a while, please be patient to wait.
-
Page 24: Changing System Settings
Ad-Hoc Setup Press ENTER to go to next step, press RETURN to cancel, and press PLAY to connect. 3.4 Changing System Settings Use this menu to configure system settings. Menu Language Select to choose the OSD (On-Screen Display) language. Text Encoding Select to set the text encoding option (subtitle display). - Page 25 Install / Upgrade 1) Copy the .ipk files (e.g., btpd_0.0.1_mipsel.ipk, samba_3.0.23c_mipsel.ipk, and unicgi_0.0.1_mipsel.ipk) to the root directory of a USB stick, and insert it to the USB HOST port on the player. 2) Select Install / Upgrade and press ENTER to confirm. Uninstall Select Uninstall and press ENTER to confirm.
-
Page 26: Miscellaneous
3.5 Miscellaneous Use this menu to adjust miscellaneous settings. Slide Show Timing Select to set the interval time for photo slide show. Transition Effect Select to set the transition effect for photo slide show. Background Music Select to set the background music options while view pictures: Off / Folder / Playlist. Screen Saver Select to turn on / off screen saver. -
Page 27: Browser Menu
4. Browser Menu The browser menu allows you to browse and play media files stored on Removable Devices (USB, Card), HDD, Network, UPnP-server, and Playlist. To enter the menu, select the Browser icon on the home screen, or press the BROWSER button on the remote control. The following buttons can be used while navigating the browser menu. -
Page 28: Browsing Music
Note: Please refer to chapter ‘9.1 Specifications‘for more about the supported content formats. Muisc tracks might not be able to played continously under All filter, please switch to the Music filter instead. 4.2 Browsing Music In this mode, all folders and supported audio files in current directory will be displayed. The following buttons can be used to control music playback. -
Page 29: Browsing Movies
Button Function PLAY Begin playback. PREV / NEXT View the previous or next photo. LEFT / RIGHT Rotate a photo in any angle. ZOOM IN / OUT Zoom in / out the image. INFO Hide or display the information bar during playback. STOP Stop playback. -
Page 30: A/V Streaming Via Network
CM SKIP Advance 30 seconds of the current playback. AUDIO Select an audio track while watching BivX video or DVD with multiple audio tracks. SUBTITLE Set subtitle options. Stop playback. STOP 4.5 A/V Streaming via Network You can stream the media files shared on the home network (Ethernet or WLAN). Please refer to ’3.3 Changing Network Settings’... - Page 31 Note: While browsing high definition video files (resolution up to 720p / 1080i / 1080p) via Ethernet or WLAN, the video might be buffering. It is normal due to the limit of network speed or signal strength. Due to different network conditions, sometimes the workgroup might not be accessed or shown in the list.
-
Page 32: A/V Streaming Via Upnp-Server
4.6 A/V Streaming via UPnP-server A built-in UPnP (Universal Plug and Play) client has been integrated on the system, which enables the player to auto-detect UPnP Media Servers on the network to browse and stream media files from them. 4.6.1 Installing UPnP Media Server on your PC There’re a lot of free and commercial UPnP Media Server software, such as Windows Media Connect, Windows Media Player 11, XBMC Media Center (Linux/Mac/Windows), MediaTomb (Linux), etc. - Page 33 Click Library -> Media Sharing, then you can allow or deny devices to access the media library. Click Allow to authorize your player. 4.6.3 Streaming Media on your Player Connect your player to the home network (LAN or WLAN). Visit Browser - > UPnP menu on the player, select the UPnP-server, and press ENTER. Then you can browse the media library shared by Windows Media Player 11.
-
Page 34: Renaming / Deleting Files
4.7 Renaming / Deleting Files When navigating in the browser menu, you can press the MENU button to activate a popup menu where you can rename and delete files or folders. Press the UP / DOWN buttons to select from Return, Rename, and Delete. And press ENTER to confirm. - Page 35 4.8.2 Browsing the playlist Press the UP / DOWN buttons to select Play List in the browser menu. Press the LEFT / RIGHT buttons to select between All, Music, Photos, and Movies. And press the ENTER button to confirm. Then you will enter the playlist. If you wish to delete a file from the playlist, press the SELECT button to select, and then press the CONFIRM button to confirm.
-
Page 36: Media Library
5. Media Library Thanks to a powerful search engine, the library menu allows you to search and browse multimedia files stored on the internal HDD in most easy ways. To enter this menu, select the Library icon on the home screen. 5.1 Music Library Use the left / right button on the remote control to select the Music tab. - Page 37 Use the navigational buttons to select, and press the enter button to confirm. Select OK and press the enter button, and then the files you desired will be displayed on the screen. Select to list all the music files in the library. Artist Select to search for music files by artist.
-
Page 38: Photo Library
Press the up / down button to select the album, and press the enter button to confirm. Quick-Search You can also press the right button to turn on a Quick-Search bar while browsing music files in the library. Press the up / down button to select characters on the Quick-Search bar, and press the enter button to confirm. - Page 39 Select to update and synchronize all the photos stored on the internal Update HDD to the library. Search Select to search for photos by their names. Use the navigational buttons to select, and press the enter button to confirm. Select OK and press the enter button, and then the files you desired will be displayed on the screen.
-
Page 40: Movie Library
previewing photos in the library. Press the up / down button to select characters on the Quick-Search bar, and press the enter button to confirm. And then photos with name starting with the specific characters will be displayed onto the top. Press the left button to delete characters, and press the back button to close the Quick-Search bar. - Page 41 Select to update and synchronize all the movies stored on the internal Update HDD to the library. Search Select to search for movies by their names. Use the navigational buttons to select, and press the enter button to confirm. Select OK and press the enter button, and then the files you desired will be displayed on the screen.
- Page 42 Press the up / down button to select the genre, and press the enter button to confirm. Year Select to search for movies by year. Press the up / down button to select the year, and press the enter button to confirm.
-
Page 43: File Copy Menu
6. File Copy Menu Select the File Copy icon from the home screen to enter the File Copy menu, which allows you to copy files between Removable Devices (Card, USB), HDD, and Network. The following buttons can be used under the file copy menu. Button Function UP / DOWN... -
Page 44: Internet Radio
7. Internet Radio This player integrates the MMS Internet radio function. Select the Internet Radio icon on the main interface to enter this menu. Note: Make sure the player is connected properly to a LAN or WLAN with Internet access, please refer to ‘3.3 Changing Network Settings’... -
Page 45: Web Server & Bittorrent
8. Web Server & BitTorrent 8.1 Web Server (unicgi) A Web server called ‘Neighbor Web’ has been integrated into the player. Connect the player to your home network (LAN or WLAN). Get the IP address of the player under SETUP -> NETWORK menu. Type the IP address (e.g., 192.168.3.15) in the address bar of Internet Explore on your PC. -
Page 46: Visit Neighbor (Samba - Nas Function)
This page allows you to set a password for accessing Neighbor Web. Note: Password will become effective when Login Control is turned on. (Please refer to Login Control in chapter ‘3.4 Changing System Settings’ for more details) The default user name is ‘admin’, and the default password is ‘123’. 8.3 Visit Neighbor (Samba –... - Page 47 8.4.1 Add new torrent Click Add new torrent on the BitTorrent Download page. Click Browse to upload a torrent file, and click Yes to confirm. 8.4.2 Managing the downloads The BitTorrent Download page also allows you to start, stop, delete torrents, and set priorities for torrents, as well as view the status of current torrents.
- Page 48 8.4.3 Settings Click Setting on the BitTorrent Download page to enter the BitTorrent Setting page. In the BitTorrent Setting page, you can configure the following settings. Set the maximum download rate. Set the maximum upload rate. Set the idle hours to start the next download automatically. Set the seeding hours.
-
Page 49: Upgrading The Firmware
9. Upgrading the Firmware The firmware is the operating system (OS) installed on the device. Firmware upgrades can bring new features, improvements and bug fixes. Please refer to System Update and Extension Info in chapter ‘3.4 Changing System Settings’ for more details. 10. -
Page 50: Frequently Asked Questions
NETWORK FEATURE: 10/100Mbps Auto-Negotiation Ethernet 802.11b/g/n WLAN, up to 300Mbps (supported by optional WLAN USB Adapter) Note: The specifications and design of this product are subject to change without notice. 10.2 Frequently Asked Questions Question 1. When I try to disconnect the USB device, I keep on getting “The device ‘Generic volume’... - Page 51 incorrect signals or the signals will not be stable and will cause the TV screen to flash, some TV’s will treat this as no signal, and will display a blue screen or screensaver. Question 6. Why when I switch to Y/Pb/Pr 480p, 576p, 720p, 1080i, and 1080p, does the TV screen display an unwatchable picture? Answer: Please check if your TV supports Y/Pb/Pr 480p, 576p, 720p, 1080i, and 1080p output, if your...
-
Page 52: Copyrights And Trademarks
Question 11. I am using the 802.11n Wi-Fi dongle with an 802.11n wireless router, why the speed is still 802.11g 54Mbps rather than 300Mbps? Answer: The IEEE 802.11n Draft standard prohibits using high throughput with WEP or TKIP as the unicast cipher. -
Page 53: License Information
10.5 License information This product contains Free Software which is licensed under the GNU General Public License, Version 2 (GPL). You will find hereinafter a copy of the GPL license text. We offer, valid for at least 3 years, to send you the source code of the GPL software. Please contact us at Dexxon Data Media - gplsourcecodes@dexxon.eu. - Page 54 announcement including an appropriate copyright notice and a notice that there is no warranty (or else, saying that you provide a warranty) and that users may redistribute the program under these conditions, and telling the user how to view a copy of this License. (Exception: if the Program itself is interactive but does not normally print such an announcement, your work based on the Program is not required to print an announcement.) These requirements apply to the modified work as a whole.
- Page 55 If distribution of executable or object code is made by offering access to copy from a designated place, then offering equivalent access to copy the source code from the same place counts as distribution of the source code, even though third parties are not compelled to copy the source along with the object code.
- Page 56 distributed through that system in reliance on consistent application of that system; it is up to the author/donor to decide if he or she is willing to distribute software through any other system and a licensee cannot impose that choice. This section is intended to make thoroughly clear what is believed to be a consequence of the rest of this License.
- Page 57 LIABLE TO YOU FOR DAMAGES, INCLUDING ANY GENERAL, SPECIAL, INCIDENTAL OR CONSEQUENTIAL DAMAGES ARISING OUT OF THE USE OR INABILITY TO USE THE PROGRAM (INCLUDING BUT NOT LIMITED TO LOSS OF DATA OR DATA BEING RENDERED INACCURATE OR LOSSES SUSTAINED BY YOU OR THIRD PARTIES OR A FAILURE OF THE PROGRAM TO OPERATE WITH ANY OTHER PROGRAMS), EVEN IF SUCH HOLDER OR OTHER PARTY HAS BEEN ADVISED OF THE POSSIBILITY OF SUCH DAMAGES.
Need help?
Do you have a question about the Movie Cube S120H and is the answer not in the manual?
Questions and answers