Table of Contents
Advertisement
Advertisement
Table of Contents

Related Manuals for Emtec Movie Cube Q120 500GB


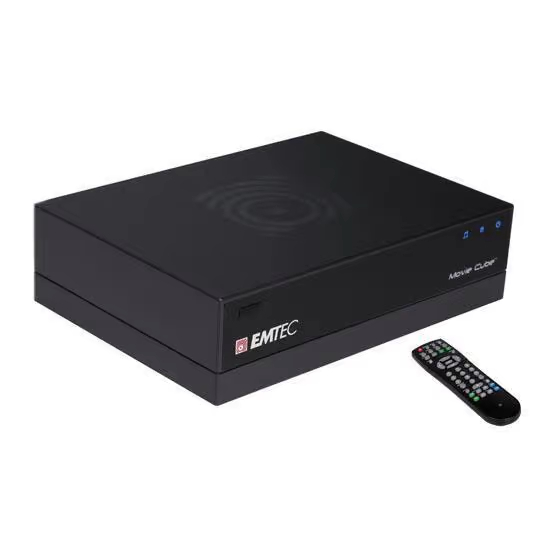
Summary of Contents for Emtec Movie Cube Q120 500GB
-
Page 2: Table Of Contents
Table of Contents 1. Introduction...3 1.1 Preface...3 1.2 Packing List...4 1.3 Caution...5 1.4 Connection...6 1.5 First Time Usage...10 2. About the Player...11 2.1 Remote Control...11 2.2 Front Panel...14 2.3 Rear Panel...15 2.4 Side Panel...15 3. Getting Started...16 3.1 Selecting Browser – Playback Multimedia Files...16 3.2 Selecting Copy –... - Page 3 6. File Copy Menu...33 7. Playlist Menu...35 8. NAS Function...36 9. Firmware Installation and Upgrade...37 9.1 Firmware Installation...37 9.2 Firmware Upgrade...38 10. Appendixes...40 10.1 Specifications...40 10.2 Frequently Asked Questions...42 10.3 Copyrights and Trademarks...45 10.4 Warranty...45...
-
Page 4: Introduction
We hope that this product will bring you a lot of enjoyment. We are committed to apply multimedia technology in your work, entertainment, family, daily life, car and everywhere! Welcome to Emtec. Thank you again for choosing our product. * Notice: WMA Pro & Advanced Profile and WMA with DRM are not supported. -
Page 5: Packing List
1.2 Packing List Part Player A/V cable USB cable Remote Control Remote Control Battery AC/DC adaptor AC/DC adaptor Power Cord User Manual Quick Installation Guide Driver CD (with User Manual) Warranty card SCART in adapter Wireless LAN USB adapter Note: The actual contents in the package might be different from the packing list in this manual. - Page 6 1.3.6 Hard disk cautions The player uses an internal hard disk for data storage, in normal case, format or repair is not required. You should carefully read the < Frequently Asked Questions > chapter, and check our website for latest information before formatting the hard disk.
-
Page 7: Connection
1.3.7 Others When using this player, please do not let the player come into contact with water or other liquid, if water is accidentally spilled on the player, please use a dry cloth to absorb the spillage. Electronic products are vulnerable, when using please avoid shaking or hitting the player, and do not press the buttons too hard. - Page 8 1.4.2 USB Mass Storage Device (likeUSB Pen Drive, MP3, USB HDD etc.) Connection (1) Make sure the player is powered on; (2) Plug in the USB Pen Drive or USB HDD etc. to the USB host port of this player.
- Page 9 In this way, you can also enjoy videos, music, and photos in the player on TV. 3. HDMI OUT (1) Follow the picture and plug one connector on your HDMI cable to the player’s HDMI jack; (not supplied) (2) Follow the picture and plug the other connector on your HDMI cable to the TV’s HDMI jack.
-
Page 10: Power Connection
1.4.5 Power connection (1) Follow the picture and connect the AC adaptor to the player’s DC IN jack; (2) Follow the picture and plug in the AC adaptor to the power outlet. 1.4.6 Ethernet connection To connect to a LAN (Local Area Network) you require a cat5, cat5e or cat6 network cable (not supplied). -
Page 11: First Time Usage
1.5 First Time Usage 1.5.1 Firmware Installation For users who bought the player without a HDD inside, and want to install a SATA HDD, please see 9.1 Firmware Installation for details. 1.5.2 Remote Control First time usage of Remote control Install the batteries before using the remote control, installation steps are as the picture shows: 1.5.3 Power on/off, language control... -
Page 12: About The Player
2. About the Player 2.1 Remote Control All procedures in this manual can be carried out using the remote control buttons. See the following for details on each button and its function: 1. STANDBY 2. DISPLAY 3. MENU 4. MUSIC 5. - Page 13 Button Function STANDBY button: Press to enter standby mode or wake up. DISPLAY button: Press during playback and an onscreen display appears, showing track number and time elapsed/remaining. MENU button: Press to activate tools menu. • Press during video playback to set bookmark in the popup menu.
- Page 14 which suitable for sport program. are available. SUBTITLE button: Press to set subtitle options. AUDIO button: Press to select an audio track. PLAY button: Press to begin playback. FAST REWIND button: Press to fast rewind the current playback. Press repeatedly to select speeds. PAUSE / STEP button: Press to pause current playback.
-
Page 15: Front Panel
2.2 Front Panel 1. STANDBY button 3. HDD indicator STOP button: Press to stop playback. GOTO button: Press to jump to a specific point on a title. Specify the point using Title, Chapter and Time. Navigational buttons: Press the arrow buttons to select menu options. RETURN button: Press to return to the previous screen when navigating menus. -
Page 16: Rear Panel
2.3 Rear Panel 1. Air Flow hole 3.A/V OUT jack 5. HDMI jack 7. DC IN jack 2.4 Side Panel 1. USB HOST port (A-Type) 2. Y/Pb/Pr OUT jack 4. S/PDIF OPTICAL/COAXIAL jack 6. RJ45 LAN socket 8. POWER switch 2. -
Page 17: Getting Started
3. Getting Started Power on the system, and after a few seconds, the system will enter a guide menu. To enter this menu, press 3.1 Selecting Browser – Playback Multimedia Files You can browse all the multimedia (Videos/Music/Photos) files stored on the internal HDD, USB devices, or Network, and playback them on TV. -
Page 18: Selecting Setup
3.4 Selecting Setup To enter the setup menu, select on the remote control or select the SETUP icon on the guide menu page. -
Page 19: Setup Menu
4. Setup Menu The Setup Menu allows you to configure language, audio, video, network and system settings. To enter the menu, select Setup from the Guide menu or select on the remote control. 4.1 Changing Language Settings Press on the remote control to select the Language tab from the menu bar. -
Page 20: Changing Audio Settings
Select to set text encoding. Text Encoding Press to confirm. 4.2 Changing Audio Settings Press on the remote control to select the Audio tab from the menu bar. to select the encoding language. Press... - Page 21 Select to set night mode. Night Mode Press Press Select to set S/PDIF mode. S/PDIF Press Press to select from Off, On, and Comfort. to confirm. to select from Raw, and LPCM. to confirm.
-
Page 22: Changing Video Settings
4.3 Changing Video Settings Press on the remote control to select the Video tab from the menu bar. Select to set aspect ratio. Aspect Ratio Press Box 4:3, or 16:9. Press Pan Scan 4:3: Display a wide picture on the entire screen and cut off the redundant portions. - Page 23 Select to set brightness levels. Brightness Press setting is previewed onscreen. Press Select to set contrast levels. Contrast Press is previewed onscreen. Press to adjust brightness. The new to adjust contrast. The new setting to confirm. to confirm.
- Page 24 Select to adjust video output type. Video Output Press depending on your viewing preferences. Press Select to adjust TV system. Video System Press your viewing preferences. Press to set the video output t ype, to set the TV system, depending on to confirm.
-
Page 25: Changing Network Settings
Network tab from the menu bar. Please refer to the user guide to wireless function available in the package of EMTEC Wi200 USB adapter for more details about these settings 4.5 Changing System Settings Press on the remote control to select the System tab from the menu. -
Page 26: Miscellaneous
4.6 Miscellaneous Press on the remote control to select the MISC tab from the menu. 5. Browser Menu The Browser menu allows you to browse and play music, photo and movie files stored on a HDD, an external USB device, and Network. To enter the menu, select Browser from the Guide menu. -
Page 27: Browsing All
5.1 Browsing All on the remote control to select the All tab. All directories and supported contents will be displayed. Press to select the directory or file you wish to browse, and press 5.2 Browsing Music on the remote control to select the Music tab. All directories and supported audio files in current directory will be displayed. -
Page 28: Browsing Photos
5.3 Browsing Photos on the remote control to select the Photos tab. All directories and supported image files in current directory will be displayed. Press to select the photo you want to view and press will be displayed full screen. Note: 1. -
Page 29: Browsing Movies
5.4 Browsing Movies on the remote control to select the Movies tab. All directories and supported video files in current directory will be displayed. Press to select the movie you want to view and press will be played in full screen mode. This function supports DAT, VOB, IFO, MPG, AVI, and TS file formats. - Page 30 5.5.1 Browsing through Workgroup You can choose the workgroup which your PC belongs to from the workgroup list, find your PC name, and press Then select the shared multimedia file that you want to browse. Note: 1. While browsing high definition video files (resolution up to 720p / 1080i / 1080p) via Ethernet or WLAN, the video might be buffering.
- Page 31 5.5.2 Browsing through ‘My Shortcuts’ You can also set ‘Specific File Server IP’ and access it from ‘My Shortcuts’ in the menu. Press and a tools menu appears. Select to set Net User ID, Net Password, and Specific File Server IP, which enables to browse files on NET through ‘My_Shortcuts’.
- Page 32 Select Net User ID and the entry screen will appear. Use the navigation arrows to select letters and numbers. Select CAPS to toggle between uppercase and lowercase letters. Press <- to delete a letter. Press -> to insert a space. Press letter or number.
- Page 33 Select Specific File Server IP, and use Navigational and Numeric buttons to enter IP address. Press You can also select Detail to set the Label, Domain, and Host Name of the shortcut. Then select OK and press Select the shortcut you added and press Then select the shared multimedia file that you want to browse.
-
Page 34: File Copy Menu
6. File Copy Menu Select Copy from the Guide menu to enter the File Copy menu, which allows you to copy files between HDD and USB devices, and network. Step 1: Select the source device and destination device. Press step. Step 2: Select the source files you want to copy. - Page 35 to select files, Press Step 3: Select the destination folder to store the above files. Press step. Step 4: Proceed to copy selected files to cancel, and to next step. to select folder. Press to cancel, and for next...
-
Page 36: Playlist Menu
Press will start. 7. Playlist Menu The Playlist menu allows you to browse and play your favorite music in the playlists. To enter the menu, select Playlist from the Guide menu, or press control. There are up to 5 playlists. Please refer to 5.2 Browsing Music for how to add music files into playlists. -
Page 37: Nas Function
8. NAS Function This player can be used as a NAS (Network-Attached Storage) device. It can be attached to the home network via either Ethernet or WLAN. This feature allows homes to store and retrieve large amounts of data more affordable than ever before. -
Page 38: Firmware Installation And Upgrade
9. Firmware Installation and Upgrade The firmware is the operating system (OS) installed on the device. 9.1 Firmware Installation If it is the first time that you are installing a SATA HDD (no matter it is a new one or an old one) into the player, please make sure you have read the following steps in advance. -
Page 39: Firmware Upgrade
Step 6: Connect the power cable Plug the power cable into the DC IN jack, turn on the POWER switch on the real panel, and wait for about 3 seconds or more, and then loosen your finger on the STANDBY button. Firmware installation will start in about 30 seconds. - Page 40 Download the latest firmware from our official website. Step 1: Prepare the USB Pen Drive Copy the 6 files into the root directory of your USB Pen Drive. Step 2: Modify ‘part.txt’ Open ‘part.txt’ file in the USB Pen Drive with WordPad, and make sure to modify ‘option:install’...
-
Page 41: Appendixes
Please do not delete any of these partitions in case of hard disc failure. 10. Appendixes 10.1 Specifications USB SUPPORTED: * USB HDD * Other USB Mass Storage Devices * USB 2.0 Interface CONTENT FORMATS SUPPORTED: * DAT/VOB/IFO/MPG/AVI/MPEG-2 TS * MP3/OGG/WMA... - Page 42 VIDEO OUTPUT SPECIFICATION Composite Output Components Output HDMI Output AUDIO PERFORMANCE DA Converte AD Converter Signal-Noise (1kHZ) Dynamic Range (1kHZ) Channel Separation Total Harmonic Distortion (1kHZ) NETWORK FEATURE Ethernet WLAN GENERAL Power Supply Power Consumption Operating Temperature Operating Humidity Hard Disk Dimensions (W/H/D) Net Weight Note:...
-
Page 43: Frequently Asked Questions
10.2 Frequently Asked Questions Question 1. My computer does not recognize my player. Answer: (1) Make sure the player is powered on. If it is off, the computer will not be able to find the player; (2) Make sure the player is connected to computer. (Refer to 1.4.1 for connecting player to computer);... - Page 44 Answer: Defragmenting the player hard disk may be useful after having transferred many files to and from the player. It is never harmful to use the defragment on the player. Make sure no other programs are running while using the Windows® defragment utility.
- Page 45 (4) Click the “OK” icon. Question 7. During power on, why does the TV will have a short flashing, blue screen or screensaver? Answer: This is normal, when the system initializes, it will setup the corresponding parameters so it can output the correct video signal to the TV, during the initializing time, the TV will receive incorrect signals or the signals will not be stable and will cause the TV screen to flash, some TV’s will treat this as no signal, and will display a blue screen or screensaver.
-
Page 46: Copyrights And Trademarks
-A unit that has been modified or incorporated into other products or is used for institutional or other commercial purposes. -Loss of customer’s software, firmware, information, or memory data. -Improper handling or installation. For complete information regarding EMTEC Movie Cube Q120 warranty and customer support please visit our website : www.emtec-international.com V1.0...
Need help?
Do you have a question about the Movie Cube Q120 500GB and is the answer not in the manual?
Questions and answers