Table of Contents
Advertisement
Advertisement
Table of Contents

Related Manuals for Emtec Movie Cube V120H


Summary of Contents for Emtec Movie Cube V120H
- Page 1 Home Multimedia Center Movie Cube V120H User’s Manual (Version 1.0.3)
-
Page 2: Table Of Contents
Table of Contents User Information Product Introduction Main Menu Web Server & BitTorrent Media Library Upgrading the Firmware Appendixes 8. Copyrights and Trademarks 9. Warranty 10. License information... -
Page 3: User Information
1. User Information 1.1 Caution This player’s design and manufacture has your safety in mind. In order to safely and effectively use this player, please read the following before usage. 1.1.1 Usage cautions User should not modify this player. If commercial hard disk is being used, the environmental temperature should be within +5 ~ +35 . - Page 4 - Physical impact may create bad sector in the hard disk, you can use CHKDSK to fix the problem. - All data stored in the player may be lost due to physical impact, electrical shock, power lost, HDD format etc. Please backup your data. - It is suggested to do defragment after a long period of usage.
-
Page 5: Product Introduction
2. Product Introduction 2.1 Product Overview Thank you very much for purchasing the Movie Cube V120H. In the digital era, this product is a great home entertainment partner. With the outstanding design, you can enjoy Full HD movies and music, view photos of precious moments. The editing function provides you with an easy way to save these. -
Page 6: Package Contents
WMV/ASF/RM/RMVB/FLV Music Playback Fast forward/rewind Shuffle Repeat Music format: MP3/OGG/WMA/WAV/FLAC File Copy Supports copying & moving files among USB, CARD, HDD, and Network Note: All the information contained in this manual was correct at the time of publication. However, as our engineers are always updating and improving the product, your device’s software may have a slightly different appearance or modified functionality than presented in this manual. - Page 7 2.3. Connection 2.3.1 Connect to Computer (1) Make sure the player is powered on; (2) Plug in the squarish connector of the USB cable to this player’s USB DEVICE port; (3) Plug in the rectangular connector of the USB cable to computer. 2.3.2 USB Mass Storage Device (like USB stick, MP3, USB HDD etc.) Connection (1) Make sure the player is powered on;...
- Page 8 2.3.3 Connecting a Memory Card Memory card can be used by inserting to the card slot (1) Follow the picture to insert the memory card to the card slot properly; (2) Insert the card by following the arrow pointer in the picture. In this way, you can browse contents on the memory card.
- Page 9 2.3.4.2 Y/Pb/Pr Component OUT (1) Follow the picture and plug in the 3 color connector to the player’s Y/Pb/Pr jack; (2) Follow the picture and plug in the 3 color connector to the TV’s Y/Pb/Pr jack. Audio Connection while using Y/Pb/Pr Video out: First method: use the audio output from the A/V OUT jack;...
- Page 10 In this way, you can have the highest quality video and audio via a single cable. 2.3.5 Digital Audio Device connection (1) Follow the picture and plug in the RCA connector on your coaxial cable to the player’s S/PDIF Coaxial jack. Or if you use optical fiber, please plug in the Toslink connector on your optical fiber to the player’s S/PDIF Optical jack;(not supplied) (2) Follow the picture and plug in the other connector on your coaxial cable or optical fiber to the digital audio device.(not supplied)
- Page 11 2.3.7 Ethernet connection To connect to a LAN (Local Area Network) you require a cat5, cat5e or cat6 network cable (not supplied). (1) Connect one of the crystal plugs on the cable to the player’s RJ45 LAN socket; (2) Connect the other crystal plug on the cable to a RJ45 LAN port on your router, switch, or hub devices.
-
Page 12: Front Panel
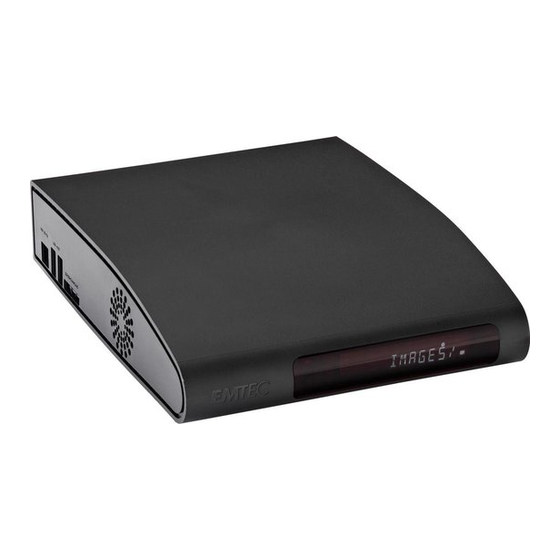
2.3.8 WLAN connection (1) Make sure the player is powered on; (2) Plug the Wireless LAN USB Adapter (i.e. Wi-Fi USB Dongle) to the USB HOST port of the player. 2.4 Front Panel 1. POWER / STANDBY indicator 2. VFD Screen 2.5 Side Panel 1. -
Page 13: Back Panel
2.6 Back Panel 1.DC-IN jack 2. Y/Pb/Pr OUT jack 3. A/V OUT jack 4. HDMI jack 5. RJ45 LAN socket 6. S/PDIF COAXIAL jack 7. S/PDIF OPTICAL jack 2.7 Menu Language The system language of this player can be set to English or other languages. Change the language you wish in the setup menu, the selected language will take effect immediately. - Page 14 Note: This page can be also accessed via Setup->System->HDD Format menu. Step 2: Select Format, press ENTER, and then hard disk format will start. The formatting procedure will be finished within a few minutes. And then you can use the hard disk properly on the player.
-
Page 15: Remote Control
2.9 Remote Control 1. MUTE 2. OPTION 3. SETUP 4. INFO 5. AUDIO 6. HOME 7. UP 8. LEFT 9. OK 10. DOWN 11. VOL- 12.Numeric buttons 13. SLOW 14. PAUSE 15. PLAY 16. FR 17. FF 18. A-B 19. REPEAT 20. - Page 16 VOL- Press to decrease the volume. Numeric buttons Press to enter channel numbers or numeric input when changing settings. SLOW Press to play back in slow motion. Press the PLAY button to resume regular playback. PAUSE Press to pause the current playback; Press again to step to the next frame;...
-
Page 17: Main Menu
3. Main Menu 3.1 Setup Menu The Setup menu allows you to personalize and configure the preferences for your player. To select a Setup option: Select the Setup icon on the home screen Use the UP/DOWN navigational buttons to select an option, and then press ENTER. There are seven Setup options, including Audio, Video, Photo, Network, System, MISC and Media Library. - Page 18 Night Mode Choose between Off / On / Comfort. If the option is turned on, the audio output volume will be decreased to make you more comfortable. Digital Output Select to set Digital Output (S/PDIF) mode. Note: In raw mode, Dolby Digital, DTS, or MPEG sound can be by passed to the HDMI TV or Digital amplifier.
- Page 19 PAL – Europe, Greenland, parts of Africa and South America, the Mideast, China, India, Australia, and Indonesia. Resolution - video output resolution 3.1.3 Changing Photo Settings Use this menu to configure photo settings Slide Show Timing Select to set the interval time for photo slide show. Transition Effect Select to set the transition effect for photo slide show.
- Page 20 Wired LAN Setup DHCP IP (AUTO) Select to obtain IP address automatically. FIX IP (MANUAL) Select to manually input the IP Address, Subnet Mask, Default Gateway, and DNS Server IP Address. Wireless Setup Selecting a connection profile This player can store up to three wireless network connections. Press ENTER to go to next step, press RETURN to cancel, and press PLAY to connect.
- Page 21 Get SSID Name Press ENTER to go to next step, press RETURN to cancel, and press OPTION to refresh the SSID list. Note: In the Security list, WEP (Wired Equivalent Privacy) and WPA (Wi-Fi Protected Access) means the network is encrypted, i.e. an encryption key is needed to access the network.
- Page 22 Test connection The testing process will take for a while, please be patient to wait. If the test is ok, the network information (Profile Name, IP address, Subnet Mask, Gateway, etc.) will be displayed on the screen. Peer to Peer (Ad Hoc) Peer to Peer mode, which is also called Ad Hoc mode or computer-to-computer mode, is used to connect wireless clients directly together, without the need for a wireless router or access point.
- Page 23 3.1.5 Changing System Settings Use this menu to configure system settings. Menu Language Select to choose the OSD (On-Screen Display) language. Text Encoding Select to set the text encoding option (subtitle display) System Info This tab gives you information about the software installed and about the material components of your player.
- Page 24 Resume Play Select to turn on / off resume playback (auto-bookmarking) feature for movies. Screen Saver Select to turn on / off screen saver. Movie Preview Select to turn on / off movie preview in the browser menu. 3.1.7 Changing Media library Settings Use this menu to set the scan folder, update media library and media library mode.
-
Page 25: Music Playback
update by manual. Note: System only scan the folders what you have selected. System default to scan all of the folders. It will take some time to scan all of the folders. 3.2 Music Playback Enter music interface, only supported audio files and folder will be displayed. This player supports MP3, WMA, and OGG audio files. -
Page 26: Photo Playback
The music toolbar has several command icons to customize the way you play music. The functions from left to right are repeat, shuffle mode, info. 3.2.3 Quick-Search You can search for a media file by filter current folder to locate the specific media file. Press SEARCH button while browsing music files in the music library. - Page 27 3.3.1 Photo Playback Control Button Function PREV / NEXT View the previous or next photo. LEFT / RIGHT Rotate a photo in any angle. OPTION Hide or display the Photo toolbar during playback. Stop playback. STOP ZOOM Zoom in and out the photo 3.3.2 Photo Playback Options During photo playback, press OPTION button.
-
Page 28: Movie Playback
3.4 Movie Playback Enter into movie interface, only supported image files and folder will be displayed. This player supports AVI, MKV, MOV, MPG files. You can navigate using a filter option (Date, Folder, Recent, Playlist, or All movie) by selecting the photo icon and using UP and DOWN button to scroll through the options listed. - Page 29 3.4.2 Movie Playback Options During movie playback, press OPTION button. The photo toolbar opens at the bottom of the screen. The movie toolbar has several command icons to customize the way you play photo. The functions from left to right are zoom in, zoom out, repeat, subtitle, info, audio, dvd. 3.4.3 Quick-Search You can search for a media file by filter current folder to locate the specific media file.
- Page 30 3.6 Net Service This player integrates the SHOUTcast free Internet radio function. Select the Net Service icon and press UP/DOWN to enter into internet radio Note: Make sure the player is connected properly to a LAN or WLAN with Internet access, please refer to ‘3.1.4 Changing Network Settings’...
- Page 31 Station All downloaded stations will be listed under this menu. Genre You can search for stations by genre (pop, rock, jazz, etc.) under this menu. Favorite Your favorite stations can be kept under this menu. 3.7 Help Function In this menu, you can get helpful information about this product.
-
Page 32: Web Server & Bittorrent
4. Web Server & BitTorrent 4.1 Web Server (unicgi) A Web server called ‘Neighbor Web’ has been integrated into the player. Connect the player to your home network (LAN or WLAN). Get the IP address of the player under SETUP -> NETWORK menu. Type the IP address (e.g., 192.168.3.15) in the address bar of Internet Explore on your Then you can access the Web server on your PC. - Page 33 This page allows you to set a password for accessing Neighbor Web. Note: Password will become effective when Login Control is turned on. (Please refer to Login Control in chapter ‘3.1.4 Changing Network Settings’ for more details) The default user name is ‘admin’, and the default password is ‘123’. When login control is turned off, and then turned on again, the password will be restored to default.
- Page 34 4.4.1 Add new torrent Click Add new torrent on the BitTorrent Download page. Click Browse to upload a torrent file, and click Yes to confirm. 4.4.2 Managing the downloads The BitTorrent Download page also allows you to start, stop, delete torrents, and set priorities for torrents, as well as view the status of current torrents.
- Page 35 Click Start to begin download. Click Stop to stop download. Click Delete to delete the selected torrent. Click Refresh to refresh the current status. Click Down arrow to decrease the priority for the selected torrent. Click Up arrow to increase the priority for the selected torrent. 4.4.3 Settings Click Setting on the BitTorrent Download page to enter the BitTorrent Setting page.
- Page 36 Set the idle hours to start the next download automatically. Set the seeding hours. Set to delete the finished torrent files automatically or not. Set the maximum number of simultaneous download tasks.
-
Page 37: Media Library
5. Media Library Thanks to a powerful search engine, the library menu allows you to search and browse multimedia files stored on an internal HDD or external USB HOST device in most easy ways. Media Library Categories Media Type Icon Category Description Music... -
Page 38: Upgrading The Firmware
Recent Select to search for movie files that have been played recently Playlist Select to search for movie files by playlist 6. Upgrading the Firmware The firmware is the operating system (OS) installed on the device. Firmware upgrades can bring new features, improvements and bug fixes. Please refer to System Update in chapter ‘3.1.5 Changing System Settings’... -
Page 39: Appendixes
7. Appendixes 7.1 Specifications I/O INTERFACES SUPPORTED: 3.5’’ SATA HDD USB 2.0 HOST port x 2 (compatible to USB 1.1) USB Device port Supports SD/SDHC/MMC/MS Card Composite (CVBS) A/V jack Component Y/Pb/Pr jackt HDMI V1.3 interface S/PDIF optical and coaxial jack DC-IN 12V 2A FILE SYSTEM SUPPORTED: FAT32/NTFS... -
Page 40: Frequently Asked Questions
7.2 Frequently Asked Questions Question 1. When I try to disconnect the USB device, I keep on getting “The device ‘Generic volume’ cannot be stopped right now. Try stopping the device again later.” message, what should I do? Answer: Close any program that might be accessing data on the player, including Windows® Explorer. If it does not work, close all programs and wait for another 20 seconds, then try the green arrow icon again. - Page 41 TV does not support, please use the A/V signal display instead, press the TV SYSYEM button on the remote control, then switch the TV’s video input to NTSC or PAL. Question 7. Why is there no sound on movie or music playback when using Y/Pb/Pr component output? Answer: Y/Pb/Pr output is a video output only, and does not include sound signals.
-
Page 42: Copyrights And Trademarks
drop to 54 Mbps. You may contact the Access Point or router manufacturer to download the latest firmware, or try other encryption methods (WPA2-AES or WPA2-TKIP), or choose to configure an unsecured profile, but this option is not recommended. Question12. Why couldn’t the player find the hard disc? Answer: Make sure the firmware is installed correctly, and no system partitions on the HDD were deleted. -
Page 43: License Information
-Damage from misuse or neglect. -A unit that has been modified or incorporated into other products or is used for institutional or other commercial purposes. -Loss of customer’s software, firmware, information, or memory data. -Improper handling or installation. 10. License information This product contains Free Software which is licensed under the GNU General Public License, Version 2 (GPL). - Page 44 may charge a fee for the physical act of transferring a copy, and you may at your option offer warranty protection in exchange for a fee. 2. You may modify your copy or copies of the Program or any portion of it, thus forming a work based on the Program, and copy and distribute such modifications or work under the terms of Section 1 above, provided that you also meet all of these conditions: a) You must cause the modified files to carry prominent notices stating that you changed the...
- Page 45 source code. (This alternative is allowed only for noncommercial distribution and only if you received the program in object code or executable form with such an offer, in accord with Subsection b above.) The source code for a work means the preferred form of the work for making modifications to it. For an executable work, complete source code means all the source code for all modules it contains, plus any associated interface definition files, plus the scripts used to control compilation and installation of the executable.
- Page 46 by all those who receive copies directly or indirectly through you, then the only way you could satisfy both it and this License would be to refrain entirely from distribution of the Program. If any portion of this section is held invalid or unenforceable under any particular circumstance, the balance of the section is intended to apply and the section as a whole is intended to apply in other circumstances.
- Page 47 LAW. EXCEPT WHEN OTHERWISE STATED IN WRITING THE COPYRIGHT HOLDERS AND/OR OTHER PARTIES PROVIDE THE PROGRAM "AS IS" WITHOUT WARRANTY OF ANY KIND, EITHER EXPRESSED OR IMPLIED, INCLUDING, BUT NOT LIMITED TO, THE IMPLIED WARRANTIES OF MERCHANTABILITY AND FITNESS FOR A PARTICULAR PURPOSE. THE ENTIRE RISK AS TO THE QUALITY AND PERFORMANCE OF THE PROGRAM IS WITH YOU.
Need help?
Do you have a question about the Movie Cube V120H and is the answer not in the manual?
Questions and answers