Table of Contents
Advertisement
Quick Links
Advertisement
Table of Contents

Related Manuals for Emtec Movie Cube N150H


Summary of Contents for Emtec Movie Cube N150H
- Page 1 Movie Cube N150H User’s Manual (v1.0)
-
Page 2: Table Of Contents
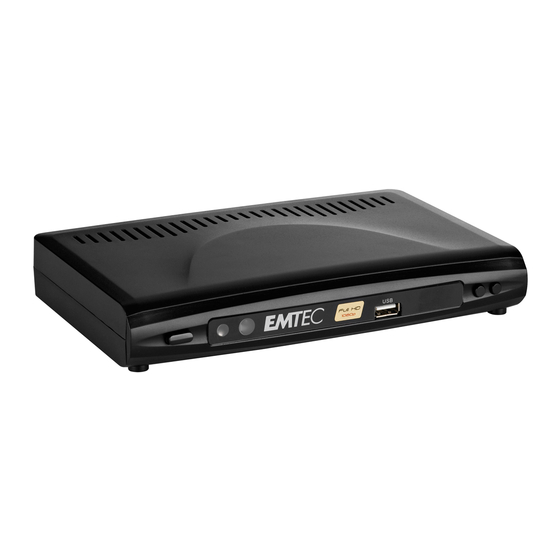
TABLE OF CONTENTS 1. Main Features ........................4 1.1 Front panel ........................4 1.2 Back panel........................4 2. Remote Control ......................... 5 3. Welcome Page ........................6 4. Installation Guide....................... 6 5. Program ..........................6 5.1 Program Edit........................ 7 5.2 EPG..........................9 5.3 Sort.......................... - Page 3 SAFETY PRECAUTIONS CAUTIONS: lightning flash with Warning: The exclamation point within arrowhead symbol, within an To reduce the risk of electric equilateral triangle equilateral triangle, is intended shock, don't open the cabinet. intended to alert the user to to alert the user to "dangerous Refer servicing to qualified important operating...
-
Page 4: Main Features
Preface Thank you for purchasing the new N150H! Please read this manual thoroughly before any use and keep it well for future reference. It will help you keep abreast with many of the exciting features and contains important safe measurements and correct operational information, so please read all the information carefully in order to avoid any damage. -
Page 5: Remote Control
2. Remote Control Button Function Button Function press to play the POWER turn on/off the device PLAY file press to pause MUTE mute on/off PAUSE the file display NUMBER 0-9 channel numbers INFO information MENU enter the main menu favorite files press to change EXIT exit function... -
Page 6: Welcome Page
3. Welcome Page When turning the power on for the first time, the welcome page will be shown as below: 4. Installation Guide (1) Press [CH+/CH-] key to move the cursor. (2) Press [VOL+/VOL-] key to select the item. (3) Select [Channel Search] and press [OK] key to begin the auto scan. (4) Press [Exit] key to exit menu. -
Page 7: Program Edit
5.1 Program Edit When entering the “ALL TV” menu, which shows as below: (1) Press [CH+/CH-] key to move the cursor. (2) Press [P ] key to execute the Page Up/Page down function. (3) Press the color key to execute the corresponding functions in “ALL TV”. 5.1.1 Move (1) Press [CH+/CH-] key to move the cursor and press [RED] key to make a mark. - Page 8 5.1.3 Lock (1) Press [CH+/CH-] key to move the cursor and press [YELLOW] key to make a “lock mark” can be seen on the right side of the highlighted channel. (2) After saving and exiting the menu, if you want to watch the locked channel, a password will be required.
-
Page 9: Epg
5.2 EPG (1) Pressing [CH+/CH-] key to move the cursor and press [OK] key to enter the “Program Guide” and show EPG information. (2) Press [Exit] to exit “Program Guide” menu. 5.3 Sort (1) Press [CH+/CH-] key to move the cursor to “Sort” then press [VOL-/VOL+] key to change the three kinds of sorting type: by “LCN, “service name”, “ONID”. -
Page 10: Channel Search
(1) Press [MENU] key to display the main menu and press [VOL-/VOL+] key to select “Picture “program. Aspect Ratio Press [VOL-/VOL+] key to change option item and press [OK] key to confirm the selection. Resolution Press [VOL-/VOL+] key to change option item and press [OK] key to confirm the selection. TV Format Press [VOL-/VOL+] key to change option item and press [OK] key to confirm the selection. -
Page 11: Time
(1) Press [CH+/CH-] key to select “Manual Search”. (2) Press [OK] to enter the “Manual Search” menu. (3) Press [VOL-/VOL+] key to select the country. (4) Press [VOL-/VOL+] key to power on/off the “Antenna Power”. (a) You can scan channel by adjusting the “Frequency Channel” number and press [OK] key to start scanning. -
Page 12: Option
Time Zone When the time offset is “MANUAL“, you can change “GMT+0” value. Power down after Press [VOL-/VOL+] key to setup when to power down automatically 9. Option (1) Press [MENU] key to display the main menu. (2) Press [VOL-/VOL+] key to select the “Option“ menu and OSD Language. (3) Press [VOL-/VOL+] key to choose the language. -
Page 13: Usb
Parental Guidance (1) Press [CH-/CH+] key to move the cursor and press [OK] key to input the Password ”000000”. (2) This sets the program parental controlling level. Set password (1) Press [CH-/CH+] key to move the cursor and press [OK] key to enter the password settings sub-menu. -
Page 14: Multimedia
(1) Press [MENU] key to display the main menu. (2) Press [VOL-/VOL+] key to select the “USB“ menu. 11.1 Multimedia (1) Press [CH-/CH+] key to enter the “Multimedia” menu. (2) Press [VOL-/VOL+] key to select “Music, Photo, Movie, or PVR“. Music (1) Press [OK] key to enter the “Music”... -
Page 15: Photo Set Up
(2) Press [CH-/CH+] key to select the PVR file and press [OK] key to play the video. (3) Press [EXIT] key to return to folder. 11.2 Photo set up (1) Press [CH-/CH+] key to move the cursor and press [OK] enter the “Photo configure” menu. - Page 16 Recording device (1) Press [CH-/CH+] key to move the cursor and press [OK] key to enter the “Record Device” menu. (2) Then press [VOL-/VOL+] key to choose the DISK. (3) Press [EXIT] key to return to sub-menu. Timeshift function This function is only available when you connect USB storage to the player. Press [Red] to start the timeshift, then press [Stop] to stop the recording.
-
Page 17: Firmware Upgrade
12. Firmware upgrade You will need a USB flashdrive to upgrade the player. (1) Copy the new firmware to the root directory of a USB stick and connect it to the USB HOST port of the player. (2) Input password “666666” on the main menu, the system will update the firmware automatically. -
Page 18: Rename
14.3 Rename (1) Press [GREEN] key to rename the selected program. (2) Press [OK] key to save the changes. 15. Packing list PART QUANTITY N150H player Power adapter Remote control CD with user manuals 16. Troubleshooting If you encounter problems when using this product, please check the following points before requesting service.
Need help?
Do you have a question about the Movie Cube N150H and is the answer not in the manual?
Questions and answers