
Related Manuals for ProForm 515 s CrossWalk


Summary of Contents for ProForm 515 s CrossWalk
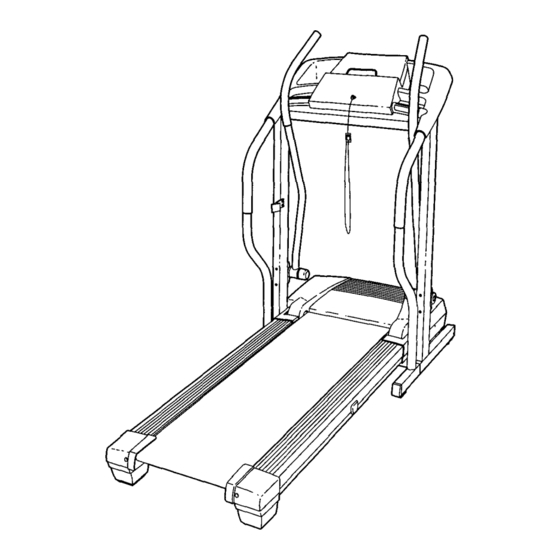
- Page 1 _C_-F_r_Jnv_. 5 1 5 s CrossWalk ,Model No. 831.294040 TREADMILL EXERCISER Serial No. User's Manual Serial Number Decal • Assembly • Operation • ' Maintenance • Part List and Drawing Sears, Roebuck and Co., Hoffman Estates, IL 60179...
-
Page 2: Table Of Contents
,__l:_-Fl:_r_J_. 5 1 5 S CrossWalk TABLE OF CONTENTS IMPORTANT PRECAUTIONS ..............BEFORE YOU BEGIN ..............ASSEMBLY ................OPERATION AND ADJUSTMENT ............HOW TO FOLD AND MOVE THE TREADMILL ..........TROUBLESHOOTING ..............CONDITIONING GUIDELINES ............... ORDERING REPLACEMENT PARTS ..........Back Cover FULL 90 DAY WARRANTY ............ -
Page 3: Important Precautions
IMPORTANT PRECAUTIONS WARNING: To._.= _..sh of bums, tire, electric shook, ol; Injury to persons, read the following important precautions and Information before operating the treadmilL 1. It is the responsibility of the owner to ensure t2. Failm to use a propmly functioning surge that all users of this Ueedmil! are adequately suppressor cOuld result in damage to the con- informed of aH warnings and prscaub_ns. - Page 4 22. When using IFIT.com CDs and videos, an 25. Never insert any object into any opening. electronic "chirping" sound will alert you 26DANGER: z.,y .nplug pow., when the speed of the treadmill is about to change. Always listen for the "chirp" and be cord Irremedlately alter use, before cleaning prepared for speed changes, in m the treadmill, and before performing...
-
Page 5: Before You Begin
BEFORE YOU BEGIN Thank you for selecting the revolutionary PROFORM ® using the treadmill. If you have questions after reading CROSSWALK 515s treadmill. The CROSSWALK 515s this manual, call 1-800-4-MY-HOME ®(1-800-469- treadmill combines advanced technology with innova- 4663).To help us assist you, please note the product tive design to help you get the most from your exercise model number and serial number before calling. -
Page 6: Assembly
ASSEMBLY Assembly requires two persons. Set the treadmill in a cleared area and remove all packing materials. Do not dispose of the packing materials until assembly is completed. Note: The underside of the treadmill walking belt is coated with high-performance lubricant. During shipping, a small amount of lubricant may be transferred to the top of the walking belt or the shipping carton. - Page 7 2. With the help of another person, carefully lower the Uprights (69) as shown. (Note: It may be helpful to place your foot on one of the Extension Legs [63] as you tip the Uprights.) Make sure that the Extension Legs re- main in the Uprights.
- Page 8 5. Hold the Console Base (47) near the Left Handrail (71). Attach the end of the ground wire in the Console Base to the small hole in the side of the Left Handrail with the 112" Ground Screw (75). Small 6.
- Page 9 8. Press the Upright Wire (42) into the slot in the underside of the Console Base (47) in the indicated area. Cover the Upright Wire with the Right Grip Plate (36). Be careful not to pinch the Upright Wire. Tighten three 3/4" Screws (2) into the Right Grip Plate and the Console Base.
-
Page 10: Operation And Adjustment
OPERATION AND ADJUSTMENT THE PERFORMANT LUBE WALKING BELT an equipment-grounding conductor and a grounding plug. Plug the power cord into a surge suppressor, Your treadmill features a walking belt coated with and plug the surge suppressor into an appropriate PERFORMANT LUBE a high-performance lubricant. - Page 11 CONSOLE DIAGRAM CALS. PULSE TIME PROGRAM DISPLAY DISTANCE SPEED STOP &WARNING: 3" 0 reduc o dsk of SOnDes in)uty_ s_a_td MAX. 16SI55145140130125115 InterBctlve o_ foot rail_ IcQ_e st Wl_t,g t readmiH, read and ut_detstand the i_,er _ manuat, 145 138 130 125 118 110 103 aJI It,sir _lJons.
- Page 12 HOW TO TURN ON THE POWER Speed + and - buttons. Each time a button is pressed, the speed will L!ll Plug in the power cord (see page 10). change by 0.1 mph. Ifa button is held down, the speed will change in in- Locate the reset/off circuit breaker on the crements of 0.5 mph.
- Page 13 Time display--When Measure your heart rate if desired. the manual mode or the iFIT.com mode is se- To use the hand- lected, this display will grip pulse sen- show the elapsed time. sor, first make When a speed program sure that your is selected, the display will show the time remain- hands are clean.
- Page 14 treadmill is about to change, the Speed display will flash to alert you. The speed setting for the second segment will then appear in the left column of the matrix and the treadmill will automatically Insert the key into the console. adjust to the speed setting for the second seg- ment, See HOW TO TURN ON THE POWER on page...
- Page 15 HOW TO CONNECT YOUR PORTABLE STEREO Note: If your stereo has an RCA-type AUDIO OUT jack, see instruction A below. If your stereo has a 3.5mm LINE OUT jack, see instruction B. If your To use iFIT.com CDs, the treadmill must be connected stereo has only a PHONES jack, see instruction C.
- Page 16 HOW TO CONNECT YOUR HOME STEREO HOW TO CONNECT YOUR COMPUTER Note: If your stereo has an unused LINE OUT jack, Note: If your computer has a 3.5mm LINE OUT jack, see instruction A below. If the LINE OUT jack is see instruction A.
- Page 17 HOW TO CONNECT YOUR VCR Note: If your VCR has an unused AUDIO OUT jack, see instruction A below. If the AUDIO OUT jack is being used, see instruction B. If you have a TV To use iFIT.com CDs or videocassettes, the treadmill with a built-in VCR, see instruction B.
- Page 18 If the speed setting is too high or too low, you can • Adjust the volume of your CD player or VCR. manually override the setting at any time by If the volume is too high or too low, the con- pressing the Speed buttons on the console.
- Page 19 During the program, an electronic "chirping" sound will alert you when the speed of the treadmill is about to change. CAUTION: Always listen for the "chirp" and be prepared for speed changes. To use programs from our Web site, the treadmill must If the speed setting is too high or too low, you can be connected to your computer.
- Page 20 HOW TO USE THE UPPER BODY ARMS As you walk on the treadmill, you can either hold the handrails or use the upper body arms. To exercise your arms, shoulders, and back for a total body workout, move the upper body arms forward and back as you walk on the treadmill.
-
Page 21: How To Fold And Move The Treadmill
HOW TO FOLD AND MOVE THE TREADMILL HOW TO FOLD THE TREADMILL FOR STORAGE Before folding the treadmill, adjust the incline to the lowest position. If this is not done, the treadmill may be per- manently damaged. Next, unplug the power cord. CAUTION: You must be able to safely lift 45 pounds (20 kg) to raise, lower, or move the treadmill. - Page 22 HOW TO LOWER THE TREADMILL FOR USE 1. Hold the upper end of the treadmill with your right hand. Press the storage latch to the left. Pivot the treadmill down until the frame and foot rail are past the storage latch. 2.
-
Page 23: Troubleshooting
TROUBLESHOOTING Most treadmill problems can be solved by following the simple steps below. Find the symptom that applies, and follow the steps listed. If further assistance is needed, call toll-free 1-800-4-MY-HOME ® (1-800-469-4663). PROBLEM: The power does not turn on SOLUTION: a. - Page 24 PROBLEM: The walking belt slows when walked on SOLUTION: a. Use only a single-outlet surge suppressor that meets all of the specifications described on page 10. If the walking belt is overtightened, treadmill perfor- mance may decrease and the walking belt may be- come damaged.
- Page 25 CONDITIONING GUIDELINES ergy. Only after the first few minutes does your body begin to use stored fat calories for energy. If your goal is to burn fat, adjust the speed and incline of the tread- mill until your heart rate is near the lowest number in your training zone.
- Page 26 SUGGESTED STRETCHES The correct form for several basic stretches is shown at the right. Move slowly as you stretch--never bounce. 1. Toe Touch Stretch Stand with your knees bent slightly and slowly bend forward from your hips. Allow your back and shoulders to relax as you reach down toward your toes as far as possible.
- Page 27 NOTES...
- Page 28 PART LIST---Model No. 831.294040 R1103B Qty. Description Qty. Description Qty. Description Hood Console Left Rear Endcap Pad 3/4" Screw Wire Cover Rear Roller Motor Belt 3 1/2" Bolt Adjustable Bolt Motor Tension Bolt Book Holder Right Rear Endcap 3/8" Washer Console Base Allen Wrench Motor Star Washer...
- Page 29 106_ 58 I...
- Page 30 Your Home For repair - in your home - of all major brand appliances, lawn and garden equipment, or heating and cooling systems, no matter who made it, no matter who sold it! For the replacement parts, accessories, and user's manuals that you need to do-it-yourself. For Sears professional installation of home appliances...