Kenmore ELITE 795.7834 Series Use & Care Manual
Hide thumbs
Also See for ELITE 795.7834 Series:
- Use & care manual (34 pages) ,
- Use & care manual (34 pages)
Table of Contents
Advertisement
E
L
I
T
E
®
REFRIGERATOR
BOTTOM FREEZER
CONGELADOR
INFERIOR
REFRIGERADOR
CONGELATEUR
INFi_RIEUR
RI_FRIGI_RATEUR
Models / Modeios / Modeles
795.7834-k, 795.7835/€
-k=color number, n0mero de color, numero de couleur
m
Z
O
r"
i
(n
-1=
m
(n
z_
O
r =
Z
I
O_
\
M FL61987626
Printed
in Mexico
Sears Brands Management Corporation,
Hoffman
Estates, IL 60179
www.sears.com
Advertisement
Table of Contents

Related Manuals for Kenmore ELITE 795.7834 Series


Summary of Contents for Kenmore ELITE 795.7834 Series
- Page 1 ® BOTTOM FREEZER REFRIGERATOR CONGELADOR INFERIOR REFRIGERADOR CONGELATEUR INFi_RIEUR RI_FRIGI_RATEUR Models / Modeios / Modeles 795.7834-k, 795.7835/€ -k=color number, n0mero de color, numero de couleur r" M FL61987626 Sears Brands Management Corporation, Hoffman Estates, IL 60179 www.sears.com Printed in Mexico...
-
Page 2: Table Of Contents
EnglishVersion Dairy Corner Warranty Dairy Corner Protection Agreements Chef Fresh / Snack Pan Safety mnstructions Can Rack Grounding Require merits Egg box Parts and Features Ice Bin Durabase 8-15 Refrigerator InstalJation Durabase Divider Unpacking Your Refrigerator Glide Out Drawer Basket Installation Filter Base Grille... -
Page 3: Warranty
BOTTOM REFRIGERATOR FREEZER ® Kenmore Elite Limited Warranty When installed, operated and maintained according to all instructions supplied with the product, if any non-consumable part of this appliance other than the sealed refrigerant system fails due to a defect in material and workmanship within one year from the date of purchase, call 1-800-4-MY-HOME®... -
Page 4: Protection Agreements
Your new Once you purchase the Agreement, a simple phone call is Kenmore ® product is designed and manufactured for years all that it takes for you to schedule service. You can call of dependable operation. But like all products, it may anytime day or night, or schedule a service appointment require preventive maintenance or repair from time to time. -
Page 5: Safety Mnstructions
This guide contains many important safety messages. Always read and obey all safety messages. This is the safety alert symbol. It alerts you to safety messages that inform you of hazards that can kill or hurt you or others, or cause damage to the product. All safety messages will be preceded by the safety alert symbol and the hazard signal word DANGER, WARNING, or CAUTION. - Page 6 This appliance is not intended for use by persons (including children) with reduce physical, sensory or mental capabilities, or lack of experience and knowledge, unless they have been given supervision or instruction concerning the use of the appliance by a person responsible for their safety. Children should be supervised to ensure that they do not play with the appliance.
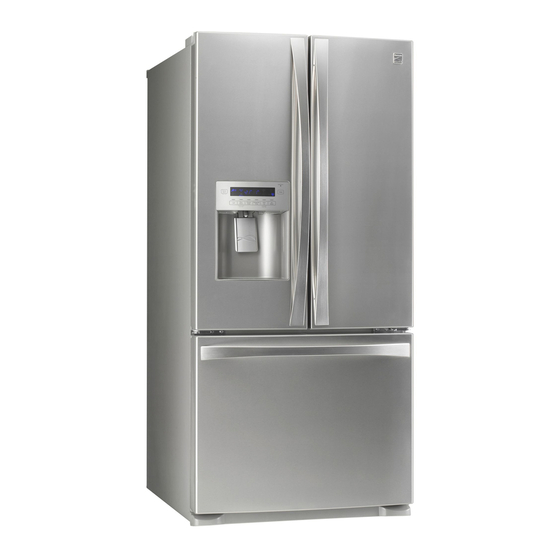
- Page 7 Usethissection to become morefamiliar w iththepartsandfeatures. NOTE:This guidecoversseveral d ifferentmodels.Therefrigerator you have purchased may have some or all of the items listed below. The locations of the features shown below may not match your model. Refrigerator Light Glide-Out Drawer Basket Refrigerator Shelves Freezer Light Snack Pan...
-
Page 8: Refrigerator Instaljation
Install this appliance in an area where the temperature is between 55°F (13°C) and 110°F (43°C.) If the temperature around the appliance is too low or high, Excessive Weight Hazard cooling ability may be adversely affected. Use two or more people to move and install CAUTION: Avoid placing the unit near heat sources, refrigerator. -
Page 9: Your Refrigerator Doors
TOOLS YOU MAY NEED 10ram ¼in 3/8in Hex head socket wrench Phillips screwdriver Flat head screwdriver Allen wrench To move refrigerator through a house door, it maybe necessary to remove refrigerator and freezer door handles. NOTE: Handle appearance may vary from illustrations on this page. HOW TO REMOVE DOOR HANDLES Mounting... - Page 10 HOW TO REPLACE DOOR HANDLES NOTE: Handle appearance may vary from illustrations on this page. 1. Replacing Refrigerator Door Handle • Place the handle on the door by adjusting handle footprints to fit mounting fastners and tighten the set screws with a 2,5 mm (%2")Allen wrench. NOTE: If the handle mounting fasteners need to be tightened or removed use a 1/4"Allen wrench.
-
Page 11: Removing And Replacing
REMOVING AND REPLACING REFRIGERATOR DOORS (models with water dispenser) 1. Removing Refrigerator Door NOTE: Handle appearance may vary. IMPORTANT: Before you begin, turn the refrigerator OFF and unplug it. Remove food and any bins from doors. i_ Left Door • Loosen the screws and remove the cover on back side (see figure A). •... - Page 12 2. Replacing Refrigerator Door I_ Right Door • Lower the door onto the middle hinge pin (9). Make sure the door is aligned with the cabinet. o Replace the top hinge (7) installing hinge screws (6) to secure it. , Make sure the gasket on the door is flush against the cabinet and is not folded. Support the door on the handle side while securing hinge.
- Page 13 HOW TO REMOVE AND INSTALL • With both hands, hold both sides of the door and pull it PULL DRAWER up to separate it from the rails. IMPORTANT: To avoid possible injury, product or property damage, you will need two people to perform the following instructions.
- Page 14 HOW TO REMOVE AND INSTALL • Make sure you have the correct rail cover for each side. PULL OUT DRAWER Right IMPORTANT: To avoid possible injury or product or Rail Cover property damage, you will need two people to perform the following instructions.
-
Page 15: Leveling And Door Alignment
LEVELING AND DOOR ALIGNMENT Door Alignment If the space between your doors is uneven, follow the Leveling instructions below to align the doors: Your refrigerator has two front leveling screws one on 1. With one hand, lift up the door you want to raise at the right and one on the left. -
Page 16: Using Your Refrigerator
ENSURING PROPER AiR CiRCULATiON SETTING THE CONTROLS In order to ensure proper temperatures, air must flow IMPORTANT: Wipe out moisture before using the display between the refrigerator and freezer sections. As shown button as operation of the button is based on touch in the illustration below, air enters at top of the freezer and sensing method and becomes slow or other buttons may circulates down. -
Page 17: Adjusting Controls Settings
• Dispenser Light: Always remember to wait at least 24 hours between When the Light button is pressed, the display will adjustments. RECOMMENDED indicate the selected function. CONDITION/REASON: ADJUSTMENT: Press the LIGHT button once to turn On/Off the REFRIGERATOR section Turn dispenser Lamp. -
Page 18: Food Storage Guide
FOOD STORAGE GUIDE Packaging Successful freezing depends on correct packaging. When Storing Fresh Food you close and seal the package, it must not allow air or Wrap or store food in the refrigerator in airtight and moisture in or out. if you do, you could have food odor moisture-proof material unless otherwise noted. -
Page 19: Refrigerator Shelves
REFRIGERATOR SECTION NOTE: Make sure that shelves are level from one side to the other. Failure to do so may result in the shelf falling or spilling food. REFRIGERATOR SHELVES The shelves in your refrigerator are adjustable to meet Sliding Out Shelves (On some models) your individual storage needs. -
Page 20: Humidity Control Crisper
HUMIDITY CONTROL CRISPER MODULAR DOOR BINS The crispers provide fresher-tasting fruit and vegetables The door bins are removable for easy cleaning and by letting you easily control humidity inside the drawer. adjusting. The crispers include: 1. To remove the bin, simply lift the bin up and pull A crisper drawer humidity control switch. -
Page 21: Can Rack
DURABASE CAN RACK (On some models) The Can Rack holds up to beverage cans. 1. To remove the Durabase, push it back to the end as much as possible. Tilt up the front of the Durabase and pull straight out. 2. -
Page 22: Durabase Divider
TILTING DOOR DURABASE DIVIDER The tilting door provides easy access for stored foods, The Durabase divider allows you to organize the Durabase area into sections. How to use: Tilt the door down and pull it out. []WARNING: There is enough open space in it for children to climb inside. -
Page 23: Filter
FILTER 4. Replace with a new cartridge. Take the new cartridge out of its packaging and remove It is recommended that you replace the filter when the protective cover from the o-rings. water filter indicator light turns on or your water dispenser or ice maker decreases noticeably. -
Page 24: Care And Cleaning
PLASTIC PARTS (covers and panels) Do not use paper towels, window sprays, abrasive cleansers, or flammable fluids. These can scratch or damage the material. COVER BACK Clean the cover back at least twice a year to keep your refrigerator working efficiently, Explosion Hazard Use non-flammable cleaner. -
Page 25: Power Interruptions
WHEN YOU GO ON VACATION To change the freezer light: 1. Unplug refrigerator or disconnect power. If you choose to leave the refrigerator on while you are away, follow these steps to prepare your refrigerator 2. Reach behind light shield to remove bulb. before you leave. -
Page 26: About The Automatic Icemaker
It is normal for several cubes to be stuck together. If ice is not used frequently, old ice cubes will become cloudy, taste stale, and shrink. Personal Injury Hazard NOTE: If the cube size is smaller or larger than you Avoid contact with the moving parts of the ejector expected, you can regulate the size with the cube size mechanism, or with the heating element that releases... -
Page 27: Installation
NOTE: Water line installation is needed when the To determine how much tubing you need: measure the distance from the water valve on the back of the Automatic Icemaker and/or Water Dispenser features are available on your product. refrigerator to the water supply pipe. Then add 8 feet (2,4 m). - Page 28 iNSTALLATiON iNSTRUCTiONS 6. ROUTE THE TUBING (CONTINUED) Route the tubing between the cold water line and the 2. CHOOSE THE VALVE LOCATION refrigerator. Choose a location for the valve Route the tubing through a hole drilled in the wall or that is easily accessible.
- Page 29 CONNECT THE TUBING TO THE 10. TURN THE WATER ON AT THE REFRIGERATOR SHUT OFF VALVE NOTES: Tighten any connections that leak. • Before making the connection to the refrigerator, be sure the refrigerator power cord is not plugged into Reattach the compressor the wall outlet.
-
Page 30: Troubleshooting Guide
UNDERSTANDING SOUNDS YOU MAY HEAR The defrost timer will click when the automatic defrost cycle begins and ends. The thermostat control (or Your new refrigerator may make sounds that your old one refrigerator control, depending on the model) will also didn't make. - Page 31 COMPRESSOR MOTOR SEEMS TO RUN TOO MUCH Check if... Then... The refrigerator that was replaced was an Modern refrigerators with more storage space require older model. more operating time. The room temperature is hotter than normal. The motor will run longer under warm conditions. At normal room temperatures, expect your motor to run about 40% to 80% of the time.
- Page 32 ICE HAS OFF-TASTE OR ODOR Check if... Then... The icemaker was recently installed, Discard first few batches of ice to avoid discolored or off-flavored ice. The ice has been stored for too long, Throw away old ice and make new supply, The food has not been wrapped tightly in Rewrap foods since odors may migrate to the ice if food either compartment,...
- Page 33 AUTOMATIC ICEMAKER DOES NOT WORK Check if... Then... Icemaker power switch in the O (OFF) position. Move the switch to the I (ON)position. Water supply turned off or not connected. See the Connecting the Water Line Section. Freezer compartment too warm. Wait 24 hours for the freezer to reach its ideal temperature.
- Page 34 Para pedir servicio de reparacidn Au Canada pour service en frangais: a domicilio, y para ordenar piezas: 1-800-LE-FOYER 1-888-SU-HOGAR ® (1-800-533-6937) www.sears.ca (1-888-784-6427) iiiiiiiiiiiiiiiiiiiiiiiiiiiiiiiiiiiiiiiiiiiiiiiiiiiiiiiiiiiiiiii iliii ® Registered Trademark / TMTrademark of KCD IP, LLC in the United States, or Sears Brands, LLC in other countries ®...
Need help?
Do you have a question about the ELITE 795.7834 Series and is the answer not in the manual?
Questions and answers