GE ASH08 Owner's Manual And Installation Instructions
Hide thumbs
Also See for ASH08:
- Owner's manual & installation instructions (20 pages) ,
- Owner's manual and installation instructions (40 pages) ,
- Owner's manual and installation instructions (20 pages)
Table of Contents
Advertisement
Quick Links
GEAppliances. com
©
Safety Instructions
..........
2, :_
I_mbs ......
6, 7
Pads ........
4, 5
Air Filter .....................
8
.....................
8
...............
8
................
8
.........
15
.........
9-14
........
16
.....
16
Consuiner
Support
.... t_ack Cover
.......
17, 18
Warranty ....................
19
ASH08
ASW08
ASH10
ASWIO
ASH12
ASW12
Write the model and serial numbershere:
Model #
Serial #
Find tbese numbers
on a label on the
side of the air conditioner.
49-7424 11-01JR
Advertisement
Table of Contents

Related Manuals for GE ASH08


Summary of Contents for GE ASH08
-
Page 1: Table Of Contents
GEAppliances. com Safety Instructions ..2, :_ Operating Instructions Controls-Control I_mbs ..6, 7 ASH08 ASWIO Controls-Touch Pads ..4, 5 ASW08 ASH12 ASH10 ASW12 Care and Cleaning Air Filter ..... Batteries ..... Grille and Case ....Outdoor Coils ....Instagation Instructions ©... - Page 2 IMPORTANT SAFETY INFORMATION. READALLINSTRUCTIONS BEFORE USING. A WARNING! For your safe_ the information in this manual must be followed to minimize the risk of fire, electric shock or personal injury. SAFETY P RECAUTIONS N Turn tim mode control OFFand unplug Use this appliance only/br its intended...
- Page 3 GEAppliances.com it WARNING! USEOFEXTENSION CORDS-77 &Volt modelsonly Because of potential safety hazards under certain CAUtiON: conditions, we strongly recommend against the use of an extension cord. DO NOT use an extension cord with any of the 230/208 volt models. However; if"you inust use an extension COIII, it is absolumly...
-
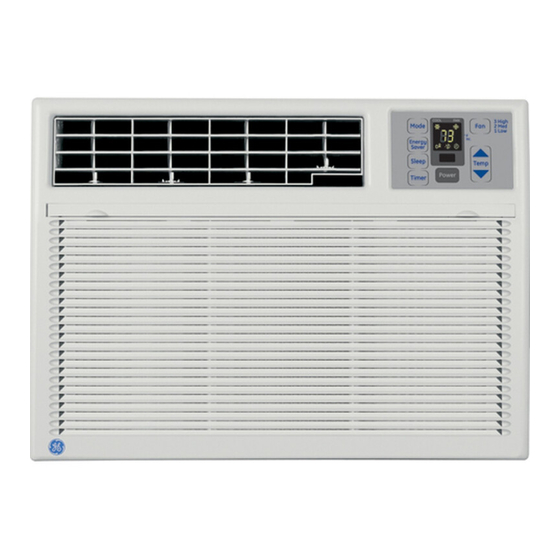
Page 4: Controls-Touch Pads
Aboutthe controlsontheair conditioner-models with touchpads. Features and appearance will varg. Air ConditionerControls RemoteControl ON/OFF TIMER hrns air conditioner on and off. ON-When the air conditioner is off, it can be set to m]tomatically turn on in 1 to 12 hours Display at its previous setting. - Page 5 GEAppliances.com When the air conditioner is turned on, it will Lights next to the touch pads on the air conditioner automatically start in the setting last used. control panel indicate the selected settings. COOL Mode Use the COOL mode widl HIGH(F3), MED (F2)or CoolingDescriptions LOW (F1) fan for cooling.
-
Page 6: Operating Instructions Controls-Control I_Mbs
Aboutthe controlsontheair conditioner-models with controlknobs. Features and appearance will vary. COOL "'0 :"' HIGHQHIGH IMED LOWQ£I COOL COOL MED COOL COOL MODECONTROLS Your model will have one of the above type controls. I'o1[' ' e l['ol TEMPCONTROLS Your model will have one of the above type controls. Controls Temp Controls Mode Controls... - Page 7 GEAppliances.com Additional controls and important information. Energy Saver (on some models) OFF- The fan runs all the time, while the _i11e energy saver switch controls the fan. compressor cycles on and ore ON - _i11et:an and compressor cycle on and off This switch must he set at OFFin order to use together.
-
Page 8: Care And Cleaning
IX- professionally steam-deaned, a service available through your GE service outlet. AirFilter TO remove(onsomemodels): The air filter behind the front grille should be Grabthe tabs on checked and cleaned at least every"30 days or more of Rm if necessary. - Page 9 Preparing to install the air conditioner. Read these instructions completely and carefully. Before You NOTE TOINSTALLER:Leave these instructions with CAUTION: the air conditioner after installation is completed. DOnot, under any circumstances, cut or remove the third (ground) prong from the NOTE TO CONSUMER:Keep this Owner's Manual power cord.
-
Page 10: Window Installation
WindowInstallationInstructions. Read the section Preparing to Install the Air Conditioner before beginning. Parts Included Top mounting rail Window omtoo / sash seal Left accordion panel w, ndowgas °P _e°_s_i_g ra" Right accordion panel Bottom inner case gasket Sill support (2) Type A Type B (8) Type C... - Page 11 Read completely, then follow step-by-step. Window Requirements @ These instructions are for a standard doubl_ _MIsupporting parts must be secured to firm wood, masom y or metal. hung window_ You will need to modif}_ them for other types of windows. The electrical outlet must be within reach of The air conditioner can be installed without...
- Page 12 WindowInstallationInstructions. Remove the Air Conditioner From the Case [Remove the 2 screws on each side of the case. []Slide the air conditioner fi'om the case by Keep these for later use. gripping the base pan handle and pulling fbrward while bracing the case. Front of air conditioner Frontof air conditioner Remove packing cardboard and tape if present.
- Page 13 Install the Case in the Window []Cut the window sashseal m the window width []Locate the 3 screw holes along the bottom and stick the adhesive side to the bottom of front edge of the case. Center the case, side- the sash.
- Page 14 WindowInstallationInstructions. Install the Air Conditioner in the Case Slide the air conditioner into the case. ]Attach the front gTille to the case by inserting Reinstall the 2 _rews removed earlier on each the tabs on the grille into the slots on the front side of the case.
-
Page 15: Instagation Instructions Through-The-Wall Installation-Optional
Through-the-WallInstallation Instructions-OptionaL The case may be installed throughthe wall in beth existing and new construction. Read completely, then follow step-by-step. IMPORTANT Through-the-wallinstallationis not appropriate if any of theside louvers in the case will be obstructedby the wall. All side louvers in the case mustproject on the outdoorside of the wall. -
Page 16: Troubleshooting Tips
Before you call for service... Troubleshooting tips: Save time and money! Review the chart below first and you may not need to call for service. Possible Causes What To Do The air conditioner • Make sure dm air conditioner plug is pushed is unplugged, completely into the outlet. -
Page 17: Product Regiswation
You can rest easy, knowing that all your valuable household products are promcted against expensive repairs. 800.626.2224 Place your confidence in GE and call us in the U.S. toll-free at for more information. *Al! h_dnds {:oveied, yeais old, conti_zental U.S. - Page 18 Da{ePlaced Number * Please provide yo,,lr e-mail address to receive, via e-mail, disco/in/s, special oft_a's alld other important conmmnications from GE Appliances (GEA). El Check here if yon do not want to receive conmmnications from GEA's carefully selected parmers. GEApMin_ps...
-
Page 19: Warranty
Customer Care® technician. To schedule service, Proof of the original purchase on-line, 24 hours a day, visit us at GEAppliances.com, or call date is needed to obtain service 800.GE.CARES (800.432.2737). under the warranty. We Will Replace: Anypartof the air conditioner which fails due to a defect in materials or workmanship. -
Page 20: Consumer Support
ContactUs GEAppliances.com ffyou are not satisfied with the service you receive from GE, contact us on our Website with all the details including your phone number, or write to: General Managel; Customer Relations GE Appliances, Appliance Park Louisville, KY 40225 RegisterYour A ppliance GEAppliances.com...
Need help?
Do you have a question about the ASH08 and is the answer not in the manual?
Questions and answers