Advertisement
Available languages
Available languages
wwvv.GEAppliances.com
0
N
0
0
Safety Instructions
..........
2-4
Operating
Instructions
Automatic
Icemaker
...........
9
(;are
and Cleaning
........
10, 11
Shelves
....................
6, 7
Storage
Drawers
.............
7, 8
Temperature
Controls
..........
5
Installation
Instructions
Preparing
to Install
the ReDigeramr
.............
19
Reversing
the Door Swing
. . 17-92
VVater Line Installauon
.....
1,9,-17
Troubleshooting
Tips
Before
You (;all For Service
. .94, 95
Normal
Operating
Sounds
.....
93
Consumer
Support
Consumer
Support
....
Back Cover
Product
Registrauon
.......
97, 98
_'arranty
for
Canadian
Customers
.........
96
V(arianw
for U.S. Customers
. . . 99
Models 16, 17, 18
Cong41ateur
sup&'ieur
Rdfrigdrateurs
Lasection
fran_aise commence
a la page30
Congelador
superior
Refrigeradores
La secci6n
en espa#ol empieza en la pagina 60
Write the model and serial
numbers here:
Model #
Serial #
You can find them on a label on
the
upper
left
side
of the
fl'esh
toed
COIIlp}l
I'tIIl
en
t.
197D5226PO02 49-60255-2
11-04JR
Advertisement
Chapters

Related Manuals for GE GTS18ABSALWW


Summary of Contents for GE GTS18ABSALWW
- Page 1 wwvv.GEAppliances.com Safety Instructions ..Operating Instructions Automatic Icemaker ... Models 16, 17, 18 (;are and Cleaning ..10, 11 Shelves ....6, 7 Cong41ateur sup&'ieur Storage Drawers ..... 7, 8 Temperature Controls ..Rdfrigdrateurs Installation Instructions Preparing to Install the ReDigeramr .....
- Page 2 IMPORTANT SAFETY INFORMATION. READALLINSTRUCTIONS BEFORE USING. A WARNING! Use this appliance only for its intended purpose as described in this Owner's Manual. SAFETY P RECAUTIONS When using electrical appliances, basic safety precautions should be followed, including the following: Keep finget_ out ot the "pinch point"...
- Page 3 DANGER!RISK OF CHILDENTRAPMENT PROPER DISPOSAL OFTHE REFRIGERATOR Refrigerants Child entrapment sufl_cation problen_s of the past.Junked or abandoned _M1 refligeration products contnin refi-igerants, refrigeratms are still dangerous...even if they will which trader federal law must be removed prior sit fin" "just a fi_w days." If you are getting rid of...
- Page 4 IMPORTANT SAFETY INFORMATION. READALLINSTRUCTIONS BEFORE USING. WARNING! HOWTOCONNECT ELECTRICITY Do not, under any circumstances, cut or remove the third (ground) prong from the power cord. For personal safety this appliance must be properly grounded. The power cord of this appliance is equipped with This...
- Page 5 About the temperaturecontrol dial Turning the dial to 0 stops cooling in both compartments--fresh food and freezer. It does not shut off power to the refrigerator. ControlSettings Temperature Control Dial plus 0. I temperature control dial nine settings is the wannest.
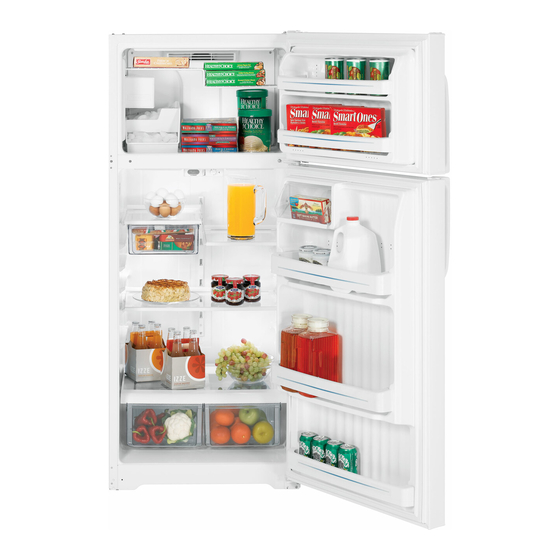
- Page 6 About the fresh foodcompartmentshelves. Shelf supports at various levels allow you to custom-space your shelves. Not all features are on all models. Half-Width Shelves One end of the shelf rests on a molded NOTE:Theshelf to the @t of the trackb designedto hookinto the @t-hand slot, side-wall support;...
- Page 7 About the freezer compartment shelves. Some models have an ice-tray shelf and some have a full-width step shelf. Ice- Tray Sheff To remove the ice-tray shelf, lift the left side of the shelf offits supports, then pull shelf to the left to fl'ee it of the...
- Page 8 About storage drawer and cover removal. Not all features are on all models. Adiustable Humidity Drawer (onsomemodels) all the wa_ to the LOW Slide the control all the way to the Slide the control HIGH setting to proxide high humidity setting to proxide lower humidity...
- Page 9 About the automatic icemaker. A newly-installed refrigerator may take 12 to 24 hours to begin making ice. Automatic lcemaker (onsome models) Power Switch Icemaker Be sure t_othing interteres with the sweep The icemaker will produce api)roxinmtely of the feeler aim. 100-130 cubes in a 24-hour period,...
- Page 10 Care and cleaning of the refrigerator. Cleaning the Outside The door handles and trim (on sonle Do not wipe the refr/_Teratorwith a soiled dish cloth or wet towel Thesemay leave a residue models). Clean with a cloth (lmnl)ened that can erode the paint Do not use scouring with soapy water.
- Page 11 Behind the Refrigerator When pushing the refngerator back, make sure Be caretul when moving reti'igerator you don't roll over the power cord or icemaker away fl'om wall. All types of floor supply line {on some models). coverings can be danmged, particularly cushioned coverings...
- Page 12 Installation Refrigerator Instructions Models 16, 17, 18 Questions?Call 800.GE.CARES (800.432.2737)or visit omX_ebsite _,t:www.GEAppliances.com In Canada, call 1.800.361.3400 or visit www.geappliances.ca _ebsite BEFORE YOU BEGIN CLEARANCES _Mlow the following clearances fin" ease of installation, Read these instructions completely and carefully, proper...
- Page 13 Refrigerator Tubing Osmosis Water System, the only approved installation kit, 1/4" outer diameter to connect refrigerator is with a GE RVEfit. For other reverse osmosis water to the water supply: If using COl)per, sm'e both s}_stems, follow the manufi_cturer's recommendations.
- Page 14 • If you are using a GE SmartConnect '_ ReflJgerator Tubing kit, the necessary fittings are preassembled [] DRILL THE HOLE FOR THE VALVE to the tubing.
- Page 15 Make sure the tubing is flfllv inserted into wdve. Tighten the compression nut securely. For plastic tubing from a GE Smart(_onnect'" Refl'igerator Tubing kit, insert the molded Saddle-Type -- VerticalCold ShutoffValve of the tubing into the shutoff wdve and...
- Page 16 While holding tubing, tighten tile fitting. For plastic tubing from a GE Slnart(_onnect Refrigerator Tubing kit, insert tile molded of the tubing into the shutoff valve and tighten compression nut tmtil it is hand...
- Page 17 Installation Instructions PLUG IN THE REFRIGERATOR START THE ICEMAKER On power sMtch models, set the icemaker power __rram,e coil of tubing so that it does _ibrate switch to the I (0/1) position. On feeler am/models, against back of the refrigerator or against ann to the ON (down) move the feeler...
- Page 18 Installation Instructions REVERSING THE DOOR SWING (CONT.) 2.2 X4ith a :5/16" hex-head socket dfixer, remoxe [] BEFORE YOU START screws that hold the top hinge to the cabinet, 1.1 UnI_lug refrigerator fl'om its electrical outlet. 2.3 I,ift hinge (and shim glued to it) straight up to free...
- Page 19 Installation Instructions [] REMOVE THE FRESH FOOD [] REMOVE THE FRESH FOOD DOOR DOOR (CONT.) 3.1 Tape the door shut with maskin,,. _ tape. 3.4 Set the door outside-up on a non-scratching S/IIS{_Ice. 3.5 Tmnsfi_r the two screws fl'om the opposite side of the cabinet to the screw holes _acated...
- Page 20 Installation Instructions REVERSING THE DOOR SWING (CONT.) [] REVERSING THE HARDWARE [] REVERSING THE DOOR HANDLES Transfer fresh food door handle 4.1 Remove tile base ,,Tille (if _our refrigerator one) b) pulling it straight out. 5.1.1 Remove tile handle phlg using tape-tipped put U knife...
- Page 21 Installation Instructions I_REVERSING THE DOOR HANDLES 5.4 Transfer Freezer Door Handle (CONT.) 5.4.1 Remove screw holding handle to the of the door screws holding 5.1 Transfer fresh food door handle handle to the bottom of the door, (cont.) 5.1.5 Pull plug button fl'om...
- Page 22 Be sure washer is in place on the pin, spacer in place on the pin. Plastic ge Pin Washer Hinge ._-_-_ Washer Bracket and Spacer Modelswith a hingebracket Models with a hinge bracket that has 2 screw holes. that has 4 screw holes.
- Page 23 Normal operating sounds. Newer refrigerators sound different from older refrigerators. Modem refrigerators have more features and use newer technology. Do you hear what I hear? These sounds are normal. HUMMM... WHIRl WHOOSH... • high effidency compressor Hm thster hmger than refl'igerator •...
- Page 24 Before you call for service... Troubleshooting Tips Save time and money/. Review the charts on the following pages first and you may not need to call for service. Possible Causes What To Do Refrigerator does not ablaut cycle Refrigerator in defrost cycle.
- Page 25 Possible Causes What To Do Automatic icemaker lcemaker power switch * On power switch models, set tile power swit(h to tile does not work is not on. I (on) position. On teeler am_ models, move the feeler (on some models) :u_u to tire ON (down) l)osifiou.
- Page 26 CONSUMER WARRANTY (for customers in Canada) Your refrigerator is warranted to be free of defects in material and workmanship. What is covered How Long Warranted Parts Labour (From Date of Sale) Repair or Replace at Camco's Option Compressor Concept II Two (2) Years Two (2) Years Two (2) Years...
- Page 27 GE Service Protection Plus rM GE, a name recognized worldwide _br quality and dependability; oflers y'ou Service Protection Plus'"--comprehensive protection on all y'our appliances-- No Matter What Brand! Benefits Include: We71CoverAny Appliance. • Backed by GE • All brands covered Anywhere.
- Page 28 FAII.I RE T() COMPLETE AND RE'F[ 7RN Tt tlS CARD DOES NOT DIMINISIi Y( )l R GE Appfiances BL\RRAN'IY RI (;I ITS. GE Consomer & Indttstrial For infi)rmation about GEA's pri_acy and data usage polio 5 go to _vw.GEAppliances.com and click Louisville, Kentttcky on "Pri_acy Policy"...
- Page 29 During this full five-year sealed refrigeration system warranty, GE will also provide, free of charge, all labor and in-home service to replace the (lefecfive part. Service trips to your...
-
Page 30: Table Of Contents
Mesures de s(curit( ..31-33 Instructions de fonctionnement Bacs de rangement ... 36, 37 Clavettes ....35, 36 Commandes de la temperature ..Entretien et nettoyag_ ..39, 40 Machine _ gta<ons automafique ..In_Ttructions d'installation Installation de la conduite d'eau .... - Page 31 INSTRUCTIONS IMPORTANTES DE SI CURITE. LISEZ TOUTESLES INSTRUCTIONS AVANT D'UTILISER VOTREREFRIGERATEUR. www.electromenagersge.ca A VERTISSEMENT! N'utilisez cet appareil qu'aux fins pr6vues clans le pr6sent Manuel du propri6taire. MESURES D ES@URITE Pour utiliser un apparei161ectrom6nager 61ectrique, vous devez prendre des mesures de s6curit6, particulier : Vous devez bien installer et placer...
- Page 32 INSTRUCTIONS IMPORTANTES DE S£:CURITE. LISEZ TOUTESLES INSTRUCTIONS AVANT D'UTILISER VOTREREFRIGERATEUR. DANGER!RISQUEDEPRISEAU PIEGED'ENFANT BONNE MISEAUREBUT DEVOTRE R EFRIGERATEUR I)ent'em/ement et l'asph)sxie des enflmts ne sent Refrigerants pas des histoires du passe. I,es r_fi_g_rateu_jet_s Tous les appareils r(_fi'ig_ration contiennent ou abandonn_s sent toujoui_ dangereux.., in&ine r_fl'ig&'ants...
- Page 33 www.electromenagersge.ca A VERTISSEMENT! BRANCHEMENT ELECTRIOUE Ne coupez ou n'enlevez jamais, en n'importe queries conditions, la troisibme broche (raise _ la terre) de votre cordon d'alimentation. Pour votre s#curit# personnelle, vous devez bien mettre _ la terre cet appareil #lectrom#nager. i,e cordon d'alimentation de cet appareil est muni...
- Page 34 Boutonde commandede la temperature. Tournez le bouton _ la position 0 pour arrOter le refroidissement dans les deux compartiments r_frig_rateur cong#lateur, r#frig#rateur. mais cela ne coupe pas I'alimentafion R#glages de la commande Bouton de commande de la temperature i,e bouton de comn/ande de la temperature possi_de...
- Page 35 Clayettesdu compartimentrefrigerateur, www.electromenagersge Les clayettes se placent _ cliff, rents niveaux vous permettant de personnaliser I'espace de rangement. Toutes les caract#ristiques ne sont pas disponibles sur tous les modbles. Clayettes demi-largeur sup_rieur darts le rail, puis abaissez Un c_)t_ de la clavette repose Sill"...
-
Page 36: Bacs De Rangement
Clayettes du compartiment congelateur. Certains modbles possbdent une clayette pour moule D glagons et certains modbles, une clayette _tag_e pleine largeur. Clayette pour moule a gla_ons Pour enlever la clayette pour moule glagons, relevez le (6t_ gauche de la clavette stlpports. - Page 37 Enlevementdu bac de rangement et du couvercle, w .electrome,agersge.ca Toutes les caract_ristiques ne sont pas disponibles sur tous les modules. Bac gl legume gl humidite reglable (surcertains mod_les) Fakes glisser le r0glage en posidon HIGH Fakes glisser le r0glage en position (elevee) pour obtenir l'hunfidit0...
- Page 38 Machine a glagons automatique. Un r6frig6rateur nouvellement install6 prend de 12 _ 24 heures pour commencer _ produire des glagons. Machine a glagons automatique Commutateur d_ marche Machine (sur certains modules) Jetez les premiers lots de glacons pore" l,a machine a glacons prod uit sept glacons permettre...
- Page 39 Soinset nettoyagede votrerefrigerateur. Nettoyage de I'exterieur N'essuyez jamais votrerfifrigfirateuravec un Les poignees de porte et les garnitures (sur torchonsaieou uneserviettemoufifie. Ce/a peut terrains modules). Nettovez avec un linge hisser un rfisiduqui risqued'endommager l a tremp0 dans de l'eau savonneuse. S0chez peinture.N'utihsezjamais de tampon_ rficurer, avec tm linge doux.
- Page 40 Soinset nettoyagede votrerefrigerateur. Derriere votre refrigerateur I orsque vous remettez en place votre Faites attention qtland \'otis (_cartez r_frlg_rateur, assurez-vous de ne pas /e rouler votre r_fi_ig(q'ateur du ram: Vous pouvez sur le cordon fl'alimentation ou la conduite fl'eau endoil/illager votre I'eveteIllent de/a machine _ g/agons (sur certains modules).
- Page 41 Instructions Refrigerateur d'installation Mod_.les 16, 17, 18 www.electromenagersge.ca Si vousavez des questions,appelez le 1.800.361.3400 o ,,isite_n,,t,'e site_eb :, l'_d,'esse : AVANT DE COMMENCER EMPLACEMENT DU RI_FRIGI_RATEUR • N'inst;fllezjamais wme r(qi_ig0ratem _darts un Veuillez ]ire toutes les directives attentivement. en_placelnei_t off la tenq)_rature ambiante sera •...
- Page 42 STOP darts votre r_ti_ig_ratem; la seule installation approuv_e (art&t) en ham (sin" les mod&les avec bras palpeur). est celle de la trousse GE RVI(IT. Pore" les atltres svstei//es N'installezjamais les tuvaux de la machine _'_gla(:on darts d'osmose de l'eau, suivez les recommandations...
- Page 43 _ssurez-\'ous que votre trousse ait au moins 2,4 m (8 pieds) BIEN comme indiqu(_ ci-dessus. • Si w)us utilisez une trousse GE Sinart(]onnect _" NOTE : Les seuls tuyaux en mati&re plastique approuv6s Refl_igerator Tubing, les garnitures n_cessaires...
-
Page 44: Installation De La Conduite D'eau
Instructions d'installation INSTALLATION DE LA CONDUITE D'EAU (SUITE) lnstallez le robinet d'arr6t sur la canalisation d'eau [] FIXEZ LE ROBINET D'ARRleT potable la plus fr&luemment utilis_e. Fixez le robinet d'arr_t au tuvau d'eau fl'oide _'_ l'aide FERMEZ L'ALIMENTATION du collier de serra ,e PRINCIPALE D'EAU Collierde serrage Omrez... - Page 45 Pour le tuvau ell mati&re plasfique d'une trousse • Molls VO/lS i'ecoiiii/i_lndons poser filtre ;'1 earl GE Sillai't(]onnect _'1Reli_igeI'amr Tubing, ins&'ez si votre alimentation d'eau contient du sable ou des l'extrg_mit(_ moulg_e du ttazlu le robinet d'ari'_t...
- Page 46 Si vous utilisez un ttl_ltl ell l//ati0I'e plastique d'une trousse GE SmartConnect ''_ Reli_igerator Tubing, ins_rez l'extr&mit_ moul_e (hl ttlv;Itl clans le robinet d'arr_t et serrez l'_crou de compression fi la main,...
- Page 47 Instructions d'installation Ik"JI I NVERSION DE L'OUVERTURE DES PORTES NOTES IMPORTANTES [] AVANT DE COMMENCER 1,1 D_branchez le r_h'ig_ratem: Pore" inverter le sens d'ouverture des portes • I,isez toutes les directives avant de commence_: • Manipulez les pi0ces avec pr0caufion pour _viter raver...
- Page 48 Instructions d'installation I_ INVERSION DE L'OUVERTURE DES PORTES (SUITE) [] ENLEVEMENT DE LA PORTE 2,5 Placez la porte sin" une sm'face anti_gratignm'e axec la surtace ext_rieure vers le haut. DU CONGI_LATEUR axec du ruban 2.1 Maintenez la porte ferrule _'lmasquer. 2.6 Transi_rez les 2 xis du c6t_ oppos_...
- Page 49 Instructions d'installation [] ENLEVEMENT DE LA PORTE [] ENLI_VEIVIENT DE LA PORTE DU RC:FRIGC:RATEUR DU RC:FRIGC:RATEUR (SUITE) 3.4 Placez la porte axec l'ext_iJeur ".ei_ le haut sur une 3.1 Maintenez la po_*e tenn0e axec du ruban 5 masque_: surii_ce anti_gratigmu'e. 3.5 TransiiZrez les deux xis du cgt_ oppose de la caisse dans les trous laiss_s libres par l'enl_xement...
-
Page 50: Inversion De L'ouverture Des Portes
Instructions d'installation INVERSION DE L'OUVERTURE DES PORTES (SUITE) [] INVERSION DES POIGNEES [] INVERSION DE LA QUINCAILLERIE DE PORTE 4.1 Enle_ez la grille inf&'ieure (si _otre r_frigt)ratem" 5.1 Transfert de la poignee de porte en poss_de une) en la tirant tout droit. - Page 51 Instructions d'installation 15]INVERSION DES POIGNI_ES 5.4 Transfert de la poignee de la porte du congelateur DE PORTE (SUITE) 5.4.1 Enlevez 1;ivis maintenant 1;ipoign_e sin" le 5.1 Transfert de la poignee de porte dessus de la porte et les deux vis inaintenant du refrigerateur (suite) la poign_e...
- Page 52 Instructions d'installation INVERSION DE L'OUVERTURE DES PORTES (SUITE) []REMONTAGE DES PORTES [] REMONTAGE DES PORTES (SUITE) 6.1 Remontage de la porte 6.2 Remontage de la porte du r6frigerateur du congelateur 6.1.1 Placez la porte du r_fi'ig&'ateur 6.2.1 Placez la porte cong_lateur sin"...
-
Page 53: Bruits Normauxde Fonctionnement
Bruits normauxde fonctionnement vvww.electromenagersge.ca Les r_frig_rateurs plus r_cents font des bruits cliff, rents de ceux des anciens. Les r#frig#rateurs modemes pr#sentent plus de fonctions et sont plus a vanc#s sur le plan technologique. Entendez-vous ce que j'entends ? Ces bruits sont normaux. OUIR HUMMM... - Page 54 Avant d'appeler un reparateur... En cas de panne Economisez votre temps et votre argent] Consultez los tableaux des pages suivantes, vous #viterez peut-#tre d'appeler un r@arateur. Solutions Causes possibles Votre r#frigerateur ne Votre trouve r_frigerateur • Attendez environ 40 minutes la fin du (l_gkrage.
- Page 55 www.electromenagersge.ca Causes possibles Solutions Lamachinefi gla_ons Le commutateur de maxche • Sur los rood&los _'l comm utnteur de marche, mettez automatique ne (marche). de la machine a glaqons COlIllIltff[Itetll" positiou lIl;ll'che StlI" fonctionne pas ne maJcche pas. Inodeles _'1bl'aS palpeul; ;ll/leuez le bl'aS palpeur (surcertainsmod_les)
-
Page 56: Garantie
GARANTIE DU CONSOMMATEUR (pour la clientele au Canada) Nous garantissons votre refrigerateur contre tout vice de materiau et de main-d'oeuvre. Main d'oeuvre Pendant combien Ce qui est couvert Pieces reparees de temps remplac_es (& la (depuis la date d'achat) discretion de Camco) Compresseur Deux (2) ans... - Page 57 Notes.
- Page 58 /Votes. €_ Ilumb _mNI...
- Page 59 Soutienau consommateur. I)Om _;otre Vous axez tree question ou ;ous avez besoin d'aide appareil _le(trom_nager? Contactez-nous I Site Web appareils _lectrom_nagersGE www.electromenagersge.ca par ]nternet au ._lte www.elec_comenagersge.ca 24 heures par join; tous lesjom_ de l'ann_e. Servicede r_parafions 1.800.361.3400 Service de r_parations est tout pros de vous.
- Page 60 Informaci6n de seguridad ..61-63 Instrucciones de operaci6n Control ....... Cuidado y limpieza ..69, 70 Estantes ....65, 66 Ga_etas de ahnacenamiento ..66, 67 M_iquina de hielos autom_tica ..Instrucciones para la instalaci6n C6mo inverfir el wdv&_ de la puerta ....
- Page 61 IMPORTANTE INFORMACI_JN D ESEGURIDAD. LEATODAS LASINSTRUCCIONES A NTESDESU USO. k, iADVERTENCIA ! Use este aparato solo con el fin para el cual fue disefiado como se describe en este Manual del propietario. PRECAUCIONES DESEGURIDAD AI usar aparatos el#ctricos, se deben seguir precauciones b#sicas de seguridad, incluyendo las siguientes: Mantenga los dedos alejados...
- Page 62 IMPORTANTE INFORMACION DESEGURIDAD. LEATODAS LASINSTRUCCIONES A NTESDESU USO. -4, i PELIGRO!RIESGODE QUELOSNIKIOS SE QUEDENATRAPADOS ELIMINACION APROPIADA DEL REFRIGERADOR Refrigerantes I,os problenms de que los niflos se queden atrapados y se soloquen no son cosas del pasado. Todos los aparatos refl'igeraci6n contienen I,os refl_igeradores desechados...
- Page 63 iADVERTENCIA ! COMO CONECTAR LAELECTRICIDAD Bajo ninguna circunstancia, no corte ni retire la tercera pata (conexiSn a tierra) del cable de electricidad. Por seguridad personal, este aparato debe estar correctamente conectado a tierra. E1 cable el_ctrico de este aparato estfi provisto Esto ofrece el mejor...
-
Page 64: Control
Sobre el dial de control de la temperatura. Girar el dial a 0 interrumpe el enfriamiento en ambos comparfimientos: el compartimiento de alimentos frescos y el congelador, aunque no apaga el suministro de corriente hacia el refrigerador. Nivelesde control Dial de control de la temperatura E1 dial control de la temperamra... -
Page 65: Estantes
Sobre los estantesdel compartimientode alimentos frescos. Los soportes de los estantes en diferentes niveles le permiten adaptar el espacio de los estantes segOn sus necesidades. No todas las caractedsticas est#n presentes en todos los modelos. Estantes medios NOTA:El estantehacia ia derechadel fie/estfi extremo estante descansa... - Page 66 Sobre los estantes del compartimiento del congelador. Algunos modelos tienen un estante con bandeja para hielo y otros tienen un estante completo de escal6n. Estante con bandeja para hielo Para retirar el estante con bandeja para hielo, levante el lado izquierdo estante sus soportes,...
- Page 67 Sobre la remocion de la gaveta de almacenamiento y cubierta. No todas las caracterfsticas est_n presentes en todos los modelos. Gaveta preservadora de humedad ajustable (enalgunos modelos) Humidity Control Deslice el control c(nnpletnn/ente hastn i,leve el control completo hastn la posiddn HIGH (alto) para ofl'ecer...
- Page 68 Sobrela maquinade hielosautomatica. Un refrigerador recientemente instalado puede tomar entre 12 y 24 horas para empezar a hacer hielo. cubos de hielo para Deseche los primeros i,a mfiquina de hielos producirfi siete Interruptor d e corriente Maquina pemfitir que la lfnea del agua se limpie. cubos dclo, aproxilnadalnente...
- Page 69 Cuidadoy limpieza del refrigerador. Limpieza exterior Las manijas de la puerta y accesorio (ell No hknpla el refrigerador con un patio sucio para platos o con una toaila mojada. Estos pueden algunos modelos). I,impie con un patio dejar residuos y pueden erosionar la pintura. humedecido con agua jabonosa.
- Page 70 Cuidadoy limpieza del refrigerador. Detrglsdel refrigerador Cuando empuje de nuevo el refrlgerador, Tenga cuidado al mover el refi_igerador aseg(lrese de no pisar el cable el_ctrico lejos de la pared. To(los los fipos o la I/nea de suministro a la m_quina de hielos cubiertas de piso se pueden (lariat;...
-
Page 71: Instrucciones Para La Instalaci6N
Instrucciones para Refrigerador la Instalaci6n Modelos 16, 17, 18 Si tiene preguntas,Ilame a1800.GE.CARES ( 800.432.2737)o bi_n ,i_it_n._t,;_p_gin;_ X_b: www.GEAppliances.com ANTES DE INICIAR AREA Permita el siguiente espacio para tma tiicil instalacidn, estas instrucciones completa y cuidadosamente. apropiada (ir(ulaci6n del aire ) (onexi(mcs... - Page 72 STOP (hacia arriba (modelos con brazo de refrigerador SmartCmmect '_' de GE. No use ninguna llenado). otra tuberla plfistica para el stuninistro del agua ya que instale la mberfa la mfiquina...
- Page 73 QUE NECESITA (CONT.) consulno mils frecuenten/ente utilizada. • Un kit de suministro de agua de GE ((omicne tuberfa, CIERRE EL SUMINISTRO v_lvula de cierre v accesorios enunler_.dos abajo) est_i PRINCIPAL DE AGUA disponible a un costo adicional...
- Page 74 Instrucciones para la instalacion COMO INSTALAR LA TUBERIA DEL AGUA (CONT.) [] INSTALE LA VALVULA DE CIERRE CONECTE LA TUBER[A A LA VALVULA la _fil_ula cierre a la mberfa agua frfa la abrazadera para el tubo. Coloque la tuerca compresi6n ) f(_rula para la tuberfa...
- Page 75 / (encendido). E n los modelos de brazo de llenado mue_a Para tuberfi_ de plfistico de un kit de tuberfa para el el brazo tie llenado a la posicidn ON (hacia abajo). reti'igerador SmartConnect _'_de GE, inserte el extremo La mfiquina de hieh)s no empezarfi a operar hasta que moldeado...
-
Page 76: La Puerta
Instrucciones para la instalacion COMO INVERTIR EL VAIVI N DE LA PUERTA NOTAS IMPORTANTES I_ANTES DE INICIAR A1 invertir el \'ai\'_n la puerta: 1.1 Desconecte el refrigerador tomacorriente el_ctrico. • I,ea las instHicciones completan_ente antes ei//pezaY. • Maneje las partes cuidado pai'a evitar... - Page 77 Instrucciones para la instalacion 2.5 Coloque la puerta sol)re superficie [] RETIRE LA PUERTA ra_,e con la parte exterior hacia arriba. DEL CONGELADOR 2.1 Pegue la puerta cerrada cinta de eninascarar. 2.6 Traslade los dos tornillos del lado opuesto gabinete hacia los orificios de los tornillos...
- Page 78 Instrucciones para la instalacion COMO INVERTIR EL VAIVI N DE LA PUERTA (CONT.) [] RETIRE LA PUERTA DE [] RETIRE LA PUERTA DE ALIMENTOS FRESCOS ALIMENTOS FRESCOS (CONT.) 3.1 Peoue_ la puerta cerrada cinta de enmascarar. 3.4 Coloque la puertn el exterior hacia arriba...
- Page 79 Instrucciones para la instalacion [] COMO INVERTIR [] C01VIO INVERTIR LAS MANIJAS ELEMENTOS DE SOPORTES DE LAS PUERTAS 5.1 Traslade la manija de la puerta 4.1 Retire la reiilla la base (si su refrigerador de alimentos frescos incluye) halfindola directamente hacia flmra.
- Page 80 Instrucciones para la instalacion COMO INVERTIR EL VAIVI_N DE LA PUERTA (CONT.) I_COMO INVERTIR LAS MANIJAS 5.3 Como reinstalar la manija de la puerta de los alimentos frescos DE LA PUERTA (CONT.) 5.3.1 Pegue la man!ia en el lado derecho de la 5.1 Traslade la manija de la puerta de...
- Page 81 Instrucciones para la instalacion I_COMO VOLVER A COLGAR I_C01VIO INVERTIR LAS MANIJAS LAS PUERTAS DE LA PUERTA (CONT.) 5.4.2 Retire la man!ia. € 6.1 Vuelva a colgar la puerta de los alimentos frescos 6.1.1 Baje la puerta de los alimentos fl'escos pasador la bisagra...
- Page 82 Instrucciones para la instalacion COMO INVERTIR EL VAIVI_N DE LA PUERTA (CONT.) [] COMO VOLVER A COLGAR 6.2.:}. Cerci6rese title la puerta est& ligeramente LAS PUERTAS (CONT.) encima de la parte superior gabinete el espacio entre las puertas est_ tmifln'me 6.2 Vuelva a colgar la puerta el fl'ente.
- Page 83 Sonidosnormales de operacion. Los refrigeradores m#s nuevos producen sonidos diferentes a los modelos m#s antiguos. Los refrigeradores modemos tienen m#s funciones y usan tecnologfa m#s reciente. Usted escucha Io que yo escucho ? Estos sonidos son normales. HMMMM... iWHIR! WHOOSH..•...
- Page 84 Antes de Ilamar a solicitar servicio... Consejos para la solucidn de problemas iAhorre tiempo siguientes p#ginas y dinero! Revise las tablas en las primero y quiz#s no necesite Ilamar a solicitar el servicio. Posibles causas Que hacer El refrigerador no opera E1 refrigerador est_ en * Espere unos 40 nlintttos...
-
Page 85: Del Agua
Posibles causas Que hacer Lamaquinade hielos E1 hlterruptor de corriente • En los modelos de imermptt)r de energfa, mueva automMicanofunciona de la m_iqtthm de hielos no es_ imen'uptor a la posici6n de I (encendMo). Ell los modelos encendido. (enalgunosmodelos) de brazo de llenado, mueva el brazo... - Page 86 Durante este de compra original garantia completa del sistema sellado de refrigeraci6n de cinco afos, GE tnmbi_n propordonar;i, sin costo, mano de obra v sex_'icio en su ho_r domicilio para reemplazar la pieza (letectuosa dentro.
-
Page 87: Soporteal Consumidor
So/iciteunareparaciOn www.Hotpoint.com E1 servicio de expertos GE est_i a tan s61o un paso de su puerta, iEntre en lfnea y solicite su reparacidn cuando le venga bien 24 horas al dfa cualquier dfa del aria! O llame al 800.GE.(:ARES (800.432.2737) - Page 88 Expert (;E repair service is only one step away li'om your door Get on-line and schedule your service at your convenience 24 l/om_ any clay of tile year! Or call 800.GE.CARES (800.432.2737) during natural business hom_. In Cmmda, cab 1.800.361.3400...
Need help?
Do you have a question about the GTS18ABSALWW and is the answer not in the manual?
Questions and answers