Bosch 1677M Manual
Hide thumbs
Also See for 1677M:
- Parts list (2 pages) ,
- Product manual (52 pages) ,
- Operating/safety instructions manual (40 pages)
Table of Contents
Advertisement
Available languages
Available languages
N ililllllilillilili
li
1619X01743
IMPORTANT:
Read BeforeUsing
IMPORTANT"
Lire avantusage
IMPORTANTE:
Leer antes de usar
Operating/Safety I nstructions
Consignes de fonctionnement/s6curit6
Instrucciones d e funcionamiento y seguridad
1677M
Call Toll Free for
ConsumerInformation
& Service Locations
Pour obtenirdesinformations
et les adressesde noscentres
de service apr_s-vente,
appelez ce numdrogratuit
Llame gratispara
obtener informaciOn
para el consumidor y
ubicaciones de servicio
For EnglishVersion
Versionfran{;aise
Versi6nen espafiol
See page2
Voir page 14
Ver la pdgina26
Advertisement
Table of Contents

Related Manuals for Bosch 1677M


Summary of Contents for Bosch 1677M
- Page 1 N ililllllilillil 1619X01743 IMPORTANT: IMPORTANT" IMPORTANTE: Leer antes de usar Read BeforeUsing Lire avantusage Operating/Safety I nstructions Consignes de fonctionnement/s6curit6 Instrucciones d e funcionamiento y seguridad 1677M Call Toll Free for Pour obtenirdesinformations Llame gratispara ConsumerInformation et les adressesde noscentres obtener informaciOn &...
-
Page 2: Work Area
__J_ Read and understand all instructions. Failure to follow all instructions listed below, may result in electric shock, fire and/or serious personal injury. SAVE THESE INSTRUCTIONS Do not abuse the cord. Never use the cord Work Area to carry the tools or pull the plug from an Keep your work... - Page 3 ToolUseandCare other condition that may affect the tools operation. If damaged, have the tool Use clamps or other practical serviced before using. Many accidents are secure and support the workpiece to a caused by poorly maintained tools. Develop stable platform. Holding the work by hand a periodic maintenance...
- Page 4 Check the operation of the lower guard Do not run the saw while carrying it at your spring. If the guard and the spring are not side. Lower guard may be opened by a operating properly, they must be serviced contact with your clothing.
- Page 5 Maintain a firmgripwithboth hands o nthe Blade depth and bevel adjusting locking sawandposition yourbodyandarmto knobs must be tight secure before allowyouto resistKICKBACK f orces. making cut. If blade adjustment shifts while KICKBACK forces can be controlled by the cutting, it may cause binding and KICKBACK. operator, if proper precautions are taken.
- Page 6 IMPORTANT: Some of the following symbols may be used on your tool. Please study them and learn their meaning. Proper interpretation of these symbols will allow you to operate tool better and safer. Symbol Name Designation/Explanation Volts Voltage (potential) Current Amperes Hertz Frequency...
-
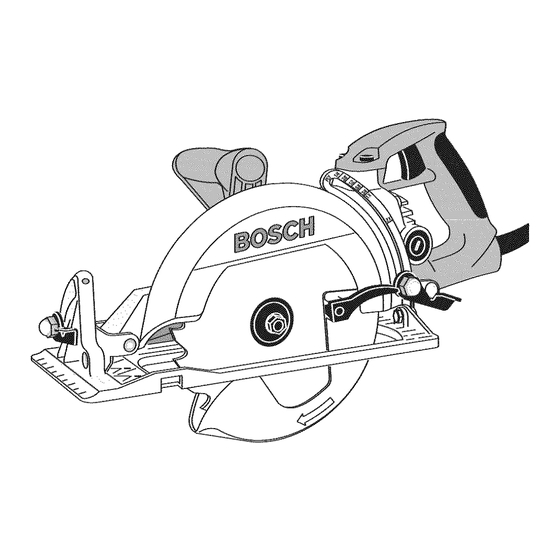
Page 7: Description And Specifications
Functional Description and Specifications isconnect the plug from the power source before making any assembly, adjustments or changing accessories. Such preventive safety measures reduce risk of starting the tool accidentally. Circular Saw I1=1[_151 AUXILIARY CALIBRATED HANDLE BRACKET Calibrated Standard Lumber Sizes UPPER GUARD ADJUSTMENT... - Page 8 ATTACHING THE BLADE 5. Reinstall OUTER WASHER. First tighten BLADE STUD finger tight, then TIGHTEN __J_ Disconnect the plug from the power source before BLADE STUD 1/8 TURN (45 °) WITH WRENCH PROVIDED. making assembly, adjustments changing accessories. Such preventive Do not use wrenches with longer handles,...
-
Page 9: Depth Adjustment
DEPTH ADJUSTMENT DEPTH LEVER Disconnect plug from power source. Loosen the depth adjustment lever located between the guard and handle of saw. Hold the foot down with one hand and raise or lower saw by the handle. Tighten lever at the depth setting desired. - Page 10 SWITCH forward pressure. Do not overload motor. Disconnect plug from power source and clean When starting tool, hold it with both hands. dust from air vents frequently. Metal cutting is The torque from the motor can cause the tool done at full depth. to twist.
- Page 11 Turn saw around and finish the cut in the normal llow blade to come to a complete stop before lifting manner, sawing forward. If corners of your the saw from cut. Also, never pull the saw pocket cut are not completely cut through, use a backward since blade will climb out of the jigsaw or hand saw to finish the comers.
- Page 12 Factory Service Center specially designed for your tool should Authorized Bosch Service Station. used. TOOL LUBRICATION BEARINGS Your Bosch tool has been properly lubricated After about 300-400 hours of operation, or at ready use. However every second brush change, the bearings...
- Page 13 RECOMMENDED SIZES OF EXTENSION CORDS f an extension cord 120 VOLT ALTERNATING CURRENT TOOLS necessary, a cord with adequate size conductors that is capable Wire Sizes in mm2 Tool's Cord Size in A.W.G. of carrying the current necessary for your Ampere Cord Lengthin Feet Cord Length in Meters...
- Page 14 Vons devez lire et comprendretontes les instructions.Len on-respect, m_me partiel, des instructions ci-apr_s entrafne un risque de choc eletrique, d'incendie et/ou de blessures graves. CONSERVEZCESINSTRUCTIONS Airedetravail sur le cordon.N'exposez pas le cordon_ la chalenr, des hniles, _ des ar_tes vives on _ des pi_ces en Veillez _ ce qne I'aire de travail soit propre et bien monvement.
-
Page 15: Utilisation Et Entretien Desoutils
Utilisation et entretien desoutils Soyez attentif _ tout d6salignement ou coincement des pibcesen mouvement, _ tout bris ou _ toute autre Immobilisez le mat6riau sur une surface stable au condition pr6judiciable au bon fonctionnement de moyen de brides oude toute autre fa_onad6quate. Le I'outil. - Page 16 Le garde inferieur dolt _tre retracte manuellement ou I'autre cas, d_branchez la scie imm_diatement et ne uniquementpour des coupesspecialestelles que les I'utilisez pas avant qu'elle ne soit r@ar_e. ,< coupes en poche >_ et les ,, coupescombinees >_. Cette scie circulaire ne dolt pas etre montee sur une Levezle garde inferieur _ I'aide de la levier de levage table et convertie en scie de table.
- Page 17 bois mouill#, le bois vert ou le bois trait# par pression dans le trait de scie. Elleaccrofl #galementla surface de lame disponible pour pincement dans des conditions de n#cessitent une attention sp#ciale durant la coupe pour fermeture du trait de scie. pr#venir le REBOND.
- Page 18 IMPORTANT : Certains des symboles suivants peuvent etre utilis_s sur votre outil. Veuillez les _tudier et apprendre leur signification. Une interpretation appropri_e de ces symboles vous permettra d'utiliser I'outil de fa(_onplus efficace et plus sQre. Symbole D_signation/Explication Volts Tension (potentielle) Courant Amperes Hertz...
-
Page 19: Scie Circulaire
Description fonctionnelle et sp6cifications 6branchez la fiche de la prise de conrant avant d'effectner qnelqne assemblage on r6glage que ce soit on de changer les accessoires. Oes mesures de s_curit_ preventive r_duisent le risque d'une mise en marche accidentelle de I'outil. Scie circulaire la[_lSI SUPPORTAPRO[ON-... - Page 20 MONTAGE D ELALAME 5. Reposezla RONDELLEEXTC:RIEURE. Vissez d'abord le GOUJONDE LA LAME & la main, puis SERREZ-LE DE D_branchez l a fichede la prise de courant avant 1/8 DE TOUR (45 °) AU MOYEN DE LA CLt_ LIVRC:E AVEOLA SOLE. d'effectuer q uelqueassemblage o n r_glageque ce soiton dechanger les accessoires.
- Page 21 RI_GLAGE DE LA PROFONDEURDE COUPE LEVIERDEREGLAGE DE-- LAPROFONDEUR D_branchezla fiche de la prise de courant. Desserrezle levier de r_glagede la profondeur qui se trouve entre le capot et la poign_e de la scie. Maintenez la semelle en place d'une main et levez ou baissez la scie par la poign_e de I'autre main.
- Page 22 INTERRUPTEUR Nettoyez capots fr6quemment pour vous A la raise en marche, tenez I'outil _ deux mains. Le assurer qne le capot inf6rieur revient rapidement en place. II se peut que le capot inferieur revienne couple du moteur risque de le renverser. mollement Iorsqu'on coupe...
- Page 23 Soulevez la scie et tournez-la en sens oppose pour ttendez I'arr_tcomplet d e la lameavantde retirerla achever normalement la coupe dans I'autre sens. Si les scie d. trait que vousvenez de tailler dans le coins de votre coupe en guichet ne sont pas matGriau.
-
Page 24: Entretien
Votre outil Bosch est ad_quatement lubrifi_ et pr_t d'usine Bosch ou une station service agr_e Bosch. Si utiliser. II est n_anmoins conseill_ de n'utiliser que du les paliers commencent & faire du bruit (& cause de lubrifiant Bosch WD7LUB &... - Page 25 DIMENSIONS DE RALLONGES R ECOMMANDEES Si nn cordonde rallonge s'avbren6cessaire,vons 0UTILS120 VOLTSCOURANT ALTERNATIF devez ntiliser nn cordon avec condnctenrsde Intensit_ Calibre A.W,G. Calibre en mm2 dimensionad6qnate ponvant porter le conrant nominale n6cessaire _ votreoutil. Ceci pr_viendra unechute Longueur en pieds de I'outil Longueuren metres excessivede tension, une pertede courant ou une...
-
Page 26: Areade Trabajo
Normas de seguridad para herramientasmecdnicas J4zJl_ ea y entienda todas las instrncciones. El incumplimiento de todas las instrucciones indicadas a continuaci6n puede dar lugar a sacudidas el_ctricas, incendios y/o lesiones personalesgraves. CONSERVE ESTASINSTRUCCIONES Areade trabajo No expongalas herramientasmec;inicas a la Ilnvia ni a sitnaciones hl_medas. - Page 27 Utilice eqnipo de segnridad. Use siempre protecci6n Comprnebe la desalineaci6no el atasco de las piezas m6viles, la rnptura de piezas y cualquier otra de los ojos. Se debe utilizar una m_scara antipolvo, situaci6nque pueda afectar el funcionamientode las zapatos de seguridad antideslizantes, casco o herramientas.
- Page 28 Comprnebe el fnncionamientodel resortedel protector combinado con un manejo firme de la sierra, le permitir_ controlar el RETROCESO. inferior. Si el protector y el resorte no funcionan correctamente, se deben ajnstar o reparar antes de No tenga la sierra en marcha mientras la Ileva a su nsar la sierra.
- Page 29 Mantenga un agarre firme de la sierra con las dos Las pomos de fijaci6n de profundidad de la hoja y de manos y sit_e el cuerpoy el brazode modo que pueda ajuste de inclinaci6nde la hoja debenestar apretadas resistir las fuerzasde RETROCESO. E l operador puede y fijas antes de hacer el code.
- Page 30 IMPORTANTE: Es posible que algunos de los simbolos siguientes se usen en su herramienta. Por favor, estt_dielos y aprenda su significado. La interpretaci6n adecuada de estos simbolos le permitir_ utilizar la herramienta mejor y con mAs seguridad. Simbolo Nombre Designaci6n/explicaci6n Volt Tensi6n (potencial) Corriente...
- Page 31 Descripci6n funcional y especificaciones esconecte el enchufe de la fuente de energia antes de realizar cualquier ensamblaje o ajuste, o cambiar accesorios. Estas medidas de seguridad preventivas reducen el riesgo de arrancar la herramienta accidentalmente. Sierra circulare rm=l MANGO PROFUNDIDAD AUXILIAR CALIBRADO Calibradaparatamanosde...
- Page 32 COLOCACION DELAHOJA 5. Vuelva a instalar la ARANDELAEXTERIOR.Primero, aprietefuertementecon eldedo el TORNILLOde la HOJA Desconecte el enchufede la y despu_s APRIETEEL TORNILLO DE LA HOJA 1/8 DE fuente de energia antes de realizarcualquierensamblajeo ajuste,o cambiar VUELTA (45 °) CON LA LLAVE DE TUERCA accesorios.Estasmedidasde seguridadpreventivas SUMINISTRADA.
- Page 33 PALANCA DEAJUSTE DE -- AJUSTE DE PROFUNDIDAD PROFUNDIDAD Desconecteel enchufe de la fuente de energia. Afloje la palanca de ajuste de profundidad situada entre el protector y el mango de lasierra. Sujetela base con una mano y suba o baje la sierra con el mango. Fije la palancaen la posici6n de ajuste de profundidad deseada.
- Page 34 GUIA DE INTERRUPTOR limpie el polvo de los conductos de aire frecuentemente. El corte de metal se hace a m_xima profundidad. AI arrancar la herramienta, suj_tela con las dos manos. El par de fuerzas del motor puedehacer que la herramienta =_=_1_ Limpie frecuentemente...
- Page 35 De la vuelta a la sierra y termine el corte de manera Dejequelahojasedetenga por completoantes de sacar la normal, aserrando hacia adelante. Si las esquinas del sierra del torte. Adem;is,nuncaintentemoverla corte de bolsillo no estAn completamente cortadas, sierra hacia atr;is,ya que la hoia se saldr;i del utilice una sierra de vaiv6n o una sierra de mano para material y se producir;iRETROCESO.
-
Page 36: Mantenimiento
$61o se deben usar escobillas de repuesto Bosch el servicio de las herramientas sea realizado por un genuinas dise5adas especificamente para su Centro de servicio de f_brica Bosch o por una Estaci6n herramienta. de servicio Bosch autorizada. RODAMIENTOS LUBRICACION DELAS HERRAMIENTAS Despu_s de 300-400 horas de funcionamiento,... - Page 37 Accesorios TAMANOSRECOMENDADOS DE CORDONESDE EXTENSION Si es necesario un cordon de HERRAMIENTAS DE 120 V CORRIENTE ALTERNA extension, se debe usar un cordonconconductores de tamafio adecuadoquesea Tamano delcordon enA.W,G. Tamafios delcable e emm z capaz de transportar la corriente necesaria para la Copacidod nominal Longitod...
- Page 38 Notes: -38-...
- Page 39 Remarques• Notas: -3g-...
- Page 40 OF BOSCH PORTABLE AND BENCHTOP POWER TOOLS Robert Bosch Tool Corporation ("Seller") warrants to the original purchaser only, that all BOSCHportable and benchtop power tools will befree from defects in material or workmanship for a period of one year from date of purchase. SELLER'S SOLE OBLIGATION AND YOUR EXCLUSIVE REMEDY...
Need help?
Do you have a question about the 1677M and is the answer not in the manual?
Questions and answers