Table of Contents
Advertisement
Available languages
Available languages
*Plasmacluster is a trademark
of Sharp Corporation.
This product earned the ENERGY STAR by meet-
ing strict energy efficiency guidelines set by the US
EPA. US EPA does not endorse any manufacturer
claims of healthier indoor air from the use of this
product.
The energy efficiency of this ENERGY STAR quali-
fied model is measured based on a ratio between
the model's CADR for Dust and the electrical en-
ergy it consumes, or CADR/Watt.
Ce produit a le droit de porter la marque ENERGY
STAR après avoir répondu à des critères stricts en
ce qui concerne l'efficacité énergétique, tels qu'
établis par l'agence EPA aux É-U. L'agence EPA
aux É-U n'appuie aucunement les témoignages
publicitaires du fabricant indiquant que ce produit
rend l'air intérieur des locaux plus sain.
L'efficacité énergétique de ce modèle, qui bénéficie
de la reconnaissance ENERGY STAR, est mesurée
par le rapport entre le DAP (débit d'air purifié) du
modèle et l'énergie électrique qu'il consomme, soit
le rapport DAP/Watt.
KC-C70U
AIR PURIFIER
with Humidifying Function
OPERATION MANUAL
Purificateur d'air à fonction
d'humidification
MANUEL D'UTILISATION
PURIFICADOR DE AIRE
Con función de humidificación
MANUAL DE OPERACIÓN
Advertisement
Chapters
Table of Contents

Related Manuals for Sharp Plasmacluster KC-C70U


Summary of Contents for Sharp Plasmacluster KC-C70U
-
Page 1: Operation Manual
*Plasmacluster is a trademark of Sharp Corporation. AIR PURIFIER with Humidifying Function OPERATION MANUAL Purificateur d’air à fonction d’humidification MANUEL D’UTILISATION PURIFICADOR DE AIRE Con función de humidificación MANUAL DE OPERACIÓN This product earned the ENERGY STAR by meet- ing strict energy efficiency guidelines set by the US EPA. - Page 2 Please read before operating your new Air Purifier The air purifier draws in room air from the air intake, passes the air through a Pre- Filter, a Washable Deodorizing Filter and a True HEPA Filter inside of the unit, then discharges the air through the air outlet.
-
Page 3: Table Of Contents
........This ISM device complies with Canadian ICES-001 Responsible Party: Thank you for purchasing this SHARP Air Pu- SHARP ELECTRONICS OF CANADA LTD. rifier. Please read this manual carefully be- 335 Britannia Road East Mississauga, Ontario fore using the air purifier. - Page 4 Address City State Telephone TO PHONE: Dial 1-800-BE-SHARP (237-4277) for: SERVICE (for your nearest Sharp Authorized Servicer) PARTS (for your Authorized Parts Distributor) ACCESSORIES ADDITIONAL CUSTOMER INFORMATION TO WRITE: For service problems, warranty information, missing items and other assistance: Sharp Electronics Corporation...
- Page 5 Product, and shall constitute full satisfaction of all claims, whether based on contract, negligence, strict liability or otherwise. In no event shall Sharp be liable, or in any way responsible, for any damages or defects in the Product which were caused by repairs or attempted repairs performed by anyone other than an authorized servicer. Nor shall Sharp be liable or in any way responsible for any incidental or consequential economic or property damage.
-
Page 6: For Customer Assistance(U.s
Address City Province Postal Code Telephone TO PHONE: Dial 1-905-568-7140 for: SERVICE (for your nearest Sharp Authorized Servicer) PARTS (for your Authorized Parts Distributor) ACCESSORIES ADDITIONAL CUSTOMER INFORMATION TO WRITE: For service problems, warranty information, missing items and other assistance: Sharp Electronics of Canada Ltd. -
Page 7: Limited Warranty(Canada
Sharp product or the loss of information. The purchaser will be responsible for any removal, reinstallation, transportation and insurance costs incurred. -
Page 8: Important Safety Instructions
• Be cautious when cleaning the unit. Strong corrosive cleansers may damage the exterior. • Only a Sharp Authorized Service Center should service this air purifier. Contact the nearest Serv- ice Center for any problems, adjustments, or repairs. -
Page 9: Cautions Concerning Operation
CAUTIONS CONCERNING OPERATION • Do not block the intake and/or air outlet. • Do not use the unit near or on hot objects, such as stoves or heaters or where it may come into contact with steam. • Always operate the unit in an upright position. •... -
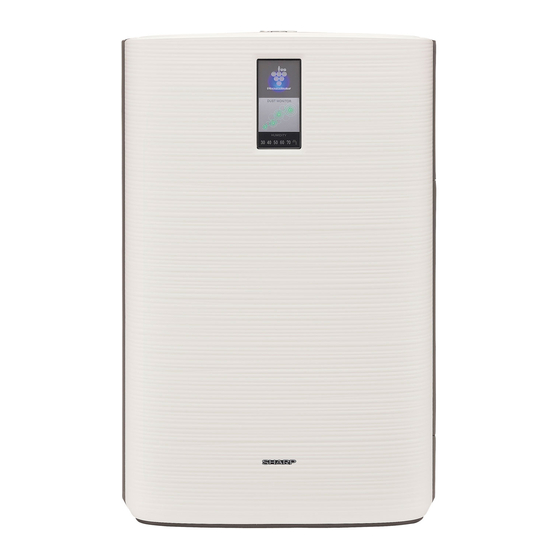
Page 10: Part Names
PART NAMES ILLUSTRATIVE DIAGRAM - FRONT Air Outlet Main Unit BACK Handle(2 locations left and right) Air Outlet True HEPA Filter (white) Sensors • Dust Sensor Washable Deodorizing • Temperature / Humidity Sensor Filter (black) Tabs Tank Handle Back Panel (Pre-Filter) Water Tank (For humidifying) Humidifying Filter... -
Page 11: Main Unit Display
MAIN UNIT DISPLAY Filter Reset Button/ Plasmacluster ON/OFF Button/ Indicator Light (red) Indicator Light (green) Power OFF Button Power ON Button Press any of the buttons to select mode and start the unit. Light ON/OFF Button Fan Speed Button/ Clean Air & Humidify MODE Button/ Quick Clean MODE Button/ Indicator Light (blue) Indicator Light (green) -
Page 12: Preparation For Use
PREPARATION FOR USE Unplug the unit before installing or adjusting the filters. FILTER INSTALLATION To maintain the quality of the filters, they are packed in plastic bags and placed in the unit. Be sure to remove the filters from the plastic bags and replace the filters in the unit before initial use. -
Page 13: Refilling The Water Tank
REFILLING THE WATER TANK The unit can be used in the Clean Air Mode without putting water in the Water Tank. When using the Clean Air & Humidify Mode, or the Quick Clean Mode, the Water Tank should be filled with water. Tank Handle Remove the Water Tank by unlatching the top. -
Page 14: Operation
OPERATION CLEAN AIR & HUMIDIFY MODE Use the Clean Air & Humidify Mode to quickly clean the air, reduce odors and to humidify. Fill Water Tank. (See E-11) Press the CLEAN AIR & HUMIDIFY MODE Button on the unit display. •... -
Page 15: Quick Clean Mode
QUICK CLEAN MODE QUICK CLEAN Mode with humidification releases concentrated Plasmacluster ions. By re- peating strong and gentle airflow cycles, the unit effectively removes airborne dust, pollen, mold and allergens from the air drawn through the filter system. Water must be in the Water Tank when this mode is selected. -
Page 16: Lights On/Off Button
OPERATION LIGHTS ON/OFF Button Press this button to turn Front Panel monitor lights ON and OFF. WATER SUPPLY INDICATOR LIGHT When the Water Tank is empty, the Water Supply Indicator Light will flash to indicate that the Water Tank should be refilled. Please note the light will not flash even when the Water Tank is empty during the Clean Air Mode and the Quick Clean Mode. -
Page 17: Care And Maintenance
CARE AND MAINTENANCE To maintain optimum performance of this air purifier, please clean the unit including the sensor and filters periodically. When cleaning the unit, be sure to first unplug the power cord, and never handle the plug with wet hands. Electrical shock and/or bodily injury may occur as a result. FILTER INDICATOR LIGHT After 720 hours of use Care Cycle... -
Page 18: Water Tank
CARE AND MAINTENANCE WATER TANK Care Cycle Every day when Humidifying Tank Cap Rinse the inside of the tank by leaving a small amount of lukewarm water inside, closing the tank cap firmly, Water Tank and shaking the tank. Mild household detergents may be used to clean the inside of the tank, but detergent should be diluted and the tank should be thoroughly rinsed to remove all detergent residue. -
Page 19: Humidifying Tray
HUMIDIFYING TRAY Frequency of maintenance cycle will depend on the hardness 1 month Care Cycle of the water. Avoid spilling water when removing or cleaning the tray. Remove the Water Tank and Humidifying Tray. When Water Deposits are Difficult to Remove Unlatch the Wa- Fill Humidifying Tray half- ter Tank first, then... -
Page 20: Humidifying Filter
CARE AND MAINTENANCE HUMIDIFYING FILTER Care Cycle Once a month or when the Filter Indicator Light is on. Frequency of maintenance cycle will depend on the hardness or the impurities of the water that you use; the harder the water the more often descaling will be necessary. Pay attention not to spill water when cleaning the filter. -
Page 21: Filter Replacement Guidelines
FILTER REPLACEMENT GUIDELINES Filter life will vary depending on the room environment, usage, and location of the unit. If dust or odors persist, replace the filters. (Refer to “Please read before operating your new Air Purifier”) Guide for filter replacement timing True HEPA Filter Up to 5 years after opening Filter life can be greatly reduced depending on the room environment. -
Page 22: Troubleshooting
TROUBLESHOOTING Before calling for service, please review theTroubleshooting chart below, since the problem may not be a unit malfunctions. REMEDY(not a malfunction) SYMPTOM Odors and smoke are not • Clean or replace the filters if they appear to be heavily soiled. -
Page 23: Specifications
ERROR DISPLAY If error occurs again, contact the Sharp Service Center. ERROR DETAILS REMEDY LAMP INDICATION Flashing of the Fan Speed Indicator Light Unplug the unit, wait one minute, Problem in circuit board 'AUTO' or the 'QUICK CLEAN' Light. and plug the unit in again. - Page 24 Veuillez lire ces instructions avant de faire fonctionner votre nouveau purificateur d’air Le purificateur d’air aspire l’air de la pièce par l’ouïe d’entrée, fait passer l’air à travers un pré-filtre, un filtre désodorisant lavable et un filtre HEPA authentique à l’intérieur de l’unité, puis refoule l’air par la sortie d’échappement.
- Page 25 Cet appareil ISM est conforme à la norme NMB-001 du Canada Merci de vous être porté acquéreur d’un pu- Partie responsable : rificateur d’air SHARP. Veuillez lire attentive- SHARP ELECTRONICS OF CANADA LTD. ment le présent manuel avant d’utiliser le 335 Britannia Road East Mississauga, Ontario purificateur d’air.
-
Page 26: Pour Vous Protéger
Ville Province Code Postal Téléphone POUR TÉLÉPHONER : Composez le 1-905-568-7140 pour : SERVICE (Pour obtenir les coordonnées du Centre de service agréé Sharp le plus proche) PIÈCES (Pour le nom d’un Revendeur de pièces agréé) ACCESSOIRES AUTRES INFORMATIONS POUR NOUS ÉCRIRE : Pour de I’aide côté service, des informations sur la garantie, des pièces manquantes ou autre :... - Page 27 1 an (excepté filtres) Pour obtenir le nom et I’adresse du Centre de service ou du Détaillant autorisé au service Sharp le plus proche, veuillez écrire ou téléphoner à : SHARP ÉLECTRONIQUE DU CANADA LTÉE., 335 Britannia Road East, Mississauga, Ontario, L4Z 1W9 Pour plus de renseignements sur cette garantie, sur des produits de Sharp Canada, sur la vente d’accessoires, sur I’emplacement de...
-
Page 28: Instructions De Sécurité Importantes
• Usez de prudence lors du nettoyage. Les nettoyants corrosifs puissants risquent d’endommager l’ extérieur de l’appareil. • Seul un centre de service agréé Sharp (SAV) devrait entretenir ce purificateur d’air. Contactez le centre de service le plus proche dans le cas de problèmes, de réglages nécessaires ou de répara- tions quelconques. -
Page 29: Précautions Concernant Le Fonctionnement
PRÉCAUTIONS CONCERNANT LE FONCTIONNEMENT • N’obturez ni l’ouïe d’entrée, ni l’ouïe d’évacuation. • N’utilisez pas l’unité sur des objets chauds ou à proximité, comme sur une cuisinière ou un radia- teur ou près d’une source de vapeur d’eau. • Exploitez toujours l’unité en position verticale. •... -
Page 30: Désignation Des Pièces
DÉSIGNATION DES PIÈCES SCHÉMA ILLUSTRATIF - AVANT Sortie d’air Unité principale DOS DE L’APPAREIL Poignée (2 emplacements, gauche et droit) Sortie d’air Filtre HEPA authentique (blanc) Capteurs • Capteur de poussière Filtre désodorisant • Capteur de température/d’humidité lavable (noir) Poignée du Languettes réservoir Panneau arrière... -
Page 31: Affichage De L'unité Principale
AFFICHAGE DE L’UNITÉ PRINCIPALE Touche de réinitialisation de filtre/ Touche de marche/arrêt du Plasmacluster/ Voyant indicateur (rouge) Voyant indicateur (vert) Touche d’arrêt de l’appareil Touche de marche de l’appareil Appuyez sur l’une ou l’autre tou- che pour sélectionner un mode et faire démarrer l’appareil. -
Page 32: Préparatifs Avant L'emploi
PRÉPARATIFS AVANT L’EMPLOI Débranchez l’appareil avant d’in- staller ou d’ajuster les filtres. INSTALLATION DES FILTRES Pour maintenir la qualité des filtres, ceux-ci sont emballés dans des sacs en plastique et placés dans l’appareil. N’oubliez pas de retirer les filtres des sacs et de les replacer dans l’appareil avant l’utilisation initiale. -
Page 33: Remplissage Du Réservoir D'eau
REMPLISSAGE DU RÉSERVOIR D’EAU On peut utiliser l’appareil en mode d’épuration de l’air sans mettre d’eau dans le réservoir d’eau. En mode d’épuration de l’air et d’humidification ou en mode d’ épuration rapide, il faut remplir le réservoir d’eau. Poignée du réservoir Retirez le réservoir d’eau en déverrouillant le haut. -
Page 34: Fonctionnement
FONCTIONNEMENT MODE D’ÉPURATION DE L’AIR ET D’HUMIDIFICATION Utilisez le mode d’épuration de l’air et d’humidification pour vite épurer l’air, réduire les odeurs et humidifier. Remplissez le réservoir d’eau. (Reportez-vous à la page F-9.) Appuyez sur la touche de mode d’épuration de l’air et d’humidification (CLEAN AIR &... -
Page 35: Mode D'épuration Rapide
MODE D’ÉPURATION RAPIDE Le mode d’épuration rapide (QUICK CLEAN) avec humidification libère des ions Plasmaclus- ter concentrés. En répétant des cycles de débit d’air forts et doux, l’appareil extrait efficace- ment la poussière, le pollen, les moisissures* et les allergènes qui traversent le système de filtres. -
Page 36: Touche De Marche/Arrêt Des Voyants
FONCTIONNEMENT Touche DE MARCHE/ARRÊT DES VOYANTS Appuyez sur cette touche pour allumer et éteindre les voyants du moniteur du panneau avant. VOYANT D’ALIMENTATION EN EAU Lorsque le réservoir d’eau est vide, le voyant d’alimentation en eau clignote pour indiquer que le réservoir a besoin d’être rempli. Veuillez noter que le voyant ne clignote pas même si le réservoir d’eau est vide en mode d’... -
Page 37: Soin Et Entretien
SOIN ET ENTRETIEN Pour maintenir le rendement optimal de ce purificateur d’air, veuillez nettoyer l’appa- reil périodiquement, y compris le capteur et les filtres. Lorsque vous nettoyez l’appareil, prenez soin de débrancher le câble d’alimentation en premier et ne manipulez jamais la fiche avec les mains mouillées. Sinon, vous vous exposez à... -
Page 38: Filtre Désodorisant Lavable
SOIN ET ENTRETIEN RÉSERVOIR D’EAU Cycle d’entretien Chaque jour lors de l’humidification Bouchon du réservoir Rincez l’intérieur du réservoir en laissant une petite quantité d’eau tiède à l’intérieur, en fermant bien le bou- Réservoir chon du réservoir, puis en secouant le réservoir. Les d’eau détergents ménagers doux peuvent servir à... -
Page 39: Bac D'humidification
BAC D’HUMIDIFICATION La fréquence du cycle d’entretien dépend de la dureté de l’ Cycle d’entretien 1 mois eau. Évitez de renverser de l’eau lorsque vous retirez ou net- toyez le bac. Retirez le réservoir d’eau et le bac d’humidification. Si les dépôts de l’eau sont difficiles à enlever Déverrouillez d’abord Remplissez le bac d’hu- le réservoir d’eau,... -
Page 40: Filtre D'humidification
SOIN ET ENTRETIEN FILTRE D’HUMIDIFICATION Cycle d’entretien Une fois par mois ou lorsque le voyant de filtre est allumé. La fréquence du cycle d’entretien dépend de la dureté ou des impuretés de l’eau que vous utilisez ; plus l’eau est dure, plus souvent il faut détartrer. Faites attention de ne pas renverser d’eau lors du nettoyage du filtre. -
Page 41: Guide De Remplacement Des Filtres
GUIDE DE REMPLACEMENT DES FILTRES La durée de vie des filtres varie selon les conditions ambiantes, l’emploi et l’emplace- ment de l’appareil. Si la poussière ou les odeurs persistent, remplacez les filtres. (Reportez-vous à “Veuillez lire ces instructions avant de faire fonctionner votre nouveau purifi- cateur d’air”.) Guide de remplacement des filtres Filtre HEPA authentique... -
Page 42: Résolution Des Problèmes
RÉSOLUTION DES PROBLÈMES Avant de faire appel au SAV, veuillez lire le tableau de résolution de problèmes ci-dessous, car le problème n’est peut être pas un dysfonctionnement de l’appareil. SOLUTION (pas un dysfonctionnement) SYMPTÔME Les odeurs et la fumée ne sont •... -
Page 43: Caractéristiques
AFFICHAGE D’ERREUR Si une erreur reproduit, contactez le centre SAV Sharp. SOLUTION AFFICHAGE LUMINEUX ORIGINE DE L’ERREUR Clignotement du voyant indicateur de vitesse du Débranchez l’appareil, attendez Problème avec la carte de circuits ventilateur “AUTO” ou du voyant “QUICK CLEAN”. - Page 44 Lea antes de operar su nuevo Purificador de aire El purificador de aire absorbe el aire de la entrada de aire y éste pasa a través del pre- filtro, un filtro desodorizador lavable y un Filtro True EPA en la parte interna de la unidad, para descargarlo luego a través del orificio de descarga de aire.
- Page 45 Este dispositivo cumple con la norma cana- diense ICES-001. Parte responsable: SHARP ELECTRONICS OF CANADA LTD. Gracias por comprar este Purificador de aire SHARP. 335 Britannia Road East Mississauga, Ontario Lea este manual detenidamente antes de usar el pu- L4Z 1W9 Canada rificador de aire.
-
Page 46: Instrucciones De Seguridad Importantes
• Tenga cuidado al limpiar la unidad. Los limpiadores fuertes de tipo corrosivo pueden dañar la parte externa. • Este purificadores de aire debe recibir servicio únicamente en un Centro de servicio autorizado Sharp. Comuníquese con el Centro de servicio autorizado más cercano para cualquier problema, ajuste o reparación. -
Page 47: Precauciones Relacionadas Con La Operación
PRECAUCIONES RELACIONADAS CON LA OPERACIÓN • No bloquee la entrada y/o salida de aire. • No use la unidad cerca de o con objetos calientes, como estufas o calentadores o donde pueda entrar en contacto con el vapor. • Siempre opere la unidad en posición vertical. •... -
Page 48: Nombre De Las Partes
NOMBRE DE LAS PARTES DIAGRAMA ILUSTRATIVO - PARTE FRONTAL Salida de aire Unidad principal PARTE POSTERIOR Manija (2 ubicadas a la derecha e izquierda) Salida de aire Filtro True HEPA (blanco) Sensores • Sensor de polvo Filtro desodorizador • Sensor de temperatura/humedad lavable (negro) Lengüetas Manija del tanque... -
Page 49: Pantalla De La Unidad Principal
PANTALLA DE LA UNIDAD PRINCIPAL Botón reestablecer filtro / Botón Plasmacluster ENCENDIDO/APAGADO / Luz del indicador (roja) Luz del indicador (verde) Botón para APAGADO Botón para ENCENDIDO Presione alguno de los botones para seleccionar el modo y hacer funcionar la unidad. Botón de MODO limpieza Botón de Luz Botón de velocidad del... -
Page 50: Preparación Para El Uso
PREPARACIÓN PARA EL USO Desconecte la unidad antes de instalar o ajustar los filtros. INSTALACIÓN DEL FILTRO Los filtros vienen empacados en bolsas de plástico y están colocados dentro de la unidad para conservar su calidad. Asegúrese de retirar las bolsas de plástico y de volver a colocar los filtros dentro de la unidad antes de usarla por primera vez. - Page 51 LLENADO DEL TANQUE DE AGUA Puede usar la unidad en el Modo Clean Air (aire limpio) sin colocar agua en el tanque de agua. Cuando utilice el Modo Clean Air & Humidify (aire limpio y humidificador) o el Modo Quick Clean (limpieza rápida) debe llenar el Tanque de agua con agua.
-
Page 52: Operación
OPERACIÓN MODO CLEAN AIR & HUMIDIFY (AIRE LIMPIO Y HUMIDIFICADOR) Utilice el Modo Clean Air & Humidify (Aire limpio y humidificador) para limpiar rápidamente el aire, reducir olores y humidificar. Llene el tanque de agua. (Vea S-7) Presione el botón de Modo CLEAN AIR & HUMIDIFY (AIRE LIMPIO Y HUMIDIFICADOR) en la pantalla de la unidad. -
Page 53: Modo Quick Clean
MODO QUICK CLEAN (LIMPIEZA RÁPIDA) El Modo QUICK CLEAN (LIMPIEZA RÁPIDA) con humidificación libera iones Plasmacluster concentrados. Al repetir ciclos de flujo de aire fuerte y moderado, la unidad retira eficazmente el polvo transportado por el aire, polen, moho* y alergenos. Al seleccionar este modo debe haber agua en el tanque de agua. -
Page 54: Botón Lights On/Off
OPERACIÓN Botón LIGHTS ON/OFF (LUCES ENCENDIDAS/APAGADAS) Presione este botón para ENCENDER y APAGAR las luces del panel frontal del monitor. LUZ DEL INDICADOR DE SUMINISTRO DE AGUA Cuando el tanque de agua está vacío, la luz del indicador del suministro de agua destellará... -
Page 55: Cuidado Y Mantenimiento
CUIDADO Y MANTENIMIENTO Para mantener un rendimiento óptimo de este purificador de aire, limpie periódica- mente la unidad incluyendo el sensor y filtros. Cuando limpie la unidad, primero asegúrese de desconectar el cable de alimentación y nunca manipule el enchufe con las manos húmedas. Puede causar choque eléctrico y/o lesiones corporales. -
Page 56: Filtro Desodorizador Lavable
CUIDADO Y MANTENIMIENTO TANQUE DE AGUA Ciclo de A diario cuando use el Tapa del tanque cuidado humidificador Enjuague el interior del tanque dejando una pequeña Tanque de agua cantidad de agua templada en el interior, cerrando la tapa del tanque firmemente y sacudiéndolo. Puede usar detergentes domésticos suaves para limpiar el interior del tanque, pero disuelva el detergente y enjuague cuidadosamente el tanque para retirar todo residuo de... -
Page 57: Bandeja Del Humidificador
BANDEJA DEL HUMIDIFICADOR Ciclo de La frecuencia del ciclo de mantenimiento dependerá de la dureza del 1 mes cuidado agua…Evite derramar agua cuando retire o limpie la bandeja. Retire el tanque de agua y la bandeja del Cuando sea difícil retirar los depósitos de agua humidificador. -
Page 58: Filtro Del Humidificador
CUIDADO Y MANTENIMIENTO FILTRO DEL HUMIDIFICADOR Ciclo de Una vez al mes o cuando la luz del indicador del filtro cuidado esté encendida. La frecuencia del ciclo de mantenimiento dependerá de la dureza o la cantidad de impurezas del agua que use; mientras más dura sea el agua, mayor será la frecuencia del decapado. Tenga cuidado de no derramar agua cuando limpie el filtro. -
Page 59: Pautas Para Reemplazar El Filtro
PAUTAS PARA REEMPLAZAR EL FILTRO La duración del filtro variará dependiendo del ambiente de la habitación, el uso y la ubicación de la unidad. Si el polvo o el olor persisten, reemplace los filtros. (Consulte “Lea antes de usar su nuevo purificador de aire”) Guía para programar el reemplazo del filtro Filtro True HEPA Hasta 5 años después de abrirlo... -
Page 60: Localización De Fallas
LOCALIZACIÓN DE FALLAS Antes de llamar solicitando servicio, revise el cuadro de localización de fallas a continuación, ya que el problema puede no ser causado por fallas de la unidad. SOLUCIÓN (no es una falla) SÍNTOMA No se eliminan los olores ni •... -
Page 61: Especificaciones
MENSAJES DE ERROR Si ocurre un error, comuníquese con el Centro de servicio de Sharp. SEÑAL LUMINOSA SOLUCIÓN DETALLES DE ERROR Destello de la luz ‘AUTO’ (AUTOMÁTICO) del indi- Desconecte la unidad, espere un Problema en el tablero cador de velocidad del ventilador o de la luz ‘QUICK minuto y vuelva a conectarla. - Page 62 Memo...
- Page 64 SHARP ELECTRONICS CORPORATION SHARP ELECTRONICS OF CANADA LTD. Sharp Plaza, Mahwah, 335 Britannia Road East Mississauga, New Jersey 07430-2135 U.S.A. Ontario L4Z 1W9 Canada SHARP CORPORATION SHARP CORPORATION Osaka, Japan Osaka, Japan Printed in China / Imprimé en Chine TINS-A246KKRZ 07L-...
Need help?
Do you have a question about the Plasmacluster KC-C70U and is the answer not in the manual?
Questions and answers