Table of Contents
Advertisement
Quick Links
GPSmile 55 Portable Automobile
Product User Manual
Version: V1.0
July 2007
Registered info
HOLUX and GPSmile are trademarks of HOLUX Technology, Inc.
All other trademarks belong to registered companies.
Note
The contents of this manual will be modified without further notice.
The operation temperature for the product is between 0℃~40℃.
Operating or recharging in an environment with a temperature over 45℃
might cause the system to stop functioning. However, this should be
considered a normal phenomenon. Please do not operate under extreme
temperatures.
Navigation System
i
GPSmile55
Advertisement
Table of Contents
Troubleshooting

Related Manuals for Holux GPSmile 55


Summary of Contents for Holux GPSmile 55
-
Page 1: Navigation System
Product User Manual Version: V1.0 July 2007 Registered info HOLUX and GPSmile are trademarks of HOLUX Technology, Inc. All other trademarks belong to registered companies. Note The contents of this manual will be modified without further notice. The operation temperature for the product is between 0℃~40℃. - Page 2 GPSmile55...
-
Page 3: Safety Precautions
Safety Precautions • Use the power adapter included with the package. Using other power adapters than the one provided will result in malfunction and could prove to be dangerous. • The device should only be used with the supplied batteries. •... -
Page 4: Warranty Statement
Holux Technology, or repairs done by anyone other than Holux Technology and authorized retail/service providers. -
Page 5: Technical Support
Technical Support • If there are any questions regarding the use of this product, please logon to the website www.holux.com and see the FAQ. • If answers cannot be found on the website, please send us an e-mail at info@holux.com, stating your query and location. -
Page 6: Table Of Contents
Table of Contents Warranty Statement ............iv Technical Support.............v Maintenance Service............v Preface ................1 Symbols ................1 Important Notice ...............1 Other Functions ..............2 First time use..............3 Copyright .................. 3 Important Notice ..............3 Package Contents .............4 Basic Operation ..............5 Introduction ................5 Front View ..................5 Rear View .................. - Page 7 Shutdown................14 Using Functions..............15 Function Menu Music Playback Function......16 Storing MP3 files on SD memory cards........ 16 Starting music playback............16 Image Browsing Function............. 19 Setting..................24 Power...................24 Time.....................24 Time.....................25 Panel Adjustment...............26 Reset GPS ...................28 Version ..................30 Startup Message.................31 Click Voice..................31 Hot Key ..................32 Troubleshooting..............33...
- Page 8 Specifications ................. 36 Federal regulations ............38 GPSmile55...
-
Page 9: Preface
Preface We appreciate your purchase of the GPSmile 55. Please read all instructions thoroughly for a full understanding of the products’ features. Symbols For fast reference of the data you wish to find, this manual uses the following symbols. This icon means you should take note of the message and read during use. -
Page 10: Other Functions
• • Do not leave this unit under your front windshield after you leave the Do not leave this unit under your front windshield after you leave the vehicle. Exposure to high temperatures might be dangerous and vehicle. Exposure to high temperatures might be dangerous and cause the battery to overheat, resulting in malfunction of the device. -
Page 11: First Time Use
First time use Copyright Without the written consent of HOLUX Technology, Inc, this manual, including the product and the software, may not be duplicated, transmitted, recorded or saved on storage devices. Furthermore, it shall not be translated under any circumstances into any other languages. -
Page 12: Package Contents
Package Contents Your product should include the following accessories: NAV-55 Unit In-vehicle Bracket Bracket fixing Home / Travel Adapter SD Memory Card Car Adapter (Optional) (Optional) CD-ROM Quick Guide GPSmile55... -
Page 13: Basic Operation
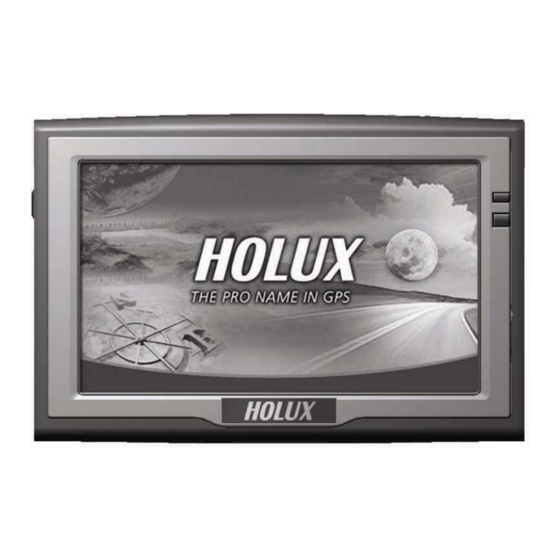
Basic Operation Introduction Front View 4.3” TFT LCD with touch screen Charging indicator LED Charging indicator LED: Charging: Orange Full: Green Stylus Rear View Auto backlight sensor System power switch I/O interface GPSmile55... -
Page 14: Left Side
Left Side Left Side External Antenna port Earphone port USB port Right Side SD card slot Reset key Top View Hot key Power button GPSmile55 GPSmile55... -
Page 15: Getting Started
Getting Started If you are a first-time system user, the following explanations will help you quickly understand the system operations, and experience the system’s powerful and convenient functions. SD memory card installation This unit is equipped with a SD memory card slot. You can purchase SD (Secure Digital) Cards to expand the memory capacity. -
Page 16: Using The Stylus
Using the stylus Using the stylus This unit can be controlled easily though the touch screen. The stylus is an This unit can be controlled easily though the touch screen. The stylus is an assist tool for operating this unit and is concealed in a pen slot at the rear. assist tool for operating this unit and is concealed in a pen slot at the rear. -
Page 17: Charging
Charging Using Home / Travel adapter: Before using the device for the first time, we strongly suggest you use a fully charged battery. Turn on the system power switch. Insert the USB connector into the unit. Plug the adapter into a power outlet. Press and hold the power button on the top to turn off device. - Page 18 Using the car charger: While using the device in a vehicle, use the included car charger for long periods of usage. Plug the small plug into the power jack on the rear of the in-vehicle bracket. Insert the other end into the cigarette lighter. GPSmile55...
- Page 19 This device uses a built-in rechargeable battery. Please note the following: • Please do not charge in a hot environment, such as on a balcony or an area exposed to direct sunlight. • Do not wait until the battery is depleted to recharge. •...
-
Page 20: Using The In-Vehicle Bracket
Using the In-Vehicle Bracket The included in-vehicle bracket set can be securely suctioned on the front windshield, or secured on top of the glove compartment using the adhesive plate. This device will effectively secure the GPS unit in the vehicle. Follow the procedures below to secure the bracket: Follow the arrows and secure the unit into the in-vehicle bracket fitting holes. - Page 21 Bend the bracket support to a proper angle. Suction the vehicle bracket securely to the windshield, ensuring its base is resting firmly on the dashboard. Follow the directions to insert the bracket into the slots on the bracket, and slide to fix the set (A The in-vehicle bracket assembly is complete.
-
Page 22: Operating Methods
Operating Methods Operating Methods Startup Startup For first time use, please turn the system power switch at the rear For first time use, please turn the system power switch at the rear side On. side On. Press and hold the power button for about two seconds to turn on the Press and hold the power button for about two seconds to turn on the power. -
Page 23: Using Functions
Using Functions During the first startup, the screen will show the main screen consisting of six functions: navigation, music, photo, video, ebook and settings. Directly select an icon on the screen to use the function. Loads the navigation program and navigation screen Note: If an SD card with navigator software is inserted, the system will automatically enter GPS... -
Page 24: Function Menu Music Playback Function
Function Menu Music Playback Function This unit has an MP3 Music Playback function that is capable of playing back MP3 files stored on SD memory cards. Storing MP3 files on SD memory cards You must first convert the music from an audio CD into MP3 files on your computer. - Page 25 The Music Playback Window. Use the buttons to control each playback function. 10 13 Play / Pause Music Status Stop Progress bar Previous Repeat mode indicator Next Battery indicator Normal / All / Random / Timer Repeat mode Exit Help Volume display Play List GPSmile55...
- Page 26 MP3 List On SD Card Delete One Add All Exit Add One MP3 List on the Device Delete All GPSmile55 GPSmile55...
-
Page 27: Image Browsing Function
Image Browsing Function The system has an Image Browsing function that is capable of displaying images/photographs stored on SD memory cards. All the files need to be stored under the Image directory, and the file format needs to be “*.jpg”. Insert the SD memory card with stored image files into the SD memory card slot on the unit. - Page 28 Video Video can read the film with the following data format: __.wmv, __.asf. Please convert files into a readable format and save them on the SD memory card in a folder named "film". Insert the SD memory card with Video files into the SD memory card slot on the unit.
- Page 29 3. Use the Up/Down arrow key to select the film. Help Previous Video Status Next Play Delete Exit Use the right/left arrow key to move forward/backward in the film. Video Status Displayed /Total length Double Play/pause Stop Next Previous All Screen Delete Exit Display...
- Page 30 eBook eBook eBook can only read files with __txt format. Please save them on the SD eBook can only read files with __txt format. Please save them on the SD memory card in a folder named "ebook". memory card in a folder named "ebook". 1.
- Page 31 GPSmile55...
-
Page 32: Setting
Setting Setting Power Power 1. After starting up the system, select the [SETTING] icon to enter. 1. After starting up the system, select the [SETTING] icon to enter. 2. Select [Backlight] from the main screen to access the Power settings screen. Select the time to turn off the backlight when running off the battery / external power. -
Page 33: Time
Time 1. Select [Time] from the main screen to access the Time settings screen. 2. Access the Date pull down menu and choose the correct value. 3. Access the Time pull down menu and choose the correct value. 4. Access the Time Zone pull down menu and choose the correct value. 5.Select to return to main menu screen. -
Page 34: Panel Adjustment
Panel Adjustment Control the unit through the stylus by touching/writing on the screen. If the system cannot correctly identify your stylus’ input, please run through the screen calibration procedure. From the settings window, select [Panel Adjustment] to start the screen calibration procedure. GPSmile55... - Page 35 Use the stylus and touch the cross at the center of the screen once. Touch the cross in the second position once. Touch the cross in the third position once. Continue the calibration by touching the cross. The setting page will return when stylus adjustment is finished. GPSmile55...
-
Page 36: Reset Gps
Reset GPS Select [Reset GPS] from the main screen to access the GPS settings screen. Select the “YES” icon to start the GPS reset procedure. Select the “NO” icon to return to the main “Setting” screen. GPSmile55... - Page 37 The following information is for "GPS reset fail!" The following information is for "GPS reset OK!" GPSmile55...
-
Page 38: Version
Version 1. Select [Version] from the main screen to access the Version screen. 2. The screen display will show the version information. GPSmile55... -
Page 39: Startup Message
Startup Message Under the settings window, check the Warning Voice to (check / uncheck) if you would like the startup message is to be broadcast. Click Voice Under the setting windows, check the click voice to (check/uncheck) to enable / disable the click voice. GPSmile55... -
Page 40: Hot Key
Hot Key Hot Key Press the [Hot key] to enter the “Volume” and ”LCD Brightness” screen. Press the [Hot key] to enter the “Volume” and ”LCD Brightness” screen. Hot key 1. Control the volume 1. Control the volume directly with the directly with the “speaker”... -
Page 41: Troubleshooting
Troubleshooting System reset It will only be required to reboot the system under extremely few circumstances. Reset your system if the following situations occur: You experience heavy lag while refreshing a screen or operations, which results in an inoperable system. Cannot turn off the system with the power button. -
Page 42: Quick Troubleshooting
Quick Troubleshooting Power Cannot startup Insufficient battery charge. Please connect to the adapter and restart the system. Screen No screen If the system does not respond after displayed powering up, try the following: 1. Connect adapter, restart system. 2. Reset system. Display speed 1. -
Page 43: Keep Away From Strong Magnetic Fields
Keep away from strong magnetic fields When using or storing, please keep away from strong electromagnetic/radioactive or magnetic field equipment. Operating temperature The products operating temperature is between 0°C ~ 40°C. Please do not operate it under extreme temperatures. Avoid exposure to sunlight Please avoid long periods of sunlight or exposure to high temperatures. -
Page 44: Appendix
Appendix Specifications Integrated GPS Receiver 20 parallel channels ◇ Reacquisition : 0.1 sec. ◇ Hot start : 1 sec. Acquisition Time ◇ Warm start : 38 sec. ◇ Cold start : 42 sec. ◇ Position: 10 m. for 90% Accuracy ◇... - Page 45 ◇ USB 1.1 ◇ mini USB Connector for USB client & DC power in Backlight Adjustment Auto Backlight Adjustment ◇ MP3 ◇ Photo Software ◇ Video ◇ eBook ◇ Hands-Free Calling Bluetooth ◇ SMS Receiver (Optional Function) ◇ File Transfer TMC Traffic Receiver (Optional Function) Flash Memory...
-
Page 46: Federal Regulations
Federal regulations This equipment is in compliance with the essential requirements and other relevant provisions of directive 1999/5/EC. GPSmile55...
Need help?
Do you have a question about the GPSmile 55 and is the answer not in the manual?
Questions and answers