Table of Contents
Advertisement
Copyright © Euro-Pro Operating LLC 2006
DIGITAL CONVECTION OVEN
HORNO DIGITAL A CONVECCIÓN
FOUR À CONVECTION NUMÉRIQUE
OWNER'S MANUAL
MANUAL DEL USUARIO
MODE D'EMPLOI
Model/Modelo/Modèle: TO31
120 V, 60 Hz, 1200 Watts
USA: EURO-PRO Operating LLC
94 Main Mill Street, Door 16
Plattsburgh, NY 12901
Tel.: 1 (800) 798-7398
Canada: EURO-PRO Operating LLC
4400 Bois Franc
St. Laurent, QC H4S 1A7
www.euro-pro.com
Advertisement
Table of Contents

Related Manuals for Euro-Pro TO31


Summary of Contents for Euro-Pro TO31
- Page 1 Copyright © Euro-Pro Operating LLC 2006 DIGITAL CONVECTION OVEN HORNO DIGITAL A CONVECCIÓN FOUR À CONVECTION NUMÉRIQUE OWNER’S MANUAL MANUAL DEL USUARIO MODE D’EMPLOI Model/Modelo/Modèle: TO31 120 V, 60 Hz, 1200 Watts USA: EURO-PRO Operating LLC 94 Main Mill Street, Door 16 Plattsburgh, NY 12901 Tel.: 1 (800) 798-7398...
-
Page 3: Garantie Limitée D'un (1) An
Si EURO-PRO Operating LLC constate que l’appareil comporte une défectuosité matérielle ou de main d’œuvre, EURO-PRO Operating LLC le réparera ou le remplacera sans frais de votre part. Une preuve d’achat indiquant la date d’achat et un montant de 12,95 $ pour la manutention et l’envoi de retour doivent être inclus.*... -
Page 4: Entretien Et Nettoyage
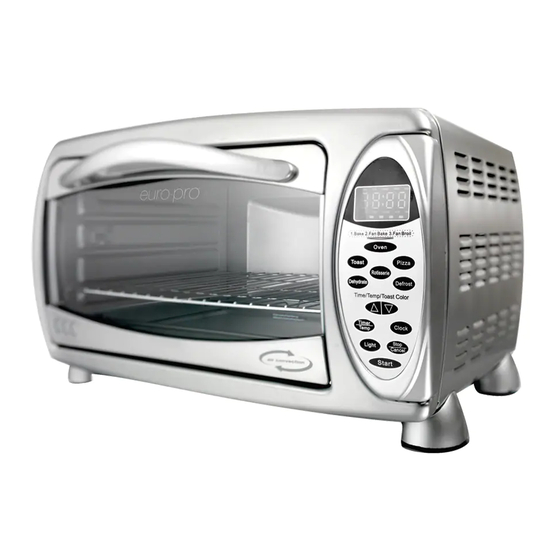
Getting To Know Your Toaster Oven Oven Housing Rotisserie Support Support Guides Control Panel Cool Touch Handle Glass Door Lower Heating Elements Crumb Tray Wire Rack 10. Bake Pan 11. Rotisserie Handle 12. Rotisserie Assembly (1 x rod, 2 x skewers) 13. - Page 5 Fig. 17 oven will beep once to advise you that it is plugged in. After re-assembling your convection oven, we recommend that you run the oven at the highest temperature on the bake function for approximately 15 minutes to eliminate any packing residue that may remain after shipping. This will also remove all traces of odor initially present.
-
Page 6: Using Your Toaster Oven
Using Your Toaster Oven Please familiarize yourself with the following oven functions and accessories prior to first use: • Oven Button – This oven is equipped with 3 choices of cooking functions: Bake Convection/Fan Bake Convection/Fan Broil • Pizza Button –... - Page 7 Mode D’Emploi Cuisson des biscuits Pour la cuisson des biscuits, nous vous suggérons de régler la température de cuisson et d’utiliser une plaque à biscuits sur la grille. (Veuillez prendre note qu’elles ne sont pas comprise avec le Très léger four).
- Page 8 Operating Instructions Rotisserie Guide Cooking results may vary, adjust times to individual requirements. Also, check often during cooking to avoid overcooking. Use the rotisserie guide below ONLY for suggested roasting times. Check the doneness with a reliable meat thermometer. Use an independent timer to remind you to check the meat temperature.
- Page 9 Mode D’Emploi Guide de Rôtisserie Les résultats peuvent varier. Ajustez la durée de cuisson selon vos besoins. Vérifiez souvent la cuisson afin d’éviter de trop cuire. Le guide de rôtisserie ci-dessous est offert à titre indicatif SEULEMENT. Vérifiez la cuisson à l’aide d’un thermomètre à...
- Page 10 Operating Instructions Baking Cookies For baking cookies, we suggest adjusting baking temperature and using cookie sheets placed on the wire rack. (Please note that these are not provided with your oven.) Also, using parchment paper on the cookie sheets might prove helpful when baking certain types of cookies.
-
Page 11: Cuisson À Convection
Utilisation de Votre Four Grille-Pain Veuillez vous familiariser avec les fonctions et les accessoires suivants de votre four avant sa première utilisation : • Bouton Four – Ce four est doté de trois options de cuisson : Cuisson Cuisson à convection Gril à... - Page 12 Operating Instructions DEFROST Using the Stop/Cancel Function 1. Press the “Stop/Cancel” button to Note: It is not recommended to pre-heat stop the oven while oven is in the oven when using the defrost function. operation. “PAUSE” will light up on Operation the display window.
-
Page 13: Care And Cleaning
Familiarisez-Vous Avec Votre Four Grille-Pain Habitacle du four Porte rôtisserie Portes grilles Panneau de commande Poignée froide au toucher Porte de verre Éléments chauffants inférieurs Plateau à miettes Grille 10. Plateau de cuisson 11. Poignée de rôtissoire 12. Ensemble à rôtir (1 tige, 2 broches) 13. -
Page 14: Product Registration Card
$ 12.95 to cover the cost of return shipping and handling must be included. * The liability of EURO-PRO Operating LLC is limited solely to the cost of the repair or replacement of the unit at our option. This warranty does not cover normal wear of parts and does not apply to any unit that has been tampered with or used for commercial purposes. -
Page 15: Instrucciones Importantes De Seguridad
Si su artefacto no funciona correctamente al utilizarlo bajo condiciones domésticas normales dentro del período de garantía, devuelva el artefacto completo y los accesorios, pagando el envío, a: En los EE.UU.: EURO-PRO Operating LLC, 94 Main Mill Street, Door 16, Plattsburgh, N.Y. 12901 En Canadá: EURO-PRO Operating LLC, 4400 Bois Franc, St. -
Page 16: Cuidado Y Limpieza
Partes De Su Horno Tostador Cubierta del Horno Soporte del Rostizador Guías de Soporte Panel de Control Mango que no se Calienta Puerta de Vidrio Elemento Calefactor Inferior Bandeja para las migas Estante de Alambre 10. Olla para Hornear 11. Mango del Rostizador 12. -
Page 17: Instrucciones De Uso
Instrucciones De Uso DESCONGELAR 4. Presione la flecha hacia arriba hasta llegar a los minutos Nota: No le recomendamos precalentar correctos. el horno al usar la función de 5. Presione nuevamente el botón de descongelar reloj para ingresar la hora Operación seleccionada. - Page 18 Uso de su Horno Tostador Debe familiarizarse con las siguientes funciones y accesorios del horno antes de usarlo: • Botón de Horno – este horno viene equipado con tres opciones de cocción: Hornear Convección/Horneado con Ventilador Convección/Parrilla con Ventilador • Botón de Pizza – Seleccione este botón para pizzas. •...
- Page 19 Instrucciones De Uso Horneado de Galletas Para hornear galletas, le recomendamos ajustar la temperatura del horno y colocar una bandeja para galletas sobre el estante de alambre. (Note que no viene incluida con su horno). También, Tostadas Muy Claras es conveniente utilizar papel manteca sobre la bandeja al hornear ciertos tipos de galletas.
- Page 20 Instrucciones De Uso Guía de Rostizado Los resultados pueden variar, ajuste estos tiempos de acuerdo con sus necesidades individuales. También, verifique los alimentos seguido durante la cocción para evitar que se cocinen de más. Use la guía siguiente ÚNICAMENTE como sugerencia para los tiempos de cocción.
Need help?
Do you have a question about the TO31 and is the answer not in the manual?
Questions and answers