Table of Contents
Advertisement
!
F
R
m
PART NAMES ........................................................
8
BEFORE OPERATING ...........................................
!0
MANUAL COOKING ..............................................
l0
AUTO COOKING ..................................................
13
www.frigJdaire.com
USA1-800-944-9044
www.frigidaire.ca
Canada 1-800-265-8352
Advertisement
Table of Contents

Related Manuals for Frigidaire FGMV154CLFA


Summary of Contents for Frigidaire FGMV154CLFA
- Page 1 PART NAMES ............BEFORE OPERATING ........... MANUAL COOKING ..........AUTO COOKING ..........www.frigJdaire.com USA1-800-944-9044 www.frigidaire.ca Canada 1-800-265-8352...
- Page 2 NEED HELP? iiiiiiiiiiiiiiiiiiiiiiiiiiiiiiiiiiiiiiiiiiiiiiiiiiiiiiiiiiiiiiiiiiiiiiiiiiiiiiiiiiiiiiiiiiiiiiiiiiiiiiiiiiiiiiiiiiiiiiiiiiiiiiiiiiiiiiiiiiiiiiiiiiiiiiiiiiiiiiiiiiiiiiiiiiiiiiiiiiiiiiiiiiiiiiiiiii iiiiiiiiiiiiiiiiiiiiiiiiiiiiiiiiiiiiiiiiiiiiiiiiiiiiiiiiiiiiiiiiiiiiiiiiiiiiiiiiiiiiiiiiiiiiiiiiiiiiiiiiiiiiiiiiiiiiiiiiiiiiiiiiiiiiiiiiiiiiiiiiiiiiiiiiiiiiiiiiiiiiiiiiiiiiiiiiiiiiiiiiiiiiiiiiiii iiiiiiiiiiiiiiiiiiiiiiiiiiiiiiiiiiiiiiiiiiiiiiiiiiiiiiiiiiiiiiiiiiiiiiiiiiiiiiiiiiiiiiiiiiiiiiiiiiiiiiiiiiiiiiiiiiiiiiiiiiiiiiiiiiiiiiiiiiiiiiiiiiiiiiiiiiiiiiiiiiiiiiiiiiiiiiiiiiiiiiiiiiiiiiiiiii iiiiiiiiiiiiiiiiiiiiiiiiiiiiiiiiiiiiiiiiiiiiiiiiiiiiiiiiiiiiiiiiiiiiiiiiiiiiiiiiiiiiiiiiiiiiiiiiiiiiiiiiiiiiiiiiiiiiiiiiiiiiiiiiiiiiiiiiiiiiiiiiiiiiiiiiiiiiiiiiiiiiiiiiiiiiiiiiiiiiiiiiiiiiiiiiiii iiiiiiiiiiiiiiiiiiiiiiiiiiiiiiiiiiiiiiiiiiiiiiiiiiiiiiiiiiiiiiiiiiiiiiiiiiiiiiiiiiiiiiiiiiiiiiiiiiiiiiiiiiiiiiiiiiiiiiiiiiiiiiiiiiiiiiiiiiiiiiiiiiiiiiiiiiiiiiiiiiiiiiiiiiiiiiiiiiiiiiiiiiiiiiiiiii Visit the Frigidaire Web Site at: http://www.frigidaire.com iiiiiiiiiiiiiiiiiiiiiiiiiiiiiiiiiiiiiiiiiiiiiiiiiiiiiiiiiiiiiiiiiiiiiiiiiiiiiiiiiiiiiiiiiiiiiiiiiiiiiiiiiiiiiiiiiiiiiiiiiiiiiiiiiiiiiiiiiiiiiiiiiiiiiiiiiiiiiiiiiiiiiiiiiiiiiiiiiiiiiiiiiiiiiiiiiii iiiiiiiiiiiiiiiiiiiiiiiiiiiiiiiiiiiiiiiiiiiiiiiiiiiiiiiiiiiiiiiiiiiiiiiiiiiiiiiiiiiiiiiiiiiiiiiiiiiiiiiiiiiiiiiiiiiiiiiiiiiiiiiiiiiiiiiiiiiiiiiiiiiiiiiiiiiiiiiiiiiiiiiiiiiiiiiiiiiiiiiiiiiiiiiiiii iiiiiiiiiiiiiiiiiiiiiiiiiiiiiiiiiiiiiiiiiiiiiiiiiiiiiiiiiiiiiiiiiiiiiiiiiiiiiiiiiiiiiiiiiiiiiiiiiiiiiiiiiiiiiiiiiiiiiiiiiiiiiiiiiiiiiiiiiiiiiiiiiiiiiiiiiiiiiiiiiiiiiiiiiiiiiiiiiiiiiiiiiiiiiiiiiii iiiiiiiiiiiiiiiiiiiiiiiiiiiiiiiiiiiiiiiiiiiiiiiiiiiiiiiiiiiiiiiiiiiiiiiiiiiiiiiiiiiiiiiiiiiiiiiiiiiiiiiiiiiiiiiiiiiiiiiiiiiiiiiiiiiiiiiiiiiiiiiiiiiiiiiiiiiiiiiiiiiiiiiiiiiiiiiiiiiiiiiiiiiiiiiiiii Before you call for service, there are a few things you can do to help us serve you better. iiiiiiiiiiiiiiiiiiiiiiiiiiiiiiiiiiiiiiiiiiiiiiiiiiiiiiiiiiiiiiiiiiiiiiiiiiiiiiiiiiiiiiiiiiiiiiiiiiiiiiiiiiiiiiiiiiiiiiiiiiiiiiiiiiiiiiiiiiiiiiiiiiiiiiiiiiiiiiiiiiiiiiiiiiiiiiiiiiiiiiiiiiiiiiiiiii iiiiiiiiiiiiiiiiiiiiiiiiiiiiiiiiiiiiiiiiiiiiiiiiiiiiiiiiiiiiiiiiiiiiiiiiiiiiiiiiiiiiiiiiiiiiiiiiiiiiiiiiiiiiiiiiiiiiiiiiiiiiiiiiiiiiiiiiiiiiiiiiiiiiiiiiiiiiiiiiiiiiiiiiiiiiiiiiiiiiiiiiiiiiiiiiiii...
- Page 3 Definitions This is the safety alert symbol. It is used to alert you to potential personal injury hazards. Obey all safety messages that follow this symbol to avoid possible injury or death. WARNING indicates a potentially hazardous situation which, CAUTION indicates a potentially hazardous situation which, if not avoided, may result in minor or moderate injury.
- Page 4 When using the convection or combination cooking Thermometer-- Do not use regular cooking or oven functions, both the outside and inside of the oven will thermometers when cooking by microwave or become hot. Always use hot pads to remove containers combination.
- Page 5 Electrical Requirements UNPACKING AND EXAMINING YOUR Check Installation Instructions for proper location for the MICROWAVE OVEN power supply. Open the bottom of the carton, bend the carton flaps The electrical requirements are a 120 volt 60 Hz, AC back and tilt the microwave oven over to rest on plastic only, 13.5 amp.
- Page 6 ABOUT YOUR MICROWAVE OVEN ABOUT MICROWAVE COOKING This Use and Care Manual is valuable: read it carefully and • Arrange food carefully. Placethickest areas towards outside of dish. always save it for reference. • Watch cooking time. Cook for the shortest amount of A good microwave cookbook is a valuable asset.
- Page 7 ABOUT CHILDREN AND THE HICROWAVE ABOUT UTENSILS AND COVERINGS Children below the age of 7 should use the microwave oven with It is not necessary to buy all new cookware. Many pieces already in your a supervising person very near to them. Between the ages of 7 kitchen can be used successfully in your new microwave oven.
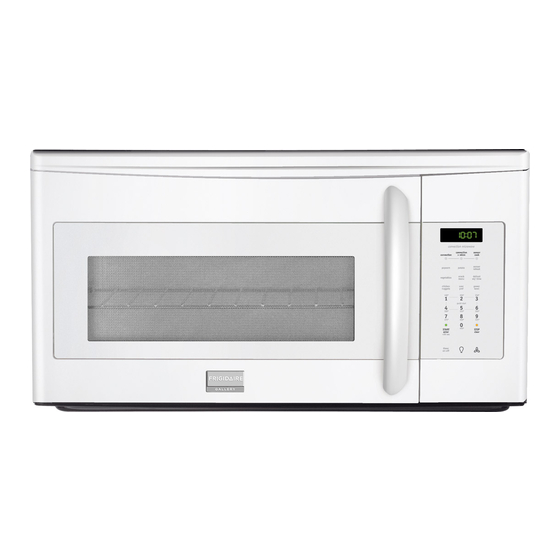
- Page 8 FRONT VIEW 1 Microwave oven door with see-through window 2 Door hinges 3 Waveguide cover: DO NOT REMOVE. Turntable motor shaft Microwave oven light It will light when microwave oven is operating or door is open. Rack holders Safety door latches The microwave oven will not operate unless the door is securely closed.
- Page 9 The7-digitInteractive Display spells out operating steps andshows cookinghints. (i_ [O1"_ comvectiom semso_ --14=15 18-22 + mkro cook eonvectiol_ 18=20 I}OS I;O :> , s_a; k (Ief o_;t --11=12 choke DOWI31 ,"_0: ] ......!2/: = ! )< 3 ] i: 4 ? ) ' 4 !) START...
-
Page 10: To Set The Clock
• Before operating your new oven make sure you read This is a 12 hour clock. If you attempt to enter an incorrect and understand this Use and Care Guide completely. clock time, ERROR will appear in the display. Press the •... - Page 11 Using the Round Wire Rack Setting Defrost by Time The rack allows several foods to be cooked or reheated by • Suppose you want todefrostfoodwiththedefault covection. Cook with SENSOR COOKING or AUTO COOKING 30% power level for 5 minutes: without the rack. But Chicken Nuggets isone of AUTO COOKING, Step Press can use the rack, glassware or ceramic cookware, Do not use...
- Page 12 Defrosting tips • When using the defrost by weight feature, the weight The shape of the package will alter the defrosting time. entered should always be pounds (valid entries are from Shallow rectangular food packets defrost more quickly 0.1 to 6.0 pounds). than a deep frozen block of food.
- Page 13 Popcorn ° Suppose you want to pop a 3.0 oz. bag of popcorn automatically. DO NOT leave microwave oven unattended while Step Press popping corn. The popcorn feature lets you pop 3 different commercially packaged microwave popcorn sized bags. Use the table Press Popcorn pad (1,2 or 3 times - refer popcorn...
- Page 14 Sensor cooking has an electronic controlled sensor that SENSOR COOKING applies to the following selections: Sensor detects the vapor (moisture and humidity) emitted from the Cook, Snack Menu, Vegetables, Potato, Sensor Reheat. food as it heats. The sensor adjusts the cooking times and power level for various foods and quantities automatically.
- Page 15 Sensor Cook chart FOOD AMOUNT PROCEDURE (Initial temperature) 1. Frozen 8 - 24 oz Use this pad for frozen, convenience foods. It will give satisfactory results for most Entrees 225 - 680 g brands. You may wish to try several and choose your favorite. Remove package from outer wrapping and follow package directions for covering.
- Page 16 Vegetables There are 2 options (Frozen Vegetables, Fresh Vegetables) under the VEGETABLES. • Suppose you want to cook fresh Vegetables. Press Step 1. Press the vegetables vegetables and number 2 for fresh Vegetables. START 2. Press the START enter +30 enter sec pad.
- Page 17 Potato There is 1 option (potato) under the POTATO. • Suppose you want to cook 2 potatoes. Step Press potato 1. Press the potato pad. START 2. Press START/enter/+30sec. pad. enter +30 sec Potato chart FOOD AMOUNT PROCEDURE Potato 1 - 4 pieces Pierce with fork in several places.
- Page 18 Convection Cooking There are ten temperatures of convection: 100F,200F, 2. Press the temperature key to select 250F, 300F,325F,350F,375F, 400F,425F,450F. the temperature you need. Convection cooking uses a heating element to raise the Press "convection" to confirm the temperature of the air insidethe oven. Any oven temperature convection from 100°F to 450°F may be set.
- Page 19 Convection Cooking • Use the round wire rack during convection baking. ° Always pre-heat the oven before convection baking. ° Avoid opening the oven door during cooking - each time the door is opened the oven loses heat and this can cause uneven baking. Biscuits and bread TYPE...
- Page 20 Combination Cooking Combination cooking helps to brown and crisp foods. TYPE QUANTITY TIME NOTES Beefburgers 16-19 minutes for two Place on microwave-proof plate, drain fat and turn halfway through cooking. Beef rump roast 1.0kg Rare: 15-20 minutes Place fat side down on low rack, season, shield if necessary Medium: 21-25 minutes After cooking,...
- Page 21 Cookware Tips Convection Cooking Combination Cooking Metal Pans are recommended for all types of baked Glass or Glass-Ceramicbaking containers products,but especially where browning or crusting recommended.Be sure not to use items with metal trim is important. as it may cause arcing (sparking) with oven wall or oven Dark or dull finish metal pans are best for breads and pies shelf, damaging the cookware, the shelf or the oven.
- Page 22 Select the best method of cooking Use the following guide to select the best method of cooking. Specific recipes can be adapted to any method of cooking. @-- Best method FOODS MICROWAVE COMBINATION CONVECTION @--Alternate method Appetizers N/R-- Not recommended Dips and Spreads Pastry Snacks Beverages...
- Page 23 User Pref Step Press User Pref provides 4 features that make using your oven easy because specific instructions provided in the interactive display. 5. Enter cooking time. Ex : 20 minutes User Pref Label 1 Crock 6. Press the power level power 2 Chitd Lock pad six times for 50%...
- Page 24 Multiple Sequence Cooking Suppose you want to heat a cup of soup for 30 sec- Your oven can be programmed for up to 2 automatic cook- onds. ing sequences, switching from one power level setting to another automatically. Step Press Sometimes cooking directions tell you to start on one power level and then change to a different power level.
- Page 25 Timer Demonstration Mode • Suppose you want to time a 3-minute long distance When the oven is electrified and within one minute, phone call. to demonstrate, press the popcorn pad and hold for 6 seconds. ENTER DEMO will appear in the display. Step Press Cooking operations and specific special features can now...
- Page 26 Disconnect the power cord before cleaning leave the door open to deactivate the oven during cleaning, EXTERIOR overheat and cause smoke or possibly catch fire. DO NOT REMOVE THE WAVEGUIDE COVER. The outside surface is precoated steel and plastic. Clean the outside with mild soap and water;...
- Page 27 Disconnect the power cord before cleaning leave the door open to deactivate the oven during cleaning. Cleaning the exhaust filters Surface light replacement The oven ventilation exhaust filters should be removed and cleaned often; generally at least once every month. TO avoid risk of personal injury or property damage, wear gloves when replacing the ligh t bu Ibsi To avoid risk of personal injury or property damage, do...
- Page 28 Disconnect the power cord before cleaning leave the door open to deactivate the oven during cleaning. Oven light replacement Charcoal filter replacement Charcoal Filter installed in your microwave oven, is used Remove the vent grill per instructions 1-4 above and for nonvented, recirculated installation.
- Page 29 Disconnectthe power cord before cleaning leave the door open to deactivate the oven during cleaning. Cleaning suggestions If steam accumulates inside or outside the oven door, For best performance and for safety reasons, keep the oven wipe with a soft cloth. Steam can accumulate when clean inside and outside.
- Page 30 Disconnectthe power cord before cleaning leave the door open to deactivat e the oven during cleaning. Control Panel and Door Wipe with a damp cloth. Dry thoroughly. Do not use cleaning To clean stainless steel surfaces, use a hot, damp cloth with a mild detergent suitable for stainless steel surfaces.
- Page 31 Please checkthefollowing before calling forservice: Placeonecupofwaterina glassmeasuring c upinthemicrowave o venandclosethedoorsecurely. Operate themicrowave o venforoneminute atHIGH100%. A Doesthemicrowave o venlightcomeon? B Does thecooling fanwork? (Put y ourhand attopaboveDisplay.) C Doestheturntable rotate? (It is normal fortheturntable t oturnineitherdirection.) D Isthewaterinthemicrowave o venwarm? If "NO"...
- Page 32 Your appliance is covered by a one year limited warranty. For one year from your original date of purchase, Electrolux will pay all costs for repairing or replacing any parts of this appliance that prove to be defective in materials or workmanship when such appliance...
Need help?
Do you have a question about the FGMV154CLFA and is the answer not in the manual?
Questions and answers