Table of Contents
Advertisement
Quick Links
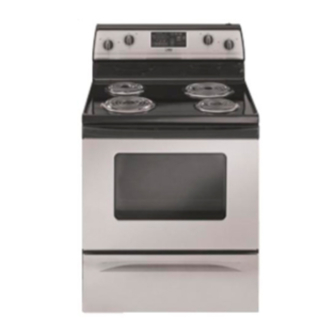
ELECTRIC RANGE
For questions
about
features,
operation/performance,
parts,
accessories
or service,
call: 1-800-253-1301.
or visit
our brand
website
at ...
www.whirlpool.com
www.estatea
pplian
ces.com
www.magicchef.com
www.roperappliances.com
Table of Contents
......................................................................
2
To the installer:
Please leave this instruction
book with the unit.
To the consumer:
Please
read and keep this book for future
reference.
W10162214A
Advertisement
Table of Contents

Related Manuals for Estate TES356TD1


Summary of Contents for Estate TES356TD1
- Page 1 ELECTRIC RANGE For questions about features, operation/performance, parts, accessories or service, call: 1-800-253-1301. or visit our brand website at ... www.whirlpool.com www.estatea pplian ces.com www.magicchef.com www.roperappliances.com Table of Contents ..............To the installer: Please leave this instruction book with the unit. To the consumer: Please read and keep this book for future...
-
Page 2: Table Of Contents
TABLE OF CONTENTS RANGE SAFETY ................3 The Anti-Tip Bracket ..............3 PARTS AND FEATURES ..............5 COOKTOP USE ................6 Cooktop Controls ................. 6 Ceramic Glass ................6 Coil Elements and Burner Bowls ..........7 Lift-up Cooktop ................7 Home Canning ................ -
Page 3: Rangesafety
RANGESAFETY Your safety and the safety of others are very important. We have provided many important safety messages in this manual and on your appliance. Always read and obey all safety messages. This is the safety alert symbol. This symbol alerts you to potential hazards that can kill or hurt you and others. - Page 4 iMPORTANT SAFETY iNSTRUCTiONS WARNING: To reduce the risk of fire, electrical shock, [] Protective Liners - Do not use aluminum foil to line surface injury to persons, or damage when using the range, follow unit drip bowls or oven bottoms, except as suggested basic precautions,...
-
Page 5: Parts And Features
PARTS AND FEA'IIJRES This manual covers several different models. The range you have purchased may have some or all of the parts and features listed. The location and appearance of the features shown here may not match those of your model. Control Panel A. -
Page 6: Cooktop Use
COOKTOP USE The surface cooking area will glow red when an element is on. It will cycle on and off, at all settings, to maintain the selected heat level. It is normal for the surface of white or biscuit ceramic glass to appear to change color when surface... -
Page 7: Coil Elements And Burner Bowls
• Use flat-bottomed cookware for best heat conduction To Replace: energy efficiency. Cookware with rounded, warped, ribbed Line up openings in the burner bowl with the coil element dented bottoms could cause uneven heating and poor receptacle. cooking results. • Determine flatness by placing... -
Page 8: Cookware
ELECTRONIC OVEN CONTROL IMPORTANT: Donotleave e mpty c ookware ona hot s urface cooking area, element orsurface burner. Ideal cookware should h ave a flatbottom, straight sides a nd a well-fitting lid, a nd thematerial should b eofmedium-to-heavy thickness. Rough finishes may scratch the cooktop orgrates. Aluminum and copper may beused asa core orbase incookware. -
Page 9: Tones
Press TIMER CANCEL* anytime to cancel the timer and/or stop reminder tones. To cancel the timer during countdown, press TIMER CANCEL* twice. The Off/Cancel pad stops any function except theClock, Timer and Control Lock. The time can be reset during the countdown by repeating above steps. -
Page 10: Oven Use
To Adjust Oven Temperature Calibration (on models with OVEN USE manual oven control): 1. Make sure the oven temperature control knob is in the Off position. Pull oven temperature control knob straight off and Odors and smoke are normal when the oven is used the first few turn it over. -
Page 11: Split Oven Rack
When finished cooking, slowly remove items. FOOD RACK POSITION(S)* Large roasts, turkeys, angel food, 1 or 2 bundt cakes, quick breads, pies Yeast breads, casseroles, meat and poultry Cookies, biscuits, muffins, cakes 2 or 3 BAKEWARE Hot air must be able to circulate around food to cook evenly, so allow 2"... -
Page 12: Meat Thermometer
Press START/ENTER. The oven control automatically sets preheating times based on the oven temperature selected. On models without a temperature probe, use a meat thermometer to determine doneness of meat, poultry and fish. The temperature can be changed after this step. START/ The internal temperature, not appearance,... -
Page 13: Timed Cooking
To Broil: Press CUSTOM BROIL. The broil oven indicator light will light Se,}i CO H_'g Press START/ENTER. The On and Heat oven indicator lights will light up. The temperature setting can be changed any time before or Food Poisoning Hazard after pressing START/ENTER. -
Page 14: Rangecare
RANGECARE Prepare Cooktop and Storage Drawer: • Remove plastic items from the cooktop because they may melt. • Remove all items from the storage drawer. Cycle How the Works IMPORTANT: The heating and cooling of porcelain on steel in the oven may result in discoloring, loss of gloss, hairline cracks... -
Page 15: General Cleaning
IMPORTANT: Before cleaning, make sure all controls are off and Sugary spills (jellies, candy, syrup) the oven and cooktop are cool. Always follow label instructions • Cooktop Scraper: on cleaning products. Clean while the cooktop is still warm. You may want to wear Soap, water and a soft cloth or sponge are suggested first unless oven mitts while cleaning... -
Page 16: Oven Light
COIL ELEMENTS (on some models) BROILER PAN AND GRID (on selected models) Cleaning Method: Cleaning Method: • Damp cloth: Make sure control knobs are off and elements Chrome only are cool. • Mildly abrasive cleanser: Do not clean or immerse in water. -
Page 17: Oven Door
For normal range use, it is not suggested to remove the oven The storage drawer can be removed. Before removing, make sure door. However, if removal is necessary, make sure the oven is off drawer is cool and empty. and cool. Then, follow these instructions. The oven door is heavy. -
Page 18: Troubleshooting
TROUBLESHOOTING Try the solutions suggested here first in order to avoid the cost of an unnecessary service call. Nothing will operate Oven temperature too high or too low Is the power supply cord unplugged? Does the oven temperature calibration need adjustment? Plug into a grounded outlet. -
Page 19: Assistanceor Service
Was the oven preheated? • Is the proper length of time being used? See "Baking and Roasting" section. Adjust cooking time. Is the proper bakeware being used? • Has the oven door been opened while cooking? See "Bakeware" section. Oven peeking releases oven heat and can result in longer cooking... -
Page 20: Warranty
WHIRLPOOL CORPORATIONMAJOR APPLIANCEWARRANTY LIMITED WARRANTY For one year from the date of purchase, when this major appliance is operated and maintained according to instructions attached to or furnished with the product, Whirlpool Corporation or Whirlpool Canada LP (hereafter "Whirlpool") will pay for Factory Specified Parts and repair labor to correct...
Need help?
Do you have a question about the TES356TD1 and is the answer not in the manual?
Questions and answers