Advertisement
Available languages
Available languages
Quick Links
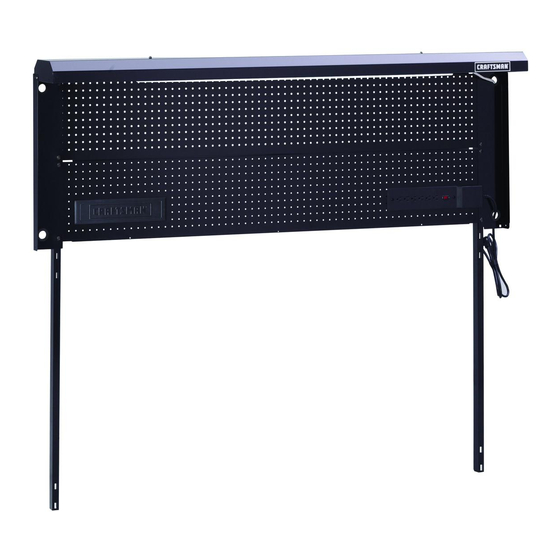
BACKWALL
WITH M ETAL PEGBOARD
CAUTION: Backwall MUST be attached to the Workbench
before the
top is attached and the drawers are installed.
CAUTION: Read and follow all Safety Rules and Operating Instructions
before first use of this product.
Sears, Roebuck and Co., Hoffman Estates, IL 60179, USA.
F1493
Advertisement

Subscribe to Our Youtube Channel
Related Manuals for Craftsman BACKWALL WITH METAL PEGBOARD


Summary of Contents for Craftsman BACKWALL WITH METAL PEGBOARD
- Page 1 BACKWALL WITH M ETAL PEGBOARD CAUTION: Backwall MUST be attached to the Workbench before the top is attached and the drawers are installed. CAUTION: Read and follow all Safety Rules and Operating Instructions before first use of this product. Sears, Roebuck and Co., Hoffman Estates, IL 60179, USA. F1493...
-
Page 2: Safety Warnings
SAFETY WARNINGS AND CAUTIONS: Use appropriate safety equipment when using power and hand tools. Failureto do so may cause personal injuryor product damage. Use adequate manpower when assembling and moving this unit. Failure to do so may cause personal injury or product damage. DO NOT stand on this product. - Page 3 A(2) C(2) ..:!:!:i:!::' B(2)
- Page 4 STEP1 WARNING: Backwallwith Metal Pegboard is only to be AA (2) attached to one of the following Workbenches: 59741, 59742, 59746 NOTE: To assemble the Backwall,the drawers and top must first be removed from the workbench. DD (2) DRAWER REMOVAL AND INSTALLATION: FRICTION DRAWERS: •...
- Page 5 STEP 3 STEP2 AA(2) DD (8) BB (2) BB {I) © EE (S) DD (2) © EE (2) • Attach B(2) and C(2). Finger tighten. Assemble tray. Finger tighten. /DD EE Back Back Wrench Tighten fasteners from step 1 Front...
- Page 6 NOTE: To reattach the top, new pilot holes will need to be marked and drilled. AA (4) DD (4) Reattach top with existing Back hardware EE (4) ¢ Install tray_ Finger tighten. Front Front Back Place top on the bench in the desired location. •...
- Page 7 STEP 5 Continued STEP6 GG (1) (_._:_ FF (2) CC (2) Install grommet (GG) in desired location. Drill (2) 1/8" pilot holes in top using holes in C(2) as a Place electrical cord for G through grommet. template. Place G against bottom of tray. Attach using CC(2).
- Page 9 MANUAL DE USUARIO TABLERO METALICO TRASERO ADVERTENCIA: Asegdrese de colocar el tablero antes que la tapa y los cajones. ATENCION: Lea y siga todas las Normas de Seguridad y las Instrucciones de Funcionamiento antes de utilizar por primera vez este producto. Sears, Roebuck and Co., Hoffman Estates, IL 60179, USA.
- Page 10 PRECAUCIONES DE SEGURIDAD: Cuando trabaje con electricidad o herramientas manuales, utilice un equipo de seguridad adecuado. Una averia puede causar daSos personales o materiales. Aseg_rese de utilizar las herramientas y piezas adecuadas cuando este montando o moviendo el producto. Una averia puede producirdatlos personales o materiales.
- Page 11 • ii_i C(2) B(2)
- Page 12 PASO 1 ADVERTENCIA: El tablero met_lico trasero s61ose puede colocar en los siguientes modalos de bancos: AA (2) 59741, 59742, 59746. AVISO: Para colocar el tablero trasero, en primer lugar debe quitar los cajones y la tapa del banco de trabajo. ,i©...
- Page 13 PASO 2 PASO3 AA (2) AA(8) BB (2) BB (I) EE (8) _.._! DD (2) EE (2) • Coloque B(2) y C(2) • Apriete a mano. Colocar la bandeja. • Apriete a mano. DD EE B(2) Parte Posterior Parte posterior Apriete con Ilave inglesa los cierres desde el paso 1.
- Page 14 NOTA: Para volver a colocar la tapa, se necesita marcar y taladrar agujeros gufa nuevos para colocar los ganchos existen_s. DD (4) Vuelva a colocarla parte Parte superiorutizando © posterior el hardwareexistente EE (4) • Instale la bandeja. • Apdete a mano. Parte frontal Parte Frontal...
- Page 15 PASO 5 - Continuacibn GG(1) CC(2) Taladre 2 agujeros de 1/8 de pulgada con una profundidad de media pulgada en la tapa utilizando los Instale arandela en el lugar deseado. agujems de C(2) cornoplantilla. Pase el cable el_tdco por G a trav_s de la arandela. Coloque usando CC(2).
Need help?
Do you have a question about the BACKWALL WITH METAL PEGBOARD and is the answer not in the manual?
Questions and answers