Advertisement
Available languages
Available languages
Quick Links
Owner's Manual
JCRIIFTSMIIWI
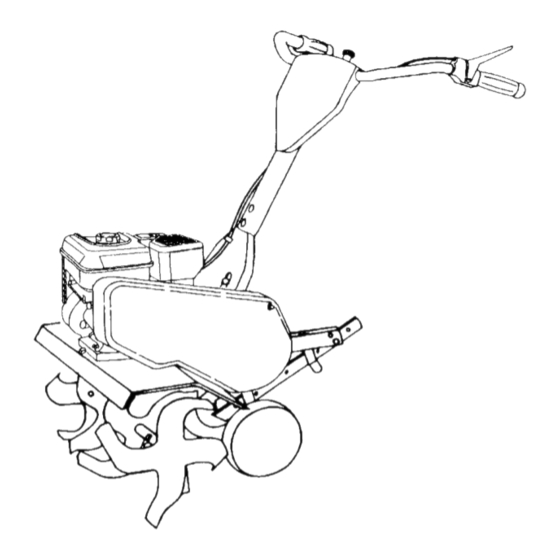
FRONT TINE TILLER
WITH REVERSE
6.0 HP
26 Inch Tine Width
Model No.
917.292492
@
This product has a low emission engine which operates
differently from previously
built engines, Before you start
the engine, read and understand
this Owner's Manual.
]
CAUTION:
Read and follow all Safety
Rules and Instructions before
operating this equipment.
Sears, Roebuck and Co., Hoffman Estates, II 60179 U.S.A.
Visit our Craftsman website:www.sears.com/craftsman
Advertisement

Related Manuals for Craftsman 917.292492


Summary of Contents for Craftsman 917.292492
- Page 1 Before you start the engine, read and understand this Owner's Manual. CAUTION: Read and follow all Safety Rules and Instructions before operating this equipment. Sears, Roebuck and Co., Hoffman Estates, II 60179 U.S.A. Visit our Craftsman website:www.sears.com/craftsman...
- Page 2 Sears Service ...... Back Cover LIMITED TWO YEAR WARRANTY ON CRAFTSMAN TILLER For two (2) years from date of purchase, when this Craftsman Tiller is maintained, lubricated, and tuned up according to the operating and maintenance instructions the owner's manual, Sears will repair free of charge any defect in material or workman- ship.
- Page 3 • Use extension cords and receptacles • Do not overload the machine capacity as specified by the manufacturer for all by attempting to till too deep at too fast units with electric drive motors or a rate. electric starting motors. •...
- Page 4 CUSTOMER RESPONSIBILITIES PRODUCT SPECIFICATIONS • Read and observe the safety rules. Gasoline 3 Quarts • Follow a regular schedule in maintain- Capacity: Unleaded ing, caring for and using your tiller. Regular • Follow the instructions under the Oil (API-SF-SJ): SAE 30 "Customer Responsibilities"...
- Page 5 Your new tiller has been assembled at the Front factory with the exception of those parts left unassembled for shipping purposes. To ensure safe and proper operation of your tiller all parts and hardware you assemble must be tightened securely. Use the correct tools as necessary to insure proper tightness.
- Page 6 UNPACK CARTON & INSTALL 3. Raise and position depth stake support to align holes in support with HANDLE holes "B" and "C" in engine brackets. _CAUTION: Be careful of exposed 4. Install into holes "B" and "C" the staples when handling or disposing of hardware removed earlier and one (1) cartoning material.
- Page 7 KNOW YOUR TILLER READ THIS OWNER'S MANUAL AND SAFETY RULES BEFORE OPERATING YOUR TILLER. Compare the illustrations with your tiller to familiarize yourself with the location of various controls and adjustments. Save this manual for future reference. These symbols ,may appear on yourTiller or in literature supplied with the product.
- Page 8 The operation of any tiller can result in foreign objects thrown into the eyes, which can result in severe eye damage. Always wear safety glasses or eye shields before starting your tiller and while tilling. We recommend standard safety glasses or a wide vision safety mask worn over spectacles. HOWTO USEYOURTILLER The depth stake should always be below...
- Page 9 BEFORE STARTING ENGINE use engine or carburetor cleaner prod- ucts in the fuel tank or permanent IMPORTANT:Be very careful not to allow damage may occur. dirt to enter the engine when checking or _kCAUTION" Fill to within 1/2 inch of top adding oil or fuel.
- Page 10 excessive bounce and difficult handling Plug of your tiller. Hard soil should be moistened before tilling; however, extremely wet soil will "ball-up" or Throttle clump during tilling. Wait until the soil is less wet in order to achieve the best Choke results.
- Page 11 MAINTENANCE SCHEDULE FILL IN DATES AS YOU COMPLETE SERVICE DATES REGULAR SERVICE Check Engine Oil Level Change Engine I_1,_ - Oil Pivot Points Inspect Spark Arrester / Muffler Inspect Air Screen Clean or Replace Air Cleaner Cartridge Clean Engine Cylinder Fins Replace Spark Plug t - Change more oftenwhen operatingundera heavyloador in high ambienttemperatures.
- Page 12 _I_CAUTION: Disconnect spark plug wire Oil Drain before performing any maintenance (except carburetor adjustment) to prevent accidental starting of engine. Prevent fires! Keep the engine free of " Oil Level grass, leaves, spilled oil, or fuel. Remove fuel from tank before tipping unit for maintenance.
- Page 13 MUFFLER CLEANING Do not operate tiller without muffler. Do Do not clean your tiller when the engine and transmission are hot. We do not not tamper with exhaust system. Dam- aged mufflers or spark arresters could recommend using pressurized water (garden hose, etc.) to clean your unit create a fire hazard.
- Page 14 Cable Clip Tine Control Cable NOTE: When reassembling outer tines, be sure right fine assembly (marked "R") and left tine assembly (marked "L") are mounted to correct side of tine shaft. TINE OPERATION CHECK _kWARNING: Disconnect spark plug wire from spark plug to prevent starting while checking tine operation.
- Page 15 6. Before installing reverse (outside) Reverse Idler Arm Reverse (OUTSIDE) V-Belt belt, turn belt "inside out". Twist so Reverse wide, flat surface of belt is to inside. Idler 7. Wrap V-belt around reverse idler pulley and reassemble idler to idler Idler arm.
- Page 16 NOTE: Fuel stabilizer is an acceptable Immediately prepare your tiller for storage at the end of the season or if the unit will alternative in minimizing the formation of not be used for 30 days or more. fuel gum deposits during storage. Add _CAUTION: Never store the tiller with stabilizer to gasoline in fuel tank or...
- Page 17 TROUBLE SHOOTING CHART: See appropriate section in manual unless directed to Sears service center. PROBLEM CAUSE CORRECTION Out of fuel. Will not start 1. Fill fuel tank. 2. See "TO START ENGINE" in Engine not "CHOKED" properly. the Operation section. 3.
- Page 18 TROUBLE SHOOTING CHART: See appropriate section in manual unless directed to Sears service center. PROBLEM CAUSE CORRECTION Engine 1. Low oil level/dirty oil. 1. Check oil level/change oil. overheats 2. Dirty engine air screen. 2. Clean engine air screen. 3. Dirty engine. 3.
- Page 19 Vea el manual Ingl6s del duefio .. Back Cover GARANTIA LIMITADA DE DOS AI_IOS PARA LA CULTIVADORA CRAFTSMAN Por dos (2) afios, a partir de la fecha de compra, cuando esta Cultivadora Craftsman mantenga, lubrique y afine segun las instrucciones...
- Page 20 MANTENIMIENTO • Tenga mucho cuidado cuando opere o cruce entradas para autom6viles de ripio, ALMACENAMIENTO senderos o caminos. Est_ alerta en Io que • Mantenga los aecesodos y aditamentos de se refiere a los peligros escondidos o al la m_quina en buenas condiciones para el trafico.
- Page 21 ESPECIFICACIONES DEL PRODUCTO RESPONSABILIDADES DEL CLIENTE • Lea y observe las reglas de seguridad. 3 Cuartos Capacidad de • Siga un programa regular de mantenimiento, Gasolina: Sin plomo, Regular cuidado y uso de eu cultivadora. Aceite (API-SF-SJ): SAE 30 (Sobre 32°F) •...
- Page 22 Su cultivadora nueva ha sido montada en la ParleDelantera fabrica, con la excepci6n de aquellas partes que se dejaron sin moRtar por razones de envfo. Para asegurarse que la cultivadora operara en forma segura y adecuada, todas las partes y los artfculos de ferreterfa monte tienen que estar apretados en forma segura.
- Page 23 DESEMPAQUE DE LA CAJA INSTALACION DEL CONJUNTO DE LA CARTON E INSTALACI6N DEL MANGO ESTACA DE PROFUNDIDAD _PRECAUCI(_N: Tenga cuidado con las 1. Aflojar la tuerca "A". grapas expuestas cuando maneje o deseche 2. Quitar la tuerca hexagonal, la arandela de los matedales de la caja de cart6n.
- Page 24 CONOZCA SU CULTIVADORA LEA ESTEMANUALDELDUEllOY LAS REGLAS DE SEGURIDAD ANTES DE OPERAR SU CUTIVADORA Compare las ilustraciones con su cultivadora para familiarizarse con la ubicaci6n de los diversos controles y ajustes. Guarde este manual para referencia en el futuro. Estos simbolos pueden apareser sobre su cultivadora en la literatura...
- Page 25 La operaci6n de cualquier cultivadora puede hacer que salten objetos extra,_os dentro de sus ojos, Io que puede producir daSos graves en estos. Siempre use anteojos de seguridad o protecciones para los ojos antes de hacer arrancar su cultivadora o mientras este labrando con _lla. Recomendamos el uso de la m&scara de seguridad...
- Page 26 ANTES DE HACER ARRANCAR arrancar el motor y h&galo funcionar hasta MOTOR que las Ifneas del combustible y el carburador queden vac/as. La prbxima temporada IMPORTANTE: Tenga mucho cuidado de no combustible nuevo. Vea la secci6n de permitir que entre mugre al motor cua do Almacenamiento para m,_s informaci6n.
- Page 27 Mueva el control de la aceleraci6n a la Si la cultivadora esta. bien ajustada, excavara posici6n de funcionamiento deseada. con poco esfuerzo por parte del operador. Permita que se caliente el motor por unos • El labrar quiere decir el excavar, dar vuelta cuantos minutos antes de enganchar...
- Page 28 CULTIVO El cultivo quiere decir la destrucci6n de la mala hierba entre las filas para evitar que _stas le roben la nutrici6n y la humedad alas plantas. AI mismo tiempo, si se rompe la capa superior de la costra del suelo, este puede retener la humedad.
- Page 29 MANTENIMIENTO LLENE LAS F ECHAS DE MEDIDA PROGRAMA o/___, _/__¢ SERVlClO REGULAR HAS DE SERVICIO Revisar el nivel del aceite del motor Cambiar el aceite del motor I_1,; ` Aceitar los puntos de pivote Inspeccionar el supresor del silenciador Inspeccionar la rejilla de aire ¥1 Limpiar/cambiar...
- Page 30 _kPRECAUCI6N: Desconecte el alambre de Remueva el tapbn del deposito de reUeno de aceite. Tenga cuidado de no permitir la bujfa antes de dar mantenimiento (excepto que la mugre entre al motor. pot el ajuste del carburador) para evitar que el Vuelva a Ilenar el motor con aceite.
- Page 31 BUJIA Aletas del cilindro Cambie las bujias al comienzo de cada Caja del temporada de cultivo, o despu_s de 50 horas ventilador de uso, Io que suceda primero. El tipo de bujfa y la abertura aparece en las "ESPEClFICAClONES DEL PRODUCTO" la pagina 21 de este manual.
- Page 32 CULTIVO/LABRADO ESTRECHO - PASO Si los brazos no rotan, el alambre interior del cable de control est,. demasiado suelto. DE 12-3/4" Suelte la abrazadera del cable y empuje el • Remuevalos brazosexteriores. cable hacia arriba para remover la soltura y vuelva a apretar la abrazadera. Vuelva a revisar en la posici6n de "ENCENDIDO"...
- Page 33 PARA CAMBIAR LAS CORREAS Referencia de vista delantera Cambie las correas V si se han estirado Polea de Guia de considerablemente o si estan partidas o si los mar, bordes estan deshilachados. Hay dos (2) +idel brazo correas V - marcha hacia adelante (interior) y de guia marcha atras (exterior).
- Page 34 MOTOR El mantenimiento, la reparaci6n, o el reemplazo de cualquier dispositivos o sistemas del control de la emisi6n, los cuales sean hechos al costo del cliente, pueden ser realizados por cualquier individuo o establecimiento de reparaci6n de motor. Los reparos que caen bajo garantia deben ser realizados por un establecimiento de servicio de reparacion de motor autorizado.
- Page 35 AVISO: El estabilizador de combustible es una Inmediatamente prepare su cultJvadora para et alternativa aceptable para reducir a un mfnimo almacenamiento al final de la temporada o si la unidad no se va a usar por 30 dias o ma,s. la formacion de dep6sitos de goma en el 4_kPRECAUCl6N:...
- Page 36 IDENTIFICACI_N DE PROBLEMAS: Vea la secci6n apropiada en el manual a menos que estd dirigido a un centro de servicio Sears. PROBLEMA CORRECCI(_N CAUSA No arranca 1. Sin combustible. 1. Llene el estanque de combus tible. 2. Vea "PARA ARRANCAR 2.
- Page 37 IDENTIFICACI6N DE PROBLEMAS: Yea la seccidn apropiada en el manual a menos que este dirigido a un centro de servicio Sears. CAUSA CORRECCION PROBLEMA Falta de fuerza 10.Rejilla de aire del motor sucia. 10. Limpie la rejilla de aire del motor. 1.Silenciador sucio/taponado.
- Page 38 TILLER -- MODEL NUMBER 917.292492 HANDLES KEY PART PART DESCRIPTION DESCRIPTION 180277 Panel, Control 12000027 Ring, Clip 1106322X 12000059 Retaining Ring Grip, Handle 72010520 Bolt 5/16-18 X 2-1/2 98000129 Nut, Flange 73970500 Locknut, Flange 5/16-18 UNC STD533107 Bolt, Carriage 5/16-18 x 3/4 152094 Assembly, Handle Column 110514X...
- Page 39 TILLER -- MODEL NUMBER 917.292492 BELT GUARD AND PULLEY ASSEMBLY KEY PART KEY PART DESCRIPTION NO. NO. DESCRIPTION 165914 Bolt, Belt Guard 180377 Assembly, Bracket, Belt Guard 9484R 12000035 Ring, Klip Clip, Cable 86777 STD541237 Nut, Hex, Jam 3/8-16 Screw, Hex Washer Hd. Slotted, 161806 Pulley, Idler Thrd cut.
- Page 40 TILLER - - MODEL NUMBER 917.292492 WHEEL AND DEPTH STAKE ASSEMBLY 19 20 PART PART DESCRIPTION DESCRIPTION 5388,.I Spdng, Stake 9194R Pin, Clevis 74760520 121117X Bolt, Shoulder Bolt, Hex Head 5/16-18 x 1-1/4 9188R Wheel STD523107 Bolt, Hex Head 5/16-18 x 3/4 STD551037 Washer 13/32 x 13/16 x 11 Ga.
- Page 41 TILLER - - MODEL NUMBER 917.292492 TINE ASSEMBLY PART PART DESCRIPTION DESCRIPTION 1569_ Tine, Outer,R.H. 156931 Tine, Inner, L.H. STD624008 156933 Tine, Outer, L.H. Re_iner Spring Tine, Inner,R.H. 4929H 1569_ Pin, Clevis...
- Page 42 TILLER - - MODEL NUMBER 917.292492 TRANSMISSION PART PART DESCRIPTION DESCRIPTION 74760524 19091412 Washer 9/32 x 7/8 x 12 Gauge Bolt, Hex 5/16-18 x 1-1/2 Gr. 2 19092016 Washer 9/32 x 1-1/4 x 16 Ga. STD523732 Bolt, Fin, Hex 3/8-16 x 3-1/4 STD551037 Washer 13/32 x 13/16 x 11 STD551125...
- Page 43 TILLER - - MODEL NUMBER 917.292492 DECALS PART DESCRIPTION Decal,Cntrl. Pnl Ser 176943 176941 Decal, Belt Grd 166131 Decal,Logo Decal,Caution,TineControl 137653 120431X Decal,HandPlacement 176783 Decal,EngineOperation 171078 Decal, RewindIntek 120075X Decal,Warning,RotatingTines 162215 Decal,Tine Shield Decal, B & S Intek 167156 181630 Manual, Owner's(Eng/Span)
- Page 44 TILLER - - MODEL NUMBER 917.292492 BRIGGS & STRATTON ENGINE -- MODEL NUMBER 126402,TYPE NO. 0206-E1 415_ REQUIRES SPECIALTOOLS TO INSTALL. SEE REPAIR INSTRUCTION MANUAL. _' /_ [1058 OWNER'S MANUAL...
- Page 45 TILLER - - MODEL NUMBER 917.292492 BRIGGS & STRATTON ENGINE -- MODEL NUMBER 126402,TYPE NO, 0206-E1 633A 6921 16_08_ 276_ °:,F ! "_.__12,6@ 977 CARBURETOR GASKET 276o 163_ 137 O 633A Q 121 CARBURETOR OVERHAUL 137_ _76@ 127(_ 633_ 633A@ 358 ENGINE GASKET SET 1022%...
- Page 46 TILLER - - MODEL NUMBER 917.292492 BRIGGS & STRATTON ENGINE -- MODEL NUMBER 126402,TYPE NO. 0206-E1 227[ 562 2o9j 2o9_ 222[ 427_ 773_ 271_ 621'_ 425_ 190 _!P...
- Page 47 TILLER - - MODEL NUMBER 917.292492 BRIGGS & STRATTON ENGINE -- MODEL NUMBER 126402,TYPE NO. 0206-E1 1211 O 689 O 456 _ 1210_ I 1036 EMISSIONS LABELI 1005 332_ 1070 305 _' 1095 VALVE GASKET...
- Page 48 TILLER - - MODEL NUMBER 917,292492 BRIGGS & STRATTON ENGINE -- MODEL NUMBER 126402,TYPE NO. 0206-E1 PART PART DESCRIPTION DESCRIPTION Shaft-Throttle 693811 Cylinder Assembly 690024 299819 • Seal-Oil (Magneto Side) 398185 Kit-Idle Speed 693643 Head-Cylinder 691242 Q Pin-Float Hinge Valve-Choke 695166 °+ Gasket-Cylinder Head...
- Page 49 TILLER - MODEL NUMBER 917.292492 BRIGGS & STRATTON ENGINE -- MODEL NUMBER 126402,TYPE NO. 0206-E1 PART PART DESCRIPTION DESCRIPTION 690345 Screw (Cylinder Shield) 692566 Gear-Idler 690662 Nut (Flywheel) 694258 Retainer 692605 Armature-Magneto 694544 Stud (Rocker Arm) 691061 Screw (Armature Magneto) 693583 Guard-Muffler 491056...
- Page 51 5"1...
- Page 52 Get it fixed, at your home or ours! For repair of major brand appliances in your own home... no matter who made it, no matter who sold 1-800-4-MY-HOME Anya_,dayor rt_t (1-8(x>469-4663) (U.SJ_ and Canada) www.sears.ca w.lmars.conl For repair of carry-inproducts like vacuums, lawn equipment, and electronics, call for the nearest Sears Parts and Repair Center.
Need help?
Do you have a question about the 917.292492 and is the answer not in the manual?
Questions and answers