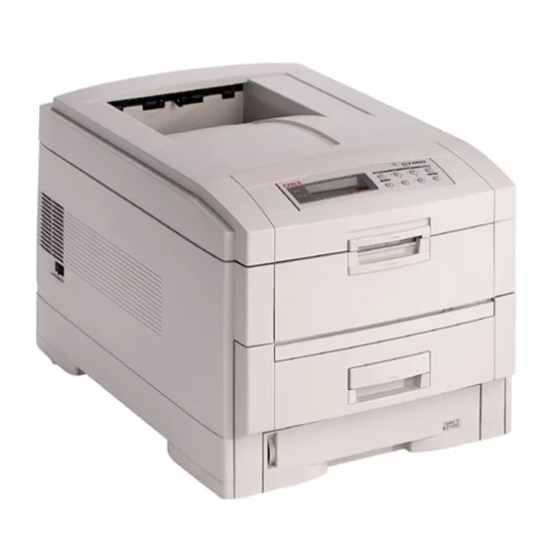
Oki C7200 Handy Reference
English: c7200 & c7400 series handy reference
Hide thumbs
Also See for C7200:
- Service manual (391 pages) ,
- User manual (186 pages) ,
- Parts list (17 pages)
Table of Contents
Advertisement
Quick Links
C
ontents
Ordering Replacement Supplies ............................................................... 2
Loading Print Media .................................................................................... 3
Print Media .................................................................................................... 5
Standard Paper ................................................................................................. 5
Recycled Paper ................................................................................................ 5
Matte Photo ..................................................................................................... 6
Transparencies ................................................................................................. 6
Labels .............................................................................................................. 7
Thick Paper (Cards, Index) ............................................................................. 8
Changing Default Media Settings ............................................................ 9
Walk-Up Functions ..................................................................................... 11
Secure Print ................................................................................................... 11
Proof & Print ................................................................................................. 11
Color Balance Adjust ..................................................................................... 12
Print the File List ........................................................................................... 13
Print the MenuMap ........................................................................................ 13
Power Save Settings ...................................................................................... 14
Print a Demo Page ......................................................................................... 14
Control Panel Buttons & Lights ............................................................... 15
Clearing Paper Jams .................................................................................. 18
Paper Feed Jam .............................................................................................. 18
Transport Jam ................................................................................................ 19
Exit Jam ......................................................................................................... 20
Tray X Jam .................................................................................................... 21
MP Tray Jam .................................................................................................. 21
Duplex Reversal Jam ..................................................................................... 22
Duplex Input Jam .......................................................................................... 23
Duplex Misfeed Jam ...................................................................................... 24
Changing Toner Cartridges ....................................................................... 25
Error Messages ........................................................................................... 27
Service & Support ....................................................................................... 30
see the on-line OKI C7000 Series Desktop User's Guide
(click Start
For more information,
®
®
Programs
®
OKI C Series
1
Desktop User's Guide).
59333601B
Advertisement
Table of Contents

Related Manuals for Oki C7200


Summary of Contents for Oki C7200
-
Page 1: Table Of Contents
Duplex Input Jam ..................23 Duplex Misfeed Jam ..................24 Changing Toner Cartridges ............... 25 Error Messages ................... 27 Service & Support ..................30 For more information, see the on-line OKI C7000 Series Desktop User’s Guide ® ® ® (click Start Programs OKI C Series Desktop User’s Guide). -
Page 2: Ordering Replacement Supplies
• Sends you an email reminder 120 volts ..41304001 when it’s time to reorder. 230 volts ..41304007 As easy as 1-2-3: Transfer Belt 1. Go to the Oki Data web site Item OKI Part No. http://www.okidata.com. Transfer Belt ..41303901 2. Click Buy Online 3. -
Page 3: Loading Print Media
oading Print Media Loading Media: 3. Fan the media and load it. Be sure to keep the media below the Trays 1, 2, & 3 PAPER FULL mark. 1. Pull the tray out. 4. Push the tray back into the printer. 2. -
Page 4: Loading Media
oading Print Media (cont.) Loading Media: 4. Adjust the guides for the media you are using. Multi-Purpose Tray 1. Pull open the Multi-Purpose Tray. 5. Place the media on the tray. 2. Swing out the platform. Place letterhead stationery with 3. -
Page 5: Print Media
rint Media Standard Paper Recycled Paper Recommended If you experience curling when • Weyerhauser Husky Zero Copy printing a file in duplex mode, 3108, 20 lb. US Bond switch to 28-lb. US Bond paper. • Great White Recycled Content Sizes 86100, 24 lb. -
Page 6: Matte Photo
rint Media (cont.) Matte Photo Sizes • Letter, A4 Recommended Feed Paths • Great White 86301 • Tray 1 (letter size, 32 lb US Bond) • Multi-Purpose Tray Sizes Exit Path • Letter, Executive • Rear Only • Legal-14, Legal-13.5, Legal-13 •... -
Page 7: Labels
rint Media (cont.) Labels Making Labels the Default If the MP Tray will normally be Load labels with print side up, loaded with labels, set the printer top nosed into the printer. menu as follows (see page 10): • MP Tray PaperSize = Letter or A4 Specifications •... -
Page 8: Thick Paper (Cards, Index)
rint Media (cont.) Thick Paper For Individual Print Jobs Make the following settings in the (Cards, Index) printer driver as you print the job: • Source = MP Tray Important! To avoid damage to the printer, always be sure to change the •... -
Page 9: Changing Default Media Settings
hanging Default Media Settings Media Weight Settings Other Special Media: Set Media Weight Setting Media Weight □ Press MENU repeatedly until MEDIA MENU appears on the Light 16 lb. display. (62 g/m □ Press ITEM repeatedly until Medium Light 17-19 lb. TRAY1 MEDIAWEIGHT appears (63-73 g/m... -
Page 10: Other Special Media
hanging Default Media Settings (cont.) Changing Settings for Other Special Media the Multi-Purpose First set the Media Size □ Press MENU repeatedly until Tray MEDIA MENU appears on the display. Transparencies Only □ Press ITEM repeatedly until First, set the Media Size MP TRAY PAPERSIZE appears □... -
Page 11: Walk-Up Functions
alk-Up Functions Secure Print Proof & Print To Print a Confidential To Print a Proofed Document Document 1. Press MENU. 1. Press MENU. PRINT JOBS MENU appears on PRINT JOBS MENU appears on the display. the display. 2. Press SELECT and enter your 2. -
Page 12: Color Balance Adjust
alk-Up Functions (cont.) Color Balance Adjust 4. Check the color of the center circle in the printout against the To set the Color Balance using the surrounding circles: front panel: • If the center circle matches the circles labeled 00, the color balance is okay. -
Page 13: Print The File List
alk-Up Functions (cont.) Print the File List Print the MenuMap To print out a list of the files stored on To print out a list of the current menu the printer’s hard drive: settings: 1. Press MENU repeatedly until 1. Press MENU repeatedly until INFORMATION MENU appears on INFORMATION MENU... -
Page 14: Power Save Settings
alk-Up Functions (cont.) Disabling/Enabling Power Power Save Settings Save Power save sets how long the printer waits before going into standby mode. The default setting for Power This saves energy, but when the Save is enabled. printer is in standby mode it takes a 1. -
Page 15: Control Panel Buttons & Lights
ontrol Panel Buttons & Lights Control Panel Buttons MENU Button ON LINE Button Printer On Line Printer On Line or Off Line Press to take the printer off line. Press to enter the Menu mode. Printer Off Line Menu mode Press to put the printer on line. - Page 16 ontrol Panel Buttons & Lights (cont.) ITEM + [1] Button VALUE + [2] Button Menu Mode Menu Mode Press to advance to the next Value for Press to advance to the next Item in an Item in the Menu. the Menu. Press and hold to advance through the Press and hold to advance through the Values at a rapid rate.
-
Page 17: Control Panel Lights
ontrol Panel Buttons & Lights (cont.) SELECT Button Control Panel Lights Menu Mode READY Light Press to engage a new value for an Item. The printer is on line. Press to initiate the action indicated on the display (e.g., print MenuMap). The printer is off line. -
Page 18: Clearing Paper Jams
learing Paper Jams Paper Feed Jam 4. Close the front cover. OPEN FRONT COVER 380: PAPER JAM 1. Open the front cover. 2. Swing down the paper feed guide. 3. Pull out the jammed sheet. -
Page 19: Transport Jam
learing Paper Jams (cont.) Transport Jam 3. Remove any paper trapped in the path. OPEN UPPER COVER 381: PAPER JAM 1. Push up on the handle and lift the cover. 4. Replace the drum/toner cradle. 2. Lift out the drum/toner cradle. 5. -
Page 20: Exit Jam
learing Paper Jams (cont.) Exit Jam b. Pull the fuser roller release lever (1) toward the front of the printer. OPEN UPPER COVER 382: PAPER JAM 1. If the sheet is visible, pull up the top cover handle, lift the cover a bit and remove the jammed sheet. -
Page 21: Tray X Jam
learing Paper Jams (cont.) Tray X Jam MP Tray Jam CHECK TRAY 1 CHECK MP TRAY 390: PAPER JAM 391: PAPER JAM 1. Pull out the tray. 1. Pull up the top cover handle, lift the cover and remove the jammed paper. -
Page 22: Duplex Reversal Jam
learing Paper Jams (cont.) Duplex Reversal Jam 4. Push the duplex unit back into the printer. CHECK DUPLEX 370: PAPER JAM 1. Open the front cover. 5. Close the front cover. 2. Grasp the duplex unit handles (blue squares) and pull the unit out as far as it will go. -
Page 23: Duplex Input Jam
learing Paper Jams (cont.) Duplex Input Jam 3. Lift the duplex cover and remove the jammed paper. CHECK DUPLEX 371: PAPER JAM 1. Open the front cover. 2. Grasp the duplex unit handles (blue squares) and pull the unit out as far as it will go. -
Page 24: Duplex Misfeed Jam
learing Paper Jams (cont.) Duplex Misfeed Jam 4. Push the duplex unit back into the printer. CHECK DUPLEX 372: PAPER JAM 1. Open the front cover. 5. Close the front cover. 2. Grasp the duplex unit handles and pull the unit out. 3. -
Page 25: Changing Toner Cartridges
hanging Toner Cartridges 4. Lift the right end of the cartridge Toner Cartridge Order #s: then slide it to the right (to clear the tube), then lift it out and • Black = 41304208 discard it in accordance with local •... - Page 26 hanging Toner Cartridges (cont.) 7. Hold the cartridge in a vertical Caution! Be sure to push the lock position with port on the left and lever all the way back. If it is not the blue lock lever on the right, pushed back and you close the cover, then lower the left end into the the lever could damage the LED...
-
Page 27: Error Messages
rror Messages Error Messages CHANGE XXXX IMAGE DRUM Some of the more common error messages appear below. For a complete list of error messages, see Meaning “Error Display Messages” under Appears on the second line of the Problem Solving in the on-line C7000 display to indicate that color XXXX Series Desktop User’s Guide. - Page 28 rror Messages (cont.) LOAD mmmmmm REMOVE THE PAPER 500: MANUAL PRINT 470: FINISHER STACKER FULL Meaning Meaning The printer has received a print job The rear output tray is full. for printing from the Multi-Purpose What to Do Tray and no media is loaded in the Remove the stack of printed sheets tray.
- Page 29 Open the top cover and check fuser: page 11). • If the fuser is there, press down on You can also use the OKI Storage it to be sure it is firmly locked in Device Manager utility to clean place. If the message still appears, up the printer’s hard disk drive.
-
Page 30: Service & Support
& Support • See our multilingual web site: http://www.okidata.com • Consult the store where you purchased your printer. • Call 1-800-OKI-DATA (1-800-654-3282) 24 hours a day, 7 days a week. Record Your Printer’s Serial Number Here: _____________________________...
Need help?
Do you have a question about the C7200 and is the answer not in the manual?
Questions and answers