Table of Contents
Advertisement
Quick Links
Advertisement
Table of Contents

Related Manuals for Ericsson 230i


Summary of Contents for Ericsson 230i
- Page 2 User’s Guide Cordless Phone 230i...
-
Page 3: Base Station
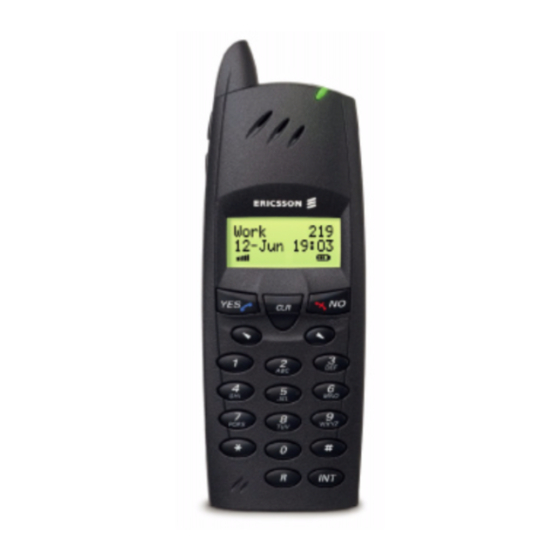
HANDSET Antenna Volume up key Volume down key Off hook key Scroll up key Number keys Microphone BASE STATION Handset compartment Charging light Warning light Earpiece Display On Hook/On/Off key Clear/Mute key Scroll down key Battery compartment (on the back) Internal call key R key Charge contacts... -
Page 4: Table Of Contents
Ericsson Business Mobile Net- works BV at any time and without notice. Such changes will, however, be incorpo- rated into new editions of this user’s guide. - Page 5 LVD directive 73/23/EC. Environmental policy Ericsson will contribute to the sustainable development of global society by developing, produc- ing and offering low environmental impact products and services that also allows customers to reduce their environmental impact. This means that we shall: •...
-
Page 6: Preparing For Use
Getting started PREPARING FOR USE About ISDN This cordless phone is suitable for use with Euro-ISDN. ISDN, which stands for Integrated Services Digital Network, integrates the simultaneous transmis- sion of speech and data. With Euro-ISDN you have access to two digital tele- phone lines. - Page 7 “Subscribing a DT200 handset to the 230i base station” on page 29. Language At this point you may wish to change the language of your handset.
-
Page 8: A Brief Guide
The standby display appears. The number on the right-hand side is the Home internal number of the handset on the base station. Making a first call. Check that the cordless telephone is installed correctly by dialling a person you know. To make a call:... -
Page 9: Using The Menus
USING THE MENUS The cordless phone can be operated via menus in the handset, which are arranged in loops. For instance, you can enter the main menu option either the D O W N to confirm an option. Some options take you into Y E S a new menu. -
Page 10: Battery
order to get to a specific function. In most cases, the next menu option is not immediately visible so you have to use the If a route through the menus is the same as the previous route except for the >AddLastDial last menu option, this will be indicated as shown here in the margin. -
Page 11: Attaching And Removing The Clip
ATTACHING AND REMOVING THE CLIP The handset has a clip which you can use to attach the handset to your clothes. Do not press on the display! See the drawings below. To minimize wear and tear, we recommend that you do not remove the clip from the handset too often. -
Page 12: Basic Use And Settings
Basic use and settings TELEPHONING Making a call To make a call: Enter the number. The number is displayed. 053555450 Correct the number if necessary ( move right). When the number is correct, press Press Note When you dial a number and that number is forwarded, you see the number to which you are forwarded in your display. - Page 13 Calling by name: >PhoneBook Select >Find&Call Press the key which has the first letter of the name you are searching for. Press once for the first letter of that key, twice for the second and three times for the third letter of the key. To narrow down the search, you can also enter the next letter(s) of the name.
- Page 14 You can also access the last dialled number list via the LastDialled ble for redial. When you switch off your handset, the last dialled numbers are erased. To store the last dialled numbers in your phone book. See “Adding last dialled and a caller’s number”...
-
Page 15: Phone Book
• Press Short beeps and the ring off icon indicate that the microphone is off. To switch the microphone on, press Turning off the ringer and warning sound If your handset rings or a warning sounds at an inconvenient moment, you can turn off the sound. - Page 16 To insert lower case letters, press the letter first and then . To revert to upper case letters again, press the letter and then . To insert an asterisk ( ) in a name, press # twice. If you want a different letter to the one currently shown, you can erase the letter with the Note Depending on the selected menu language, the character order may dif-...
-
Page 17: Advanced Telephoning
To change a phone book entry: >PhoneBook Select >Find&Edit >Edit Enter the first letter(s) of the name you are searching for and press If necessary scroll to find the name, press Correct the name using the number keys if necessary, press confirm. - Page 18 If you receive a search call from another handset on the base station, Page Call appears. Press Paging a handset from the base station. You can also search for or page handsets from the base station by briefly pressing the the paging, press briefly the on a handset.
- Page 19 You can select a different ring signal when being called back by the base sta- tion. For more information, please read “Ringer tones and melodies” on page 20. Involving an external party. with another external party: Press the You hear the dial tone. Dial the number for the external party.
-
Page 20: Personalising The Handset
When using more than one handset If you are using more than one handset with the base station you can give all handsets different telephone numbers or up to two handsets the same tele- phone number. By giving the handsets different telephone numbers a particu- lar handset can be called by its own telephone number. -
Page 21: Personalising The Base Station
Ringer tones and melodies You can change the ringer tone for each call type to a different sound or a pre- >RingType programmed melody using the type, you can choose from four ringer tones or six melodies. Discreet ringing In the discreet ringing mode, your handset starts ringing at the lowest audible >DiscreetRng volume level. - Page 22 Restricting your telephone number from being sent When you make a phone call your telephone number is normally sent to the >BaseStation person you are calling. With the >Basic >PhoneLine menu option you can prevent this information from being sent. >CLIR With the >COLR...
-
Page 23: Pin Codes And Blocking Handset Keys
for more information) has to be assigned to that handset. Use menu option PriorityNo Setting a handset as priority phone and setting the diverted telephone >BaseStation number: >PriorityNo >AssignNo Select Enter the PIN code for the base station (see page 23) and press Select DeviceNo: number can be seen instead. - Page 24 You can write down the new PIN code in the space provided in “Personal handset PIN code” on page 24. Resetting the handset PIN code If your handset is blocked because an incorrect PIN code has been entered three times. Press code (see “Showing the IPEI code”...
- Page 25 Personal handset PIN code Personal base station PIN code IPEI code handset Basic use and settings...
-
Page 26: Extra Features
Extra features BABY MONITOR You can use your handset as a baby monitor. This means you can remotely lis- ten to the sounds in a baby’s room. The handset being used as the baby monitor automatically makes a call to 00:10:34 another handset if this feature is activated. -
Page 27: Cost Manager
Switching on To activate direct call >Handset Select >DirectCall Enable Direct Call? Press DirectC.No: shown in the display. Enter the direct call number with the number keys, press Note Direct call switches off the automatic key lock. For information about automatic key lock, see “Blocking handset keys”... -
Page 28: Voice Mail Notification
Some telephone numbers, such as emergency numbers, cannot be barred. You can also have call barring via your telephone operator. It remains in effect irre- spective of the call barring settings of the handset and base station. Please consult your dealer or retailer for more information. Switching on or off. -
Page 29: Connecting Handsets To Base Stations
You will be notified by a rapidly flashing message icon on the handset if a message has been left in your voice mailbox. You can then conveniently dial the service number of your voice mailbox using the Checking for voice mail messages When the message icon on the handset flashes, you can check for voice mail >Voice: x messages by selecting menu option... - Page 30 Subscribing It is possible to subscribe the handset manually to the 230i base station. It is also possible to subscribe theDT200 handset to a base station other than the 230i base station and even to subscribe a different handset to the 230i base sta- tion.
- Page 31 Press Press <Page> base station Ensure that the base station is ready to subscribe as indicated in the appro- priate base station manual. For example, for the cordless phone 230i base station you have to press Wait until The handset is connected to the base station. You can see its internal phone Home number on the right-hand side of the display.
-
Page 32: Safety Instructions
Reference SAFETY INSTRUCTIONS Do not place the base station near audio or video equipment. It may cause interference. The handset is not suitable for lifeline applications. Intrinsic safety Do not use the handset in conditions where there is a danger of electrically ignited explosions. - Page 33 What should I do if the handset dials a number as soon as I press a key? A direct call has been set. See “Direct call” on page 25. I have called an interactive service but it does not respond to my key presses.
- Page 34 It could also mean that a base station other than the one which you are close to has been selected. See “Using base stations” on page 28 and “Subscribing a DT200 handset to the 230i base station” on page 29.
-
Page 35: Buttons, Keys, Icons And Signals
The base station does not work at all. What is wrong? The telephone cable and power cord connections may be plugged into each other’s sockets. This does not cause any harm but the base station will not work. If this is the case, swap them over. I cannot use the phone book. - Page 36 Base station. Button Function Pressed briefly: page or search for handsets PA G E Pressed longer: subscribe a handset. Display icons and signals A number of icons may appear in the handset display. The list below explains what the icons mean. Icons Meaning Signal strength...
-
Page 37: Menus
The handset also generates audible ring signals, alarm signals, warning tones and key clicks. Sound Ring signal Alarm signal Key click Warning tone Base station. Signal Green bottom light Red top light The base station also generates ring signals. MENUS Handset and base station functions can be accessed via the handset menus. - Page 38 Find&Call (12) Store (15) >PhoneBook (14) find&Edit (15) DeleteAll >Voice (27) AutoKeyLock (22)( BabyPhone (25) Alerts (19) PhoneLock (22) DirectCall (25) >Handset MasterReset (20) Language (19) Display (20) RingVolume (21) Routing (27) Access >BaseStation Basic PriorityPhone (21) VoiceMail (27) Information SelectNet (30) Priority (30) Rename (30)
-
Page 39: Maintenance
Battery cover for handset. • English user’s guide. WARRANTY Thank you for purchasing this Ericsson Product. To get maximum use of the features of your new product we recommend that you follow a few simple steps: • Read the “Safety instructions” on page 31. - Page 40 The warranty is valid only if the original receipt issued to the original pur- chaser by the dealer, specifying the date of purchase and serial number, is presented with the product to be repaired or replaced. Ericsson reserves the right to refuse warranty service if this information has been removed or changed after the original purchase of the product from the dealer.
-
Page 41: Index
Index Accessories 31, 38 Advanced telephoning 16 Advice of charge 26 Answering a call 11 AOCE 26 Arrow keys 8, 34 Auto divert 21 Baby monitor 25 destination number 25 information tone 25 Back light 20 Back-door code 23 Barring calls 26 exempt numbers 27 numbers 27... - Page 42 CLIR 21 CLR key 8, 34 COLR 21 Conference call 18 Connecting to base stations 28 Consulting another handset 17 Contrast 20 Cost manager 26 Direct call 25 Discreet ringing 20 Display contrast 20 illumination 20 language 6, 19 light 20 Down key 8, 34 Emergency call 13 Entering...
- Page 43 Master reset base station 22 handset 20 Melodies 20 Menu cancel 8 operation 8 using menus 8 Menus 36 Message icon 35 waiting 27 Microphone off 13 MSN 20 Multi cell mode 22 Multiple Subscriber Numbers 20 Mute microphone 13 Navigation keys 8 Networks 28 No key 8, 34...
- Page 44 Subscribing 29 another handset type to the base station 30 handset to the base station 29 Subscription deleting on a base station 30 deleting on a handset 30 Subscriptions 28 Switching the handset off 34 the handset on 7, 34 Telephoning 11 advanced 16 Three-party call 18...
- Page 45 Visit us on our web site: http://mobile.ericsson.com EN/LZTNB 101 91/1 R1 ©Ericsson Business Mobile Networks BV 2000...
Need help?
Do you have a question about the 230i and is the answer not in the manual?
Questions and answers