Nikon COOLPIX S8100 User Manual
Hide thumbs
Also See for COOLPIX S8100:
- Manual del usuario (220 pages) ,
- User manual (108 pages) ,
- Quick start manual (20 pages)
Table of Contents
Advertisement
Advertisement
Chapters
Table of Contents

Related Manuals for Nikon COOLPIX S8100


Summary of Contents for Nikon COOLPIX S8100
- Page 1 Nikon DIGITAL CAMERA COOLPI.X" $8100 User's Manual...
- Page 2 Interface are trademarks registered trademarks of HDMI Licensing LLC. • All other trade names mentioned in this manual or the other documentation provided with your Nikon product are trademarks or registered trademarks of their respective holders. AVC Patent Portfolio License...
-
Page 4: Warnings
To prevent damage to your Nikon product or injury to yourself or to others, read the following safety precautions in their entirety before using this equipment. Keep these safety instructions where all those who use the product will read them. - Page 5 If liquid from the damaged battery Observe caution when comes in contact with clothing or handling the battery skin, rinse immediately with plenty The battery may leak, overheat, or of water. explode if improperly handled. Observe the following precautions Observe the following when handling the battery for use in precautions when handling this product:...
- Page 6 Failure to observe this precaution provided or sold by Nikon for the could result in burns or fire. purpose, to maintain compliance with prod uct reg ulations. Avoid contact with liquid...
- Page 7 Nikon interference in a residential installation. Corporation may void the user's This equipment generates, uses,and authority to operate the equipment.
- Page 8 State of California to cause birth DISPOSE OF USED BATTERIES defects or other reproductive harm. ACCORDING TO THE Wash hands after handling. INSTRUCTIONS. Nikon Inc., 1300 Walt Whitman Road This symbol indicates that Melville, New York 11747-3064 this product is to be collected separately.
-
Page 9: Table Of Contents
For Your Safety ............................WARNINGS ..............................Notices ............................... Introduction ............................1 About This Manual ..........................Information and Precautions ......................Parts of the Camera ..........................The Camera Body ............................The Monitor ..............................Main Features of the Operation Controls ..................Using Camera Menus ..........................Switching Between Tabs .......................... - Page 10 More onShooting ................Selecting aShooting Mode (Mode Dial) ............ Changing I_1 ( Auto) Mode Settings (Shooting Menu) ........image Mode (Image Quality/Image Size) ..........White Balance (Adjusting Hue) ............Metering ................ISO S ensitivity ................ AF Area Mode ................ Autofocus Mode ..............
- Page 11 Playback Options: Playback Menu ...................._l, Print Set (Creating a DPOF Print Order) ..................Slide Show ............................... O11Protect ..............................Rotate Image ............................Voice Memo .............................. G"_Copy (Copy Between Internal Memory and Memory Card) .......... Sequence Display Options ........................Choose Key Picture ..........................Editing Images ..........................122 Editing Functions ..........................
- Page 12 Basic Camera Setup ........................1 57 Setup Menu ............................Welcome Screen ............................Date ................................1_60 Monitor Settings ............................Date Imprint (Imprinting Date and Time) ..................Vibration Reduction ............................ Motion Detection ............................AF Assist ................................. Digital Zoom ..............................Sound Settings ............................. Auto Off .................................
-
Page 13: Introduction
Thank you for your purchase ofa Nikon COOLPIX 581O0digital camera. This manual was written to help you enjoy taking pictures with your Nikon digital camera. Read this manual thoroughly before use, and keep it where all those who use the product will read it. -
Page 14: Information And Precautions
• Nikon will not be held liable for any damages resulting from the use of this product, • While every effort was made to ensure that the information... -
Page 15: Notices
Notice Concerning Prohibition of Copying or Reproduction Note that simply being in possession of material that was digitally copied or reproduced by means of a scanner, digital camera or other device may be punishable by law. • Items prohibited by law from being copied or reproduced Do not copy or reproduce... -
Page 16: Parts Of The Camera
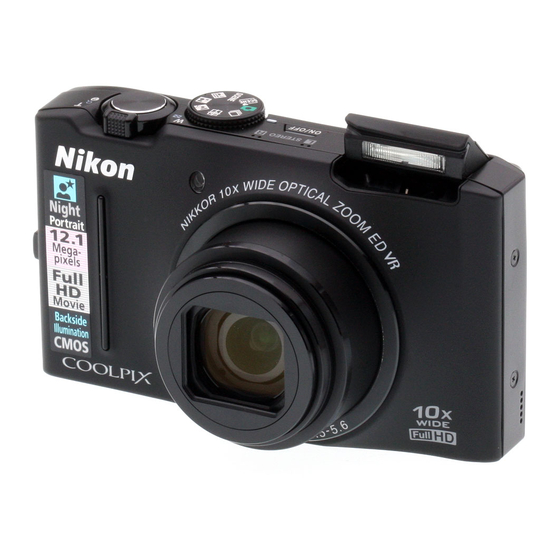
The Camera Body Flash raised Lens cover closed Zoom control ..........Power switch/power-on lamp : wide ..........................17, 171 :tele ............Mkropbone (stereo} ..... 1 ] 7, 129 :thumbnail playback ... 85,87 Flash ..............: playback zoom ......help ............Speaker .......... - Page 17 £ I0 11 12 (apply selection) button ...... Rotary multi selector ........Eyelet for camera strap ......I-_"1 (playback) button ....8, 28, 80 _HDMI mini connector ......Charge lamp ......... 15, 150 HDMI connector cover ......Flash lamp ............USB/audio/video output connector (movie-recoid)
-
Page 18: The Monitor
The Monitor Tile following indicators may appear in tile monitor during shooting and playback (actual display varies with current camera settings). Tile indicators that appear in tile monitor during shooting and playback disappear after a few seconds 163). Shooting 11 12 --@s:>... - Page 19 Playback ° _l_l_l--lm _ ="""""'T _ h:_®@_10 _999S999_ E; llJJ®®s_ E®®9®]99®®_ Date of recording ......... Internal memory indicator ..... 28 Time of recording ......... ! Sequence playback guide ...... Movie playback guide ......Protect icon ........... _Skin softening icon ........Sequence display ........
-
Page 20: Main Features Of The Operation Controls
Control Name Function Power switch Turns the camera on and off (_ Shooting mode: changes the shooting mode Mode dial Playback mode: switches to the shooting screen Shooting mode: rotate to T (% to zoom in; rotate to W (_;_) to zoom out ([_) 25) Zoom control Playback mode: rotate to T (C_)to magnify ([_) 88);... - Page 21 oL£,,,,,,,,,,il,,ii,i,,£°,,_,!,,r,!,,,,,,i _._...L.._.:._..._..._:.._.:_..!_...:_.._._._..._..:_. Shooting mode: deletes the last image captured (_] Delete button Playback mode: deletes images or voice memo 29, 118, or 140) Rotary multi ..®_/_ selector (up) During menu display: moves the highlight I Shooting mode: displays the _ (sdf-timer)/smi]e //:'Y_\_\\ Rotary multi...
-
Page 22: Using Camera Menus
Using Camera Menus Presstile MENU b utton (_ 8) to display tile menu for tile selected mode. Usethe rotary multi selector (_ 9) to navigatethe menus. /_ is displayed when previous Tab for the menus available in menu items are available the current shooting mode/ tab for playback mode menu... -
Page 23: Switching Between Tabs
Switching Between Tabs Press the rotary multi Press the rotary multi The selected menu is selector _1 to highlight selector • or • to select a displayed the tab tab, and press either the _) button or • The Shutter-release Button Tile camera features... -
Page 24: First Steps
Insert a Rechargeable Li-ion Battery EN-EL12 (supplied) into the camera. • Charge the battery before the first use or when the battery is running 14). 10:en.the battery-chamber/memory card slot Insert the supplied battery. Batterychamber Use the edge of the battery to push the orange battery latch in the direction indicated by the arrow (Q) and fully insert the battery ({9). -
Page 25: Removing The Battery
Removing Battery Turn tile camera off (_ 17) and be sure that tile power-on lamp and the monitor have turned off before opening the battery-chamber/memory card slot (:over. To eject the battery, open the battery-chamber/ memory card slot cover and slide the orange battery .I,®... -
Page 26: Charging The Battery
Charge the supplied Rechargeable Li-ion Battery EN-EL12 inserted into the camera, by connecting the supplied Charging AC Adapter EH-68P to the camera via the supplied USB Cable UC-E6, and then plugging the Charging AC Adapter into an electrical outlet. Prepare the Charging ACAdapter EH-68P. - Page 27 Plug the Charging AC Adapter into electrical outlet. The charge lamp slowly blinks green to indicate that the battery is charging. About three hours and 50 minutes are required to charge a fully exhausted battery. The following chart explains charge lamp status when the camera is plugged into the electrical outlet.
- Page 28 Notes on Charging AC Adapter • The Charging AC Adapter EH 68P is _r use only with compatible devices. Do not use with another make or model of device, • Be sure to read and follow the warnings for the Charging AC Adapter on page iii and the section, "The Battery"...
-
Page 29: Turning On And Off The Camera
Turning On and Off the Camera Press tile power switc:h to turn tile camera. Tile power-on lamp (green) will light, then tile monitor (the power-on lamp will turn turns offwhen on). monitor turns To turn of[the camera, press again. of[, power switch When... -
Page 30: Setting Display Language, Date, And Time
When the first time the camera is turned on, the language-selection screen and the date and time setting screen for the camera (:lock are displayed. Press the power switch to turn on the camera. Tile power-on ]amp (green)will light, and then ii i;x _iiiii '1 -_ ----__,,,,x_"-_ monitor... - Page 31 Edit the date and time. Select an item: Press • or _1 (changes between D, M, Y, hour, minute, (the order in which the day, month, and year are displayed)). Edit the highlighted item: Rotate the rotary multi selector, or press • or V.
-
Page 32: Inserting Memory Cards
Image, sound, and movie files are saved in the camera's internal memory (approximately 102 MB) or on removable Secure Digital (SD) memory cards ((:ommercially available; _ 184). If a memory card is inserted in the camera, data are automatically saved on the memory card and data saved to the memory card can be played back, deleted, or transferred. - Page 33 Formatting Memory Cards If the message on the right is displayed when the camera is turned on, the memory card must be formatted before use (_ ] 72). Note that formatting permanently deletes all images and other data on the memory card.
-
Page 34: Basic Photography And Playback: I_1 (Auto) Mode
This section describes taking pictures inI_1 ( auto) mode, an automatic:, "point-and- shoot" mode recommended for f irsbtime users ofdigital cameras. Press the power switch to turn on the camera. The lensextendsand the monitor turns on. Rotate the mode dial to I_1. -
Page 35: Indicators Displayed In I_1 (Auto) Mode
Indicators Displayed in I_1 (Auto) Mode Vibration reduction icon [Vibration reduction can be applied to reduce the effects "Shooting mode "_ r-=----I of camera shake, I " disp]ayed in I_1 (auto) mode. • Movie options A movie option is displayed for movie recording 129, / F,"... -
Page 36: Step 2 Frame A Picture
Readythe camera. Flash Hold the camera steadily in both hands. Do not hold the flash down with your fingers or other objects. Keep fingers, hair and other objects away from the lens, flash, AF assist-illuminator and microphone. When taking pictures in portrait ("tall") orientation, turn the camera so that the flash is above the lens. -
Page 37: Using The Zoom
Using the Zoom Use the zoom control to activate optical zoom. Rotate Zoom out Zoom in the zoom control toward T to zoom in, increasing size of the subject. Rotate the zoom control toward to zoom out, increasing the area visible in the frame. -
Page 38: Step 3 Focus And Shoot
Pressthe shutter-release button halfway. When the shutter-release button is pressed halfway (_ 11), the camera sets focus and exposure (shutter speed and aperture value). Focus and exposure remain locked while the shutter-release button is pressed halfway. When a face is detected: •... - Page 39 Note on Saving Images While images are being saved, the number of exposures remaining will blink. Do notopen battery-chamber/memory card slot cover while images are being saved, Cutting power removing the memory card in these circumstances could result in loss of data or in damage to the camera or card,...
-
Page 40: Step 4 Playing Back And Deleting Images
Playing Back Images (Playback Mode) Press the []E] (playback) button. • (movie-record) button The last image captured will be displayed in full-frame playback mode. Rotate the rotary multi selector, or press A, V, _1, or i_ to view previous or next images (_]] 9). ack) To return to shooting mode, press the [] button,... -
Page 41: Deleting Unwanted Images
Deleting Unwanted Images Press the'_ button to delete the image currently displayed in the monitor. To exit without deleting, pressthe rotary multi selector _1......Press the rotary multi selector • or • choose the desired deletion method and press the _) button. -
Page 42: Using The Flash
The flash mode (:an be set to match the shooting conditions. • When ISO sensitivity is set to Auto, the flash has a range of0.S-4.0 m (1 ft. 8 in.-13 ft.) at the maximum wide-angle zoom position and a range of 0.5-2.5 m (1 ft. -
Page 43: Setting The Flash Mode
Setting the Flash Mode Press the rotary multi selector _ (flash mode). The flash mode menu is displayed. Usethe rotary multi selector to choose the desired mode and press the _]_ button. icon for the selected flash mode is displayed. _AUl"I) applied, @_ is only displayed When... - Page 44 Flash Lamp The flash lamp indicates flash status when the shutter release button is pressed hal_ay. • On: Flash will fire when picture is taken. • Slinks; Flash charging. Wait a few seconds and try again. • Off: Flash will not fire when picture is taken, If the battery...
-
Page 45: Taking Pictures With The Self-Timer
The s elf-timer isuseful for s elf-portraits orreducing the effects ofcamera shake that o ccur when t he shutter-release button i s pressed. When using the self4imer, use ofatripod i srecommended. Vibration reduction (_ 166) to Off in the setup menu (_ 157) when using a tripod to stabilize the camera during shooting. -
Page 46: Taking Pictures With The Smile Timer
The camera uses face detection to detect human faces, and then automatically releases the shutter when a smile is detected. The skin softening option can be used to smooth skin tones of human faces. This feature can be used when shooting mode (_ 42) is set to _ (auto) mode or the [] (night portrait) or Portrait... - Page 47 Press the shutter-release button all the way when shooting complete. Automatic shooting ends. Shooting also ends in the following situations. • When 12 pictures have been taken • If five minutes pass after pressing the shutter-release button in step 4 without a smile being detected...
-
Page 48: Macro Mode
Macro mode i sused for t aking pictures ofobjects as (:lose as 1cm (0.4 i n.). Note that t he flash m ay b eunable tolight the entire subject atdistances ofless than S0 cm (1 ft.8in.). Press the rotary multi selector _ (macro mode). -
Page 49: Adjusting Brightness (Exposure Compensation), Vividness, And Hue
Brightness (exposure compensation), vividness, and hue (:an be adjusted for taking pictures by pressing the rotary multi selector i_ (I_-A). i tems that (:an be set vary by the shooting mode. When Using I_1 (Auto) Mode (_ 22) and Continuous Shooting Mode Brightness (exposure compensation), vividness, and hue carl be adjusted with the... -
Page 50: Operating The Creative Slider
Operating Creative Slider When using I_1 (auto) mode and _ (continuous) mode, use the creative slider to adjust brightness (exposure compensation), vividness, and hue for taking pictures. Press the rotary multi selector i_ (I_). Tile creative slider screen is displayed. Press the rotary multi... - Page 51 When adjustment is complete, press _ or i_ to choose [] and press the _ button. If the _) button (except when is selected) or the shutter-release button is pressed in step 3, tile selected amount of effect is applied. When tile effect...
- Page 52 Adjusting Brightness (Exposure Compensation) Adjust tile overall brightness of the image. Slider • To make the subject brighter, move the slider toward "+'. • To make the subject darker, move the slider toward Exposure Histogram compensation value Using the Histogram A histogram is a graph showing the distribution of tones in the image, Useas a guide when using exposure compensation and shooting without the flash.
-
Page 53: Adjusting Exposure Compensation
Adjusting Exposure Compensation When using scene mode and subject tracking mode, brightness (exposure compensation) can be adjusted for taking pictures. Pressthe rotary multi selector [] (exposure compensation). The exposure compensation guide and histogram are displayed. F," Use the rotary multi selector to select Exposure compensation... - Page 54 Rotate the mode dial and align an icon to the mark to select one of the following shooting modes. "-_ Subject tracking I_1 (Auto) mode ([_ Continuous shooting mode ([_ mode ([_ Pictures can be taken Choose this mode to with an automatic, point- Change settings to and-shoot...
- Page 55 The following options can be set when shooting in I_1 (auto) mode 22). Image mode []_[_44 Choose the image mode (combination of image size and compression rate) at which images are saved.This setting can be changed when using any shooting mode.
-
Page 56: Image Mode
Image Mode (Image Quality/Image Size) (Shooting menu) Image I_1 (auto) -) MENU "_ mode Image mode refers to the combination of image size and image quality (compression) at which images are saved. Choose the image mode best suited the manner in which images will be used and the capacity... - Page 57 Number of Exposures Remaining The _llowing table lists the approximate number of images that can be saved in the internal memory and on a 4 GB memory card, Note that due to JPEG compression, the number of images that can be saved differs depending on the composition of the image, In addition,...
-
Page 58: White Balance
White Balance (Adjusting Hue) (Shooting menu) I_1(auto) -) MENU "_ White balance The color of light reflected from an object varies with the color of ttqe light source. The human brain is able to adapt to changes in the color of the light source, with the result ttqat white objects appear white whether seen in the stqade,direct sunlight, or under incandescent lighting. - Page 59 Preset Manual Preset manual is usd with rTfixed lighting or to compensate for light sources with a strong color cast when tile desired effect has not been achieved with white balance settings like Auto and Incandescent (for example, to make images shot under a lamp with a red shade look as though they had been shot under white light).
-
Page 60: Metering
Metering I_1 (auto) -) MENU (Shooting menu) -') Metering The process of measuring the brightness of the subject to determine exposure is known as metering. Choose how the camera meters exposure. Matrix (defaUlt setting) Uses a wide area of the screen for metering. This metering mode provides the appropriate exposure for a variety of shooting conditions. -
Page 61: Iso Sensitivity
ISO Sensitivity (Shooting menu) sensitivity I_1(auto) -) MENU -,) ISO When ISOsensitivity is increased, less light is needed when taking pictures. Higher ISO sensitivity allows darker subjects to be captured. Additionally, even with subjects of similar brig htness, pictures can be taken at faster shutter speeds, and blurring caused by camera shake and subject movement can be reduced. -
Page 62: Af Area Mode
AF Area Mode (Shooting menu) area I_1 (auto) -_ MENU "_ AF mode Use this option to determine how the camera selects the focus area for autofocus. priority(defaUlt setting) When the camera detects a human face, it focuses on that face. See "Face Detection" (_ 52) for more .. - Page 63 Center The camera focuses on the subject at the center of the frame. The focus area is aEways dispByed at the center of the screen. Focus area Notes on AF Area Mode • When digital zoom is in effect, focus will be on the center of the screen regardless of the AF area mode...
- Page 64 Face Detection When the camera is pointed at a human face, face detection, which the camera automatically detects that face and focus on it, starts. The face detection function is activated in the following situations. • When AF area mode is set to Face priority in I_ (auto) mode or continuous shooting mode (_ •...
- Page 65 Press the shutter-release button halfway. The camera focuses on the face framed by the double border. The double border turns green and focus is locked. When the camera is unable to focus, the double border will blink. Press the shutter-release button halfway again to focus.
-
Page 66: Autofocus Mode
Autofocus Mode MENU I_1 (auto) ( Shooting menu) -') Autofocus mode Choose how the camera focuses. single AF (default setting) The camera focuses when the shutter-release button is pressed halfway. Full-time The camera focuses continuously until the shutter-release button is pressed down halfway. - Page 67 When one of the following scenes is selected using the mode dial or the scene menu, images are captured using settings that are optimized for the selected scene. (Scene auto selector) [ [] Night Landscape By simply framing a picture, _ _/--L_ _"_ I []...
- Page 68 Shooting in the Scene Mode Selected by the Camera (Scene Auto Selector) By simply framing a picture, tile camera automatically selects tile optimum scene mode for simpler shooting. • _: Auto (general shooting) • I_i_j: Portrait • IF_: Landscape • II'_: Night portrait •...
- Page 69 Notes on Scene Auto Selector • Digital zoom is not available. • Depending upon shooting conditions, the camera may not select the desired scene mode. Should this occur, switch to I_1 (auto) mode 22) or select the desired scene manually S8).
- Page 70 Choosing a Scene and Shooting (Scene Mode Types and Characteristics) Tile mode dial can be used to select scenes when shooting 55). See "Shooting in tile Scene h!lode Selected by tile Camera (Scene Auto Selector)" 56) for more information on scene auto selec:tor. The following icons are used for descriptions in this section:...
- Page 71 Night portrait Use this mode for portraits of a human subject shot in front of background lighting at night. Flash is used to illuminate the subject while maintaining the mood of the background. When the [] icon at the top left of the monitor lights in green, press the shutter-release button all the way to capture a series of images at high speed which will be combined into a single image and saved.
- Page 72 _1 Backlighting Use when light is coming from behind the subject, throwing features or details into shadow. Set NDR to On or Off in the [] (backlighting) menu according to the shooting conditions and subject. Press the MENU button to display the [] (backlighting) menu.
- Page 73 SCENE"> _ Portrait Use this mode for portraits. • The camera detects and focuses on a human face. See "Face Detection" 52) for more information. • If more than one face is detected, focus will be on the face closest to the camera. •...
- Page 74 SCENE _ _ Party/indoor Suitable for taking pictures in parties. Captures the effects of candlelight and other indoor background lighting. • The camera focuses on the subject at the center of the frame. • As images are easily affected by camera shake, hold the camera steadily.
- Page 75 SCENE-_ _ Sunset Preserves the deep hues seen in sunsets and sunrises. • The camera Focuses on the subject at the center of the fra me. off _ Default setting can be modified, SCENE_ iii DuslddaWn Preserves the colors seen in the weak natural light before sunrise or after sunset.
- Page 76 SCENE-)' 8f_Closelup Photograph flowers, insects, and other small objects at close range. • Macro mode (_) 36) is enabled and the camera automatically zooms to the closest position at which it can fOCUS. • The closest distance at which the camera carl focus varies depending on the zoom position.
- Page 77 SCENE_'rl FoOd Use this mode when taking pictures of food. • Macro mode (_) 36) is enabled and the camera automatically zooms to the closest position at which it can fOCUS. • The closest distance at which the camera carl focus varies depending on the zoom position.
- Page 78 SCENE-_ _ Museum Useindoors where flash photography is prohibited (for example,in museumsand art galleries)or in other settings in which you do not want to usethe flash. • Camerafocuseson the subject at the centerof the frame. • BSS(bestshot selector)can be enabled (_ 75).
- Page 79 SCENE-_ copy Provides dear images of text or drawings on a white board or in print. • Camera focuses on the subject at the center of the frame. • Use macro mode (_ 36) to focus at short ranges. • Colored text and drawings may not show up well. off _ off _ 0.0 _...
- Page 80 Shooting for a Panorama Tile camera focuses on tile subject at tile center of the frame. Use a tripod for tile best results. Set Vibration reduction ([_] 166) to Off in setup menu 157) when using a tripod to stabilize tile camera.
- Page 81 Press the _) button when shooting complete. The camera returns to step Notes on Panorama Assist • Set flash mode, serf timer, macro mode and exposure compensation before taking the first picture.They cannot be changed after the first picture is taken, images cannot be deleted, nor can...
- Page 82 Use t his mode totake p ictures ofmoving subjects. By registering asubject, camera can move the focus area a utomatically totrack t he subject. Rotate mode dial to _E] (subject tracking). The camera enters subject tracking mode and a white border is displayed at the center of the frame.
- Page 83 Notes on Subject Tracking Mode • Digital zoom is not available, • Adjust zoom position, flash mode, exposure compensation, and menu settings prior to registering the subject, If any camera setting is changed after the subject has been registered, subiect registration will be canceled.
- Page 84 Changing Subject Tracking Mode Settings While using _ (subject tracking) mode 70), press tile MENUbutton 8) and then set tile following options in tile subject tracking menu. • Use the rotary multi selector to choose and apply settings 9, 10). •...
- Page 85 Use this mode to capture the details of a moving subject by shooting a continuous series of images. • The focus, exposure, and white balance settings are fixed at the values for the first picture in each series. Pressthe MENU button and confirm or change the settings in the continuous menu.
- Page 86 Notes on Continuous Shooting Mode • It may take some time to save the images after shooting. The amount of time it takes to finish saving the captured images depends on the number of images, image mode, the write speed the memory card, etc •...
- Page 87 Changing Continuous Shooting Mode Settings After displaying tile _ (continuous) mode shooting so:teen (_ 73), press tile MENUbutton 8) to set the following options in the continuous menu. • Items other than Continuous share tile same settings with I_1 (auto) mode, and tile settings...
- Page 88 Option Description Pre-shooting cache makes it easy to capture perfect moments. Ey saving images from before the shutter- release Dur_on was pressed all the way. Pre-shooting cacne shooting begins when the shutter-release button s Dressed halfway, and continues when the shutter- release t)u_on Is pressed all the way ([_]] 77).
- Page 89 _so se.smvity Set the ISO sensitivity to suit the brightness of the subject. AF area mode [_[Z] 5 0 Use this option to determine the camera selects the focus area for autofocus. Autofocus mode C.hoose tile camera focuses. Pre-shooting Cache When Pre-shooting cache is selected, shooting...
- Page 90 Some settings in the I_1 (auto) mode and continuous shooting mode menus cannot be used with other functions. Restricted Setting Descriptions function When using Sport continuous, image mode is fixed at [] (image size: 1280 x 960 Image nod e Continuous pixels).
- Page 91 _°" Restricted _i'!_ _!_'_!! function Setting When shooting with Pre-shooting cache AF assist Continuous or Sport continuous, the AF-assist illuminator does not light. _'!_ When using Multi-shot 16, digital zoom is Digital zoom Continuous disabled. Blinkwarning Smile timer (_]] 34) Blink warning does not function.
-
Page 92: Calendar Display
Press the [] (playback) button in shooting mode to enter playback mode and display images that have been captured (_ 28). The following operations are available in full-frame playback mode. Function Control Description Press A,V, ,or d sp ayprev,ousor ne×t images. Press and ho,d A', Selec t images... -
Page 93: Using Favorite Pictures Mode
Function Control Description _,,,_,_,_-_o_÷_!_,_ Select a deletion method and delete images. When using favorite pictures mode Delete images 92), auto sort mode (_ 100), or list by 29, 84 date mode (_ 104), images in the same album, category, or shooting date can be deleted. - Page 94 Displaying Histogram Shooting Information Press tile _) button in full-frame playback mode to display tile highlight, histogram, and the shooting information (not possible with movies). Pressthe _) button again to return to full-frame playback mode. ®÷ Highlight 1 Folder name FiJename Current frame number/ Aperture...
- Page 95 Playing Images Captured Using Continuous Shooting Mode (Sequence) Each time tile following continuous shooting mode (_ 73) settings are usd to take pictures, tile captured images are saved asa "sequence". • ContinuousH • ContinuousL • Sport continuous • Pre-shooting cache In full-frame playback mode or thumbnail playback Sequencedisplay...
- Page 96 Deleting Images in a Sequence If images in a sequence are selected and tile _ button is pressed when Sequence display options is set to picture only, tile deletion method selected. • Erase current picture: Delete only tile image that displayed (_ 29).
- Page 97 Rotate the zoom control to W (I_;_) in full-frame playback mode (_ 80) to display images in "contact sheets" of thumbnail images (except in list by date mode). The following operations are available while tt]umbnails are displayed. Description Rotate the rotary multi selector, or press A,V,, orig.
- Page 98 Thumbnail Playback Mode Display Protect icon When images marked using Print set (_ 109) or Print set icon Protect 114) are selected, the icons shown on the right are displayed with them. Sequence - The icon shown on the right is displayed when an display...
- Page 99 Calendar Display With playback display of 16 thurnbnails (_ 85), rotate the zoom control to W (_;_) to switch to calendar display. Images can be selected for display based on the date on which they were captured. The dates on which images were captured are underlined in yellow.
- Page 100 Rotating the zoom control to T (c_)in full-frame playback mode (_ 80) enlarges display of the (:enter portion of the current image. • The guide displayed at bottom right shows the portion of the image currently displayed. The following operations are available while image display is enlarged.
- Page 101 Images Captured with Face Detection When zooming in (playback zoom) on an image captured using face detection (_ 52) by rotating the zoom control to T (c_) in full-frame playback mode, the image will be enlarged with the face detected with shooting at the center of the monitor (except images captured with continuous shooting mode (_ 73)).
- Page 102 The following playback modes can be selected. Play back all images. Pavorite pictures Play back images added to an album. Auto sort Hay back images and movies automatically sorted to the selected category with shooting. List by date Play back images captured on the selected date. Press the MENU button in playback -_:_...
- Page 103 Use the rotary multi selector to choose playback mode. To return to the current playback mode without switching playback modes, press the MENU button. Press the _) button. The cameraentersthe seEected playbackmode.
- Page 104 Captured images (:an b eadded toanalbum a nd sorted. After images are added, they ( :an b e easily played back using "_,] favorite pictures mode." • By a dding images toan album, images (:an b e easily found. • images can besorted by each e vent such as vacations orweddings.
- Page 105 Use the rotary multi selector to choose the album to which the images will be added and press the _) button. selected images are added and the camera switches to the pEayback menu. To add the same image to multipEe aEbums, repeat from...
-
Page 106: Favorite Pictures Menu
Viewing Images in an Album When using "a favorite pictures mode", images added to an album can be displayed by selecting the album. • In full-frame playback mode, images in the same album (:an be played back (I]_180) and edited (_ 122). - Page 107 Removing Images From an Album Removeimagesflom an album without deleting tile images. Select the album from which images in that album ([_1 94), and then press MENU button. images will be removed, play back The playback menu is displayed. Use the rotary multi selector...
-
Page 108: Rotate Image
Using Favorite Pictures Mode Tile following operations are available from tile list of albums screen (_ 94 step Control Description Choose an album V,_,orl_. Rotate the rotary multi selector, or press A, Switchto full: Images in the selected album are displayed frame playback full frame. - Page 109 Changing Album Icons Tile design of the album icons carl be changed. By changing tile icons, it will be easier to identify what kind of images are added to each album. Pressthe MENU button during playback, choose the MInE (playback mode) tab, and then press I_ or the _ button...
- Page 110 Notes on Album Icons Set the album icons separately _r the internal memory and _r the memory card. • To change the album icons for the internal memory, first remove the memory card from the camera, • The default setting for the icon is the number icon (black).
- Page 111 Adding/Playing Favorite Pictures When images are added to an album, they are not moved from the _lder to which they were saved 185) or copied to the album, Only the file names of the images are added to the album. When using favorite pictures...
- Page 112 Nikon No reproduction in any form of this manual, in whole or in part (except for brief quotation in critical articles or reviews), may be made without written authorization from NIKON CORPORATION. NIKON CORPORATION CT0103(11) 6MM86211-03 © 2010 Nikon Corporation...
Need help?
Do you have a question about the COOLPIX S8100 and is the answer not in the manual?
Questions and answers