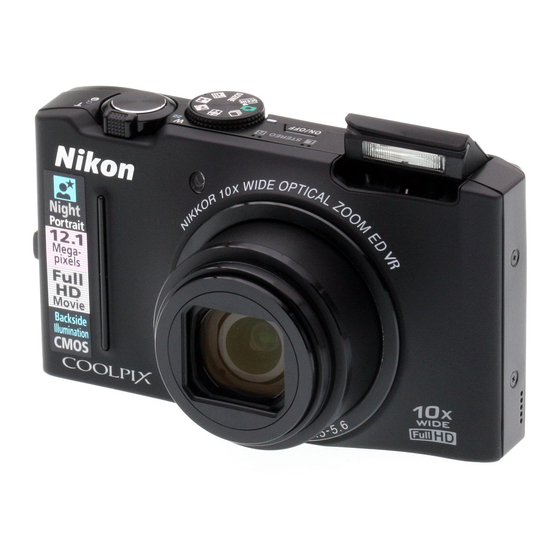
Nikon Coolpix S8100 Quick Start Manual
Digital camera
Hide thumbs
Also See for Coolpix S8100:
- Manual del usuario (220 pages) ,
- User manual (112 pages) ,
- Specifications (2 pages)

Related Manuals for Nikon Coolpix S8100


Summary of Contents for Nikon Coolpix S8100
-
Page 1: Table Of Contents
Quick Start Guide Take the Camera out of the Box First Steps Shooting and Playback Installing ViewNX 2 Using ViewNX 2... - Page 2 Thank you for purchasing a Nikon COOLPIX S8100 digital camera. This guide introduces the procedures necessary in using this camera for the first time. For more detailed information, please refer to the supplied User’s Manual. Technical support information is available online at the following sites: For users in the USA: http://www.nikonusa.com/...
-
Page 3: Take The Camera Out Of The Box
Take the Camera out of the Box Remove the camera and accessories from the box and confirm that you have all the items listed below. COOLPIX S8100 Camera Strap Rechargeable Li-ion Charging AC Adapter Digital Camera Battery EN-EL12 EH-68P/EH-68P (AR)*... -
Page 4: First Steps
First Steps Attach the Camera Strap Step Insert the Battery and Memory Card Step If a memory card is inserted, images will be saved on the memory card when you take pictures. If a memory card is not inserted, images will be saved in the camera’s internal memory (approximately 102 MB). - Page 5 3 Insert the memory card. Memory card slot Slide the memory card in until it clicks into place. Inserting Memory Cards Inserting the memory card upside down or backwards could damage the camera or the memory card. Be sure to check that the memory card is in the correct orientation.
-
Page 6: Charge The Battery
Charge the Battery Step Use the supplied Charging AC Adapter EH-68P and USB Cable UC-E6 to charge the supplied Rechargeable Li-ion Battery EN-EL12 while it is in the camera. 1 Prepare the Charging AC Adapter EH-68P. If a plug adapter* is included, attach the plug adapter to the plug on the Charging AC Adapter. -
Page 7: Turn On The Camera
Turn On the Camera Step Press the power switch to turn on the camera. The power-on lamp (green) will light, and then the monitor will turn on (the power-on lamp turns off when the monitor turns on). Power Saving Function (Auto Off) If no operations are performed for a while, the monitor will turn off, the camera will enter standby mode, and the power-on lamp will blink. - Page 8 Daylight Saving Time If daylight saving time is in effect, press H L o n d o n C a s a b l a n c a to enable the daylight saving time function. When the daylight saving time function is enabled, W is displayed at the top of the monitor.
-
Page 9: Shooting And Playback
Shooting and Playback Rotate the Mode Dial and Align the A (Auto) Icon Step to the Mark Auto mode Check the Battery Level and the Number of Step Exposures Remaining Battery level indicator Battery level Description indicator (NO INDICATOR) Battery fully charged. Battery low. - Page 10 Frame a Picture Step 1 Use both hands and ready the camera. Flash Do not hold the flash down with your fingers or other objects. Keep fingers and other objects away from the lens, etc. 2 Frame a picture. Point the camera at the object (subject) you want to take a picture of.
-
Page 11: Focus And Shoot
Focus and Shoot Step 1 Press the shutter-release button halfway, stopping when you feel resistance. Flash lamp If the camera detects a face in step 3: Focus area The camera focuses on the area indicated by the yellow double border (focus area), and the double border changes to green. -
Page 12: Playback Images
Playback Images Step Press the c (playback) button. The camera enters b (movie-record) button playback mode. The last image captured is displayed in full- 1 5 / 1 1 / 2 0 1 0 1 5 : 3 0 1 5 / 1 1 / 2 0 1 0 1 5 : 3 0 0 0 0 4 . -
Page 13: Installing Viewnx 2
Installing ViewNX 2 Install the supplied software to display and edit photographs and movies that have been copied to your computer. Before installing ViewNX 2, confirm that your computer meets the system requirements (A19). Your Imaging Toolbox ViewNX 2™ Start the Computer and Insert the Installer CD Step Windows Mac OS... -
Page 14: Select A Language
Select a Language Step If the desired language is not available, click Region Selection to choose a different region and then choose the desired language. 1 Select region (if required) 2 Select language 3 Click Next Start the Installer Step Click Typical Installation (Recommended) and follow the on-screen instructions. -
Page 15: Using Viewnx 2
The camera automatically turns on and the power-on lamp lights. The camera monitor will remain off. When the action selection dialog is displayed on the computer, select Nikon Transfer 2. When Using Windows 7 When the screen shown below is displayed, use the following procedure to select Nikon Transfer 2. - Page 16 Starting Nikon Transfer 2 If there are a large number of images on the memory card, it may take some time for Nikon Transfer 2 to start. Powering the Camera During Image Transfer When connecting the camera to a computer to transfer images, use a fully charged battery to prevent the camera from turning off unexpectedly.
-
Page 17: View Images
.5 Terminate the connection. If the camera is connected to the computer, turn the camera off and disconnect the USB cable. If you are using a card reader or card slot, choose the appropriate option in the computer operating system to eject the removable disk corresponding to the memory card and then remove the card from the card reader or card slot. -
Page 18: Retouching Photographs
Retouching Photographs Click Edit in the ViewNX 2 toolbar. Images can be edited by using tone compensation, adjusting sharpness, trimming (cropping) images, etc. Editing Movies Click Movie Editor in the ViewNX 2 toolbar. Movies recorded with this camera can be edited by deleting unwanted sections of movies, etc. - Page 19 System Requirements Windows Mac OS Photographs/JPEG movies: Photographs/JPEG movies: Intel Celeron/Pentium 4, or Intel PowerPC G4 (1 GHz or better), G5, Core series,1.6 GHz or better Intel Core series, or Xeon series H.264 movies: H.264 movies: - Playback: 3.0 GHz or better - Playback: PowerPC G5 Dual or Pentium D Core Duo, 2 GHz or better...
-
Page 20: Shooting Mode
Other Features of the COOLPIX S8100 Shooting mode Rotate the mode dial to select various shooting modes. In x scene auto selector, y, j night landscape, e night portrait, or R backlighting, camera settings are automatically optimized for the selected scene.
Need help?
Do you have a question about the Coolpix S8100 and is the answer not in the manual?
Questions and answers