Advertisement
Available languages
Available languages
Table of Contents
- 1 Operation
- 2 Maintenance and Storage
- 3 Spark Arrestor
- 4 Setting the Depth
- 5 Adjusting the Handle Height
- 6 Clearing the Tines
- 7 TILLING Tips & TECHNIQUES
- 8 Engine Maintenance
- 9 General Recommendations
- 10 Tire Pressure
- 11 Belt Replacement
- 12 Preparing the Engine
- 13 Mantenimiento
- 14 Need more Help
- Download this manual
Operator's
Manual
I:Rl FI'SlVl N
208cc Engine
Rear Tine Tiller
Model No. 247.29930
CAUTION:
Before
using
this product,
read this
manual
and follow
aJl
safety
rules
and operating
instructions.
* SAFETY
* ASSEMBLY
* OPERATION
* MAINTENANCE
* PARTS LIST
* ESPANOL
Sears Brands
Management
Corporation,
Hoffman
Estates,
iL 60179, U.S.A.
Visit our web site: www.craftsman.com
FORM1/0. 769-05423D
1/2/2012
Advertisement
Table of Contents

Related Manuals for Craftsman 247.29930


Summary of Contents for Craftsman 247.29930
- Page 1 * OPERATION CAUTION: Before using * MAINTENANCE this product, read this * PARTS LIST manual and follow * ESPANOL safety rules and operating instructions. Sears Brands Management Corporation, Hoffman Estates, iL 60179, U.S.A. Visit our web site: www.craftsman.com FORM1/0. 769-05423D 1/2/2012...
- Page 2 FORTWO YEARSfrom the dateof purchase,this productis warrantedagainstanydefectsin materialor workmanship, A defectiveproductwill receivefree repairor replacementif repairis unavailable, For warranty coverage details to obtain free repair or replacement,visit the web site: www.craftsman.com This warranty covers ONLYdefects in material and workmanship. Warranty coverage does NOT include: •...
- Page 3 This machinewas built to be operatedaccordingto the safe opera- This symbolpointsout importantsafetyinstructionswhich,if not tion practicesin this manual.As with any type of powerequipment, followed,couldendangerthe personalsafetyand/orpropertyof carelessnessor error on the part of the operatorcan resultin yourselfand others. Readand followall instructionsin this manual seriousinjury.This machineis capableof amputatingfingers,hands, beforeattemptingto operatethis machine.Failureto complywith toes and feet and throwingdebris.
-
Page 4: Operation
Safe Handling of Gasoline: • Lookdownand behindand usecare whenin reverseor pulling machinetowardsyou. Toavoidpersonalinjuryor propertydamageuseextremecare in handlinggasoline.Gasolineis extremelyflammableand the vaporsare • Start the engineaccordingto the instructionsfoundinthis manual explosive.Seriouspersonalinjurycan occurwhengasolineis spilled and keepfeet well awayfromthe tines at all times. on yourselfor yourclotheswhichcan ignite.Washyour skin and •... -
Page 5: Spark Arrestor
NOTICE REGARDING EMISSIONS • Do notchangethe enginegovernorsettingsor over-speed the engine.Thegovernorcontrolsthemaximumsafeoperatingspeed Engineswhich are certifiedtocomplywith Californiaand federal of engine. EPAemissionregulations for SORE(SmallOff RoadEquipment) are Maintainor replacesafetyand instructionlabels,as necessary. certifiedto operateon regularunleadedgasoline,and mayinclude Followthis manual f or safe loading,unloading,transporting, a nd the followingemissioncontrol systems:EngineModification (EM), storageof this machine. - Page 6 SAFETY SYMBOLS This pagedepictsand describessafetysymbolsthat mayappear on this product. Read,understand,and followall instructionson the machine beforeattemptingto assembleand operate. READ THE OPERATOR'S MANUAL(S) Read, understand, and follow all instructions in the manual(s) before attempting to assemble operate WARNING-- ROTATING TINES Do not put hands or feet near rotating parts.
- Page 7 NOTE:This unitis shippedwithoutgasolineor oil in the engine.Be Installthe handle-crankadjustment r od intothe top holeof the certainto serviceenginewith gasolineand oil as instructedin the mountingbracketfromthe left hand sideof the handleassembly, Operationsectionof this manualbeforeoperatingyourmachine. securewith the otherflangelock nut previouslyremoved.Fit NOTE:Referenceto rightand left hand sideof the Tilleris observed the hexend of the retainerbracketoverthe flangelock nut.
- Page 8 MOVING THE TILLER OFF THE SKID Totest thefunctionof theforwarddrive bail,lift the bailto the handle and releaseit. The bail shouldreturnto its neutralposition.Ifit doesn't, To roll thetiller off the shippingplatform,put thewheels infreewheel,if contactCustomerSupportfor assistanceor the nearestdealer. they are not alreadyfrom the factory,as follows: Snapthe cablehousingclips intothe handleassemblycable Placea sturdyblock underthe transmissionto raiseone wheel mount.The red clip (reversecable)fits into thetop positionon the...
- Page 9 SET-UP Fuel Recommendations Useautomotive gasoline(unleadedor lowleadedto minimizecombus- Checking and Adding tion chamberdeposits)with a minimumof 87 octane.Gasolinewith up to 10%ethanolor 15%MTBE(MethylTertiaryButyl Ether)can be used. Neverusean oil/gasolinemixtureor dirty gasoline.Avoidgetting Theengine is shippedwithoutoil in theengine.Youmustfill the dirt, dust,or waterinthe fuel tank.DO NOTuse E85 gasoline. enginewith oil beforeoperating.Runningthe enginewith insufficient •...
- Page 10 Transmission/Gear First Time Use With thetiller on levelground,pull the DepthRegulatorLever back and thenall the way up untilthe lowestnotch in the leveris engaged.See Figure8. Depth Regulator Lever Figure8 Removetheoil fill plug from thetransmissionhousingcoverand locatethe maindriveshaft situatedinsidethe housing. See Figure9. Figure9 Thegear oil levelis correctif the gear oil is approximately halfway up the side of the maindriveshaft.
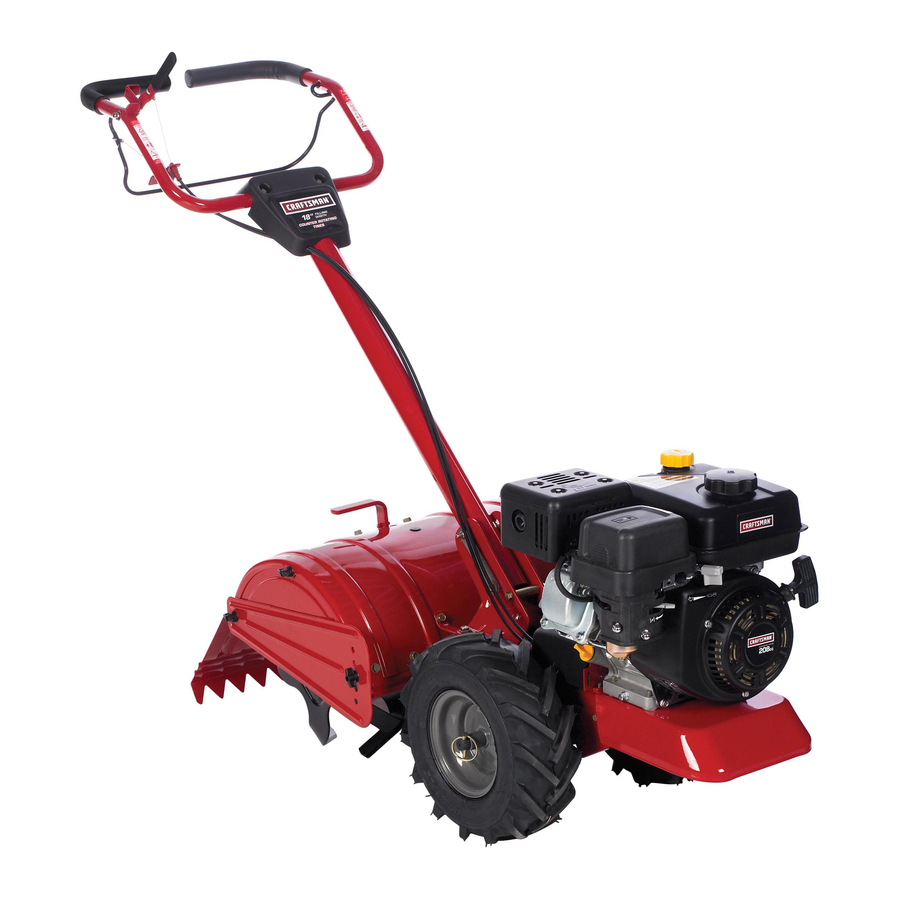
- Page 11 Forward Clutch Bail Fuel Cap & Tine Engagement OU Fill Cap Muffler & Dipstick ulator Air Filter Handle Height Adjustment Choke Rear Tine Shield Throttle Side Shield Tines Pull Starter Handle Wheel Drive Pin Oil Drain Figure10 CHOKE CONTROL Nowthat youhaveset up yourtillerfor operation,get acquainted with itscontrolsand features.Theseare describedon the next two pages and illustrated o n this page.This knowledge will allowyou to useyour newequipmentto itsfullestpotential.
- Page 12 OiL FiLL CAP & DIPSTICK Movethe choke leveron the engineto CHOKE_÷ position.(A warm enginemay notrequirechoking.)See Figure11. Engineoil levelcan be checkedand oil addedthroughtheoil fill. See Figure10. NOTE:This unitwas shipped%THOUT oil inthe engine.Oil is included in the plasticbag packedwith the manualin with the unit. Add the oil as directedinthe Assemblysection.Checkthe oil levelbefore eachoperationto ensureadequateoil isinthe engine.Forfurther instructions, referto thesteps inthe Serviceand Maintenancesection...
-
Page 13: Setting The Depth
To move tiller in reverse: (Do not till in reverse) Toadjust t hesideshields, remove thewingnuts.Move thesideshield to the a. Releasethe ForwardClutchBail. desiredposition and replace thewingnuts.Tighten securely. SeeFigure 13. b. Lift the handlebaruntilthe tinesare off the ground. c. Slowlypull backon the ReverseLever, a nd carefullywalk backwardswiththe machine. -
Page 14: Clearing The Tines
CLEARING THE TINES Whencultivating(breakingup the surfacesoil aroundthe plants to destroyweeds,See Figure15),adjustthe tines to dig only 1" Beforeclearingthetines by hand,stop theengine,allowall moving to 2" deep. Usingthe shallowtillingdepthhelpspreventinjury to parts to stop and disconnectthe sparkplug wire. Failureto followthis the plantswhose rootsoften growclose to the surface.If needed, warningcouldresult in personalinjury. - Page 15 If the gardensize will notpermit lengthwiseand thencrosswise Suggested Tilling Patterns tilling, thenoverlapthe first passesby one-halfa tiller width,fol- • Whenpreparinga seedbed,go overthe samepathtwice in the lowedby successivepassesat one-quarterwidth.See Figure18. first row,thenoverlapone-halfthetiller width on the rest of the passes.See Figure16. Figure18 Figure16 Tilling on a Slope Whenfinishedin one direction,makea second passat a right...
- Page 16 • Positionthe loadingvehicle so that the rampangle is as flat Terrace Gardening as possible(the less inclineto the ramp,the better).Turnthe Tocreatea terrace,start at thetop of the slopeand work down vehicle'sengineoff and applythe parkingbrake. Go back and forth acrossthe first row.See Figure19. •...
-
Page 17: Engine Maintenance
MAINTENANCE SCHEDULE Followthe maintenanceschedulegivenbelow.This chart describes Beforeperforming anytypeof maintenance/service, disengage all serviceguidelinesonly. Usethe ServiceLog columnto keeptrackof controls and stoptheengine.Waituntilall moving partshavecometo completedmaintenance tasks.To locate the nearest Sears Service a complete stop.Disconnect sparkplugwireandgrounditagainstthe Centeror to scheduleservice,simplycontactSears at enginetoprevent u nintended starting. A lways wearsafety glassesduring 1-800-4-MY-HOME®. - Page 18 Removethespark plug bootand use a sparkplug wrenchto Servicing the Air Cleaner removethe plug.See Figure20. Neverusegasolineor lowflash point solventsfor cleaningtheair cleanerelement.A fireor explosioncould result. The air cleanerpreventsdamagingdirt, dust,etc., from enteringthe carburetorand being forcedintothe engineand is importantto engine lifeand performance.Neverrunthe enginewithoutan air cleaner completelyassembled.Checkthe air cleanerbeforeeachuse.
- Page 19 To Drain Oil Check Engine Checkoil beforeeachuse. Stopengineand wait severalminutes beforecheckingoil level.With the tilleron levelground,the oil Usedoil is a hazardouswasteproduct.Disposeof usedoil properly mustbe to FULLmarkon dipstick. IDo notdiscardwith householdwaste.Checkwith your localauthori- Removeoil fill dipstickand wipe cleanwith cloth. lties or SearsService Centerfor safe disposal/recycling facilities. Replacedipstick intothe oil filler neck,but do not screwitin.
-
Page 20: Tire Pressure
Check Transmission Gear Oil LUBRICATION Checkthetransmissiongear oil after every 30 hoursof operation After every 10operatinghours,oil or greasethe lubricationpoints.Use or wheneveryou noticeanyoil leak. Operatingthe tiller whenthe clean lubricating oil (#30 weight motoroil is suitable)and cleangeneral transmissionis lowon oil can resultin severedamage. purposegrease(greasecontaininga metal lubricantis preferred,if ToCheckthe Transmission GearOil Level: available).See Figure26. -
Page 21: Belt Replacement
BELT REPLACEMENT Removethe idler bracketextensionspring.See Figure29. It is recommended to usea pair of needle-nosedpliers,and grab the If the drive beltor reversebeltneedsto be replaced,itis bestto springby the end that hooksoverthe frame.Simplygrab it and replacebothbeltsat the same time.Use onlya factoryauthorized pull it awayfrom the frame,thenup wardsand carefullyrelieve beltas an "over-the-counter"beltmay not performsatisfactorily. - Page 22 Removethehex bolts securingthe transmissiondrivepulley,then Removing/Installing a Tine Assembly removethe pulleyalongwith the two belts. See Figure31. Removethe tine shieldend coversand side shieldsby removing the threewing nutson eachside that securethem. V-side out A fine assemblyconsistsof a left handtine and a righthand fine. Remove pulley NOTE:The tineassemblymovesin a counter-rotating motionwith...
-
Page 23: Preparing The Engine
Neverstoretiller withfuel in tank indoorsor in poorlyventilatedareasI wherefuel fumesmay reachan open flame,spark,or pilotlightas on a furnace,water heater,c othesdryer, or gas app ance. PREPARING THE TILLER Whenthe tillerwon't be usedfor an extendedperiod,prepareit for Neverleaveengineunattendedwhileit is running. storageas follows: Cleanthe tillerand engine. PREPARING THE ENGINE Followthe lubricationrecommendations a nd checkfor looseparts... - Page 24 Before performing anytype d maintenance/service, disengage all controls and stoptheengine.Waituntilall movingpartshavecometo a completestop.Disconnect sparkplugwireandgroundit against t heenginetoprevent unintended starting. A lways wearsafetyglasses duringoperation or whileperforming anyadjustments or repairs. Reconnect w ire. Enginefails to start Sparkplugwire disconnected. EngineThrottleControlLeverincorrectlyset. Putleverin STARTposition. Fueltank emptyor stale fuel. Filltank with clean,fresh gasoline.
- Page 26 Craftsman Tiller B Model No. 247.29930 j> 33 27 50...
- Page 27 Craftsman Tiller B Model No. 247.29930 649-04098A-4044 710-0597 Hex Screw, 1/4-20 x 1.00 Upper Handle Assembly 686-04135-4044 710-0604A Hex Washer Screw, 5/16-18 x 0.625 Reverse Handle Assembly 71O- 0189 710-1238 Hex Washer Screw, 5/16-18 x .875 Hex Screw, 5/16-18 x 3.00 710-0599 Hex Washer Screw, 1/4-20 x 0.500...
- Page 28 Craftsman Tiller B Model No. 247.29930...
- Page 29 Craftsman Tiller B IViodel No. 247.29930 736-3092 FlatWasher,.265x 1.0x .030 934-04652 CompleteWhl.Assy.,13x 5 x 6 (B,C) 714-0143A Click Pin 738-04425 ShoulderScrew,.342x .335 1/4-28 684-04168 Idler PulleyAssembly 748-04087A PivotIdlerSpacer 750-04571 ShoulderSpacer,.260x .785x .538 710-0151 Hex Screw,3/8-24x 2.00 710-0170 Hex Screw,5/16-24x .625...
- Page 30 Craftsman Tiller B Model No. 247.29930 i iT...
- Page 31 Craftsman Tiller B IViodel No. 247.29930 918-04815A Transmission Assembly 919-04184A Housing,Transmission 710-3008 Hex Screw,5/16-18,.75,Gr5 911-04844 Shaft,Tiller 911-04854 Shaft,Wheel 911-05028 Shaft,Worm 714-04059 Key, Hi Pro .25x 1.062 716-0204 Retaining Ring 716-04102 RetainingRing,Int 917-04380 WormGear,61t,RH 917-04381 WormGear,30t, LH 918-04435 BearingCover 921-04030 Seal,Oil, .750Shaftx 1.783Bore...
- Page 32 Craftsman Engine Model 170=TOB For Tiller Model 247.29930 951-11285 ExhaustPipe Gasket 712-04214 Nut,M8 951-12156 MufflerAssembly 710-05002 Bolt 951-10806 Air CleanerHousing 712-04213 710-05102 Self-Tapping Bolt M4.2x16 951-12135 SilencerPlate 951-10794 Air CleanerAssembly 951-10794 Air CleanerAssembly 951-12136 Air CleanerCover...
- Page 33 Craftsman Engine IViodel 170=TOB For Tiller IViodel 247. 29930 951-12124 Carburetor Assembly FloatPin 951-11571 Carburetor GasketPlate Emulsion Tube 951-11177 ControlLever, Choke NeedleValve ChokeShaft MainJet ChokePlate NeedleValveSpring ThrottleShaft Float ThrottlePlate 951-11589 FuelBowlGasket ScrewM3x5 FuelBowl LockWasher 951-11348 FuelBowlGasket IdleJet Assembly 710-04945 FuelBowlMountingBolt...
- Page 34 Craftsman Engine Model 170=TOB For Tiller Model 247. 29930 5a 64...
- Page 35 Craftsman Engine Model 170=TOB For Tiller Model 247. 29930 951-11253 PistonRingSet 951-11632 PistonPin Snap Ring 951-12007 Piston 951-11633 PistonPin 710-04915 Bolt M6x12 951-11113 Air Shield 951-11573 ConnectingRod Assembly 951-11356 GovernorArm Shaft 736-04461 Washer5.2xl.9 951-11574 GovernorSeal 714-04074 CotterPin 951-11575 CamshaftAssy. 951-11369...
- Page 36 Craftsman Engine Model 170=TOB For Tiller Model 247. 29930 .,_,4,_ 16_1 13 1_415 11_"_4 _110 25__2 1--¢_ 1--@_ __ya3...
- Page 37 Craftsman Engine IViodel 170=TOB For Tiller IViodel 247. 29930 710-05276 MufflerStud M8x36 710-04968 BoltM6x16 951-10657 951-11054 ValveCover MufflerStudAssembly 710-05101 StudM6x110 731-07059 BreatherHose 951-11567 Carburetor InsulatorGasket 726-04101 HoseClamp 951-11568 Carburetor Insulator 951-11565 ValveCoverGasket 951-11569 Carburetor Gasket 951-11892 RockerArmAssembly 951-11572 751-11124 Gasket,CylinderHead...
- Page 38 Craftsman Engine IViodel 170-TOB For Tiller IViodel 247. 29930 _110 951-12126 Oil Seal25x41.25x6 951-10792 IgnitionCoil Assembly 710-04919 BoltM6x25 951-10805 Flywheel 951-10909 Fan,Cooling 951-10911 Pulley,Starter 712-04209 Nut,Special,M14x1.5 710-04915 BoltM6x12 951-11583 BlowerHousing 736-04455 FlatWasher 710-04974 BoltM6xlO 951-12127 RecoilStarter 712-04212 Nut,M6 710-04918 BoltM6x20...
- Page 39 Craftsman Engine Model 170=TOB For Tiller Model 247. 29930 01_101 97 _ _>100 ¢/97 -Io6 84 83 ---'u 710-04968 BoltM6x16 951-10662 DipstickDecorationCover 951-11067 ThrottleControlKnob 710-04905 Bolt 951-12131 PrimerBracket 710-04915 Bolt M6x12 710-04928 BoltM6x12 951-11903 Oil FillTubeO-Ring 951-11585 951-10656 Oil FillTube...
- Page 40 Craftsman Tiler IViodel No. 247.29930 777S33496 777D15447 777i23259 777S33612 777X45317 777D15452 777D17085 777i22969 777122968 WHEELS REVERSE i TIN£1 REVERSE YINES 777123174...
- Page 41 (Thispage applicablein the U.S.A.and Canadaonly.) Sears Brands Management Corporation (Sears), the California Air Resources Board (CARD) and the United States Environmental Protection Agency (U.S. EPA) Emission Control System Warranty Statement (Owner's Defect Warranty Rights and Obligations) EMISSIONCONTROL WARRANTY COVERAGEISAPPLICABLE TO CERTI- YEAR 1997AND LATERENGINES WHICHARE PURCHASED AND USED FIEDENGINESPURCHASEDIN CALIFORNIAIN 1995ANDTHEREAF- ELSEWHERE IN THE UNITEDSTATES (ANDAFTERJANUARY1,2001 IN...
- Page 42 Look For Relevant Emissions Durability Period and Air index information On Your Engine Emissions Label Engines that are certified to meet the California Air Resources Board (CARB) Tier 2 Emission Standards must display information regarding the Emissions Durability Period and the Air Index. Sears Brands Management Corporation makes this information available to the consumer on our emission...
- Page 43 Congratulations on making a smart purchase. Your new Craftsman® product is designed manufactured for years of dependable operation. But like all products, it may require repair from time to time. That's when having a Repair Protection Agreement can save you money and aggravation.
- Page 44 Durantedos a_osdesdela fechade compra,este productoestAgarantizadocontracualquierdefectode materialeso manode obra. Un productodefectuosorecibir_la reparaci6no sustituci6ngratuitasi la reparaci6nno est_ disponible. Paradetalles sobre la garantia de coberturapara obtener reparaci6ngratuita o reemplazo,visite el sitio web: www.craftsman.com Esta garantias61ocubre defectos en materiaies y mano de obra. Cobertura de la garantiano ineiuye: •...
- Page 45 Esta m _quina est_ d ise_ada para ser u tilizada respetando las normas Lapresencia deeste s fmbolo indica que s e trata d einstrucciones de seguridad contenidas en este m anual. AI i gual que con cualquier tipo seguridad importantes que s e deben respetar para e vitar poner enpeligro de equipo motorizado,...
- Page 46 • Si golpea algOnun objeto extraSoo si la m&quinacomienzaa emitir Manejo seguro de la gasolina: un sonidopococomOno a vibrar,apagueel motorde inmediato. Para evitarlesionespersonalesy da_os materialestenga muchocuidado al Desconecteel cable de la buj[a,p6ngalohaciendomasacontrael motor manipularla gasolina.La gasolinaes sumamenteinflamabley sus vapores y siga los pasossiguientes: puedencausarexplosiones.Si se derramagasolinaencimao sobre la ropa se puedelesionargravementeya quese puedeincendiar.
- Page 47 ,, Observe lareglamentaci6n ylas normas respecto alaeliminaci6n AVISO REFERIDO A EMISIONES correcta degasolina, aceite, etc. para proteger elmedic ambiente. Losmotoresque est_ncertificadosy cumplencon las regulacionesde • SegOn laComisi6n de Seguridad deProductos para elConsumidor emisionesfederalesEPAy de Californiapara SORE (EquiposSmall Off Road los Estados Unidos (CPSC) ylaAgencia deProtecci6n...
- Page 48 SiIVIBOLOS DE SEGURIDAD En esta p_ginase presentany describenlos simbolosde seguridadque puedenapareceren este producto. Lea,entienday cumplatodas las instruccionesincluidasen la m_quinaantes de intentararmarlay utilizarla. LEA LOS MANUALES DEL OPERADOR Lea, entienda y cumpla todas las instrucciones incluidas en los manuales antes de intentar armar la unidad y utilizarla.
- Page 49 NOTA:Estaunidadse envfa singasolinani aceiteen el motor.Antes Coloquela manijaen sus soportesde montaje,aNneando los de operar la m_.quina cargueel motorcongasolinay aceitecomo se orificiosya perforados.Inserteel perno hexagonal d e 5/16-18 indicaen la secci6nFuncionamiento de este manual. x 3.00"en el orificio inferiorpas_.ndolo de izquierdaa derecha. NOTA:Lasreferencias a losladosderechoe izquierdo de la cultivadora Coloqueel extremocon el orificioredondodel soportede se hacenobservando la m_.quina desdela posici6n de operaci6n.
- Page 50 COiVlO RETIRAR LA CULTIVADORA DE LA Calcelas abrazaderas del conductodel cableen el rnontajedel cabledel rnanillar.La abrazaderaroja (cablede rnarchaatr_.s) ESTIBA calzaen la posici6nsuperiordel rnanillar,y la abrazaderanegra Paradeslizarla cultivadorafuerade la plataforrna de ernpaque, (cablede ernbrague/directa) c alzaen la posici6ninferiordel coloquelas ruedasen posici6n"ruedaslibres",si no vienenasi de rnanillar.Vea la Figura3.
- Page 51 CONFIGURACION Recomendaciones sobre el combustible Utilicegasolinaparaautom6viles(sinplomoo bajocontenidode El control y la Adici6n de Aceite plomopara minimizarlosdep6sitosen la c_.mara de combusti6n)con un minimode 87 octanos.Se puedeusargasolinacon hasta un 10% de etanolo un 15%de MTBE(etermefilicoterciario-bufilico).Nunca El motor seenvia sinaceite en el motor.Usteddebe Ilenar el motor use una mezclade aceitey gasolinani gasolinasucia.Eviteque se conaceiteantes de operar.El fundonamientodel motorcon el aceite introduzcasuciedad,polvoo agua en el tanquede combustible.NO...
- Page 52 5. Vuelva acolocar latapa decombustible yapriete bien. Lirnpie Retireel tap6nde Ilenadode aceite de la tapade la caja de losderrarnes decombustible antes dearrancar elmotor. Sise transrnisi6ny Iocalizarel eje principalsituadoen el interiorde la derrarna combustible NO arranque elmotor. Mueva larn_.quina vivienda.Wa la Figura9. fuera d el _ .rea dederrarne.
- Page 53 El controldel regulador e st,. ubicadoen la partedelantera del motor. Regulala velocidad del motor,y IoapagacuandoseIo colocaen la posici6nSTOP(detenci6n). V eala Figura10. Curnple con los estandares de seguridad de ANSI Lascultivadoras Craftsman curnplencon lasnorrnasde seguridad del InstitutoNacional A rnericano de Norrnalizaci6n ( ANSI).
- Page 54 Sueltetodos loscontrolesde la cultivadora. GANCHO DEL EMBRAGUE DE MARCHA Mueva la palanca delcebadordelmotora la posici6n CHOKE [];_.(Si DIRECTA Y ENGRANAJE DE DIENTES. el motor e st,.tibiopuedenosetnecesario cebarlo). V eala Figura11. El ganchodel ernbrague de rnarchadirectacontrolael engranado de la rnarchadirectaen lasruedasy dientes.Vea la Figura10. TAPON DE LLENADO Y VARILLA...
- Page 55 PARA ENGRANAR LA TRANSiVIISION Y LOS Paraajustarla estacade profundidad, t irela m_nsula de ajustede profundidad haciaatr_.s(A)y empujehaciaarribao haciaabajo(B) DIENTES hastaque la m_nsula alcancela posici6n deseada,luegosueltela Para moverlas ruedashaciaadelantee impulsarlos dientes m_nsula(C). Veala Figura12. coloqueel ganchodel embraguede marchadirectacontrala barra de control. NOTA:Enmodomarchadirectha,losdientesgirar_.n a la inversa.
- Page 56 AJUSTE DE LA ALTURA DE LA MANIJA SUGERENCIAS Y TC:CNICAS DE LABRANZA Larnanijadebeajustarseparaquecuandola cultivadora est_ labrandoa una profundidad de 3-4"en el suelo,la rnanijase encuentre aproximadarnente a la alturade la cintura.Paraajustarla rnanija, Antesde la labranza,p6ngaseen contactoconla cornpaSia sirnplernente aflojela varillade ajustede la rnanivela, r nuevala rnanijaa telef6nica o de servicios y preguntesise usaequiparniento o lineas la alturadeseaday vuelvaa ajustarla varillade ajuste.Vea la Figura14.
- Page 57 Cuandoterrnineen una direcci6n,realiceunasegundapasada Elecci6n de la velocidad correcta para las ruedas en _.ngulo recto,veala Figura17.Traslape cada pasadapara y los dientes obtenerel rnejor resultado(en terrenornuyduro,puedeser Conexperiencia, p odr_, encontrarla cornbinaci6n de profundidad y necesariorealizartres o cuatropasadaspara pulverizarel suelo velocidad de labranzarn_.s adecuadaalas necesidades de sujardin. a fondo).
- Page 58 Labranzaen pendiente El trabajoen cadaterrazainferiorsucesivacornienzacarninando en la terrazadebajo de la que est_ preparando.Paramayor estabilidadde la cultivadora,siernprernantengala ruedacuesta arriba en el sueloblando,reci_nlabrado.Norealicela labranza Nooperela cultivadora en unapendientedernasiado ernpinada para en las Oltirnas 12"o rn_.s del hordeexteriorcuestaabajode cada unaoperaci6nsegura.Realicela labranzalentarnente y asegOrese terraza.Esta franjasin labrarayudaa evitar que lasterrazasse de estarfirrnernente parado.Nuncaperrnitaque la cultivadora se quiebreny desintegren cuestaabajo.Tarnbi_nproporcionauna...
-
Page 59: Mantenimiento
PROGRAMA DE MANTENIMIENTO Siga el cronograrna de rnantenirniento que se presentaa continuaci6n. Antesde realizarcualquiertipode rnantenirniento o servicio,desengan- Estatabla s61o describepautasde servicio.Utilicela colurnnaRegistro chetodosloscontrolesy detengael motor.Esperea que sedetengan de Serviciopara hacerel seguirniento de lastareas de rnantenirniento cornpletarnente t odaslas piezasrn6viles.Desconecte el cablede la cornpletadas. - Page 60 IVlantenimiento del filtro de aire. Retireel capuch6nde la bujia y con una Ilavepara bujiasextraiga la bujia.Veala Figura20. Nuncausegasolinao solventes de puntode encendidobajopara lirnpiar el elernento del depurador de aire.Podriaproducirse un incendioo explosi6n. Elfiltro de aireevitael ingresoal carburador d e suciedad,polvo,etc. perjudiciales y evitaquelos rnisrnos seanintroducidos dentrodel motor.
- Page 61 Inspeccione el aceite del motor Drenaje del aceite Controleel aceiteantes de cada uso. Detengael motor y espere variosrninutosantes de verificarel nivelde aceite.Con la El aceiteusadoes un residuopeligroso. D esecheel aceiteusadoco- cultivadorasobreuna superficiepareja,el aceite debealcanzarla rrectarnente. No Ioarrojejuntoconlos residuos dorn_sticos. C onsulte rnarcaFULL (lleno)de la varilladel nivelde aceite.
- Page 62 Inspeccione el aceite del engranaje de la trans= Cambio de aceite del engranaje de la transmisiSn rnisi6n Elaceitedel engranaje de la transrnisi6n no necesitasercarnbiado a rnenosque secontarnine con suciedad,arenao particulasde metal. Verifique el aceitepara engranajes de latransrnisbncada30 horasde Vayaa un Centrode ServicioSearsautorizado paraque le carnbienel funcionarniento o cadavez queadviertauna perdidade aceite.Si se hacefuncionar la cultivadora cuandoel nivelde aceitede la transrnisbn aceitedel engranaje de la transrnisi6n o paraprograrnar u n servicio,...
- Page 63 CAMBIO DE CORREA Retireel resortede extensi6ndel soporteinterrnedio. V ea la Figura29. Se recorniendausarun par de pinzasde puntade Si es necesarioreernplazar l a correade transrnisi6n o lascorreasde aguja paraagarrarel resorteper el extremeque enganchasobre barrenas, c onvienereernplazar a rnbasal rnisrnotiernpo.UseQnicarnen- el bastidor.Sirnplernente, t6rneloy tirealej_.ndolo del bastidor, te correasautorizadas per el fabricante, y a quelas correasgen_ricas luego haciaarribaaflojandola tensi6ndel resorte.
- Page 64 Saquelos pernoshexagonales que aseguranla poleade transrni- Retiro/Instalaci6n de un conjunto de dientes si6n, luegosaquela poleay lasdos correas.Vea la Figura31. Retirelascubiertasde losextrernosy losprotectores iaterales dei protectorde losdientessacandolas tres tuercasrnariposaque Io sujetana cadalade. (V=hada afuera) ..etire el p erno ..Saque la polea Unconjuntode dientesconstade un conjuntode dientes _as ¢orreas hexagonal...
- Page 65 Nuncaalrnacenela cultivadoraconcombustibleen el tanqueen un espaciocerradoo en _.reas pocoventiladasdonde los gasesdel combustiblepuedanNegar a una Narna expuesta,una chispao un pilotocornoel que tienenalgunoshornos,calentadores de agua, secadoresde ropao algQnartefactoa gas. PREPARACI6N DE LA CULTIVADORA Si la cultivadorano se va a usarduranteun perfodoprolongado, Nuncadeje el motorsin vigilanciarnientras est,. en funcionarniento. prep_.rela parael alrnacenarniento de la siguienteforrna: Lirnpiela cultivadoray el motor.
-
Page 66: Need More Help
Antesde realizar c ualquier t ipode mantenimiento o servicio, d esenganche t odosloscontroles y detenga el motor.Esperea que sedetengan completamente t odaslaspiezasm6viles. D esconecte e l cablede la bujiay p6ngaJo haciendo masacontrael motorparaevitarqueseenciendaaccidentalmente. Utilicesiempre anteojos de seguridad durantelaoperaci6n o mientras realizaajustes o reparaciones. El motorno arranca Reconecteel cable. - Page 69 (Esta p_.ginase aplica s61oen EE.UU. y Canada.). Sears Brands Management Corporation, el Consejo de Recursos Ambientales de California (CARB) y la Agencia de Protecci6n Ambiental de los Estados Unidos (EPA) Declaraci6n de garantia del sistema de control de emisiones (derechos y obligaciones de la garanfia de defectos del propi= etario)
- Page 70 Busque el periodo de duraci6n de emisiones importantes yla informaci6n de clasificaci6n de aire en la etiqueta de emisiones de su motor Los motores cuyo cumpiimiento con los estAndares de emisi6n Tier 2 de la Comisi6n de Recursos Ambientales de California (CARB) est6 certificado deben exhibir la informaci6n relacionada con el periodo de duraci6n de ias emisiones y la clasificaci6n de aire.
- Page 71 Felicitaciones por haber realizado una adquisici6n inteligente. El producto Craftsman® que ha adquirido esta diseSado y fabricado para brindar muchos aSos de funcionamiento confiable. Pero como todos los productos a veces puede requerir de reparaciones. Es en ese momento cuando...
- Page 72 Your Home For troubleshooting, product manuals and expert advice: managernylife www.managemylife.com For repair - in your home - of all major brand appliances, lawn and garden equipment, or heating and cooling systems, no matter who made it, no matter who sold it! For the replacement parts, accessories owner's manuals that you need to do-it-yourself.
Need help?
Do you have a question about the 247.29930 and is the answer not in the manual?
Questions and answers