Table of Contents
Advertisement
Available languages
Available languages
Quick Links
Before connecting, operating or adjusting this product, please read the instructions completely.
Antes del uso, lea completamente estas instrucciones.
For USA and Puerto Rico assistance, please call: 1-800-211-PANA(7262) or,
contact us via the web at: http://www.panasonic.com/contactinfo
For Canadian assistance, please call: 1-800-561-5505 or visit us at www.panasonic.ca
P
Instrucciones de funcionamiento
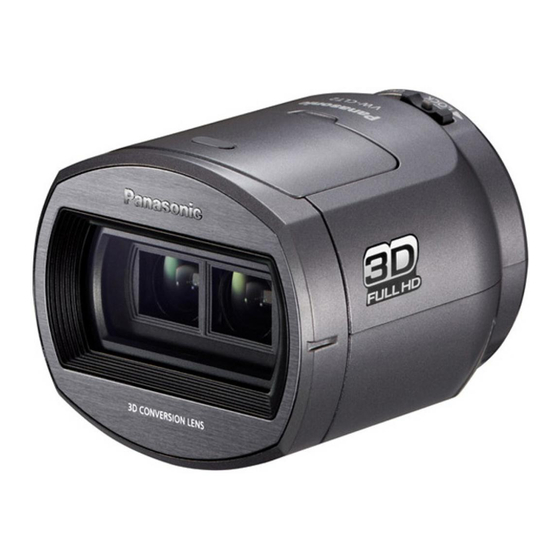
3D Conversion Lens
Owner's Manual
VW-CLT2
Model No.
VQT4A75
Advertisement
Chapters
Table of Contents

Related Manuals for Panasonic VW-CLT2


Summary of Contents for Panasonic VW-CLT2
- Page 1 Before connecting, operating or adjusting this product, please read the instructions completely. Antes del uso, lea completamente estas instrucciones. For USA and Puerto Rico assistance, please call: 1-800-211-PANA(7262) or, contact us via the web at: http://www.panasonic.com/contactinfo For Canadian assistance, please call: 1-800-561-5505 or visit us at www.panasonic.ca VQT4A75...
-
Page 2: Table Of Contents
Countries) ...............28 required. ≥ Panasonic will not be liable for any damages sustained directly or indirectly from the use or failure of this product. ≥ Panasonic will also not be liable for any losses of data caused by this product. VQT4A75(ENG) -
Page 3: To Avoid Malfunctions
English To Avoid Malfunctions ∫ About Condensation (When the 3D ∫ About the Handling of the 3D Conversion Conversion Lens is Fogged Up) Lens ≥ Condensation occurs when there is a difference in the ≥ Sand or dust will cause malfunctions in the 3D temperature or humidity as in the following cases. -
Page 4: Cautions For Use
Cautions for use Do not drop or strike the 3D Conversion Lens when Do not use or store the 3D Conversion Lens in the carrying it. following places since it may cause a failure or Also, be careful not to apply strong force to the 3D malfunction. - Page 5 ∫ About 3D recording Do not allow any insecticide or volatile substance to get on the 3D Conversion Lens if they are used in Attach the 3D Conversion Lens securely. It must not the surrounding area. be used with an insecure attachment. ≥...
- Page 6 ∫ About 3D viewing Anyone who is hyper sensitive to light, suffers from heart disease or is otherwise unwell should avoid viewing 3D video. ≥ Doing so may have an adverse affect on such medical conditions. If you feel tired, uncomfortable or otherwise strange when viewing 3D video, stop viewing at once.
-
Page 7: Accessories
Accessories Check the accessories before using the lens. Keep the accessories out of reach of children to prevent swallowing. Product numbers correct as of Dec. 2011. These may be subject to change. VFC4768 Lens storage bag VYK5F47 Lens front cap VGQ0X77 Lens rear cap (for the 3D Conversion Lens) -
Page 8: Names And Functions Of Main Parts
Names and Functions of Main Parts Protective panel (front) Lens Adjustment dial cover Protective panel (rear) Camera body attachment part (convex) VQT4A75(ENG) - Page 9 Vertical position adjustment dial [ Horizontal image position adjustment dial [ Attachment lever (upper) Lock button 10 Attachment lever (lower) Lens front cap 11 Horizontal line for adjustment ≥ Use to adjust the lens attachment position. (l 15) Step up ring 12 Attachment screw (ENG)VQT4A75...
-
Page 10: Attaching/Detaching The Lens To/From The Video Camera
Attaching/Detaching the Lens to/from the video camera ≥ To attach the 3D Conversion Lens to the video camera with a filter diameter of 46 mm, a supplied step up ring is required. Rotate the lens rear cap (for the 3D Conversion Lens) in the direction indicated by the arrow. - Page 11 Match the position of the convex C with the concave D in the video camera. ≥ Attach with the adjustment dial cover E of the 3D Conversion Lens facing upwards. ≥ You cannot attach the 3D Conversion Lens together with the lens hood or a filter etc.
- Page 12 Slide the attachment lever of the 3D Conversion Lens to LOCK while holding down the lock button of the attachment lever. ≥ Slide the upper and lower attachment levers while LOCK LOCK UNLOCK UNLOCK pressing them down with your fingers. ∫...
- Page 13 (For the video camera with a filter diameter of 46 mm) Tighten the attachment screw of the step up ring by rotating to LOCK. ≥ Be careful not to overtighten. If the 3D Conversion Lens is overtightened, you may not be able to remove it from the video camera.
- Page 14 ∫ When not using the 3D Conversion ∫ Attaching/Detaching the lens front cap Lens Attach the lens rear cap to the 3D Conversion Lens and store it inside the supplied storage bag. ≥ If you use the lens front cap as a stand as shown below, you can leave the video camera with the 3D Conversion Lens attached.
-
Page 15: Adjust The Attachment Position And Record
Adjust the attachment position and record When using for the first time, be sure to adjust the 3D Conversion Lens attachment position. ≥ Change the mode to on the video camera Attach the 3D Conversion Lens to the Attach the lens front cap to the 3D video camera. - Page 16 Open the adjustment dial cover. Adjust the horizontal position by rotating the horizontal image position adjustment dial to place the black vertical line between the images at right and left in between the red guidelines A. ≥ When turning the adjustment dials, hold the video camera in the palm of your hand from the bottom and operate with the fingers of your other hand without applying too much force from above.
- Page 17 Adjust the vertical position by rotating Touch [ADJUST]. the vertical position adjustment dial so that the black horizontal line comes around the center of two red guidelines ≥ Difference in horizontal direction is characteristic of 3D video. ≥ If you cannot adjust the attachment position, perform the adjustment again after touching [RETURN] and checking the subject and the brightness.
- Page 18 ∫ Adjusting the vertical position of the Touch [EXIT] to end the adjustment. ≥ When re-attaching the 3D Conversion Lens or right and left 3D images after an impact etc., it is recommended that you When the lens attachment position is out of alignment perform the adjustment again.
- Page 19 ≥ Use of a tripod is recommended for recording with a will stop moving. In such a case, rotate the stable picture. adjustment dial in the opposite direction until the ≥ You will hear a sound when the video camera is adjustment screen starts moving.
-
Page 20: Specifications
Specifications ∫ 3D Conversion Lens Attachment screw diameter: ‰ 49 mmkP 0.75 mm Lens: When attached to a video camera with a filter diameter of 49 mm; F2.0 f = 1.64 mm (35 mm equivalent; 33 mm) Minimum recording distance; Approx. 1.2 m (3.9 feet) When attached to a video camera with a filter diameter of 46 mm;... - Page 21 Dimensions: (3D Conversion Lens) 73 mm (W)k59 mm (H)k82 mm (D) [2.87 q (W)k2.32 q (H)k3.23 q (D)] [Without lens cap] (When attaching step up ring) 73 mm (W)k61 mm (H)k101 mm (D) [2.87 q (W)k2.40 q (H)k3.97 q (D)] [Without lens cap] Mass (Weight): (3D Conversion Lens) Approx.
-
Page 22: Limited Warranty (Only For U.s.a. And Puerto Rico)
Limited Warranty Coverage (For USA and Puerto Rico Only) If your product does not work properly because of a defect in materials or workmanship, Panasonic Consumer Electronics Company (referred to as “the warrantor”) will, for the length of the period indicated on the chart below, which starts with the date of original purchase (“warranty period”), at its option either (a) repair your product with... - Page 23 When shipping Lithium Ion batteries please visit our Web Site at www.panasonic.com/BatteryHandling as Panasonic is committed to providing the most up to date information. Include a letter detailing the complaint, a return address and provide a daytime phone number where you can be reached.
- Page 24 Obtain Product Information and Operating Assistance; locate your nearest Dealer or Service Center; purchase Parts and Accessories; or make Customer Service and Literature requests by visiting our Web Site at: http://www.panasonic.com/help or, contact us via the web at: http://www.panasonic.com/contactinfo You may also contact us directly at:...
- Page 25 Accessory Purchases (United States and Puerto Rico) Purchase Parts, Accessories and Instruction Books online for all Panasonic Products by visiting our Web Site http://www.pstc.panasonic.com Or, send your request by E-mail to: npcparts@us.panasonic.com You may also contact us directly at: 1-800-332-5368 (Phone) 1-800-237-9080 (Fax Only)
-
Page 26: Warranty (For Canadian Customers)
(b) replace it with a new or a refurbished equivalent value product, or (c) refund your purchase price. The decision to repair, replace or refund will be made by Panasonic Canada Inc. Camcorder Accessory 3D Lens - One (1) year, parts and labour... - Page 27 INCLUDING ANY IMPLIED WARRANTIES OF MERCHANTABILITY AND FITNESS FOR A PARTICULAR PURPOSE. IN NO EVENT WILL PANASONIC CANADA INC. BE LIABLE FOR ANY SPECIAL, INDIRECT OR CONSEQUENTIAL DAMAGES RESULTING FROM THE USE OF THIS PRODUCT OR ARISING OUT OF ANY BREACH OF ANY EXPRESS OR IMPLIED WARRANTY.
-
Page 28: Useful Information (Only For Latin American Countries)
Service Center; buy spare parts and accessories by our web site to Latin American: http://www.lar.panasonic.com Also you may contact us directly by our Contact Center: Panama 800-PANA (800-7262) Colombia 01-8000-94PANA (01-8000-947262) Ecuador 1800-PANASONIC (1800-726276) Costa Rica 800-PANA737 (800-7262737) El Salvador 800-PANA (800-7262) Guatemala 1-801-811-PANA (1-801-811-7262) Chile... - Page 29 Mexico Service To obtain information in the Republic of Mexico contact us at: email: atencion.clientes@mx.panasonic.com Or you may contact us in the next following phones numbers: 01800-VIP-PANA (01800-847-7262) - Interior (55) 5000-1200 - Mexico D.F. and Metropolitan Area (ENG)VQT4A75...
-
Page 30: Antes De Usar
≥ Para ver un video en 3D, se requiere un televisor compatible con 3D. ≥ Panasonic no se hará responsable por los daños sufridos directa o indirectamente del uso o falla de este producto. ≥ Panasonic tampoco se hará responsable por las pérdidas de datos causadas por este producto. -
Page 31: Para Evitar Fallas
Español Para evitar fallas ∫ Acerca de la condensación (Cuando la lente ∫ Acerca de la manipulación de la lente de de conversión 3D está empañada) conversión 3D ≥ La condensación ocurre cuando hay una diferencia ≥ La arena o polvo causarán fallas en la lente de de temperatura o humedad en los siguientes casos. -
Page 32: Precauciones De Uso
Precauciones de uso No golpee ni deje caer la lente de conversión 3D No utilice o almacene las lentes de conversión 3D mientras la transporta. en los siguientes lugares ya que pueden provocar También, tenga cuidado de no aplicar demasiada una falla o un funcionamiento defectuoso. - Page 33 ∫ Acerca de la grabación en 3D No permita que ningún insecticida o sustancia volátil entre en la lente de conversión 3D si se usan Coloque las lentes de conversión en 3D de forma en un área del alrededor. segura. No se deben usar con un accesorio no ≥...
- Page 34 ≥ Se recomienda utilizar un trípode. 3D. Corrija su visión adecuadamente antes de mirar el video grabado en 3D. ∫ Acerca de la visualización de 3D ≥ Puede cambiar el ajuste de 3D de su televisor o el Cualquier persona muy sensible a la luz, que sufra ajuste de salida de 3D de la videocámara a 2D.
-
Page 35: Accesorios
Accesorios Revise los accesorios antes de usar esta lente. Guarde los accesorios fuera del alcance de los niños para evitar que se los traguen. Referencias vigentes desde diciembre de 2011. Pueden sufrir modificaciones. VFC4768 Bolsa de almacenamiento de las lentes VYK5F47 Tapa delantera de las lentes VGQ0X77... -
Page 36: Nombres Y Funciones De Los Principales Componentes
Nombres y funciones de los principales componentes Panel protector (parte delantera) Objetivo Tapa del disco de ajuste Panel protector (parte trasera) Pieza del accesorio del cuerpo de la cámara (parte convexa) VQT4A75(LSP) - Page 37 Disco de ajuste de posición vertical [ Disco de ajuste de posición de imagen horizontal [ Palanca del accesorio (superior) Botón de traba 10 Palanca del accesorio (inferior) Tapa delantera de las lentes 11 Línea horizontal para el ajuste ≥ Use para ajustar la posición del accesorio de la lente. (l 43) Anillo de aumento 12 Tornillo de sujeción...
-
Page 38: Colocar/Extraer La Lente En/De La Videocámara
Colocar/extraer la lente en/de la videocámara ≥ Para colocar la lente de conversión 3D en la videocámara con un diámetro de filtro de 46 mm, se requiere un anillo de aumento suministrado. Gire la tapa trasera de la lente (para las lentes de conversión 3D) en la dirección que indica la flecha. - Page 39 Coincida la posición del ahuecado C con la parte cóncava D en la videocámara. ≥ Coloque con la tapa del disco de ajuste E de las lentes de conversión 3D mirando hacia arriba. ≥ No puede colocar las lentes de conversión 3D junto con la visera o un filtro, etc.
- Page 40 Para colocar, deslice la palanca del accesorio de la lente de conversión 3D hacia LOCK mientras presiona el botón de bloqueo de la palanca del accesorio. ≥ Deslice las palancas del accesorio inferior y superior LOCK LOCK UNLOCK UNLOCK mientras las presiona con sus dedos. ∫...
- Page 41 (Para la videocámara con un diámetro de filtro de 46 mm) Apriete el tornillo de sujeción del anillo de aumento al girar hacia LOCK. ≥ Tenga cuidado de no apretar demasiado. Si se aprietan demasiado las lentes de conversión 3D, posiblemente no se pueda retirarlas de la videocámara.
- Page 42 ∫ Colocación/extracción de la tapa ∫ Cuando no se usa la lente de delantera de las lentes conversión 3D Coloque la tapa trasera de la lente en la lente de conversión 3D y almacénela dentro de la bolsa de almacenamiento suministrada.
-
Page 43: Ajuste La Posición De Sujeción Y Grabe
Ajuste la posición de sujeción y grabe Al usar por primera vez, asegúrese de ajustar la posición del accesorio de las lentes de conversión 3D. ≥ Cambie el modo a en la videocámara Coloque las lentes de conversión 3D en Coloque la tapa delantera de las lentes la videocámara. - Page 44 Abra la tapa del disco de ajuste. Ajuste la posición horizontal girando el disco de ajuste de posición de imagen horizontal para colocar la línea vertical negra entre las imágenes a la derecha e izquierda entre las líneas de guía rojas A. ≥...
- Page 45 Ajuste la posición vertical al girar el Toque [Ajuste]. disco de ajuste de manera que la línea horizontal negra pase por el centro de las dos líneas guía rojas A. ≥ La diferencia en la dirección horizontal es una característica del video en 3D. ≥...
- Page 46 ∫ Ajuste de la posición vertical de las Toque [SALIR] para finalizar el ajuste. ≥ Al volver a colocar las lentes de conversión 3D o imágenes en 3D izquierda y derecha luego de un impacto, etc. se recomienda volver a Cuando la posición del accesorio de la lente está...
- Page 47 ≥ Se recomienda usar un trípode para la grabación de ajuste parará de moverse. En ese caso, gire el disco una imagen estable. de ajuste en la dirección opuesta hasta que la ≥ Escuchará un sonido cuando la videocámara se mueva pantalla de ajuste comience a moverse.
-
Page 48: Especificaciones
Especificaciones ∫ Lentes de conversión 3D Diámetro del tornillo de sujeción: ‰ 49 mmkP 0,75 mm Objetivo: Cuando se coloca en una videocámara con un diámetro del filtro de 49 mm; F2.0 f = 1,64 mm (35 mm equivalente; 33 mm) Distancia de grabación mínima;... - Page 49 Dimensiones: (Lentes de conversión 3D) 73 mm (L)k59 mm (A)k82 mm (P) [2,87 q (L)k2,32 q (A)k3,23 q (P)] [Sin la tapa de la lente] (Al colocar el anillo de aumento) 73 mm (L)k61 mm (A)k101 mm (P) [2,87 q (L)k2,40 q (A)k3,97 q (P)] [Sin la tapa de la lente] Masa (Peso): (Lentes de conversión 3D) Aprox.
-
Page 50: Información Útil (Solo Para Los Países De América Latina)
Sitio Web para América Latina: http://www.lar.panasonic.com Además puede contactarnos directamente a través de nuestro Contact Center: Panamá 800-PANA (800-7262) Colombia 01-8000-94PANA (01-8000-947262) Ecuador 1800-PANASONIC (1800-726276) Costa Rica 800-PANA737 (800-7262737) El Salvador 800-PANA (800-7262) Guatemala 1-801-811-PANA (1-801-811-7262) Chile 800-390-602 Desde teléfono celular: 797-5000... - Page 51 Servicio en México Para obtener información en la República de México contáctenos a través de: email: atencion.clientes@mx.panasonic.com O a través de los siguientes números telefónicos: 01800-VIP-PANA (01800-847-7262) - Interior (55) 5000-1200 - México D.F. y Area Metropolitana (LSP)VQT4A75...
- Page 52 Panasonic Consumer Electronics Company, Division of Panasonic Corporation of North America One Panasonic Way, Secaucus, NJ 07094 Panasonic Canada Inc. 5770 Ambler Drive, Mississauga, Ontario, L4W 2T3 Panasonic Corporation 2011 Printed in Japan...
Need help?
Do you have a question about the VW-CLT2 and is the answer not in the manual?
Questions and answers