Table of Contents
Advertisement
Quick Links
Advertisement
Chapters
Table of Contents

Related Manuals for Epson POWERLITE 8300I EMP-8300


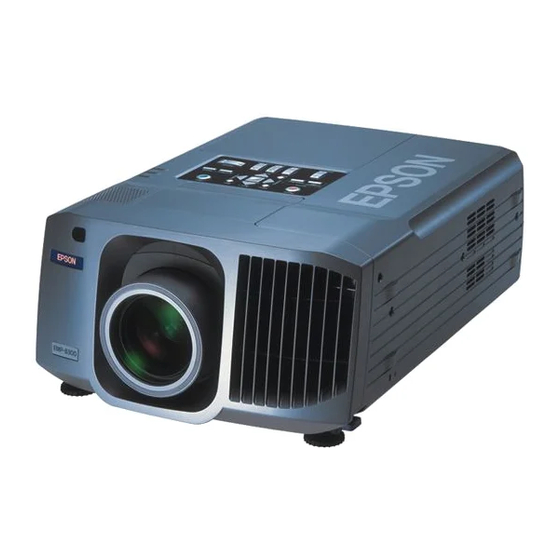
Summary of Contents for Epson POWERLITE 8300I EMP-8300
-
Page 2: Table Of Contents
Adding Markings and Comments during a Presentation ... 11 Adding Markings and Comments to the Image (EasyMarker) ..11 Using the Tools ...11 Using the Projector as a Whiteboard (EasyBoard) ... 14 Operating a Network PC (Remote Desktop) ...15 Remote Connection... 15 Setting EasyMP.net Options... - Page 3 Local Area Network (LAN) Environments ... 45 If No Local Area Network (LAN) is Available ... 49 Installing Additional Software ...50 Installation Procedure ... 50 Executing an Installed Program ... 51 When You Receive a Projector Error E-mail ...52 EasyMP .net Operation Guide...
-
Page 4: Projector Functions
Projector Functions The EasyMP.net installed in the projector provides the functions required for presentation. The following explains how to use each of these simple but powerful software functions. Displaying Motion Pictures and Video Images (EasyPlayer) ...4 • Selecting a File... 4 •... -
Page 5: Displaying Motion Pictures And Video Images (Easyplayer)
.mp3 Still image file .bmp, .jpg, .jpeg, .png When using your projector system for the first time, you must initialize EasyPlayer. Set it up by following the on-screen instructions. Once initialized, you need not repeat the initialization during the second and subsequent startup. -
Page 6: Playing Motion Pictures
EasyConfiguration. p.21 Playing Motion Pictures The projector can play, pause, rewind, or fast forward motion pictures in a similar way to a video cassette recorder (VCR). The "Rewind" and "Fast Forward" operations stop when their buttons are released Display Full-screen mode Full-screen display To display an image on the entire screen, click "Full screen". -
Page 7: Playing Sounds
Displaying Motion Pictures and Video Images (EasyPlayer) Playing Sounds Similar to motion pictures, MP3 and other sound files can be Paused, Previous, Rewound or Fast Forwarded. EasyPlayer displays the following image during sound play. Selects Full-screen display mode. Full-screen display To display an image on the entire screen, click "Full screen". -
Page 8: Adding A Comment To The Projected Still Images
Displaying Motion Pictures and Video Images (EasyPlayer) Adding a Comment to the Projected Still images A comment can be added by using the EasyMarker feature. Right-click the full screen image ( p.6) and select "EasyMarker". Start EasyMarker The image with comments can be saved. "Save Tool"... -
Page 9: Copying/Moving/Deleting/Executing A File (Easyfile)
Copying/Moving/Deleting/Executing a File (EasyFile) Use EasyFile to process a file. Click "EasyFile" on the Task Manager. Selecting a File To select a file from EasyFile, click "EasyMP.net", then "NetWork", then a folder to select the file location. The file list is switched from large icon display to small icon display and detailed display, each time is clicked (as shown below). -
Page 10: Displaying A Web Page (Easybrowser)
Displaying a Web Page (EasyBrowser) To display a Web page, use EasyBrowser. Click "EasyBrowser" on the Main Menu. EasyBrowser is a tab browser that can display multiple Web pages. During a presentation, you can display other Web pages in other windows and you can switch and project the required page one after the other. -
Page 11: Adding A Comment To The Displayed Page
Displaying a Web Page (EasyBrowser) Adding a Comment to the Displayed Page Click "Start EasyMarker" on the toolbar to add a marking or a comment to the currently displayed page. You can save the page with the markings and comments in an image file and use it later. See "Adding Markings and Comments during a Presentation"... -
Page 12: Adding Markings And Comments During A Presentation
Right-click from any position during full-screen display of a still image, and click function when you are playing motion pictures. When one of the Click the center button of the mouse, or press the [Effect] projector's button of the remote control. applications application is started Toolbar Click the required button on the toolbar to draw or erase. -
Page 13: Pen Tool
Adding Markings and Comments during a Presentation Pen Tool A line can be drawn by dragging the pencil pointer. The line thickness and colour can be selected from the properties. The initial value for the pen colour can be changed by using EasyConfiguration ( p.21). -
Page 14: Text Tool
Adding Markings and Comments during a Presentation Text Tool When you drag from a left upper position to a right lower position, a character input frame appears into which you can enter text. The size and colour of the text can be selected from the properties. Text Size To end the text input, click outside of the text frame. -
Page 15: Using The Projector As A Whiteboard (Easyboard)
EasyMarker closes.) Using the Projector as a Whiteboard (EasyBoard) EasyBoard allows you to use the projector as a whiteboard. When you start EasyBoard, the toolbar appears on a clear background and you can start drawing an image using the tools. -
Page 16: Operating A Network Pc (Remote Desktop)
A password for each user must be set. To set the password, click "Start" - "Control Panel" and click "User Account". Select the required user account and set the user password. Setup on the Projector (EasyMP.net) Use the following procedure to connect the EasyMP.net location to the server PC. - Page 17 Operating a Network PC (Remote Desktop) Click "New...". When the connection setup dialogue box appears, set the following items (see the table below) and click "OK" Item Registration name Enter a name that you can easily understand. Enter the name or an PC (running Windows XP OS).
- Page 18 EasyMP .net Operation Guide Operating a Network PC (Remote Desktop) When the connection is established, the "Windows Logon" screen is projected and you are ready to operate the Windows XP desktop PC from EasyMP.net. To terminate the remote connection, move the mouse pointer ( ) to the top of the screen and click...
-
Page 19: Setting Easymp.net Options (Easyconfiguration)
EasyConfiguration data without any access restrictions. change the password. p.36 Access procedure . Specify the access right to the "EveryOne" common folder. Specify the access right to EasyMenu for projector setup using the PC browser. the projector power and sounds using the PC browser. -
Page 20: Basic System Setup
Network Setup (LAN Setup) Naming the Projector "Network" - "Projector Name" The projector you use can be given a name so that it can be identified on the network. Projector Name The projector name can be up to 15 characters. -
Page 21: Establishing The Wireless Lan
"EasyConnection Mode" ( Screen. Establishing the Mail Notification Function "Network" - "Mail notification function" The following parameters must be set if a projector error is sent to the PC by mail using the Mail Notification function ( Mail notification function... -
Page 22: Functions Setup (Application Setup)
Network Screen Setup "Application" - "NetworkScreen" Specify whether to use Network Screen or not. When an image from a PC is projected by Network Screen, the use of a projector keyword (optional) is set for PC connection. NetworkScreen Select "Use" to use Network Screen. -
Page 23: Automatic Projection By Schedule (Timer Setup)
Enter the file path in EasyMP.net you wish to project (e.g. everyone/easymp.jpg). The application will start from EasyMP.net. Enter the file path of the network PC (e.g. //epson/ share/easymp.jpg). An application that can open the file is called from the PC. -
Page 24: Operations From The Pc (Via Network)
• Registering Projectors to be Monitored... 39 • Registration Using Auto Detection ... 40 • Registration Using the Projector's IP Address (Manual Registration) ... 41 • Editing the Manually Registered Projector List... 41 • Deleting a Projector from the List... 41 •... -
Page 25: Projecting Pc Images (Network Screen)
Projecting PC Images (Network Screen) If the projector is connected to a PC via a network, images stored in the PC can be projected after a simple setup process. This projector System Configuration Example EasyConnection Mode Network Screen allows you to easily connect a PC to the projector in Easy Connection mode. -
Page 26: Connecting To The Projector
• The DOS prompt cannot be projected in full-screen mode. Connecting to the Projector Start EMP NS Connection in Windows and connect the PC to the projector. Mount the wireless LAN card on the PC before starting EMP NS Connection. The card will not be recognized if it is mounted after EMP NS Connection has been started. - Page 27 PC to multiple projectors. Up to four (4) projectors can be selected to project an image from one PC. • Once you have connected a projector or projectors to a PC, you cannot add another projector. "...
-
Page 28: If The Connected Projector Is Not Displayed
The projector keyword is changed when you turn the projector power off and turn it on again or when you remove the wireless LAN card from the slot and insert it again. When you connect a projector to a PC, always check the projector keyword on the connection standby screen of the projector and enter it in the "Keyword"... - Page 29 "IP address" box and click "Search". The projector name with specified IP address is displayed in the "Registered Projectors" field. To search for another projector, repeat Step 5. Select the projector you want to connect to, and click "Connect".
-
Page 30: Projector Connection By Creating A Projector Group
The projector name can be displayed each time EMS NS Connection is started if a group has been created and the projector has been registered in the group. If not registered in the group, the projector name will not be displayed the next time EMS NS Connection is started. -
Page 31: Projector Connection Using A Group
If you with to register another projector, repeat Step 6. Up to 16 projectors can be registered in a single group. To delete a projector from its list, select the projector name and click "Delete". Click "OK". -
Page 32: Exporting And Importing A Group
The information of a group can be saved (or exported) in a file, and it can be used on multiple PCs. When you use an exported group information file, you can connect your PC to a projector without searching for a projector if you have changed the PC. -
Page 33: Importing A Group
Importing a Group While you are creating or editing a group, you cannot import. PROCEDURE Select "Start"- "Program" (or "All Programs")- "EPSON Projector"-"EMP NS Connection" to start in this order EMP NS Connection. Click "Extension". Check "Use IP-specified connection" and "Use group list", and click "Advance". -
Page 34: Using The Toolbar
Using the Toolbar The projector is usually controlled by the remote control. However, if EMS NS Connection is used, the projector can be controlled by using the toolbar on the desktop of the connected PC. Use the remote control to set up and operate the projector. -
Page 35: E-Zoom
Switches the PC input source between sources [DV1", "Computer1] or "Computer2" ports on the projector rear panel or to the image of the connected PC. This function is the same as the "Computer/DVI" button on the projector control panel. "Turning the Power On and Projecting User’s Guide. -
Page 36: Disconnecting The Network Connection
Disconnecting the Network Connection There are two ways to disconnect the network connection between the projector and the PC. You can either disconnect the PC from the projector or disconnect the projector from the PC. Disconnecting the Network Connection from the PC Click "Disconnect"... -
Page 37: Projector Setup From The Pc (Easyweb)
Projector Setup from the PC (EasyWeb) A projector can be set up and operated using a Web browser through a network connection. This projector Volume level down System Configuration Example Only the administrator or a user with sufficient access rights can access the Change Setup page using a Web browser. -
Page 38: Easyconfiguration
"EasyRemote" to set up or operate the projector. EasyConfiguration EasyConfiguration allows you to operate the projector using a Web browser in a similar way as EasyConfiguration in EasyMP.net. For details of the settings that can be made, see the "Setting EasyMP.net Options (EasyConfiguration)"... -
Page 39: Easymenu
Projector Setup from the PC (EasyWeb) EasyMenu EasyMenu allows you to set up the system environment using a Web browser in the same way as the configuration menus of the projector. For a description of the setup elements. p.74 "Using the Configuration Menu Functions"... -
Page 40: Integrated Management For Projector Status Check And Control (Emp Monitor)
EMP Monitor. Turn projector B PROCEDURE Select "Start" - "Program" (or "All Programs") - "EPSON Projector" - "EMP Monitor" in this order to start EMP Monitor. Click "Register projector". " option. EasyMP .net Operation Guide Click to add a projector to be monitored. -
Page 41: Registration Using Auto Detection
Select the projector(s) you wish to register, and click "Add". Multiple projectors can be selected simultaneously. If the projector you want to register is not displayed in the list, use "Registration Using the Projector's IP Address (Manual Registration)" ( p.41). -
Page 42: Registration Using The Projector's Ip Address (Manual Registration)
"IP address" field, and click "Confirm". When a projector with the same IP addres is found, the projector name is displayed. If this isn't the projector you wanted to register, enter the correct IP address and click "Confirm". -
Page 43: Emp Monitor Main Screen
To terminate the projector operation, click the of the screen. Button Functions A projector selected from the projector list can be turned on or off and its source can be switched. Projectors can also be controlled from the "Tools" menu. -
Page 44: Displaying Detailed Information
Integrated Management for Projector Status Check and Control (EMP Monitor) Error information: If the projector has failed, its status is identified by the following icons. Lamp Replace the lamp with a new one. replacement Lamp" in "Replacing Consumables" in the User’s Guide. -
Page 45: Appendices
• If No Local Area Network (LAN) is Available ... 49 • Example 5: Connection Using Wireless Adhoc Mode LAN Only ... 49 Installing Additional Software...50 • Installation Procedure ... 50 • Executing an Installed Program ... 51 When You Receive a Projector Error E-mail ...52... -
Page 46: Examples Network Connection Configurations
EasyFile. You do not need to bring the PC to the presentation room. • The status of the projector can be monitored from a PC connected to the LAN. If multiple projectors have been installed, they can all be monitored from a network PC. You do not need to go to the room where the projector is installed. -
Page 47: Example 2: Connection Using A Wireless Lan Access Point
Access Point Network Environment • A Wireless LAN is in use or the projector is fixed to the ceiling and it is difficult to connect a network cable to it. This is also the case when it will be difficult to use the wireless LAN in the future. -
Page 48: Example 3: Connection Using A Wireless Lan Access Point And Network Cables
They do not need to bring their computer to the presentation room. • The status of the projector can be monitored from a PC connected to the LAN. If multiple projectors have been installed, they can all be monitored from a network PC. You do not need to go to the DHCP room where the projector is installed. -
Page 49: Example 4: Connection Using Wireless Adhoc Mode And Network Cables
LAN. If multiple projectors have been installed, they can all DHCP be monitored as an integrated management system from the network PC. You do not need to go to the room where the projector is installed. Local Area Network Notes •... -
Page 50: If No Local Area Network (Lan) Is Available
You do not need to change the PC connection for each presenter. Notes • As the projector is not connected to a network, it can only project files from a computer with a Wireless LAN card. Setting Up a Wireless LAN Connection... -
Page 51: Installing Additional Software
CAUTION When you install and use software applications in the projector, you must abide by the software licence agreement. EPSON cannot be held responsible for problems caused by the breaching of software licence agreements on your part. "Software Extension" does not include licenses for additional application software. -
Page 52: Executing An Installed Program
Installing Additional Software Restart the projector when the PowerPoint installation has finished. To install Adobe Acrobat Reader, you must check both "Application Installer" and "Adobe Acrobat Reader" boxes during application selection in Step 2. The "Application Installation" function is required for the installation of certain applications. -
Page 53: When You Receive A Projector Error E-Mail
When You Receive a Projector Error E-mail The e-mail heading or subject will be "EPSON Projector". The following information is contained in the e-mail text. Line 1: The name of the projector which is not functioning properly. Line 2: The... - Page 54 SEIKO EPSON CORPORATION operating and maintenance instructions. SEIKO EPSON CORPORATION shall not be liable for any damages or problems arising from the use of any optional or consumable products other than those designated as Original EPSON Products or EPSON Approved Products by SEIKO EPSON CORPORATION.
Need help?
Do you have a question about the POWERLITE 8300I EMP-8300 and is the answer not in the manual?
Questions and answers