Table of Contents
Advertisement
Available languages
Available languages
Quick Links
A
E
s an
NERGY
for energy efficiency.
CONTENTS
IMPORTANT INFORMATION ................................................ 2
Supplied Accessories ............................................................. 3
Before Operating Your TV/ VCR Combination ....................... 3
Antenna Connections ............................................................. 4
Description Of Controls .......................................................... 5
Location Of Control's Buttons (Remote Control) .................... 6
Watching A TV Program ........................................................ 7~11
7 EZ SETUP during First Use ......................................... 8
8 WAKE-UP TIMER ........................................................ 8
9 SLEEP TIMER ............................................................. 9
! VIDEO ADJUST ........................................................... 9
CLOSED CAPTION ..................................................... 9~10
# PRESETTING THE CHANNELS ................................. 10~11
EZ SETUP ................................................................... 10
CH SETTING ............................................................... 11
Tamper Proof Function .......................................................... 12
Setting The Clock ................................................................... 12~13
1 AUTOMATIC CLOCK SETTING .................................. 12
2 MANUAL CLOCK SETTING ........................................ 13
01 13VT-CR10[E].pm65e
®
S
P
TAR
artner, SHARP has determined that this product meets the
®
E
S
U.S.
NERGY
TAR
is a
PAGE
1
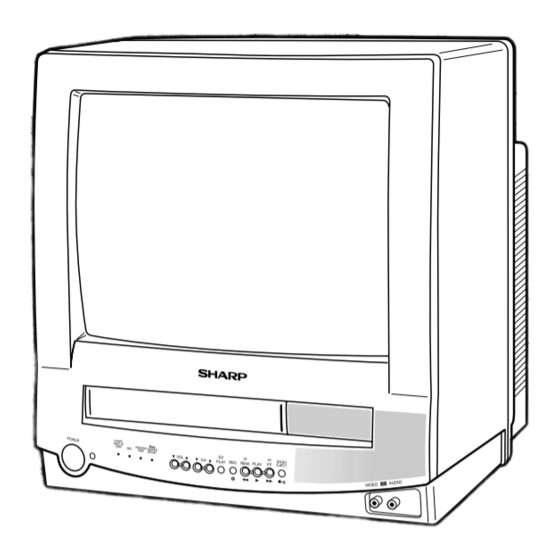
TV • VCR COMBINATION
13VT-CR10
L OPERATION MANUAL L
registered trademark.
Playing A Cassette ................................................................. 14~16
INSERTING A VIDEO CASSETTE
EJECTING THE CASSETTE TAPE
PLAYBACK
AUTOMATIC TRACKING CONTROL SYSTEM
FULLY AUTOMATIC PLAYBACK FUNCTION
STILL PICTURE
DPSS (DIGITAL PROGRAM SEARCH SYSTEM)
Recording A TV Program ....................................................... 17
RECORDING A TV PROGRAM
Recording With The Timer ..................................................... 18~19
Tape Dubbing ........................................................................ 20
Pre-Service Call Checklist ..................................................... 21
Specifications ......................................................................... 22
Limited Warranty .................................................................... 24
15/5/01, 7:23 pm
MODEL
HIGH QUALITY
®
E
S
NERGY
TAR
guidelines
PAGE
7456 PE
Advertisement
Chapters
Table of Contents

Related Manuals for Sharp 13VT-CR10


Summary of Contents for Sharp 13VT-CR10
-
Page 1: Table Of Contents
TV • VCR COMBINATION MODEL 13VT-CR10 L OPERATION MANUAL L HIGH QUALITY ® ® s an NERGY artner, SHARP has determined that this product meets the NERGY guidelines ® U.S. for energy efficiency. NERGY is a registered trademark. CONTENTS PAGE PAGE IMPORTANT INFORMATION .......... -
Page 2: Important Information
Welcome to the SHARP Family. We are pleased that you are now the owner of a SHARP TV/ VCR Combination – built for outstanding quality, reliability and performance. Every SHARP TV/ VCR Combination set is properly tuned and adjusted for a proper color picture and sound, and has passed through the most stringent quality control tests at the factory. -
Page 3: Supplied Accessories
Supplied Accessories Infrared Remote Control/Part Number Size AA RRMCG1330PESA Dry Batteries Before Operating Your TV/ VCR Combination Location • For normal operation, your TV should be located in an area of the room where cool adequate ventilation is provided. Do not place the back of the television set in a place where free airflow will be restricted. -
Page 4: Antenna Connections
Cable TV Line splitter (not supplied) Cable TV converter/ descrambler (not supplied) Note: • Consult your SHARP Dealer or Service Center for the type of splitter, RF switch or combiner that might be required. 04 13VT-CR10[E].pm65e 15/5/01, 7:23 pm... -
Page 5: Description Of Controls
Description Of Controls FRONT POWER POWER/ WAKE-UP PROGRAM TIMER TAMPER TIMER PROOF POWER button SENSOR AREA FOR REMOTE CONTROL VIDEO/AUDIO Input Jacks POWER/ WAKE-UP PROGRAM TAMPER TIMER TIMER PROOF TAMPER PROOF indicator STOP/EJECT PLAY VOLUME CHANNEL button button UP/DOWN UP/DOWN PROGRAM TIMER indicator PLAY button... -
Page 6: Location Of Control's Buttons (Remote Control)
Location Of Control’s Buttons (Remote Control) Infrared Transmitter Window INPUT DISPLAY TV/VIDEO Select • Used to change the On Screen Display. POWER ON/OFF MUTE Press Mutes sound. CHANNEL SELECT POWER Press again Restores sound INPUT DISPLAY MUTE to previous level. FLASHBACK Press the MUTE button to enter Returns to previously viewed... -
Page 7: Watching A Tv Program
Watching A TV Program 1 POWER DISPLAY • Press the POWER button to turn on the TV. (The POWER indicator will be lit in RED.) Press Once* • Time and Date Sound will start instantly and picture will appear 5 to 10 •... -
Page 8: Ez Setup During First Use
Watching A TV Program (Continued) 7 EZ SETUP during First Use 8 WAKE-UP TIMER L Setting the Wake-up Timer automatically turns on the When you turn on the TV for the first time, it will automatically TV or VCR at a preset time. memorize the broadcast channels. -
Page 9: Sleep Timer
• Closed Caption broadcast can be viewed in two modes: ! VIDEO ADJUST CAPTION and TEXT. For each mode, two channels are (PICTURE, TINT, COLOR, BRIGHT, SHARP, FAVORITE COLOR) available, CH1 and CH2: (1) Select “VIDEO ADJUST” The [CAPTION] mode subscripts dialogues and... -
Page 10: Presetting The Channels
Watching A TV Program (Continued) (1) Press Remote’s M E N U DPSS MENU button to access T I M E R +/– button V I D E O A D J U S T the MENU screen. TIMER – PROG ON/OFF C L O S E D C A P T I O N... -
Page 11: Ez Setup
Watching A TV Program (Continued) 3 Adding weak or additional channels from TV memory. L CH SETTING If EZ SETUP does not memorize all the channels in your (1) Select “CH MEMORY” region, follow the instructions below to manually memorize C H M E M O R Y from the CH SETTING the channel. -
Page 12: Tamper Proof Function
Tamper Proof Function L Operation Mode Lock • If the TAMPER PROOF Lock is on during operation of this product, the current operation mode will not change until the TAMPER PROOF Lock is released, even if another POWER INPUT DISPLAY MUTE operation button is pressed. -
Page 13: Manual Clock Setting
Setting The Clock (Continued) (5) Press the + or – button to C L O C K S E T select the “YEAR”, then PLAY A U T O C L O C K O F F press the SET button. The E D S C H A U T O “... -
Page 14: Playing A Cassette
Playing A Cassette L AUTO REPEAT L ENERGY SAVE This feature is used to repeatedly play the same cassette This feature lets you lower the power consumption of your tape. You can select the function that rewinds and plays TV set which in turn saves you money and minimizes the back the tape from the beginning automatically when the impact on the environment. - Page 15 Playing A Cassette (Continued) • L AUTOMATIC TRACKING CONTROL SYSTEM • FLASHBACK TAPE SPEED • • • The Automatic Tracking Control System adjusts the tracking button COUNTER TAPE TAMPER RESET SPEED PROOF to its optimum setting when playback begins after inserting TAMPER PLAY button PROOF button...
-
Page 16: Fast Forward And Rewind
Playing A Cassette (Continued) (1) Load a tape containing index signals into the VCR. L STILL PICTURE (2) Select the index number of the desired program using the (1) Press the PAUSE/STILL button on the Remote Control during DPSS e or d button on the Remote Control. With each press Playback mode. -
Page 17: Recording A Tv Program
Recording A TV Program L RECORDING SPEEDS Your VCR enables you to select recording tape speed (SP, EP). Although recording time is shorter, SP provides a better picture. Select the tape speed that best suits your needs. The table below shows the recording speed and recording time for the three most popular cassettes. MODE CASSETTE (Standard Play) -
Page 18: Recording With The Timer
Recording With The Timer (5) Press the + or – button on R E C R E S E R V A T I O N - 1 COUNTER TAPE TAMPER RESET SPEED PROOF the Remote Control to TAPE M O D E F R I select the starting time SPEED... -
Page 19: 1 5 ( S A T )
Recording With The Timer (Continued) L To confirm the program content, press the CONFIRM L Notes on the Timer Recording button on the Remote Control. • To correct any erroneous data entry made during program timer setting work: R E C T I M E R P R O G R A M (1) Press the RETURN button on the Remote Control to M O D E S T A R T... -
Page 20: Tape Dubbing
• It is the intent of SHARP that this product be used in full compliance with the copyright law of the United States and that prior permission be obtained from copyright owners whenever necessary. -
Page 21: Pre-Service Call Checklist
The heads may be contaminated with condensed moisture or the magnetic playback. coating of the video tape. (In this case, the heads need to be cleaned. Ask the retailer or a Sharp approved service center.) Cassette cannot be loaded. Make sure there is no other cassette inside. -
Page 22: Specifications
Specifications MODEL 13VT-CR10 Receiving System NTSC Reception Channels 2-13 ch 14-69 ch CATV 1-125 ch Channel Tuning 181-channel Reception PLL tuning system Antenna Input Impedance VHF/UHF 75 ohm Unbalanced Screen Size 13˝ Diagonally Measured Terminals Audio/Video input x 1 (Front x 1) Sound Output 1.0 W Power Source... - Page 23 Notes 23-24 13VT-CR10[E].pm65e 15/5/01, 7:25 pm...
-
Page 24: Limited Warranty
Sharp product or the loss of information. - Page 25 13VT-CR10 L MODE D’EMPLOI L HAUTE QUALITÉ ® n sa qualité de partenaire NERGY , SHARP a déterminé que ce produit répond aux prescriptions NERGY ® ® en matière d’utilisation efficace de l’énergie. NERGY est une marque déposée aux Etats-Unis.
-
Page 26: Informations Importantes
SHARP — fabriqué pour offrir une qualité, une fiabilité et un rendement remarquables. Chaque combiné télé-magnétoscope de SHARP a été correctement syntonisé et réglé afin d’assurer une image couleur et un son parfaits, et a subi à l’usine les tests de contrôle de qualité les plus stricts. Ce MODE D’EMPLOI vous permettra de régler l’image et la couleur selon vos goûts personnels. -
Page 27: Accessoires Fournis
Accessoires fournis Télécommande à infrarouges Piles sèches de Numéro de pièce : RRMCG1330PESA format AA Avant d’utiliser votre télé-magnétoscope Emplacement • Pour assurer son fonctionnement normal, votre téléviseur doit être placé dans un endroit bien aéré. Ne pas placer le dos du téléviseur dans un endroit où... -
Page 28: Connexions D'antenne
SORTIE ENTRÉE Convertisseur/ Décodeur de câblodiffusion (non fourni) Remarque : • Consulter un revendeur ou un Centre de service SHARP pour toute information sur le type de répartiteur, de commutateur RF ou de multiplexeur requis. 04 13VT-CR10[F].pm65e 18/5/01, 1:51 PM... -
Page 29: (Program Timer)
Description des commandes AVANT Touche POWER POWER/ WAKE-UP PROGRAM TIMER TAMPER TIMER PROOF d’alimentation (POWER) FENÊTRE DU CAPTEUR DE SIGNAUX DE LA TÉLÉCOMMANDE Prises d’entrée audio/vidéo (VIDEO/AUDIO IN) POWER/ WAKE-UP PROGRAM TAMPER TIMER TIMER PROOF Indicateur de Touches Touche verrouillage de d’augmentation/ Touche Touche... -
Page 30: Emplacement Des Touches De Commande
Emplacement des touches de commande (Télécommande) Location Of Control’s Buttons (Remote Control) Émetteur infrarouge de signal de la télécommande Affichage (DISPLAY) Entrée (INPUT) • Utilisée pour changer l’affichage Sélection TV/VIDEO sur écran. Alimentation marche/arrêt Mise en sourdine (MUTE) (POWER) Appuyer pour couper le son. Appuyer de nouveau pour le remettre POWER Sélection des canaux... -
Page 31: Pour Regarder Une Émission Télévisée
Pour regarder une émission télévisée 1 ALIMENTATION AFFICHAGE • Appuyer sur la touche d’alimentation POWER pour mettre le téléviseur sous tension. Appuyer • Heure et date (Le témoin d’alimentation POWER de couleur ROUGE une fois* • Numéro de canal s’illumine.) •... -
Page 32: Prérégl Auto Canal Au Cours De La Première Utilisation
Pour regarder une émission télévisée (suite) 8 MINUTEUR DE RÉVEIL PRÉRÉGL AUTO CANAL au cours de la première utilisation L Le réglage du minuteur de réveil commande la mise sous tension automatique du téléviseur ou du Lorsque le téléviseur est mis sous tension pour la première fois, magnétoscope à... -
Page 33: Minuterie De Mise Hors Tension
Pour regarder une émission télévisée (suite) (2) Appuyer sur la touche + R E G L A G E I M A G E ou – de la télécommande C O N T R A S T E pour sélectionner la T E I N T E PLAY C O U L E U R... -
Page 34: Préréglage Des Canaux
Pour regarder une émission télévisée (suite) (1) Appuyer sur la touche M E N U DPSS MENU de la télécom- Touches +/– +/– button M I N U T E U R R E G L A G E I M A G E TIMER mande pour accéder à... -
Page 35: Réglage Canal
Pour regarder une émission télévisée (suite) 3 Ajout de canaux faibles ou de canaux supplémentaires L RÉGLAGE CANAL Si PREREGL AUTO CANAL ne mémorise pas tous les à partir de la mémoire du téléviseur. canaux diffusés dans la région, suivre les instructions ci- (1) Sélectionner “MEMOIRE CA- M E M O I R E C A N A L dessous pour mémoriser manuellement les canaux voulus. -
Page 36: Verrouillage De Fonctionnement
Verrouillage de Fonctionnement L Verrouillage du mode de fonctionnement • Si la touche de verrouillage de fonctionnement TAMPER PROOF est enfoncée pendant l’utilisation de l’appareil, le mode de fonctionnement courant ne pourra pas être POWER modifié aussi longtemps que la touche de verrouillage INPUT DISPLAY MUTE... -
Page 37: Réglage Manuel De L'horloge
Réglage de l’horloge (suite) (5) Appuyer sur la touche + ou – H O R L O G E R E G L E E pour sélectionner l’ “ANNEE”, A U T O H O R L O G E A R R E T PLAY puis appuyer sur la touche SET. -
Page 38: Lecture D'une Cassette
Lecture d’une cassette L RÉPÉTITION AUTOMATIQUE L ÉCONOMIE D’ÉNERGIE Cette fonction permet de répéter la lecture de la même Cette fonctionnalité vous permet de réduire la cassette. Il y a deux modes de répétition au choix: l’un permet consommation de votre téléviseur et de réaliser ainsi des de rembobiner la cassette à... -
Page 39: Mise En Place D'une Cassette Vidéo
Lecture d’une cassette (suite) • L SYSTÈME DE CONTRÔLE AUTOMATIQUE DE • FLASHBACK • TAPE SPEED • Touche L’ALIGNEMENT button TAPE SPEED COUNTER TAPE TAMPER RESET SPEED PROOF • Le système de contrôle automatique de l’alignement règle TAMPER Touche PLAY button Touche PLAY l’alignement à... -
Page 40: (Program Timer)
Lecture d’une cassette (suite) (1) Insérer une cassette qui a des signaux d’index dans le L ARRÊT SUR IMAGE magnétoscope. (1) Appuyer sur la touche PAUSE/STILL de la télécommande en (2) Sélectionner le numéro du signal d’index en appuyant sur la mode de lecture. -
Page 41: Enregistrement D'une Émission Télévisée
Enregistrement d’une émission télévisée L VITESSES D’ENREGISTREMENT Ce magnétoscope vous permet de choisir la vitesse d’enregistrement (SP et EP). En temps normal, la vitesse SP apporte une meilleure qualité d’image, sa durée d’enregistrement par contre est plus courte. Choisir la vitesse qui convient le mieux aux besoins. Le tableau ci-dessous indique la vitesse et la durée d’enregistrement pour trois types de cassettes. -
Page 42: Enregistrement Avec Le Minuteur
Enregistrement avec le minuteur (5) Appuyer sur la touche + R E S E R V A T I O N E N R E G - 1 COUNTER TAPE TAMPER ou – de la télécommande RESET SPEED PROOF M O D E V E N TAPE Touche... -
Page 43: Start Start End End Recording Recording Recording Recording
Enregistrement avec le minuteur (suite) L Pour vérifier des données d’un programme, appuyer L Remarques sur l’enregistrement avec le minuteur sur la touche CONFIRM de la télécommande. • Fausses données entrées pendant la programmation : (1) Appuyer sur la touche RETURN de la télécommande pour E N R E G I S T R E M E N T S P R O G R A M M E S retourner à... -
Page 44: Duplication D'une Cassette
Le contraire risquerait d’endommager l’un ou l’autre des appareils. • SHARP entend que ce produit soit utilisé en stricte conformité avec les lois de copyright et qu’une autorisation préalable soit obtenue des détenteurs des droits d’auteur, le cas échéant. -
Page 45: Avant D'appeler Un Technicien
(Si c’est le cas, confier le nettoyage des têtes à votre revendeur ou à un centre de service Sharp agréé.) • Impossibilité de charger une cassette. • S’assurer qu’une autre cassette n’est pas déjà chargée. -
Page 46: Caractéristiques
Caractéristiques MODÈLE 13VT-CR10 Système de réception NTSC Canaux reçus ANTENNE Canaux 2-13 Canaux 14-69 CÂBLE Canaux 1-125 Syntonisation des chaînes Système de syntonisation PLL pour réception de 181 canaux Impédance d’entrée de l’antenne VHF/UHF 75 ohms non pondérés Taille de l’écran 13"... - Page 47 Remarques 23-24 13VT-CR10[F].pm65e 18/5/01, 1:57 PM...
-
Page 48: Garantie Limitée
Aux coûts d’installation, configuration et/ou programmation. Si un défaut de fabrication est décelé dans ce produit Sharp au cours de la période de la garantie, la réparation sous garantie est offerte à condition que le produit Sharp soit livré accompagné de la preuve d’achat et une copie de cette GARANTIE LIMITÉE à un centre agréé...
Need help?
Do you have a question about the 13VT-CR10 and is the answer not in the manual?
Questions and answers