Table of Contents
Advertisement
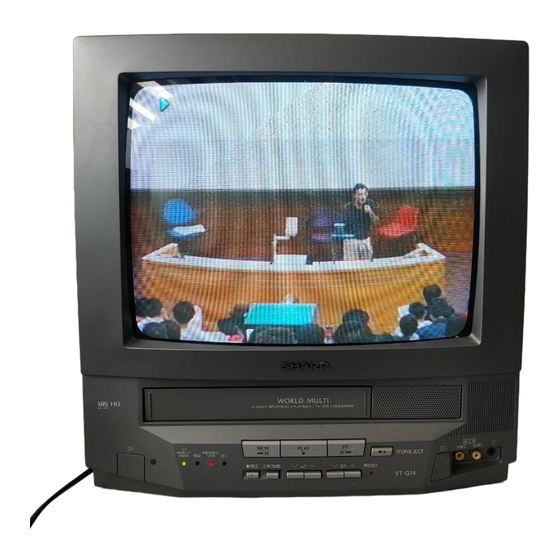
VT-G14
In the interests of user-safety (Required by safety regulations in some countries) the set should be restored to its
original condition and only parts identical to those specified should be used.
Ë Full Auto Search Tuning System
Ë On Screen Digital Channel/Sound Level/Tuning Display,
Control (Contrast, Colour, Brightness, Tint, Sharpness,
White temp) Symbol and Level
Ë Blue Back Off Timer
Ë 39 Key, Wireless Remote Control Unit
Ë Channel Skip
Ë High Speed and Double Speed Video Search System
» PAL/MESECAM : 3 times/7 times (SP/LP)
» NTSC : 3 times/5 times (SP/LP)
5 times/15 times (EP)
The component parts of this model are partially
different depending on their suffix symbols. Before
servicing the units, be sure to check the suffix
symbol on the model label that is applied on the
back of the unit.
Suffix "J" for Russia
The chassis in this receiver is partially hot. Use an isolation transformer between the line cord plug and power receptacle,
when servicing this chassis.
To prevent electric shock, do not remove cover.
No user — serviceable parts inside. Refer servicing to qualified service personnel.
SERVICE MANUAL
VT-G21
FEATURE
Example of suffix symbol:
VIDEO TV
RATING 110-240V(AUTO.) ~ 50/60 Hz
POWER CONSUMPTION
SERIAL NO. Jxxxxxxxxx
SHARP CORPORATION
CAUTION : DANGEROUS
VOLTAGE INSIDE
TO PREVENT ELECTRIC SHOCK, DO NOT
REMOVE COVER. NO USER-SERVICEABLE
PARTS INSIDE. REFER SERVICING TO
QUALIFIED SERVICE PERSONNEL.
WARNING
SHARP CORPORATION
TV/VCR COMBINATION
TELEVIDEO
Chassis No. VP-7
MODELS
Ë DPSS (Digital Program Search System)
Ë Quick Start Playback with Full Loading System
Ë Digital Automatic Tracking Control
Ë Automatic Playback Function
Ë AHC (Automatic Head Cleaning System)
Ë Sharp Super Picture
Ë 345 Times Hi-Speed FF/REW
MODEL
1
VT-G14
VT-G21
S11N9VT-G14//
VT-G14
VT-G21
VT-G21
112 W
Advertisement
Table of Contents

Related Manuals for Sharp VT-G14


Summary of Contents for Sharp VT-G14
- Page 1 White temp) Symbol and Level Ë Blue Back Off Timer Ë AHC (Automatic Head Cleaning System) Ë 39 Key, Wireless Remote Control Unit Ë Sharp Super Picture Ë Channel Skip Ë 345 Times Hi-Speed FF/REW Ë High Speed and Double Speed Video Search System »...
-
Page 2: Table Of Contents
VT-G14 VT-G21 CONTENTS Page Page » SPECIFICATIONS ............3 » CHASSIS LAYOUT ............68 » IMPORTANT SERVICE NOTES ........4 » BLOCK DIAGRAM OF TV SECTION ......70 » LOCATION OF USER'S CONTROL ......5 » DESCRIPTION OF TV SECTION »... -
Page 3: Specifications
Temperature: Operation; 5°C to 40°C Storage; -10°C to 60°C VT-G14 : 378 mm (W) × 387 mm (H) × 384 mm (D) Dimensions (Approx.): VT-G21 : 505 mm (W) × 503 mm (H) × 478 mm (D) Weight (Approx.): VT-G14 : 12.7 kg VT-G21 : 23.5 kg... -
Page 4: Important Service Notes
29.3 kV, (at beam 0 µA) for the set. 2. VT-G14: To keep the set in a normal operation, be sure to make it function on 22.0 kV + 1.5 kV – 2.0 kV (at beam 800 µA) in the case of the set. The set has been factory –... -
Page 5: Location Of User's Control
VIDEO/AUDIO INPUT terminals Infrared sensor window PRESET button CHANNEL UP/DOWN buttons VOLUME UP/DOWN buttons SHARP SUPER PICTURE button (This function will create a clearer image during playback.) REC (Recording) button REC indicator PROGRAM TIMER indicator CHILD-LOCK indicator POWER/WAKE-UP TIMER indicator... - Page 6 VT-G14 VT-G21 LOCATION OF USER'S CONTROL (Continued) Remote Control Infrared Transmitter Window DISPLAY button TV/VIDEO Select button • Used to display the different current settings on the STANDBY/ON button screen. MUTE button CHANNEL SELECT buttons TV/VIDEO Press → Mutes sound.
-
Page 7: Disassembly And Reassembly
2. Take out the anode cap, CRT PWB, connectors F, G and AO, coating ground, SP chip, fixing screws and others. 3. Remove the 2(VT-G14)/1(VT-G21) Main PWB fixing screws and take out the Main PWB unit and the Power PWB. - Page 8 VT-G14 VT-G21 DISASSEMBLY AND REASSEMBLY (Continued) 5. Remove the 7 VCR fixing screws, and detach the shielding case. 6. Remove the 4 cassette housing control fixing screws, and detach the cassette housing control. 7. Remove the 4 mechanism chassis fixing screws, and detach the mechanism chassis from the Main PWB.
- Page 9 VT-G14 VT-G21 DISASSEMBLY AND REASSEMBLY (Continued) For servicing any of the components inside, disconnect the lead dressing holder. Position the main PWB unit upright as shown below and connect the leads for starting the services. FRONT Note: Fit the VCR unit the front cabinet with the front flap door tilted at 70~80°.
-
Page 10: Adjustment Of The Tv Electrical Circuitry
1) Item selectable by the CH '" buttons and data by the VOL '" buttons (effective on both the remote controller and the set) 2) `This item is not used with the VT-G14 and VT-G21 (but displayed on the screen). - Page 11 VT-G14 VT-G21 The numeric keys on the remote controller work as follows in the DIRECT mode only. DOWN R CUT OFF G CUT OFF B CUT OFF Õ õ G DRIVE GAIN B DRIVE GAIN Notes : In all the other modes, these buttons are used to select channels.
- Page 12 VT-G14 VT-G21 Trouble indicators If the set is interrupted by the protectors, the following indicators work to identify a spot in trouble. LED (red) flashing : Deflection system protector activated (high-voltage or beam protector) 2) REC LED flashing C bus line error...
- Page 13 VT-G14 VT-G21 SERVICE ADJUSTMENT Ë Ë Ë Ë Ë PIF/AFT/AGC ADJUSTMENT 1. TUNER IFT : TU201 (preset) IF-OUT 1. Get the tuner ready to receive the E-9CH signal, 1000p but with no signal input. Adjust the PLL data. 10kΩ 2. Connect the sweep generator’s output cable to the tuner antenna.
- Page 14 VT-G14 VT-G21 Ë Ë Ë Ë Ë PIF/AFT/AGC ADJUSTMENT(Continued) 3. RF AGC CUT-IN ADJUSTMENT: R265 Oscilloscope TV Set 1. Receive the “E-12CH” (PAL COLOUR BAR) sig- nal. TP201 » Field strength: 57 ± 1 dBµV (75 ohms open) 0.1V 2. Connect the oscilloscope to TP201, as shown at right.
- Page 15 1. First of all, let a beam current of over 700µA flow in the set to warm it up for 30 minutes or longer. (over 400 µA for VT-G14). 2. Keep the purity magnet in the zero magnetic field in advance. Roughly adjust the static conver- gence.
- Page 16 VT-G14 VT-G21 Ë Ë Ë Ë Ë CONVERGENCE ADJUSTMENT 1.CONVERGENCE ADJUSTMENT (to be done after the purity adjustment) B G R R G B 1. Receive the crosshatch pattern signal. 2. Using the remote controller, call the Normal mode. STATIC CONVERGENCE 1.
- Page 17 3. Connect the beam ammeter between TP601 and TP602. 4. Using the sub-contrast control, roughly adjust the beam current to about 1,000 µA (about 700 µA for VT-G14). 5. Adjust the G-drive and B-drive data to have a colour temperature of 7,500°K (white).
- Page 18 1. Receive the crosshatch pattern signal. 2. Put the set in the service mode and select the SUB-CONTRAST mode (CONT). 3. Adjust the sub-contrast data to "10" (VT-G21)/ "0" (VT-G14). 4. Exit from the service mode. Ë Ë Ë Ë Ë HORIZONTAL AND VERTICAL CIRCUIT ADJUSTMENT 1.
- Page 19 2. Put the set in the service mode. 3. Select the sub-colour mode (COL). W Y CY G MG R B 4. Connect the oscilloscope to TP855 (RED cathode). (Use a 10 : 1 probe.) (TP852 for VT-G14) » Range: 20 V/div. » Sweep time: 20 µsec/div.
- Page 20 VT-G14 VT-G21 Ë Ë Ë Ë Ë SECAM CHROMA ADJUSTMENT(Continued) 2. SECAM BLACK LEVEL (R-Y/B-Y) and BLACK OFFSET ADJUSTMENT C bus data adjustment) 1. Receive the SECAM colour bar signal. 2. Call the service mode. 3. Select the R-Y black offset mode (R-Y).
- Page 21 VT-G14 VT-G21 Ë Ë Ë Ë Ë A/V INPUT AND OUTPUT CHECK 1. VIDEO and AUDIO OUTPUT CHECK 1. Receive the PAL colour bar signal. (100% white colour bar, 400 Hz, 100% modula- tion audio) 2. Terminate the video output with a 75Ω impedance.
- Page 22 VT-G14 VT-G21 Ë Ë Ë Ë Ë FUNCTION CHECK (1) (VIDEO AND AUDIO) 1. CONTRAST MENU BUTTON 1. Receive the mono scope pattern signal. 2. Using the PICTURE ADJUST control, select CON- →PICTURE ADJUST TRAST. 3. The contrast must be changeable with the +/- →CONTRAST...
- Page 23 VT-G14 VT-G21 Ë Ë Ë Ë Ë FUNCTION CHECK (2) (VIDEO AND AUDIO) 8. COLOUR SYSTEM 1. Receive the PAL colour bar signal. Using the COL- Note : When the NTSC 4.43 colour bar special sig- OUR SYSTEM button, select a mode other than...
-
Page 24: Precautions In Reassembling
VT-G14 VT-G21 PRECAUTIONS IN REASSEMBLING INSTALLING THE CASSETTE CONTROLLER When the cassette controller is installed on the mecha- nism, the initial setting is essential condition. There are two initial setting methods, namely electrical and mechanical. 1. Electrical initial setting 2. Mechanical initial setting... -
Page 25: Function Of Major Mechanical Parts
VT-G14 VT-G21 FUNCTION OF MAJOR MECHANICAL PARTS (TOP VIEW) Function Function Reverse guide lever ass'y Full erase head Casecon drive gear Supply pole base ass'y Take-up reel disk Tension arm ass'y Pinch roller lever ass’y Idler wheel ass’y Drum ass'y Pinch drive lever ass’y... - Page 26 VT-G14 VT-G21 FUNCTION OF MAJOR MECHANICAL PARTS (BOTTOM VIEW) Function Function Clutch lever Slow brake Limiter pulley ass'y Master cam (12) Casecon drive gear Capstan D.D. motor Shifter Reel belt...
-
Page 27: Adjustment, Replacement And Assembly Of Mechanical Units
VT-G14 VT-G21 ADJUSTMENT, REPLACEMENT AND ASSEMBLY OF MECHANICAL UNITS The explanation given below relates to the on-site general service (field service) but it does not relates to the adjustment and replacement which need high-grade equipment, jigs and skill. For example, the drum assembling, replacement and adjustment service must be performed by the person who have finished the technical courses. - Page 28 VT-G14 VT-G21 MAINTENANCE CHECK ITEMS AND EXECUTION TIME Perform the maintenance with the regular intervals as follows so as to maintain the quality of machine. Possible symptom Maintained 500 1000 1500 2000 Remarks encountered Parts hrs. hrs. hrs. hrs. Abnormal rotation or significant Guide Roller Ass’y...
- Page 29 VT-G14 VT-G21 Notes: REMOVING AND INSTALLING THE CASSETTE 1. When fitting the S/E sensor holder to the cassette HOUSING controller frame L/R, take care. • Removal 2. Misengagement of teeth of casecon drive gear and 1. In the cassette eject mode remove the cassette.
- Page 30 VT-G14 VT-G21 Notes: REEL DISK REPLACEMENT AND HEIGHT 1. When installing the reel disk, take due care so that the CHECK tension band ass'y is not deformed and grease does • Removal no adhere. 1. Remove the cassette housing control assembly.
- Page 31 VT-G14 VT-G21 Note: Notes: Whenever replacing the reel disk, perform the height 1. Hold the torque gauge by hand so that it is not moved. 2. Do not keep the reel disk in lock state. Do not allow checking and adjustment.
- Page 32 VT-G14 VT-G21 CHECKING AND ADJUSTMENT OF TAKE- CHECKING AND ADJUSTMENT OF TAKE- UP TORQUE IN RECORD/PLAYBACK MODE UP TORQUE IN VIDEO SEARCH REWIND • Remove the cassette housing control assembly. MODE • After short-circuiting TP7701 (J301) and TP7702 • Remove the cassette housing control assembly.
- Page 33 VT-G14 VT-G21 CHECKING THE VIDEO SEARCH REWIND BACK TENSION • Remove the cassette housing control assembly. • After short-circuiting TP7701 (J301) and TP7702 Tension gauge Pinch roller 8.8 –11.8N (J302) provided at the left on the main PWB, plug (900 ~ 1,200gf) in the power cord, then turn on the power.
- Page 34 VT-G14 VT-G21 • Checking Tension pole adjuster adjusting range 1. Set a cassette tape, push the REC button to place the unit in the SP record mode. Now check the tension Tension pole adjuster pole position. 2. Visually check to see if the right edge of the tension pole is within the 1.5 ±...
- Page 35 VT-G14 VT-G21 • Adjustment • Checking the brake torque at the take-up side 1. If the indication of torque cassette meter is lower than the setting, shift the tension spring engagement to the part A. 2. If the indication of torque cassette meter is higher...
- Page 36 VT-G14 VT-G21 REPLACEMENT OF A/C (Audio/Control) 3. Align the left end of gear of A/C head plate with the punched mark of chassis, tentatively tighten the HEAD screws 1 and 2 so as to ensure smooth motion of 1. Remove the cassette housing control assembly.
- Page 37 VT-G14 VT-G21 A/C HEAD HEIGHT ROUGH ADJUSTMENT HEIGHT ADJUSTMENT OF REVERSE GUIDE • Setting 1. Adjust the height from the mechanism chassis to the reverse guide lower flange to 13.38 mm, using the reverse guide height adjustment jig, in tape loading Azimuth screw state.
- Page 38 VT-G14 VT-G21 ADJUSTMENT OF TAPE DRIVE TRAIN 1. Tape run rough adjustment 1 Remove the cassette housing control assembly. 2 After shortcircuiting TP7701 (J301) and TP7702 (J302) provided at the left on the main PWB, plug in the power cord, then turn on the power.
- Page 39 VT-G14 VT-G21 4 If the tape is lifted or sunk from the helical lead PB CHROMA surface, the PB CHROMA envelope waveform Envelope appears as shown in Figure 1-35. 5 Press the tracking button (+), (–) and make sure that the envelope waveform changes nearly par- allel.
- Page 40 VT-G14 VT-G21 REPLACEMENT OF THE CAPSTAN D.D. REPLACEMENT OF DRUM D.D. MOTOR (DIRECT DRIVE) MOTOR 1. Set the eject mode. 2. Withdraw the main power plug from the socket. • Remove the mechanism from the main PWB (refer to "7. Remove the 4 mechanism chassis fixing screws, •...
- Page 41 VT-G14 VT-G21 REPLACING THE UPPER AND LOWER ASSEMBLING OF PHASE MATCHING DRUM ASSEMBLY MECHANISM COMPONENTS • Assemble the phase matching mechanism com- • Replacement (Perform in the numerical order) ponents in the following order. 1 Remove the motor as stated in Page 40 D.D. motor 1.
- Page 42 VT-G14 VT-G21 1Insert Reverse Guide Lever Ass’y Insert reverse guide lever ass'y 2 Insert pinch drive cam Align here. Turn the reverse guide lever assembly counterclockwise Fit the pinch drive cam so that the notch of pinch to the stopper.
- Page 43 VT-G14 VT-G21 1. Make sure that the loading gear is at the phase- INSTALLING THE SHIFTER matching point 1 as shown below. 2. Install, paying attention to 5 insertion points and 3 release points. 3. For the phase matching at the insertion point 1, see Drum the phase-matching point 2 as shown below.
- Page 44 VT-G14 VT-G21 INSTALLING THE MASTER CAM (AT REAR REPLACEMENT OF LOADING MOTOR SIDE OF MECHANISM CHASSIS) • Removal 1. Make sure beforehand that the shifter is at the point as shown below. 2. Place the master cam in the position as shown below.
- Page 45 VT-G14 VT-G21 ASSEMBLY OF CASSETTE HOUSING 1. Drive Gear and R Drive angle ass’y MSPRT0381AJFJ Apply grease Apply grease Apply grease Figure 1-47. 2. Synchro Gear, Drive Gear L and Drive Gear R LANGF9592AJFW Top surface should be free from scratches or soil.
-
Page 46: Adjustment Of The Vcr Electrical Circuitry
VT-G14 VT-G21 ADJUSTMENT OF THE VCR ELECTRICAL CIRCUITRY Notes: » Before the adjustment: Electrical adjustments described here are often required after replacement of electronic components and mechanical parts such as video heads. Check that the mechanism and all electric components are in good working condition prior to the adjustments, otherwise adjustments can not be completed. - Page 47 VT-G14 VT-G21 Test points layout. MAIN UNIT PWB-A Figure 2-2. Adjustment of PAL System LP still Adjustment of NTSC System EP still picture vertical sync picture vertical sync Measuring Monitor TV Measuring Monitor TV instrument instrument Mode Still picture playback...
- Page 48 VT-G14 VT-G21 MECHANISM OPERATION FLOWCHART AND TROUBLESHOOTING GUIDE...
- Page 49 VT-G14 VT-G21...
- Page 50 VT-G14 VT-G21...
- Page 51 VT-G14 VT-G21...
- Page 52 VT-G14 VT-G21...
- Page 53 VT-G14 VT-G21...
- Page 54 VT-G14 VT-G21...
- Page 55 VT-G14 VT-G21...
- Page 56 VT-G14 VT-G21...
- Page 57 VT-G14 VT-G21...
- Page 58 VT-G14 VT-G21...
- Page 59 VT-G14 VT-G21...
- Page 60 VT-G14 VT-G21...
- Page 61 VT-G14 VT-G21...
- Page 62 VT-G14 VT-G21...
- Page 63 VT-G14 VT-G21...
- Page 64 VT-G14 VT-G21...
- Page 65 VT-G14 VT-G21...
- Page 66 VT-G14 VT-G21...
- Page 67 VT-G14 VT-G21...
-
Page 68: Chassis Layout
VT-G14 VT-G21 CHASSIS LAYOUT PWB-D (ONLY for VT-G14) PWB-D (ONLY for VT-G21) MAIN UNIT CRT UNIT CRT UNIT PWB-A PWB-F (ONLY for VT-G14) KEY UNIT PWB-E FRONT AV UNIT PWB-F (ONLY for VT-G21) KEY UNIT PWB-C POWER UNIT PWB-B PWB-G... -
Page 69: Block Diagram Of Tv Section
VT-G14 VT-G21 BLOCK DIAGRAM OF TV SECTION-1... - Page 70 VT-G14 VT-G21 BLOCK DIAGRAM OF TV SECTION-2 PWB-D PWB-D PWB-G CRT UNIT (Only for VT-G14) CRT UNIT (Only for VT-G21) IF UNIT PWB-B TUNER/DEF UNIT PWB-C POWER UNIT...
-
Page 71: Description Of Tv Section Schematic Diagram
VT-G14 VT-G21 DESCRIPTION OF TV SECTION SCHEMATIC DIAGRAM NOTES: SAFETY NOTE: 1. The unit of resistance "Ω" is omitted. 1. DISCONNECT THE AC PLUG FROM THE AC OUTLET (K = kΩ = 1000 Ω, M = MΩ). BEFORE REPLACEING PARTS. -
Page 72: Solid State Device Base Diagram
VT-G14 VT-G21 SOLID STATE DEVICE BASE DIAGRAM TOP VIEW FX0008GE BA7357S S24C04A TB1226DN AN3363S iX3057CE iX3109CE NN3572F SIDE VIEW BASE BASE BASE E C B COLLECTOR COLLECTOR COLLECTOR EMITTER EMITTER EMITTER E C B E C B DTC144ES 2SA1266 2SC2229... -
Page 73: Waveforms
VT-G14 VT-G21 WAVEFORMS (VT-G14) AC: 0.7Vp-p AC: 0.9Vp-p AC: 2.7Vp-p AC: 2.8Vp-p AC: 1.0Vp-p DC: 1.7V DC: 1.8V DC: 1.2V DC: 1.2V DC: 4.8V AC: 1.8Vp-p AC: 1.5Vp-p AC: 140Vp-p AC: 3.0Vp-p AC: 47Vp-p DC: 0V DC: 0V DC: 0V DC: 1.2V... - Page 74 VT-G14 VT-G21 WAVEFORMS (VT-G21) AC: 0.7Vp-p AC: 0.9Vp-p AC: 2.7Vp-p AC: 2.8Vp-p AC: 1.0Vp-p DC: 1.7V DC: 1.8V DC: 1.2V DC: 1.2V DC: 4.8V AC: 1.8Vp-p AC: 1.5Vp-p AC: 122Vp-p AC: 3.0Vp-p AC: 47Vp-p DC: 0V DC: 0V DC: 0V DC: 1.2V...
- Page 75 VT-G14 VT-G21 MODEL VT-G14 SCHEMATIC DIAGRAM OF TV SECTION; MAIN and FRONT AV Unit...
- Page 76 VT-G14 VT-G21 MODEL VT-G14 SCHEMATIC DIAGRAM OF TV SECTION; CRT and POWER Unit...
- Page 77 VT-G14 VT-G21 MODEL VT-G14 SCHEMATIC DIAGRAM OF TV SECTION; KEY and IF Unit...
- Page 78 VT-G14 VT-G21 MODEL VT-G14 SCHEMATIC DIAGRAM OF TV SECTION; TUNER/DEF Unit...
- Page 79 VT-G14 VT-G21 MODEL VT-G21 SCHEMATIC DIAGRAM OF TV SECTION; MAIN and FRONT AV Unit...
- Page 80 VT-G14 VT-G21 MODEL VT-G21 SCHEMATIC DIAGRAM OF TV SECTION; CRT and POWER Unit...
- Page 81 VT-G14 VT-G21 MODEL VT-G21 SCHEMATIC DIAGRAM OF TV SECTION; KEY and IF Unit...
- Page 82 VT-G14 VT-G21 MODEL VT-G21 SCHEMATIC DIAGRAM OF TV SECTION; TUNER/DEF Unit...
- Page 83 VT-G14 VT-G21 BLOCK DIAGRAM OF VCR SECTION Ë OVERALL BLOCK DIAGRAM...
- Page 84 VT-G14 VT-G21 BLOCK DIAGRAM OF VCR SECTION Ë SERVO PROCESS BLOCK DIAGRAM...
-
Page 85: Block Diagram Of Vcr Section
VT-G14 VT-G21 BLOCK DIAGRAM OF VCR SECTION Ë SYSTEM CONTROL BLOCK DIAGRAM... - Page 86 VT-G14 VT-G21 BLOCK DIAGRAM OF VCR SECTION Ë SAFETY DEVICE BLOCK DIAGRAM...
- Page 87 VT-G14 VT-G21 BLOCK DIAGRAM OF VCR SECTION Ë AUDIO BLOCK DIAGRAM...
- Page 88 VT-G14 VT-G21 BLOCK DIAGRAM OF VCR SECTION Ë Y/C BLOCK DIAGRAM...
-
Page 89: Description Of Vcr Section Schematic Diagram
VT-G14 VT-G21 DESCRIPTION OF VCR SECTION SCHEMATIC DIAGRAM IMPORTANT SAFETY NOTICE: BE SURE TO USE GENUINE PARTS FOR SECURING THE SAFETY AND RELIABILITY OF THE SET. PARTS MARKED WITH " å " AND PARTS SHADED (IN BLACK) ARE ESPECIALLY IMPORTANT FOR MAINTAINING THE SAFETY AND PROTECTING ABILITY OF THE SET. - Page 90 VT-G14 VT-G21 SCHEMATIC DIAGRAM OF VCR SECTION; VCR-1 Unit...
- Page 91 VT-G14 VT-G21 MODEL VT-G14 SCHEMATIC DIAGRAM OF VCR SECTION; VCR-2 Unit...
- Page 92 VT-G14 VT-G21 MODEL VT-G21 SCHEMATIC DIAGRAM OF VCR SECTION; VCR-2 Unit...
-
Page 93: Printed Wiring Board Assemblies
VT-G14 VT-G21 PRINTED WIRING BOARD ASSEMBLIES PWB-C: POWER Unit (Wiring Side) - Page 94 VT-G14 VT-G21 PWB-F: KEY Unit (Wiring Side) PWB-D: CRT Unit (Wiring Side)
- Page 95 VT-G14 VT-G21 PWB-A: MAIN Unit (Wiring Side)
- Page 96 VT-G14 VT-G21 PWB-A: MAIN Unit (Chip Parts Side)
- Page 97 VT-G14 VT-G21 PWB-E: FRONT AV Unit (Wiring Side) (Wiring Side) (Chip Parts Side) PWB-G: IF Unit...
- Page 98 VT-G14 VT-G21 (Chip Parts Side) (Wiring Side) PWB-B: TUNER/DEF Unit...
- Page 99 R UN2213 PRINTED WIRING BOARD ASSEMBLIES Q783 VS2SB564-KL-1 R 2SB564 (NOT REPLACEMENT ITEM) Q801 VS2SA1266-Y-1 R 2SA1266(Y) Q802 VS2SA1266-Y-1 R 2SA1266(Y) MODEL VT-G14 Q803 VS2SA1266-Y-1 R 2SA1266(Y) Q1001 VSUN2213///-1 R UN2213 PWB-A DUNTK9568WEV0 – Main Unit — Q1002 VS2SB564-KL-1 R 2SB564 PWB-B DUNTK9570WEV0 –...
- Page 100 R Peaking 220µH D471 VHD1SS119//-1 R Diode L6605 VPADK822J0000 R Peaking 8.2mH D472 VHD1SS119//-1 R Diode L6607 VP-DF180K0000 R Peaking 18µH (VT-G14) D473 VHD1SS119//-1 R Diode L6607 VP-DF8R2K0000 R Peaking 8.2µH (VT-G21) D474 VHD1SS119//-1 R Diode L6610 VPADK153J0000 R Peaking 15mH...
- Page 101 VT-G14 VT-G21 Ref. No. Part No. Description Code Ref. No. Part No. Description Code PWB-A: DUNTK9568WE V0/V1 C2215 VCCCCY1HH201J R 200p Ceramic C2216 VCKYCY1CF474Z R 0.47 Ceramic MAIN UNIT (Continued) C2217 VCEA9A1HW474M R 0.47 Electrolytic C2218 VCKYCY1HF103Z R 0.01 Ceramic...
- Page 102 VT-G14 VT-G21 Ref. No. Part No. Description Code Ref. No. Part No. Description Code PWB-A: DUNTK9568WE V0/V1 RJ16 VRS-CY1JF000J 1/16W Metal Oxide RJ18 VRS-CY1JF000J 1/16W Metal Oxide MAIN UNIT (Continued) RJ21 VRS-CY1JF000J 1/16W Metal Oxide RJ23 VRS-CY1JF000J 1/16W Metal Oxide...
- Page 103 VT-G14 VT-G21 Ref. No. Part No. Description Code Ref. No. Part No. Description Code PWB-A: DUNTK9568WE V0/V1 R1070 VRS-CY1JF103J R 10k 1/16W Metal Oxide R1071 VRS-CY1JF562J R 5.6k 1/16W Metal Oxide MAIN UNIT (Continued) R1072 VRS-CY1JF221J R 220 1/16W Metal Oxide...
- Page 104 VT-G14 VT-G21 Ref. No. Part No. Description Code Ref. No. Part No. Description Code PWB-A: DUNTK9568WE V0/V1 R7754 VRS-CY1JF393J R 39k 1/16W Metal Oxide R7755 VRS-CY1JF183J R 18k 1/16W Metal Oxide MAIN UNIT (Continued) R7756 VRS-CY1JF102J R 1k 1/16W Metal Oxide...
- Page 105 R Peaking 33µH SC7701 QSOCN0795REZZ R Socket, 7-pin (AD) L402 VP-DF120K0000 R Peaking 12µH SC7702 QSOCZ0292GEZZ R Socket, 2-pin (AL) L601 VP-CF1R5M0000 R Peaking 1.5µH (VT-G14) RRMCU0222CEZZ R R/C Receiver RMC1001 L601 VP-CF1R0M0000 R Peaking 1µH (VT-G21) LB301 LX-BZ0007PEFD J Screw...
- Page 106 VT-G14 VT-G21 Ref. No. Part No. Description Code Ref. No. Part No. Description Code PWB-B: DUNTK9570WE V0/V1 R305 VRS-CY1JF472J R 4.7k 1/16W Metal Oxide R316 VRS-CY1JF153J R 15k 1/16W Metal Oxide TUNER/DEF UNIT (Continued) R317 VRS-CY1JF101J R 100 1/16W Metal Oxide...
- Page 107 VT-G14 VT-G21 Ref. No. Part No. Description Code Ref. No. Part No. Description Code PWB-B: DUNTK9570WE PWB-C: DUNTK9569FM V0/V1 V0/V1 TUNER/DEF UNIT (Continued) POWER UNIT INTEGRATED CIRCUITS R624 VRD-RM2HD2R7J R 2.7 1/2W Carbon R625 VRD-RM2HD2R7J R 2.7 1/2W Carbon å...
- Page 108 VT-G14 VT-G21 Ref. No. Part No. Description Code Ref. No. Part No. Description Code PWB-C: DUNTK9569FM V0/V1 R774 VRD-RA2BE104J R 100k 1/8W Carbon R775 VRD-RM2HD331J R 330 1/2W Carbon POWER UNIT (Continued) MISCELLANEOUS PARTS C714 VCEA0A1HW106M R 10 Electrolytic RY751...
- Page 109 R1809 VRD-RA2BE560J R 56 1/8W Carbon MISCELLANEOUS PARTS (VT-G21) R1810 VRD-RA2BE561J R 560 1/8W Carbon CN1101 QCNW-5240PEN3 J Connecting Cord (VT-G14) AD R1811 VRD-RA2BE471J R 470 1/8W Carbon CN1101 QCNW-5225PEN3 J Connecting Cord (VT-G21) AD R1812 VRD-RA2BE561J R 560 1/8W Carbon...
- Page 110 VT-G14 VT-G21 Ref. No. Part No. Description Code Ref. No. Part No. Description Code PWB-G: DUNTK9573FM V0/V1 R256 VRS-CY1JF561J R 560 1/16W Metal Oxide R257 VRS-CY1JF000J 1/16W Metal Oxide IF UNIT R258 VRS-CY1JF221J R 220 1/16W Metal Oxide R259 VRS-CY1JF562J R 5.6k 1/16W Metal Oxide...
- Page 111 VT-G14 VT-G21 Ref. No. MECHANISM CHASSIS PARTS Part No. Description Code Ref. No. Part No. Description Code ∗ (VT-G21) (VT-G21) ∗ (VT-G14)
- Page 112 V Tension Arm Boss MSPRD0183GEFJ V I-Roller Arm Spring LBOSZ1006AJZZ V Cassette Stay L (VT-G21) LCHSM0166AJZZ V Main Chassis Ass’y (VT-G14) BA LCHSM0170AJZZ V Main Chassis Ass’y (VT-G21) BA LHLDZ2016AJZZ V Loading Motor Block LPOLM0063GEZZ J Supply Pole Base Ass’y (VT-G14) LPOLM0070GEZZ J Supply Pole Base Ass’y...
- Page 113 VT-G14 VT-G21 Ref. No. CASSETTE HOUSING CONTROL PARTS Part No. Description Code Ref. No. Part No. Description Code...
- Page 114 VT-G14 VT-G21 Ref. No. Part No. Description Code Ref. No. Part No. Description Code SCREW, NUTS AND WASHERS CASSETTE HOUSING CONTROL PARTS XBPSD26P08000 V Screw 2.6P+8S A/C Head CHLDX3081TEV2 V Cassette Housing Control LX-HZ3082GEZZ J A/C Head Screw Ass'y XHPSD26P06000 V Screw, C2.6P+6S...
- Page 115 VT-G14 VT-G21 MODEL VT-G14 CABINET AND MECHANICAL PARTS...
- Page 116 CABINET MECHANICAL PARTS MODEL VT-G14 CCABA2458WEV0 R Front Cabinet Ass’y Not Available – Front Cabinet — HDECQ0109PESC R Punching Plate HBDGB0014PESB R Badge, “SHARP” HDECQ0122PESA R VCR Flap GCOVA0094PESA R LED Decoration JBTN-0293PESC R Button, Power CBTN-0294WEV0 R Button Ass’y, VCR Control...
- Page 117 VT-G14 VT-G21 MODEL VT-G21 CABINET AND MECHANICAL PARTS...
- Page 118 Not Available – Front Cabinet — RRMCG1456PESA R Infrared R/C Unit GCOVA0091PESA R LED Decoration TiNS-6458PEZZ R Operation Manual HBDGB0019PESA R Badge, "SHARP" HDECQ0123PESA R VCR Flap LHLDZ0015PEZZ R Holder, x2 JBTN-0287PESB R Button, Power CBTN-0297WEV0 R Button Ass’y, VCR Control...
-
Page 119: Packing Of The Set
VT-G14 VT-G21 PACKING OF THE SET (VT-G14) » Setting positions of the knobs INITIAL CH POSITION POWER LAST POWER ON SOUND VOLUME MAIN SWITCH (OFF) COLOUR SYSTEM (AUTO) TAPE SPEED (SP) SOUND SYSTEM B/G, D/K or I WOUND-UP (OFF) BLUE BACKGROUND... - Page 120 VT-G14 VT-G21 PACKING OF THE SET (VT-G21) » Setting positions of the knobs INITIAL CH POSITION POWER LAST POWER ON SOUND VOLUME MAIN SWITCH (OFF) COLOUR SYSTEM (AUTO) TAPE SPEED (SP) SOUND SYSTEM B/G, D/K or I WOUND-UP (OFF) BLUE BACKGROUND...
- Page 121 VT-G14 VT-G21 COPYRIGHT © 2001 BY SHARP CORPORATION ALL RIGHTS RESERVED. No part of this publication may be reproduced, stored in a retrieval system, or transmitted in any form or by any means, electronic, mechanical, photocopying, recording, or otherwise, without prior written permission of the publisher.
Need help?
Do you have a question about the VT-G14 and is the answer not in the manual?
Questions and answers