Table of Contents
Advertisement
II
OPERATO
°$
SELF-PROPELLED
ROTARY
LAWN MOWER
UAL
Assembmy
Operation
o Maintenance
• Service and Adjustments
o Storage
o Troubleshooting
_,WARNING: This lawn mower is equipped with an internal combustion engine and
should not be used on or near any unimproved forest-covered, brush-covered or
grass-covered land unless the engine's exhaust system is equipped with a spark
arrester meeting applicable local or slate laws (if any). If a spark arreeter is used, it
should be maintained in effective working order by the operator
In Ihe state of California the above is required by law (Section 4442 of the California
Public Resources Code). Other states may have similar laws, Federal laws apply
on federal lands_ A spark arrester for the muffler is available through your nearest
authorized service center.
193733 Rev. 9
09.16.10
BY
Printed in U.SoA.
Advertisement
Table of Contents

Related Manuals for Craftsman Lawn Mower


Summary of Contents for Craftsman Lawn Mower
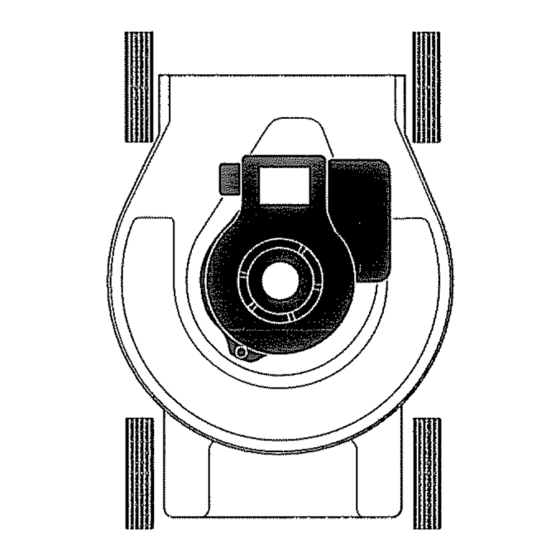
- Page 1 OPERATO °$ SELF-PROPELLED ROTARY LAWN MOWER Assembmy Operation o Maintenance • Service and Adjustments o Storage o Troubleshooting _,WARNING: This lawn mower is equipped with an internal combustion engine and should not be used on or near any unimproved forest-covered, brush-covered or grass-covered land unless the engine's exhaust system is equipped with a spark arrester meeting applicable local or slate laws (if any).
- Page 2 Safety R ules ...... 2-3 Maintenance ..... 22-26 Storage ......33-34 Assembly ......5-B Service and Troubleshooting ....35-36 Operation ...... 9-21 Adjustments ....27-32 IMPORTANT" This cutting machine iscapable ofamputating hands and feet and throwing ob- jects_ Failure toobserve the following safely instructions could r esult in serious injury or death, _Look for this symbol to point out impor_...
- Page 3 • Remove obstacles (rocks, tree limbs, etc,,) away from your vehicle before filling,. • Watch f orholes, ruts, o rbumps_ Tall ,, Remove gas-powered equipment from the grass c an hide obstacles truck ortrailerand refuelitonthe ground, tf this is not possible, then refuel such equip- DO NOT: ment with a portable container, rather than ,, Do not trim near drop-offs, ditches or...
- Page 4 TO REMOVE LAWN MOWER FRONT FROM CARTON o Remove all loose parts from carton° • Remove lawn mower housing wilh care,, Avoid touching blade under housing_ LEFT RIGHT Always wear gloves or other protection HAND HAND when working under or lifting mower,, SIDE SIDE THINGS TO KNOW BEFORE YOU...
- Page 5 _CAUTION" Do not operate this lawn , Insert handle bolt through handle and bracket and secure with knob_ mower without the discharge guard or an o Repeat for opposite side of handle, entire approved grass catcher in place° Handle These guards are for your protection and bracket are required by the American National Standards Institute and Consumer Prod-...
- Page 6 INSTALL REAR WHEELS "FABRIC TOP" GRASS CATCHERS ("HIGH WHEEL" MOWERS ONLY) TO ASSEMBLE AND ATTACH GRASS CATCHER Some high wheel models require washers which will be provided in a parts bag, If • Put grass catcher frame into grass bag provided, install washers on the axle first with rigid part of bag on the bottom,, as shown,...
- Page 7 SPARK PLUG BOOT For DOOR PIVOT PIN mounted cafcller, place lhe grass catcher Irame tlooks On some models a spark plug boot is onto the door pivot pins packed loose in the parts bag.. If your model has the boot, install on spark plug _tns Rear Grass...
- Page 8 TO PREPARE BATTERY HANDLE-MOUNTED KEY SWITCH (ELECTRIC START MODELS ONLY) Engine Harness NOTE: Your battery must be charged connector connector before you can start your lawn mower° ale) = Open battery box (if equipped)° • Disconnect engine connector (male) (if equipped) from battery connector (female), o Connect battery charger connector (male) to harness connector (female),.
- Page 9 The operation of any lawn mower can result in foreign objects thrown into the eyes, which can result in severe eye damage, Always wear safety glasses or eye shields while operating your lawn mower or performing any adjustments or repairs. We recommend standard safety glasses or a wide vision safety mask worn over spectacles.
- Page 10 "QU ICK+PIN" ADJUSTMENT "DUAL POINT" ADJUSTMENT . To change cutting height, pull up on Both front wheels are adjusted by a single adjuster lever, move wheel up or down lever on the lett front wheel.. Likewise, to suit your requirements and release both rear wheels are adjusted by a single adjuster lever.
- Page 11 "THREE POINT" ADJUSTMENT TO CONVERT MOWER: (18" (45cm) HI-VAC MODELS ONLY) Most mowers are shipped ready to be used as a mulchero Both rear wheels are adjusted by a single lever on lhe left rear wheel, "REAR DISCHARGE ONLY" MOWERS o Pull adjuster lever toward wheel°...
- Page 12 "SIDE DISCHARGE ONLY" MOWERS MULCHER PLUG TYPE "B" MULCHER PLATE To convert to bagging or discharging: To convert to bagging or discharging, ,, Lift discharge guard and remove mulcher plate must be removed from un- mulcher plug. derside of lawn mower_ •...
- Page 13 "MULTI-CUT" MOWERS Your lawn mower was shipped ready to be SIDE DISCHARGING used as a mutcher To convert to bagging • Mulcher plate or plug (if equipped) must or discharging: be installed into rear discharge opening of mower. Rear door must be clesed_ REAR BAGGING o Open mulcher door and install discharge o Open rear door and remove mulcher...
- Page 14 SIMPLE STEPS TO REMEMBER 18" (45cm) HI-VAC MODELS: WHEN C ONVERTING YOUR Your lawn mower was shipped ready to "MULTI-CUT" LAWN M OWER: be used as a mulchero To convert to rear FOR MULCHING bagging or side discharging: o Rear mulcher plate orplug (ifequipped) REAR BAGGING installed and rear d oor c losed., 1o Remove knob securing mulcher door...
- Page 15 3. Secure rear of side discharge deflector 21" (53cm) HI-VAC MODELS: to lawn mower housing with knob_ Your lawn mower was shipped ready to = Mower is now ready for side discharging be used as a mulcher., To convert to rear operation, bagging or side discharging: SIMPLE STEPS TO REMEMBER WHEN...
- Page 16 3,,Secure rear o fdischarge chute;to lawn ..SIMPLE STEPS TO REMEMBER mower housing with knob, WHEN CONVERTING YOUR 21" HI-VAC: 4, Place r ear h andle ofgrass c atcher on FOR MULCHING - the crossbar ofthe lawn mower's tower 1, Grass catcher, discharge chule and handle as shown.
- Page 17 OPERATOR PRESENCE CONTROL DRIVE CONTROL "STANDARD" DRIVE CONTROL BAR (ALL MODELS) Your lawn mower is equipped with an op- ° Self-propelling is controlled by holding erator presence control bar which requires the operator presence control bar down the operator to be positioned behind the to the handle and pushing the drive lawn mower handle in order to start and control lever forward until it clicks;then...
- Page 18 "DUAL BAIL" DRIVE CONTROL "AUTOWALK" DRIVE CONTROL . To start forward motion, lift drive control o Self-propelling is controlled by holding bar up to handle° the operator presence control bar down ° To stop forward motion, release drive to the handle and pulling the ddve con- control bar_ trol lever(s) rearward to the handle.
- Page 19 "VARI-SPEED"DRIVECONTROL Over time, thedrive control system m ay o Serf-propelling is controlled by hold- become "loose", resulting indecreased ing the operator presence control bar speed° There i sa tumbuclde onthe down to the handle and pulling the drive underside ofthe drive control housing to control bar up to the handle.
- Page 20 BEFORE STARTING ENGINEI:' ::::::::::::::::::::::: If your mower has a primer, to start a cold engine, push primer as many times Read the engine manual packed with your mower,, as instructed in the engine manual packed with your mower_ Use a firm FILL ENGINE WITH OIL push_ This step is not usually necessary Your lawn mower is shipped without oil in...
- Page 21 MOWING TIPS FOR MULCHING MOWERS ONLY CAUTION: Do not use de-thatcher + MULCHING MOWING TIPS blade attachments on your mower, Such IMPORTANT; For best performance, keep attachments are hazardous, will damage mower housing free of built-up grass and trash, See '*CLEANING" in the Mainte- your mower and could void your warranty_ nance section of this manual.
- Page 22 MAINTENANCE ieEFORE AFTER ! EVERY EVERY EVERY EACH EACH 25 HOURS BEFORE SCNEDILILIE HOURS OR SEASON HOURS STORAGE Check {or Loose Fasteners ....Clean /inspect G'mss Catcher" _i_ec_ T.es ...... W Check Drive Wheels "" ' .... Ciean Lawn Mower " _';; l,,n '_'i'ean'under cowr'"...
- Page 23 LAWN MOWER Always observe safety' rules when per- forming any maintenance TIRES Belt o Keep tires free of gasoline, oil, or insect control chemicals which can harm rub- ber_ Ing edge o Avoid stumps, stones, deep ruts, sharp objects and other hazards that may cause tire damage BLADE CARE...
- Page 24 BLADES WITH ROUND HOLE: 18" (45cm) HI-VAC MODELS ONLY: " To check blade balance, drive a nail into Remove hubcaps (if equipped) and a beam or wall. Leave about one inch of locknuts= tl_e straight nail exposed.. Place center 2. Remove wheels from wheel adjuster hole of blade over the head of the nail..
- Page 25 GEAR CASE IN-LINE FUEL FILTER (KOHLER ENGINES ONLY) o To keep your drive system working properly, the gear case and area around The fuel filter should be replaced once each season, If fuel filler becomes the drive should be kept clean and free of trash build-up.
- Page 26 WATER WASHOUT FEATURE CAUTION: Do not remove hose from (IF EQUIPPED) tilting while engine is running,, Water in Your lawn mower may be equipped with a engine can result in shortened engine life fitting that allows quick and easy cleaning &...
- Page 27 ,_CAUTION: Before p erforming any ser- vice oradjustments: o Release operator presence control bar . Make s ure the blade a nd allmoving paris have completely stopped. ,' Disconnect spark p lug wire from spark p)ug and place w ire where i tcannot come incontact with plug, LAWN MOWER TO ADJUST CUTTING HEIGHT...
- Page 28 3 POSITION "QUICK" HANDLES _'..;__':: TO REMOVE/REPLACE DRIVE BELT The handle on your lawn mower has three FRONT WHEEL DRIVE MODELS: (3) height positions - adjust to height that : "STANDARD" OR "DUAL BAIU' MODELS: suits you. ° Remove drive cover., Remove belt from ,, Squeeze the bottom ends of lower gearcase pulley by pushing down on handle towards each other until the pin...
- Page 29 MODELS WITH GEARCASE-MOUNTED o Remove drive cable from anchor, then BELT KEEPER: detach it and return spring (if equipped) from idler arm assembly,. o Remove drive cover and belt keeper. o Remove idler arm assembly from hous- o Remove belt from gearcase pulley° ing by removing hex nut;...
- Page 30 MODELS WITH GEARCASE-MOUNTED Route t he other end ofthenew drive belt BELT K EEPER: through hole in housing. ,, Remove drive cover, • Return mower to upright position. • Remove spring a nd belt k eeper, • Install new belt on gearcase pulley. o Remove be_t from gearcase pulley,, •...
- Page 31 21" (53cm) HI-VAC MODELS: Remove screw securing debris shield,, Note that the debris shield has a tab which fits into a gap in the housing,, Crankshaft Housing hole Blade Hardened washer shield 2. Route the other end of the new drive belt through hole in housing.
- Page 32 22PLUS REAR WHEEL DRIVE MODELS: "ENGINE 1, Remove screws securing rear baffle, CARBURETOR 2,, Turn lawn mower on its side with air The carburetor has been preset at the fac- filler and carburetor down., tory and adjustment should not be neces- 3., Remove rear baffle from mower, sary, However, minor adjustment may be 4., Remove blade bolt, lockwasher, hard-...
- Page 33 tmmediatemy prepare your l awn mower for Operator MOWING storage at the end of the season or if the _. POSITION unit will not be used for 30 days or more. cenlrol bar _CAUTtON: Never store the lawn mower ,f?, with gasoline in the tank inside a building where fumes may reach an open flame FOLD...
- Page 34 "QUICK-RELEASE" HANDLES Acidic gas can damage the fuel system of You canfold your l awn mower handle for an engine while in storage, storage, • Drain the fuel tank. 1..Loosen the two (2)handle levers o n o Slart the engine and let tt run until the sides o fthe upper handle and allow fuel lines and carburetor are empty,, handle tofolddown t otherear.
- Page 35 See appropriate section in manual unless directed to an authorized Service Center. CORRECTION PROBLEM CAUSE Does not start Dirty air filter 1o Cleanlreplace air filter_ Out of fuel 2o Fill fuel tank,, Stale fuel, 3, Drain fuel tank and refill tank with fresh, clean gasoline., 4o Drain fuel tank and refill tank Water in fuel...
- Page 36 See appropriate section in manual unless directed to an authorized Service Center. PROBLEM CAUSE CORRECTION Grass catcher 1, Cutting height too low, Raise cutting height° not filling 2o Lifton brade worn oil Replace blade° (if so equipped) Catcher not venting air. Crean grass catcher_ Hard to push t_ Grass is too high or wheel...
Need help?
Do you have a question about the Lawn Mower and is the answer not in the manual?
Questions and answers
I have a craftsman M320 what kind of oil do you use
@Larry Elliott 10w 30
The recommended oil types for the Craftsman M320 lawn mower are synthetic 5W30 or SAE 30 high-quality detergent oil with an API service classification of SF through SJ.
This answer is automatically generated
wat type of oil does it use
I have a craftsman rotary mower moder M220, 150 cc engine. It says no oil changes. Is this correct? Please respond