Advertisement
Quick Links
Operator's
Manual
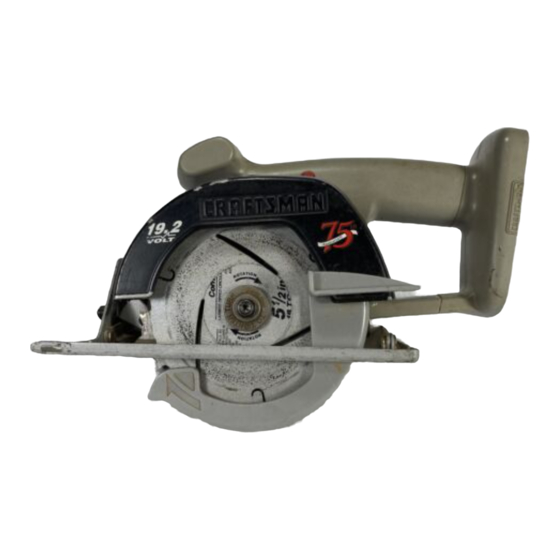
5-1/2 in. 19.2 VOLT
CORDLESS
TRIM SAW
Model No.
973.112930
Save this manual for
future reference
_I= CAUTION:
Read and follow
all Safety Rules and Operating
Instructions
before first use of
this product.
Customer
Help Line: 1-800-932-3188
Sears Roebuck
and Co., 3333 Beverly
Rd. Hoffman
Estates,
IL 60179 USA
visit the Craftsman web page: www.sears.com/craftsman
983000-002
2-02
• Safety
• Features
• Assembly
• Operation
• Maintenance
• Parts List
0( us
Advertisement

Related Manuals for Craftsman 973.112930


Summary of Contents for Craftsman 973.112930
- Page 1 • Assembly this product. • Operation • Maintenance Customer Help Line: 1-800-932-3188 • Parts List Sears Roebuck and Co., 3333 Beverly Rd. Hoffman Estates, IL 60179 USA 0( us visit the Craftsman web page: www.sears.com/craftsman 983000-002 2-02...
- Page 2 ............................FULL ONE YEAR WARRANTY ON CRAFTSMAN CORDLESS TRIM SAW If this CRRFTSMAN Cordless Trim Saw fails to give complete satisfaction within one year from the date of purchase, RETURN IT TO THE NEAREST SEARS STORE OR SEARS SERVICE CENTER IN THE UNITED STATES, and Sears will repair it, free of charge.
- Page 3 Yourtrimsawhasmanyfeatures formaking yourcutting CAUTION:Carefully readthrough thisentire operations m orepleasant a ndenjoyable. Safety, operator's m anual b efore using yournewtrimsaw. performance anddependability havebeengiventop Paycloseattention totheGeneral SafetyRules, priority inthedesign of thistrimsawmaking iteasyto Specific SafetyRules, S ymbols, Warnings, and maintain andoperate. Cautions. If youuseyourtrimsawproperly a ndonly forit'sintended use,youwillenjoy yearsofsafe, reliable service.
- Page 4 • Do not use tool if switch does not turn it on or off. • Check for misalignment or binding of moving A tool that cannot be controlled with the switch is parts, breakage of parts, and any other condition dangerous and must be repaired.
- Page 5 Additional Specific Safety Rules • DANGER! Keep hands away from cutting area and Never use damaged or incorrect blade washers or blade. Keep your second hand on auxiliary handle bolts. The blade washers and bolt were specially or motor housing. If both hands are holding the saw, designed for your saw, for optimum performance and they cannot be cut by the blade.
- Page 6 Do not operate charger with a damaged cord or WARNING: Never use a battery that has been • plug. If damaged, have replaced immediately by a dropped or received a sharp blow. A damaged qualified serviceman. Following this rule will reduce the battery is subject to explosion.
- Page 7 Important: Some of the following symbols may be used on your tool. Please study them and learn their meaning. Proper interpretation of these symbols will allow you to operate the tool better and safer. SYMBOL NAME DESIGNATION/EXPLANATION Volts Voltage Amperes Current Hertz Frequency (cycles per second)
- Page 8 ITEM NO. 9 11041 CHARGER TRIM SAW 973.112930 (1425301) Blade Diameter 5-1/2 in. 120 v, 60 Hz, AC only Input Blade Arbor 318 in. 7.2 - 24 Volts Charging Voltage Cutting Depth at 90 ° 1-9/16 in. t Hour Charge Rate Cutting Depth at 45 °...
- Page 9 LOCK-OFF BUTTON SPINDLE LOCK BUTTON BATrERY PACK SWITCH TRIGGER UPPER GUIDESCREW BLADEGUARD (WINGSCREW) LOWERBLADE GUARDHANDLE LOWER BLADEGUARD BEVELCUTADJUSTMENT (BEVELADJUSTMENT KNOB) BLADE BASE ASSEMBLY RIP GUIDE BLADEW_ STORAG_ DEPTHOF BLADEWRENCH CUTADJUSTMENT (5 mm HEX KEY) (DEPTHADJUSTMENT KNOB) Fig. 1...
- Page 10 MOUNTING CHARGER LED FUNCTION OF CHARGER See Figure3. YELLOWANDGREENLEDSON INDICATESDEEPLY Your charger has a "key hole" hanging feature for conve- DISCHARGED OR DEFECTIVEBATTERYPACK. nient, space saving storage. Therefore, if desired, you can CHARGER REDLED ON INDICATES mount your charger to a wall. Screws should be installed FASTCHARGINGMODE so that center distances are 4-1/2 inches apart.
- Page 11 SPINDLE WARNING: Always remove battery pack from your LOWERBLADE saw when you are assembling parts, making LOCKBUTTON GUARDHANDLE adjustments, assembling or removing blades, cleaning, or when not in use. Removing battery pack will prevent accidental starting that could cause serious personal injury. Note: Your saw is assembled with the battery pack attached.
- Page 12 TO INSTALL BA'n'ERY PACK TO REMOVE BLADE See Figure 7, See Figure 6. Note: Battery pack is shipped in a low charge condition. • Remove battery pack from saw. Therefore, it must be charged prior to use. Refer to page WARNING: Failure to remove battery pack from 13, "CHARGING...
- Page 13 • Press down on battery pack to be sure contacts on WARNING: Always wear safety goggles or safety battery pack engage properly with contacts in charger. glasses with side shields when operating tools. Failure to do so could result in objects being thrown •...
- Page 14 BLADE GUARD SYSTEM CAUTION: To prevent damage to battery pack, remove battery pack from charger immediately if no The lower blade guard attached to your trim saw is LED comes on. Return battery pack and charger to there for your protection and safety. It should never be your nearest Sears Service Center for checking or altered for any reason.
- Page 15 TO LESSEN THE CHANCE OF KICKBACK: KICKBACK See Figure 10. • Always keep the correct blade depth setting - the correct blade depth setting for all cuts should not exceed 1/4 in. below the material to be cut. See Figure 12. One blade tooth below the material to be cut works best for most efficient cutting action.
- Page 16 • Whenmaking a cutusesteady, e venpressure. STARTING A CUT Never f orcecuts. Know the right way to use your saw. • Donotcutwarped or wetlumber. See Figure 15. • Always holdyoursawfirmlywithbothhands andkeep yourbodyin a balanced position so asto resistthe forcesofkickback shoulditoccur. When using your saw, always stay alert and exercise control.
- Page 17 Hold your saw firmly with both hands. TO HELP MAINTAIN CONTROL: See Figure 18 • Always support your workpiece near the cut. • Support your workpiece so the cut will be on your left. • Clamp your workpiece so it will not move during the cut. Ptace your workpiece with its good side down.
- Page 18 A width of cut scale has been provided on the base of TO CROSSCUT OR RIP your saw. When making straight cross cuts or rip cuts, the When making a cross cut or rip cut, align your line of cut scale can be used to measure up to four inches to the with the outer blade guide notch on the saw base as right side of the blade.
- Page 19 Align your line of cut with the inner blade guide notch on ALTERNATIVE RIP METHOD the saw base when making 45 ° bevel cuts. See Figure 22. Since blade thicknesses vary and different angles Using C-clamps, firmly clamp a straight edge to the require different settings, always make a trial cut in workpeice and guide the saw along the straight edge to scrap material along a guideline to determine how...
- Page 20 POSITIVE 0 ° BEVEL STOP • Turn screw and adjust base until square with saw See Figure 25. blade. •"l]ghten hex nut and bevel adjustment knobsecurely. ADJUSTMENT SCREW BEVEL WARNING: Attempting to make cuts without bevel ADJUSTMENT adjustment knob securely tightened can result in KNOB serious injury.
- Page 21 Do not abuse power tools. Abusive practices can damage WARNING: When servicing, use only identical tool as well as workpiece. Craftsman replacement parts. Use of any other part may create a hazard or cause product damage. Only the parts shown on parts list, page 23, are intended to be repaired or replaced by the customer.
- Page 22 CRAFTSMAN 19.2 VOLT CORDLESS TRIM SAW - MODEL NUMBER 973.112930 19 20 21 22...
-
Page 23: Parts List
CRAFTSMAN 19.2 VOLT CORDLESS TRIM - MODEL NUMBER 973.112930 The model number will be found on a plate attached to the motor housing. Always mention the model number in all correspondence regarding your CORDLESS TRIM SAW or when ordering repair parts,... - Page 24 Get it fixed, at your home or ours! For repair of major brand appliances in your own home... no matter who made _t,no matter who sold it! 1-800-4-MY-HOME Anytime, day or night (1-800-469-4663) www.sears.com To bring in products such as vacuums, lawn equipment and electronics for repair, call for the location of your nearest Sears Parts &...
Need help?
Do you have a question about the 973.112930 and is the answer not in the manual?
Questions and answers