Bose LIFESTYLE DVD Operating Manual
Hide thumbs
Also See for LIFESTYLE DVD:
- Operating manual (146 pages) ,
- Installation manual (136 pages) ,
- Owner's manual (82 pages)
Table of Contents
Advertisement
Quick Links
Advertisement
Chapters
Table of Contents
Troubleshooting

Related Manuals for Bose LIFESTYLE DVD


Summary of Contents for Bose LIFESTYLE DVD
- Page 1 i@ @ HOME ENTERTAINMENT SYSTEMS Operating Guide...
- Page 2 SAFETY INFORMATION Please read this guide Please take the time to follow the instructions in this guide carefully. It will help you set up and operate your system properly and enjoy all of its advanced features. Please save this guide for future reference. WARNING: To reduce the risk of fire or electrical shock, do not expose the product to rain or moisture.
-
Page 3: Table Of Contents
CONTENTS INTRODUCTlONiiiiiiiii!i ! SYSTEM CONTROLS SYSTEM OPERATIONiiiiiiiii_iiiii'i:i{:!!ii CONTROLLING EXTERNALSOURCESiiiii!iiiiiiil;{iiiiiiiiiiiiiii USING SYSTEM MENUSiiiiiii:i!iiiii!!!iii!i_ CHANGING SOURCE REEERENCE!fjii!i:ili!ii!ii'i!"!il INTRODUCTION Welcome ................... Clarifying some basics ................. Types of discs you can use with this system ........... Check DVDs for region number compatibility ..........Audio and video terms defined .............. - Page 4 ................Replacing the remote control batteries ............Changing remote control switch settings ............Setting up a second room with sound ............. Bose ®link-compatible products make it easy ..........Protecting and caring for your system ............. Troubleshooting ................Contacting Customer Service ..............
-
Page 5: Introduction
INTRODUCTION Welcome Thank you for purchasing a Bose ® LIFESTYLE ®DVD home entertainment system. Through proprietary Bose technologies and innovative LIFESTYLE ®system design, this elegant and easy-to-use system delivers superior performance for both music and video programming. Clarifying some basics You may consider yourself a dedicated audiophile or someone who simply loves music. -
Page 6: Audio And Video Terms Defined
INTRODUCTION Audio and video terms defined Aspect ratio - An expression for the width of the picture relative to the height and seen when as a rectangular TV image. For example, if the aspect ratio is 4:3 (read as 4 by 3), the shape of that picture is 4 units wide by 3 units high. - Page 7 European systems only. SACD - An abbreviation for Super Audio Compact Disc, used for high-resolution digital audio storage on CD-sized discs. New Bose ®LIFESTYLE ®systems play the CD-compatible portion of such discs, identified by the CD disc logo on the front of the disc.
-
Page 8: System Controls
SYSTEM CONTROLS Remote control buttons The advanced radio frequency (RF) remote control provided with this system works from almost anywhere inside your home, with no need to aim it in the direction of the system. Turns the system on and off. Selects the last used source. Mutes the volume for all connected speakers (main and in other rooms). - Page 9 SYSTEM CONTROLS Below this button on your remote, there is one of two symbols. Depending on which symbol (a or b, left) appears on your remote, the following applies: When a video source is selected, changes between a 4:3 screen display ratio and 16:9 widescreen display.
- Page 10 SYSTEM CONTROLS Skips backward or forward to the next TV, cable, or satellite channel, CD track, or DVD chapter. Track ChanneU Chapter Raises or lowers the volume of the current source. Pressing +raises the volume and unmutes the source playing (if muted) in the current room only.
-
Page 11: Getting Strong Remote Control Range And Response
If the batteries are not dead and your efforts to avoid dead spots are in vain, you may need an antenna extender. To contact Bose for more information, or to order the extender, refer to the address list included with the system. -
Page 12: Media Center
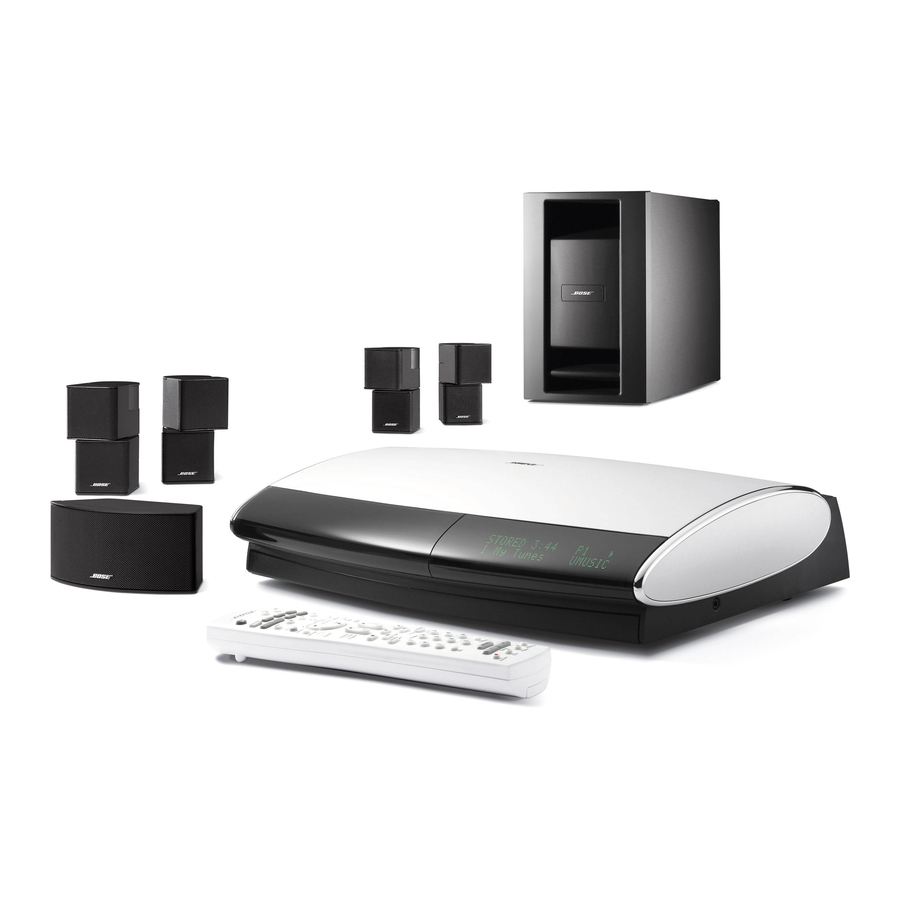
SYSTEM CONTROLS Media center The disc tray and system controls are located under the front panel door of the media center. To the right of the system controls is the display window (Figure 1). CAUTION: Pressing the Open/Close button on the media center is the best way to open and retract the disc tray. -
Page 13: Display Window
SYSTEM CONTROLS Display window The media center display window indicates the state of the system, including which source is playing, program details, and what option, if any, is selected (Figure 2). Figure 2 Sample of information that appears on the media center display When Settings menu items or messages appear in the display, they may scroll to reveal information that does not fit in the two lines available. -
Page 14: System Operation
SYSTEM OPERATION Initial pointers to get you started Scanning the following tips may prove worthwhile before using your system. _b Note: For information on how to set the remote to operate other components, refer to "Using your LIFESTYLE®remote with other components" on page 21. To turn on your system •... -
Page 15: To Adjust What You Hear Or See
SYSTEM OPERATION To adjust what you hear or see * To correct sound problems (unexpected boominess, harshness, thinness, or reverberation take time to run the ADAPTiQ ®audio calibration program, if you have not done so. _b Note: Refer to "Making sure the sound is as good as it gets" in the Installation Guide. * For lasting adjustment to system operation (for audio, video, media center, remote control or DVD lock), use the System menus. -
Page 16: Using Dvd Parental Controls
SYSTEM OPERATION c,0,,,o, r:l up. Skip to the next chapter... 220_' U Skip to the previous chapter... c,,_oouc,o_o,r_,_k [_ down twice. _"_ while the chapter you want to repeat plays. Repeat a chapter... Search backward or forward... for the motion rate control bar to appear. Press again to adjust the rate of the search and set the direction. -
Page 17: Playing A Cd
SYSTEM OPERATION Playing a CD Press CD/DVD to select the CD player. If the system is off, this will turn it on and begin playing CD loaded in the disc tray. To load a disc: 1. On the media center, lift the door and press Open/Close to expose the disc tray. -
Page 18: Using The Radio
SYSTEM OPERATION Using the radio Press FM/AM t o select the radio tuner. This turns on the system if it was off and tunes to the FM or AM station last selected, Changing stations Press: When you want to: Switch between FM and AM... Seek the next strong station... -
Page 19: Using The Headphone Jack
SYSTEM OPERATION To remove a station preset: 1. Tune to the preset number you want to remove. 2. On the remote control, press and hold the 0 number button until the message PRESET: ## ERASED appears briefly on the media center display. Removal is then complete. To reassign a preset to a different station: 1. - Page 20 SYSTEM OPERATION To set the timer: On both the media center display and the TV on-screen menu, the same actions apply: 1. Press the Settings button on the LIFESTYLE ®remote to enter the source Settings menu. 2. Move down to the Sleep Timer symbol, the last feature in the menu (Figure 5). If you see a continuation arrow at the bottom of the menu, move to it to see the other attributes that are not currently shown.
-
Page 21: Controlling External Sources
CONTROLLING EXTERNAL SOURCES Using your LIFESTYLE ®remote with other components You can control most brands of external components - such as TVs, cable/satellite boxes, and VCR/DVRs - using your LIFESTYLE ®remote control. After you make the proper menu selections for each component you want to control, the LIFESTYLE ®remote serves as a universal remote for most of your component operations. - Page 22 CONTROLLING EXTERNAL SOURCES Identify the TV brand: • From the list of options that appear, select TV Brand (Figure 7). • Move right into the list of brands and up or down to locate the brand of your TV. • Press Entertoselect the brand. Figure 7 TVbrand selection Choose the TV code:...
-
Page 23: For Cable/Satellite Control
CONTROLLING EXTERNAL SOURCES Figure 8 Changingthe TV Power Notice the TV Power Status: • "rv Detected means the installed TV sensor is working. • "rv Not Detected means the TV sensor (if installed) is not connected or not positioned properly. •... -
Page 24: For Vcr (Or Other Video Recorder) Control
CONTROLLING EXTERNAL SOURCES Choose the device code: * From the menu options on the left, select CBL° SAT Code. . Move right to select the first code. . Press the CBL-SAT 0 n/0ffbutton on your LIFESTYLE ® remote. Press the button again. If the cable or satellite box turns off and on, you have chosen the right code. -
Page 25: For Aux Control
CONTROLLING EXTERNAL SOURCES When you complete these settings and select VCR as the source, you can now use the VCR 0n/0ff button and press Play, Pause, or Stop and Seek to control your VCR or other video recorder. On some DVRs, pressing Shuffle a nd Repeat buttons will allow you to skip backward or forward quickly. - Page 26 CONTROLLING EXTERNAL SOURCES Make this selection from the RemoteControloptions in the System menu. Opposite the TV Control option, select from multiple options the one you want to use as channel selector. Then press System or Exit t o leave the menu. Figure Designating the TV as channel selector (TV tuner)
-
Page 27: Using System Menus
USING SYSTEM MENUS Properties that you can adjust Adjustments to system properties are typically those you make only once. If your system already operates just as you want, there is no need to make such adjustments. However, for some installation options, changes to the System menu may be required. This is simply to make the system fully compatible and convenient for your setup. -
Page 28: How To Make Changes
USING SYSTEM MENUS How to make changes Making adjustments to system properties in this menu is similar to changing the settings for a source. • Move right to see a preview of features under each property. • Move around and make choices by using the selection buttons shown. •... -
Page 29: Video Options
Bose ® link remote Wave ®radios or Wave ® radio/CDs, which pre-date Bose link compati- control. bility) and with some non-Bose products in other areas or rooms of your house. Video options Press System on the LIFESTYLE ®remote control. Move right to see a preview of video features, and press the Enter b utton to move into the active list of video options. -
Page 30: Media Center Options
USING SYSTEM MENUS Default settings (Options) Effect of this setting TV Power Automatic TV turns on automatically when a video source is selected.** (Manual TV does not come on automatically. Euro) TV responds to SCART connector input. TV Power Status TV Not Detected Indicates: TV Sensor not installed or not positioned correctly. -
Page 31: Remote Control Options
USING SYSTEM MENUS Default settings (Options) Effect of this setting Display Brightness Media center display lights with a midrange brightness. (1 to 7) Darkens or lightens the media center display (7 = brightest). Display Language English On-screen display menus appear in the selected language. (Dansk, Deutsch, Espa_ol, Frangais, Italiano, Nederlands,... - Page 32 USING SYSTEM MENUS Default settings (Options) Effect of this setting "IV Brand -- Identifies the TV brand for the LIFESTYLE ®remote to control. (Brand name) "IV Code -- Identifies the IR code that works with your TV. CBL* SAT Device -- Identifies which device is connected to the CBL* SAT input.
-
Page 33: Dvd Lock Options
USING SYSTEM MENUS DVD Lock options Press System o n the LIFESTYLE _ remote control. Move right to see a preview of DVD Lock features, and press the Enter b utton to move into an active display of DVD Lock options. Figure Preview of DVD Lock features... -
Page 34: Using The Lock To Apply Parental Control
USING SYSTEM MENUS Using the lock to apply parental control The parental control feature of the LIFESTYLE ®system lets you restrict viewing of DVDs with certain ratings. To activate this feature, you need to set a level of restriction and establish a password in the DVD Lock section of the System menu. -
Page 35: Changing Source Settings
CHANGING SOURCE SETTINGS Quick adjustments as you watch or listen Quick changes to whatever system source is playing are easy to make when you press the Settings button on the LIFESTYLE ®remote control. You can boost the system center channel volume or hear audio from five instead of two of the system speakers, for example. -
Page 36: How To Change The Settings
CHANGING SOURCE SETTINGS How to change the settings In the Settings menu on the media center display or on the TV screen, move around and make changes by using the selection buttons shown. On the display or the screen, the same actions apply: •... -
Page 37: Cd Settings Options
CHANGING SOURCE SETTINGS CD settings options To see the CD Settings menu, you must insert a CD into the disc tray before you select the source. Set to Features (Options) Setting effect 2-3-5 Speakers 5 Determines the number of speakers playing. (2, 3) Surround 0 Establishes relative surround sound volume. -
Page 38: Tuner Settings Options (Fm Or Am Radio)
CHANGING SOURCE SETTINGS Set to Features (Options) SettMg effect Time 0:00 Displays elapsed time. Advances or reverses the film to the new time. Advances or reverses the film to another section Title of the DVD, according to the number set. Advances or reverses the film to a new scene, Chapter according to the number set. -
Page 39: Tv Settings Options (For Vcr, Cbl/Sat, And Aux)
CHANGING SOURCE SETTINGS TV settings options (for VCR, CBUSAT, and AUX) The settings below affect programs on the TV, even when the source of the program is VCR, CBL/SAT or AUX. There are no separate settings menus for these sources. Three features (shown in itafic type below) appear in the TV menu only if you have set Audio Processing to User Adjustable in the Audiooptions of the System menu. -
Page 40: Reference
REFERENCE System maintenance Changing batteries is the only regular maintenance required. However, switches inside the remote battery case can be changed, as needed (to select a new house code, for example). Similar changes may be required for any additional remotes, purchased for use in other rooms. - Page 41 Room A with all switches down. For a Bose ®link remote in another room Switches 1-4 need to match those switch settings in your main remote. Set switches 5-9 for the room where you will use the Bose ® link remote.
-
Page 42: Setting Up A Second Room With Sound
Bose products of consistent quality for use in other rooms. These include: the Bose link AL8 homewide wireless audio link. You can use it with the Wave ® music system, 3.2.1 Series II or 3.2.1 GS Series II systems, the LIFESTYLE ®... -
Page 43: Protecting And Caring For Your System
REFERENCE Bose ®link remote switch settings These settings apply only to remote controls with battery compartment switches.* * House code switches (1,2, 3, and 4) must match those on your main remote. • Consider your choices for Switch 5: Change the switch so the expansion room shares the audio stream heard in the main room (A). -
Page 44: Troubleshooting
ON (I). Sound is marred by a • Contact Bose ®Customer Service to determine if and how other electrical components loud hum or buzz, which the room may be creating unwanted signals, and the possible remedies. - Page 45 • Make sure the remote control and media center house codes match. next.) • Contact Bose ®Customer Service for assistance. With a plasma-screen • Momentarily disconnect the video cable (composite, S-video, or component) and see if TV turned on, remote performance improves.
-
Page 46: Contacting Customer Service
Details of the limited warranty are provided on the Product Registration Card that came with your system. Please fill out the information section on the card and mail it to Bose. However, failure to do so will not affect your limited warranty rights. -
Page 47: Accessories
Accessories For information on speaker mounting brackets and stands, additional remote controls, and connecting additional Bose ® powered loudspeakers, contact your Bose dealer or call Bose Customer Service. See the address and phone number list included with your system. Technical... - Page 48 ® Better sound through research® @2006 Bose Corporation, The Mountain, Framingham, MA 01701-9168 289324 AM Rev.01 CCM-001770 289324_001...
- Page 49 i@ @ HOME ENTERTAINMENT SYSTEMS Operating Guide...
- Page 50 SAFETY INFORMATION Please read this guide Please take the time to follow the instructions in this guide carefully. It will help you set up and operate your system properly and enjoy all of its advanced features. Please save this guide for future reference. WARNING: To reduce the risk of fire or electrical shock, do not expose the product to rain or moisture.
- Page 51 CONTENTS INTRODUCTlONiiiiiiiii!i ! SYSTEM CONTROLS SYSTEM OPERATIONiiiiiiiii_iiiii'i:i{:!!ii CONTROLLING EXTERNALSOURCESiiiii!iiiiiiil;{iiiiiiiiiiiiiii USING SYSTEM MENUSiiiiiii:i!iiiii!!!iii!i_ CHANGING SOURCE REEERENCE!fjii!i:ili!ii!ii'i!"!il INTRODUCTION Welcome ................... Clarifying some basics ................. Types of discs you can use with this system ........... Check DVDs for region number compatibility ..........Audio and video terms defined ..............
- Page 52 ................Replacing the remote control batteries ............Changing remote control switch settings ............Setting up a second room with sound ............. Bose ®link-compatible products make it easy ..........Protecting and caring for your system ............. Troubleshooting ................Contacting Customer Service ..............
-
Page 53: Introduction
INTRODUCTION Welcome Thank you for purchasing a Bose ® LIFESTYLE ®DVD home entertainment system. Through proprietary Bose technologies and innovative LIFESTYLE ®system design, this elegant and easy-to-use system delivers superior performance for both music and video programming. Clarifying some basics You may consider yourself a dedicated audiophile or someone who simply loves music. -
Page 54: Audio And Video Terms Defined
INTRODUCTION Audio and video terms defined Aspect ratio - An expression for the width of the picture relative to the height and seen when as a rectangular TV image. For example, if the aspect ratio is 4:3 (read as 4 by 3), the shape of that picture is 4 units wide by 3 units high. - Page 55 European systems only. SACD - An abbreviation for Super Audio Compact Disc, used for high-resolution digital audio storage on CD-sized discs. New Bose ®LIFESTYLE ®systems play the CD-compatible portion of such discs, identified by the CD disc logo on the front of the disc.
-
Page 56: System Controls
SYSTEM CONTROLS Remote control buttons The advanced radio frequency (RF) remote control provided with this system works from almost anywhere inside your home, with no need to aim it in the direction of the system. Turns the system on and off. Selects the last used source. Mutes the volume for all connected speakers (main and in other rooms). - Page 57 SYSTEM CONTROLS Below this button on your remote, there is one of two symbols. Depending on which symbol (a or b, left) appears on your remote, the following applies: When a video source is selected, changes between a 4:3 screen display ratio and 16:9 widescreen display.
- Page 58 SYSTEM CONTROLS Skips backward or forward to the next TV, cable, or satellite channel, CD track, or DVD chapter. Track ChanneU Chapter Raises or lowers the volume of the current source. Pressing +raises the volume and unmutes the source playing (if muted) in the current room only.
-
Page 59: Getting Strong Remote Control Range And Response
If the batteries are not dead and your efforts to avoid dead spots are in vain, you may need an antenna extender. To contact Bose for more information, or to order the extender, refer to the address list included with the system. -
Page 60: Media Center
SYSTEM CONTROLS Media center The disc tray and system controls are located under the front panel door of the media center. To the right of the system controls is the display window (Figure 1). CAUTION: Pressing the Open/Close button on the media center is the best way to open and retract the disc tray. -
Page 61: Display Window
SYSTEM CONTROLS Display window The media center display window indicates the state of the system, including which source is playing, program details, and what option, if any, is selected (Figure 2). Figure 2 Sample of information that appears on the media center display When Settings menu items or messages appear in the display, they may scroll to reveal information that does not fit in the two lines available. -
Page 62: System Operation
SYSTEM OPERATION Initial pointers to get you started Scanning the following tips may prove worthwhile before using your system. _b Note: For information on how to set the remote to operate other components, refer to "Using your LIFESTYLE®remote with other components" on page 21. To turn on your system •... -
Page 63: To Adjust What You Hear Or See
SYSTEM OPERATION To adjust what you hear or see * To correct sound problems (unexpected boominess, harshness, thinness, or reverberation take time to run the ADAPTiQ ®audio calibration program, if you have not done so. _b Note: Refer to "Making sure the sound is as good as it gets" in the Installation Guide. * For lasting adjustment to system operation (for audio, video, media center, remote control or DVD lock), use the System menus. -
Page 64: Using Dvd Parental Controls
SYSTEM OPERATION c,0,,,o, r:l up. Skip to the next chapter... 220_' U Skip to the previous chapter... c,,_oouc,o_o,r_,_k [_ down twice. _"_ while the chapter you want to repeat plays. Repeat a chapter... Search backward or forward... for the motion rate control bar to appear. Press again to adjust the rate of the search and set the direction. -
Page 65: Playing A Cd
SYSTEM OPERATION Playing a CD Press CD/DVD to select the CD player. If the system is off, this will turn it on and begin playing CD loaded in the disc tray. To load a disc: 1. On the media center, lift the door and press Open/Close to expose the disc tray. -
Page 66: Using The Radio
SYSTEM OPERATION Using the radio Press FM/AM t o select the radio tuner. This turns on the system if it was off and tunes to the FM or AM station last selected, Changing stations Press: When you want to: Switch between FM and AM... Seek the next strong station... -
Page 67: Using The Headphone Jack
SYSTEM OPERATION To remove a station preset: 1. Tune to the preset number you want to remove. 2. On the remote control, press and hold the 0 number button until the message PRESET: ## ERASED appears briefly on the media center display. Removal is then complete. To reassign a preset to a different station: 1. - Page 68 SYSTEM OPERATION To set the timer: On both the media center display and the TV on-screen menu, the same actions apply: 1. Press the Settings button on the LIFESTYLE ®remote to enter the source Settings menu. 2. Move down to the Sleep Timer symbol, the last feature in the menu (Figure 5). If you see a continuation arrow at the bottom of the menu, move to it to see the other attributes that are not currently shown.
-
Page 69: Controlling External Sources
CONTROLLING EXTERNAL SOURCES Using your LIFESTYLE ®remote with other components You can control most brands of external components - such as TVs, cable/satellite boxes, and VCR/DVRs - using your LIFESTYLE ®remote control. After you make the proper menu selections for each component you want to control, the LIFESTYLE ®remote serves as a universal remote for most of your component operations. - Page 70 CONTROLLING EXTERNAL SOURCES Identify the TV brand: • From the list of options that appear, select TV Brand (Figure 7). • Move right into the list of brands and up or down to locate the brand of your TV. • Press Entertoselect the brand. Figure 7 TVbrand selection Choose the TV code:...
-
Page 71: For Cable/Satellite Control
CONTROLLING EXTERNAL SOURCES Figure 8 Changingthe TV Power Notice the TV Power Status: • "rv Detected means the installed TV sensor is working. • "rv Not Detected means the TV sensor (if installed) is not connected or not positioned properly. •... -
Page 72: For Vcr (Or Other Video Recorder) Control
CONTROLLING EXTERNAL SOURCES Choose the device code: * From the menu options on the left, select CBL° SAT Code. . Move right to select the first code. . Press the CBL-SAT 0 n/0ffbutton on your LIFESTYLE ® remote. Press the button again. If the cable or satellite box turns off and on, you have chosen the right code. -
Page 73: For Aux Control
CONTROLLING EXTERNAL SOURCES When you complete these settings and select VCR as the source, you can now use the VCR 0n/0ff button and press Play, Pause, or Stop and Seek to control your VCR or other video recorder. On some DVRs, pressing Shuffle a nd Repeat buttons will allow you to skip backward or forward quickly. - Page 74 CONTROLLING EXTERNAL SOURCES Make this selection from the RemoteControloptions in the System menu. Opposite the TV Control option, select from multiple options the one you want to use as channel selector. Then press System or Exit t o leave the menu. Figure Designating the TV as channel selector (TV tuner)
-
Page 75: Using System Menus
USING SYSTEM MENUS Properties that you can adjust Adjustments to system properties are typically those you make only once. If your system already operates just as you want, there is no need to make such adjustments. However, for some installation options, changes to the System menu may be required. This is simply to make the system fully compatible and convenient for your setup. -
Page 76: How To Make Changes
USING SYSTEM MENUS How to make changes Making adjustments to system properties in this menu is similar to changing the settings for a source. • Move right to see a preview of features under each property. • Move around and make choices by using the selection buttons shown. •... -
Page 77: Video Options
Bose ® link remote Wave ®radios or Wave ® radio/CDs, which pre-date Bose link compati- control. bility) and with some non-Bose products in other areas or rooms of your house. Video options Press System on the LIFESTYLE ®remote control. Move right to see a preview of video features, and press the Enter b utton to move into the active list of video options. -
Page 78: Media Center Options
USING SYSTEM MENUS Default settings (Options) Effect of this setting TV Power Automatic TV turns on automatically when a video source is selected.** (Manual TV does not come on automatically. Euro) TV responds to SCART connector input. TV Power Status TV Not Detected Indicates: TV Sensor not installed or not positioned correctly. -
Page 79: Remote Control Options
USING SYSTEM MENUS Default settings (Options) Effect of this setting Display Brightness Media center display lights with a midrange brightness. (1 to 7) Darkens or lightens the media center display (7 = brightest). Display Language English On-screen display menus appear in the selected language. (Dansk, Deutsch, Espa_ol, Frangais, Italiano, Nederlands,... - Page 80 USING SYSTEM MENUS Default settings (Options) Effect of this setting "IV Brand -- Identifies the TV brand for the LIFESTYLE ®remote to control. (Brand name) "IV Code -- Identifies the IR code that works with your TV. CBL* SAT Device -- Identifies which device is connected to the CBL* SAT input.
-
Page 81: Dvd Lock Options
USING SYSTEM MENUS DVD Lock options Press System o n the LIFESTYLE _ remote control. Move right to see a preview of DVD Lock features, and press the Enter b utton to move into an active display of DVD Lock options. Figure Preview of DVD Lock features... -
Page 82: Using The Lock To Apply Parental Control
USING SYSTEM MENUS Using the lock to apply parental control The parental control feature of the LIFESTYLE ®system lets you restrict viewing of DVDs with certain ratings. To activate this feature, you need to set a level of restriction and establish a password in the DVD Lock section of the System menu. -
Page 83: Changing Source Settings
CHANGING SOURCE SETTINGS Quick adjustments as you watch or listen Quick changes to whatever system source is playing are easy to make when you press the Settings button on the LIFESTYLE ®remote control. You can boost the system center channel volume or hear audio from five instead of two of the system speakers, for example. -
Page 84: How To Change The Settings
CHANGING SOURCE SETTINGS How to change the settings In the Settings menu on the media center display or on the TV screen, move around and make changes by using the selection buttons shown. On the display or the screen, the same actions apply: •... -
Page 85: Cd Settings Options
CHANGING SOURCE SETTINGS CD settings options To see the CD Settings menu, you must insert a CD into the disc tray before you select the source. Set to Features (Options) Setting effect 2-3-5 Speakers 5 Determines the number of speakers playing. (2, 3) Surround 0 Establishes relative surround sound volume. -
Page 86: Tuner Settings Options (Fm Or Am Radio)
CHANGING SOURCE SETTINGS Set to Features (Options) SettMg effect Time 0:00 Displays elapsed time. Advances or reverses the film to the new time. Advances or reverses the film to another section Title of the DVD, according to the number set. Advances or reverses the film to a new scene, Chapter according to the number set. -
Page 87: Tv Settings Options (For Vcr, Cbl/Sat, And Aux)
CHANGING SOURCE SETTINGS TV settings options (for VCR, CBUSAT, and AUX) The settings below affect programs on the TV, even when the source of the program is VCR, CBL/SAT or AUX. There are no separate settings menus for these sources. Three features (shown in itafic type below) appear in the TV menu only if you have set Audio Processing to User Adjustable in the Audiooptions of the System menu. -
Page 88: Reference
REFERENCE System maintenance Changing batteries is the only regular maintenance required. However, switches inside the remote battery case can be changed, as needed (to select a new house code, for example). Similar changes may be required for any additional remotes, purchased for use in other rooms. - Page 89 Room A with all switches down. For a Bose ®link remote in another room Switches 1-4 need to match those switch settings in your main remote. Set switches 5-9 for the room where you will use the Bose ® link remote.
-
Page 90: Setting Up A Second Room With Sound
Bose products of consistent quality for use in other rooms. These include: the Bose link AL8 homewide wireless audio link. You can use it with the Wave ® music system, 3.2.1 Series II or 3.2.1 GS Series II systems, the LIFESTYLE ®... -
Page 91: Protecting And Caring For Your System
REFERENCE Bose ®link remote switch settings These settings apply only to remote controls with battery compartment switches.* * House code switches (1,2, 3, and 4) must match those on your main remote. • Consider your choices for Switch 5: Change the switch so the expansion room shares the audio stream heard in the main room (A). -
Page 92: Troubleshooting
ON (I). Sound is marred by a • Contact Bose ®Customer Service to determine if and how other electrical components loud hum or buzz, which the room may be creating unwanted signals, and the possible remedies. - Page 93 • Make sure the remote control and media center house codes match. next.) • Contact Bose ®Customer Service for assistance. With a plasma-screen • Momentarily disconnect the video cable (composite, S-video, or component) and see if TV turned on, remote performance improves.
-
Page 94: Contacting Customer Service
Details of the limited warranty are provided on the Product Registration Card that came with your system. Please fill out the information section on the card and mail it to Bose. However, failure to do so will not affect your limited warranty rights. -
Page 95: Accessories
Accessories For information on speaker mounting brackets and stands, additional remote controls, and connecting additional Bose ® powered loudspeakers, contact your Bose dealer or call Bose Customer Service. See the address and phone number list included with your system. Technical... - Page 96 ® Better sound through research® @2006 Bose Corporation, The Mountain, Framingham, MA 01701-9168 289324 AM Rev.01 CCM-001770 289324_001...
Need help?
Do you have a question about the LIFESTYLE DVD and is the answer not in the manual?
Questions and answers