Bose 35 Series II Operating Manual
Bose dvd home entertainment system operating guide
Hide thumbs
Also See for 35 Series II:
- Manual (194 pages) ,
- Operating manual (46 pages) ,
- Owner's manual (38 pages)
Table of Contents
Advertisement
Advertisement
Table of Contents

Related Manuals for Bose 35 Series II


Summary of Contents for Bose 35 Series II
- Page 1 LIFESTYLE ® H O M E E N T E R T A I N M E N T S Y S T E M S...
- Page 2 See the additional instructions on the Important Safety Information sheet enclosed in the shipping carton. ©2005 Bose Corporation. No part of this work may be reproduced, modified, distributed or otherwise used without prior written permission. For additional copyright, trademark, patent, and licensing information, please refer to pages at the back of this book.
-
Page 3: Table Of Contents
English Dansk Deutsch Español Français Italiano NTRODUCTION Welcome ................. . . Introducing the uMusic For a detailed explanation . - Page 4 Setting up a second room with sound ............. Bose ®...
-
Page 5: Introduction
Introducing the uMusic One innovative feature of your new home entertainment system – a revolutionary advance- ment unique to this Bose product – is the uMusic You may have seen a demonstration and know how this new approach to storing and ! enjoying your own CDs adds listening pleasure with so little effort. -
Page 6: Audio And Video Terms Defined
DVR – An abbreviation for Digital Video Recording, sometimes used interchangeably with PVR, for Personal Video Recording. Gracenote – contracted for by Bose. – An abbreviation for infrared. Pertains to the type of remote that sends/receives ! commands on an infrared light beam. - Page 7 – A remote control that transmits commands to a device using radio frequency ® LIFESTYLE – A revolutionary Bose play mode, which performs ® 5 – Bose proprietary decoding circuitry that provides five-channel surround NTRODUCTION ommittee of experts from ® systems play the CD-compatible portion...
-
Page 8: System Controls
YSTEM ONTROLS Remote control buttons The advanced radio frequency (RF) remote control provided with this system works from almost anywhere inside your home, with no need to aim it in the direction of the system. Note: You may set the LIFESTYLE turn these devices on or off. - Page 9 English Dansk Deutsch Español Français Italiano Nederlands Svenska When Stored is the selected source, enters the library of stored CD tracks. Above the Library button on your remote, there is one of two symbols. Depending on which symbol (a or b, left) appears on your remote, the ! following applies: When a video source is selected, changes between a 4:3 screen display ratio and 16:9 widescreen display.
- Page 10 YSTEM ONTROLS Svenska Nederlands Français Italiano Raises or lowers the volume of the current source. ! Pressing + raises the volume and unmutes the source playing (if muted) in the current room only. ! Pressing – lowers the volume. Stops music (except FM/AM) or video play. For DVDs and VCDs only, the system bookmarks where the disc stopped, so you can resume play there.
-
Page 11: Getting Strong Remote Control Range And Response
If the batteries are not dead and your efforts to avoid dead spots are in vain, you may need an antenna extender. To contact Bose for more information, or to order the extender, refer to the address list included with the system. -
Page 12: Media Center
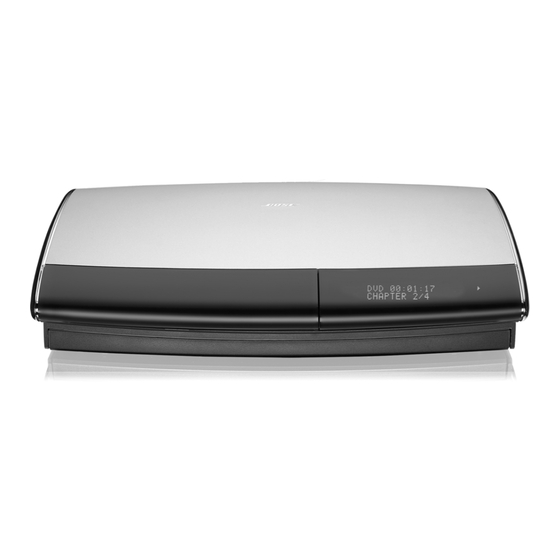
YSTEM ONTROLS Media center The disc tray and system controls are located under the front panel door of the media center. To the right of the system controls is the display window (Figure 1). CAUTION: Pressing the Open/Close button on the media center is the best way to open and retract the disc tray. -
Page 13: Display Window
TV and media center and to select progressive scan. Note: For detailed instructions on how to activate this feature in your Bose refer to your Installation Guide. When activation is completed, you will see the proper results, assuming: •... -
Page 14: System
YSTEM PERATION Initial pointers to get you started Scanning the following tips may prove worthwhile before using your system. Note: For information on how to set the remote to operate other components, refer to “Using your LIFESTYLE To turn on your system •... -
Page 15: To Adjust What You Hear Or See
English Dansk Deutsch Español Français Italiano To adjust what you hear or see • To correct sound problems (unexpected boominess, harshness, thinness, or reverberation) take time to run the ADAPTiQ Note: Refer to “Making sure the sound is as good as it gets” in the Installation Guide. •... -
Page 16: The Basics Of Your Umusic
YSTEM PERATION Here’s how to begin: 1. Place the first CD into the disc tray of the media center and close the tray. 2. Press the Store button, located on the media center control panel. • During this process, the media center displays the message CD STORING and shows what percentage of the task is completed. -
Page 17: Making Sure You Hear What You Like
English Dansk Deutsch Español Français Italiano Repeat a selection… Search backward or forward… Find out about what’s playing... Search for a particular CD… Hear music of one type or by one performer… Add a selection to the Playlist... Hear your Playlist selections... Make sure a track never plays... -
Page 18: Train Your Preset
YSTEM PERATION With CDs already stored in the system, use the preset you prefer to get started: 1. Press Stored on your LIFESTYLE 2. Check the media center display to see which play mode is selected. • If it says UMUSIC, you are ready to listen and enjoy. •... -
Page 19: Check In At Your Music Library
English Dansk Deutsch Español Français Italiano To delete tracks from the Playlist: • While listening to music in the Playlist, press and hold Playlist as the track you want to remove plays. To completely clear the Playlist: • To use the Playlist again for a different purpose, you may want to remove all the tracks listed there now. -
Page 20: Using The Other Sources
1. Turn on your TV. 2. Press CD/DVD to select the DVD player. If the system is off, this will turn it on. 3. On the media center, lift the door and press the Open/Close button to expose the ! disc tray. - Page 21 English Dansk Deutsch Español Français Italiano 4. Insert a DVD into the tray (label side up). Be sure the DVD is clean. If not, refer to! “Protecting and caring for your system” on page 55. 5. On the media center, press the Open/Close button again to retract the disc tray. 6.
-
Page 22: Using Dvd Parental Controls
YSTEM PERATION Using DVD parental controls The parental control feature of your LIFESTYLE locking any DVD movies that you find inappropriate for members of your family. Before you can use this feature, you need to choose a password and a level of restriction (matched to movie rating levels) as found in the System menu. -
Page 23: Using The Radio
English Dansk Deutsch Español Français Italiano Repeat a track… Repeat a CD… Cancel repeat… Note: For information on the quick adjustments you can make to CD settings, refer to “CD settings options” on page 45. Instructions on how to enter the menu to make these changes are available in “Where to find the list of options”... -
Page 24: Using The Headphone Jack
YSTEM PERATION Note: Assigning a preset number to a station will replace any previous assignment to that number. To remove a station preset: 1. Tune to the preset number you want to remove. 2. On the remote control, press and hold the 0 number button until the message PRESET: ## ERASED appears briefly on the media center display. - Page 25 English Dansk Deutsch Español Français Italiano To set the timer: On both the media center display and the TV on-screen menu, the same actions apply: 1. Press the Settings button on the LIFESTYLE 2. Move down to the Sleep Timer symbol, the last feature in the menu (Figure 9). If you see a continuation arrow at the bottom of the menu, move to it to see the other attributes that are not currently shown.
-
Page 26: Controlling External Sources
ONTROLLING XTERNAL Using your LIFESTYLE You can control most brands of external components – such as TVs, cable/satellite boxes, and VCR/DVRs – using your LIFESTYLE selections for each component you want to control, the LIFESTYLE universal remote for most of your component operations. Setting the remote to control each component Your LIFESTYLE of the music center to each component that your LIFESTYLE... - Page 27 English Dansk Deutsch Español Français Italiano 5. Identify the TV brand: • From the list of options that appear, select • Move right into the list of brands and up or down to locate the brand of your TV. • Press Enter to select the brand. Figure 11 TV brand selection 01#$/"235...
-
Page 28: For Cable/Satellite Control
ONTROLLING XTERNAL OURCES Figure 12 Changing the TV Power 01#?-B(/5 01#?-B(/#'+"+.@5 01#%@E(*+#<"+;-5 G;3(@*/((2#919@5 1;3(-#6-22(*+-/5 1;3(-#&)"*H#7(:()5 0A(#F(3;"#6(2+(/#*"2#+./2#,-./#01#-2# ".+->"+;*")),#BA(2(:(/#,-.#@()(*+#"#:;3(-#@-./*(4 navigate 8. Notice the • TV Detected • TV Not Detected properly. • Press System or Exit to leave the System menu. For cable/satellite control The cable or satellite that is connected to the CBL•... -
Page 29: For Vcr (Or Other Video Recorder) Control
English Dansk Deutsch Español Français Italiano 3. Choose the device code: • From the menu options on the left, select • Move right to select the first code. • Press the CBL If the cable or satellite box turns off and on, you have chosen the right code. ! If not, select another code, and press the CBL •... -
Page 30: For Aux Control
ONTROLLING XTERNAL OURCES When you complete these settings and select VCR as the source, you can now use the VCR On/Off button and press Play, Pause, or Stop and Seek to control your VCR or other video recorder. On some DVRs, pressing Shuffle and Repeat buttons will allow you to skip backward or forward quickly. - Page 31 English Dansk Deutsch Español Français Italiano Make this selection from the Remote Control options in the System menu. Opposite the option, select from multiple options the one you want to use as channel selector. Then Control press System or Exit to leave the menu. Figure 13 Designating the TV as channel selector (TV tuner)
-
Page 32: Using System Menus
SING YSTEM ENUS Properties that you can adjust Adjustments to system properties are typically those you make only once. If your system already operates just as you want, there is no need to make such adjustments. However, for some installation options, changes to the System menu may be required. This is simply to make the system fully compatible and convenient for your setup. -
Page 33: How To Make Changes
English Dansk Deutsch Español Français Italiano How to make changes Making adjustments to system properties in this menu is similar to changing the settings for a source. Note: When activated, the screen changes from a preview of features to a list of the specific options you may choose to alter for that property. -
Page 34: Using The Edit Screen
SING YSTEM ENUS Genre Rock/Pop, Classical, Jazz, Electronica, World, Latin, Country, Gospel/Religious, Blues, Soundtrack, Folk/Bluegrass, New Age, Reggae, Easy Listening, Children, Spoken/Comedy, Holiday, Other, Unlabeled Album No default; specific to the CD Selection of this item brings up an editing screen. Artist* No default;... - Page 35 English Dansk Deutsch Español Français Italiano Use the LIFESTYLE to a character, and press Enter to select it. Each time you press Enter, the selected character appears in the text line. When you are finished, move to the Done box at the top right and press Enter to leave the Edit Screen, or press Exit to leave the System menu.
-
Page 36: Audio Options
(-9 to +6) Range available following ADAPTiQ system calibration. ® Automatic Standard Bose processing applies. Allows you to make adjustments to the options (specific to each sound source) after pressing the Settings button while playing any internal or external system sound source. -
Page 37: Video Options
Allows the system to communicate with Bose legacy products (like Wave ® radios or Wave ® bility) and with some non-Bose products in other areas or rooms of your house. ® remote control. Move right to see a preview of video features, Video 1;3(-#6-22(*+-/... -
Page 38: Media Center Options
SING YSTEM ENUS Widescreen DVDs Video Connector Composite, S-VIDEO (See Note on page 37.) Video Black Level TV Video Format (MULTISTANDARD) Progressive Scan Media center options Press System on the LIFESTYLE features. Press the Enter button to move into an active display of submenus. Figure 19 Preview of media center features... -
Page 39: Remote Control Options
English Dansk Deutsch Español Français Italiano Digital Audio Output Tuner Spacing uMusic Preset (2, 3, 4, 5, 6, 7, 8, 9) Preset Action Restore Settings Remote control options Press System on the LIFESTYLE features, and press the Enter button to move into an active list of remote control options. Figure 20 Preview of remote control features... -
Page 40: Dvd Lock Options
SING YSTEM ENUS VCR Device VCR, DVR, Cable/DVR, Satellite/DVR, DVD/DVD recorder, VCR Brand VCR Code AUX Device CD Changer, DVR, DVD/DVD Recorder, DVD/DVR, HDTV TV, TV/DVD, VCR, Cable/DVR, Cable, Satellite/DVR, AUX Brand AUX Code TV Control AUX, VCR, CBL• SAT Remote Version Record/ABC, Teletext Sets the functions of some buttons on the remote, such as Screen IR Control... -
Page 41: Using The Lock To Apply Parental Control
English Dansk Deutsch Español Français Italiano Active list of options Create Password (appears only before ! a password is created) Confirm Password (appears only when ! a password is created or changed) Enter Password (appears only after ! a password is created) Change Password (appears only if ! a password is entered) - Page 42 SING YSTEM ENUS For example, by choosing a Parental Control Setting of 4, you restrict access to videos ! rated above PG-13. Videos with ratings above that may be viewed only after entering the password. Your password also prevents others from changing the parental control setting without ! permission.
-
Page 43: Changing Source Settings
English Dansk Deutsch Español Français Italiano Quick adjustments as you watch or listen Quick changes to whatever system source is playing are easy to make when you press the ! Settings button on the LIFESTYLE volume or hear audio from five instead of two of the system speakers, for example. A dedicated Settings menu for each separate audio source, and one other for all of the video sources, gives you nearly instant access. -
Page 44: How To Change The Settings
HANGING OURCE ETTINGS How to change the settings In the Settings menu on the media ! center display or on the TV screen, ! move around and make changes! by using the selection buttons shown. On the display or the screen, the same actions apply: •... -
Page 45: Stored Cds Settings Options
English Dansk Deutsch Español Français Italiano Stored CDs settings options To get into the Stored CD Settings menu, you must have CD tracks stored in the system. Select Stored as the source. Stored CD settings options To see the CD Settings menu, you must insert a CD into the disc tray before you select the source. -
Page 46: Dvd Settings Options
HANGING OURCE ETTINGS DVD settings options To see the DVD Settings menu, you must insert a DVD into the disc tray before you select the source. Three features (shown in italic type below) appear in the DVD menu only if you have set Processing Svenska Nederlands... -
Page 47: Tuner Settings Options (Fm Or Am Radio)
English Dansk Deutsch Español Français Italiano Tuner settings options (FM or AM radio) There are different settings menus for AM and FM. You can adjust the settings differently for each. Two of the attributes below are available only when the tuner is set to FM. (or AM) TV settings options (for VCR, CBL/SAT, and AUX) The settings below affect programs on the TV, even when the source of the program is VCR,... -
Page 48: Presenting A New Way To Play
You may have chosen your LIFESTYLE breakthrough new feature: the uMusic Bose ® technology, it transforms your system into a virtual DJ, capable of playing a continuous stream of the music you most enjoy and adapting to your preferences as they change. -
Page 49: Planning Time To Store Your Music
(using the CD player or Stored as the source), or you can replace the CD with a DVD and watch a video. • If your setup includes a Bose other rooms, too. • You may notice some minor interruptions to the audio temporarily. But, if you have the source connected using both digital and analog cables, you can still enjoy listening to it. -
Page 50: How The Umusic
RESENTING A AY TO How the uMusic We know that the time spent sorting through CDs to locate the tracks you prefer simply delays your listening pleasure. Now, almost instantaneously, the uMusic job for you: finding and playing what you most want to hear. Why presets are important The uMusic system provides Presets 1 through 9, ready and waiting to provide each member of your household a private space for their personal listening preferences. -
Page 51: Take Advantage Of The System Intelligence
(genre), and other meaningful information that helps characterize the music you enjoy. As a further benefit, Bose issues update discs to keep the music databases current. So even your newest CD acquisitions will have this information available. -
Page 52: Reference
EFERENCE System maintenance Changing batteries is the only regular maintenance required. However, switches inside the remote battery case can be changed, as needed (to select a ! new house code, for example). Similar changes may be required for any additional remotes, purchased for use in other rooms. - Page 53 Room A with all switches down. For a Bose ® link remote in another room Switches 1-4 need to match those switch settings in your main remote. Set switches 5-9 for the room where ® you will use the Bose link remote.
-
Page 54: Setting Up A Second Room With Sound
Bose products of consistent quality for use in other rooms. These include: the Bose link AL8 homewide wireless audio link. You can use it with the Wave music system, 3•2•1 Series II or 3•2•1 GS Series II systems, the LIFESTYLE... -
Page 55: Protecting And Caring For Your System
English Dansk Deutsch Español Français Italiano Bose ® link remote switch settings These settings apply only to remote controls with battery compartment switches.* • House code switches (1, 2, 3, and 4) must match those on your main remote. • Consider your choices for Switch 5:... -
Page 56: Troubleshooting
• Make sure that the power switch on the Acoustimass module is set to ON (I). Sound is marred by a • Contact Bose loud hum or buzz, which the room may be creating unwanted signals, and the possible remedies. - Page 57 To purchase the chokes, contact Bose Customer Service for assistance. System turns on by itself, • Change the house code setting to prevent signals from conflicting with another nearby!
-
Page 58: Contacting Customer Service
Details of the limited warranty are provided on the Product Registration Card that came with your system. Please fill out the information section on the card and mail it to Bose. However, failure to do so will not affect your limited warranty rights. -
Page 59: Accessories
(40.1 cm x 27.9 cm x 8.9 cm) Media center weight 8.2 lb (3.7 kg) Nederlands Svenska ® powered loudspeakers, contact your Bose dealer or call Bose 0.55A 50/60Hz 33VDC 1.1A 0.30A 50/60Hz 33VDC 0.55A 50/60Hz 33VDC 50/60Hz 350W 50/60Hz 350W 50/60Hz 350W with sync 75"... -
Page 60: End User License Agreement
You agree that your non-exclusive license to use the Technology will terminate if you violate these restrictions. If your license terminates, you agree to cease any and all use of the Technology or Data. Bose, its vendors, and licensors reserve all rights in the Technology, including all ownership rights. - Page 61 Consumers should note that not all high definition television sets are fully compatible with this product and may cause artifacts to be displayed in the picture. In case of 525 or 625 progressive scan picture problems, it is recommended that the user switch the connection to the “standard definition” output. If there are questions regarding our TV set compatibility with this model 525p and 625p DVD player, please contact our customer service center.
- Page 62 English Español Français CD L TORED Note: Using a pencil here will make it easier to revise the log as needed. Album Title Artist/Composer Optional Notes...
- Page 63 English Español Français Album Title Artist/Composer Optional Notes...
- Page 64 English Español Français Album Title Artist/Composer Optional Notes...
- Page 65 English Español Français Album Title Artist/Composer Optional Notes...
- Page 66 English Español Français Album Title Artist/Composer Optional Notes...
- Page 67 English Español Français Album Title Artist/Composer Optional Notes...
Need help?
Do you have a question about the 35 Series II and is the answer not in the manual?
Questions and answers