
Related Manuals for Worth Data 5000 TriCoder


Summary of Contents for Worth Data 5000 TriCoder
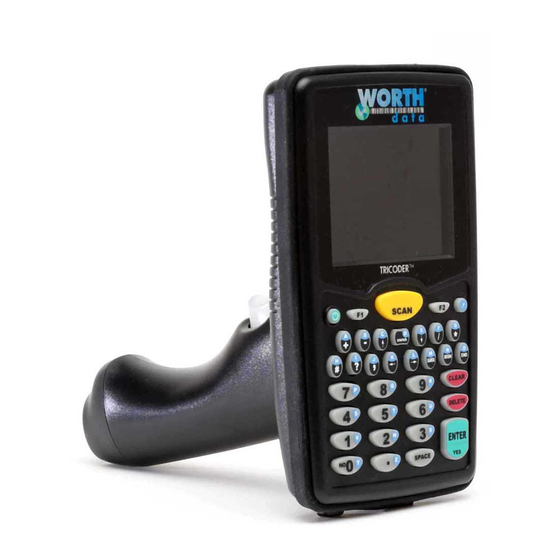
- Page 1 5000 TriCoder ™ Portable Data Collector A battery operated Portable Batch Reader with Voice Messages for PC, Mac, etc. Owner’s Manual www.worthdata.com...
- Page 2 5,589,680 5,612,531 Worth Data, Inc. ● 623 Swift Street, Santa Cruz, CA 95060 ● 831-458-9938 ● 800-345-4220 www.worthdata.com © Copyright 2010, All rights reserved This manual contains confidential and proprietary information and is copyrighted. No part of this manual may be...
-
Page 3: Table Of Contents
Table of Contents Chapter 1: How to Use this Manual ................................. 5 Chapter 2: TriCoder Quickstart................................6 Program #0 Quickstart ..................................7 Getting into Data Collection Mode ..............................7 Collecting Data ....................................8 Uploading Data ....................................9 Program #1 Quickstart ..................................10 Collecting Data .................................... - Page 4 Other Settings ....................................45 System Tools ....................................47 Chapter 9: Using the Integrated Hardware Utilities ..........................48 Installing the Hardware Utilities ..............................48 Running the Hardware Utilities program ............................48 Using the Table Editor ..................................50 Uploading from TriCoder to your Computer ..........................51 Serial Uploading ....................................
- Page 5 Chapter 16: Powering the TriCoder ............................... 93 Turning the TriCoder ON and OFF ..............................93 Battery Power and Wall Power ................................ 93 To change the Li-ion battery: ................................94 Storing the TriCoder ..................................94 Chapter 17: Firmware Upgrades ................................95 Failsafe Firmware Update .................................
-
Page 6: Chapter 1: How To Use This Manual
Chapters 11-13 of the manual describe Voice Messaging, Transmitting and Receiving programs, and uploading Lookup Tables. TROUBLESHOOTING section provides reference for error messages, solving problems and details on how to reach Worth Data. APPENDIXES offers bar code specifications and other useful information. -
Page 7: Chapter 2: Tricoder Quickstart
Chapter 2: TriCoder Quickstart As powerful as the TriCoder is, its basic operation is quite simple. Many people can use Program #0 or Program #1 to satisfy their data collection needs. This Chapter helps you get started quickly using Program #0 or Program #1. It also will refer you to the correct place if you want to customize or expand on Program #1. -
Page 8: Program #0 Quickstart
Program #0 Quickstart The default data collection program, Program #0, is a simple program, repeatedly prompting the operator for data entry Step of the same type. This TriCoder program works well for a simple inventory where each item is scanned. This chapter is in the form of a tutorial. -
Page 9: Collecting Data
Collecting Data Step The second step involves collecting data in the TriCoder. This is a good time to practice scanning. If you are not for details and suggestions. If you don‟t familiar with scanning bar codes, see Appendix B: How to scan a bar code intend on using bar codes later, you can just enter the same data from the keypad. -
Page 10: Uploading Data
Uploading Data Once you have collected your data in Program #0, uploading that data to the computer is the final step. For the tutorial, we assume that you have successfully established communication between the computer and the TriCoder. If you have Step not, go to Chapter 3: Non Portable... -
Page 11: Program #1 Quickstart
Program #1 Quickstart Sample Program #1 prompts the operator for "Item" and then "Quantity". What makes this program different from program #0 (other than the additional "Quantity" prompt) is that Sample Program #1 is editable. It can be customized Step to allow for additional prompts, voice messaging and file formatting. -
Page 12: Reviewing And Editing Data
Reviewing and Editing Data During or after collecting data, it is possible to review and edit the data while it is still in the TriCoder. You can also Step delete data entirely. Data Review Mode is a handy tool – especially if you know you‟ve made a mistake and want to correct it before you upload your data. - Page 13 You can use the STATUS key at any time during data collection to check the amount of memory you have left as well as the battery levels: mm/dd/yy hh:mm:ss BATTERY: ------ xx% xxxK BYTES FREE If during data collection, the TriCoder displays the following message: WARNING 2K LEFT HIT STATUS KEY_ it means that the TriCoder has only 2K of memory left to collect data.
-
Page 14: Uploading Data
Uploading Data Once you have collected your data in Program #1, uploading that data to the computer is the final step. For the tutorial, Step we assume that you have successfully established communication between the computer and the TriCoder. If you have not, go to Chapter 3: Non Portable Mode, and establish communication first. -
Page 15: Chapter 3: Non Portable Mode
Chapter 3: Non Portable Mode NON PORTABLE mode allows the user to transmit data directly from the TriCoder to the host computer immediately without saving the data in the TriCoder memory. Once data is entered via scanning a bar code or using the keypad, it is transmitted immediately by the TriCoder to the host. - Page 16 If you are using Windows® 7, Vista, XP, 2000, ME, or 98SE and you wish to upload your files directly into your application through the keyboard, you must choose 2 – PC OR MAC USB HIS KEYBOARD. After specifying 2, depending on the version of Windows you have you may be asked to install the USB Keyboard HID driver, which is probably on your hard disk, but if not, is on your original Windows CD-ROM;...
-
Page 17: Chapter 4: Using Integrated Hardware Utilities
Downloads). If using a Unix dumb ASCII terminal configuration, the testing is identical to keyboard testing in the previous section. Serial and Fast USB Upload on a Macintosh are not supported with programs from Worth Data. Windows Users Install the Integrated Hardware Utilities program by inserting the Utilities CD-ROM;... -
Page 18: Pc Serial Interface
Windows Users Install the Integrated Hardware Utilities program by inserting the Worth Data Hardware Utilities CD-ROM in your computer and clicking on Start when the installation dialog appears, then choosing Run. If not, click on Start, then choose Run. Type in D:/setup.exe (substitute your drive letter if your CD-ROM Drive is not D:) then click on OK. - Page 19 Hardware Utilities Serial Settings Once the serial port configuration is finished, click on the "Test" button. Click on the test window so that a flashing cursor appears. Scan the test label or, if you have no scanner, type 123 on the TriCoder keypad, then press the TriCoder ENTER key. Hardware Utilities Serial Port Test Screen You should see the data displayed both on the TriCoder display and in the test window on the PC.
-
Page 20: Chapter 5: Uploading Data
Chapter 5: Uploading Data If you are ready to upload data, we assume you have established correct communication between your TriCoder and host and have collected some sample data, preferably using the Default Program #0 or Sample Program #1 Tutorials. By default, the TriCoder uploads using a Carriage Return Separated format. -
Page 21: Comma Separated Files
Comma Separated Files Another common file format is a Comma Separated File. A TriCoder setup to upload in this format uploads data like this: “DATA”,”DATA”(CR) “111111”,”22” “DATA”,”DATA”(CR) data looks like: “222222”,”33” “DATA”,”DATA”(CR) “333333”,”44” Each data item is surrounded by double quotes, creating a field. Fields of data are separated by commas. The double quotes allow commas to be used as actual data as well as separaters (see the example below). -
Page 22: Flat File Formats
SUFFIX -- Scan the bar code for “double quote” then scan the bar code for the “comma”. “,_ SUFFIX -- Press the ENTER key to complete the change. Press the Right Arrow to go to PROMPT 02. At the prompt scan the “double quote” bar code. PREFIX -- Press ENTER or the down arrow until you move the cursor to the line: Scan the “double quote”... -
Page 23: Uploading The Data
The TriCoder is not limited to uploading using only the three file formats - Carriage Return delimited, Comma delimited and Flat File - described above. By using different characters in the Upload Prefix and Upload Suffix of each program statement, you can create a file in just about any format –... -
Page 24: Serial Upload
Serial Upload Windows Serial PC Users The Worth Data Hardware Utilities program has the ability to upload the TriCoder via the serial port in addition to USB support. Plug the serial cable into the TriCoder and turn it on. -
Page 25: Chapter 6: Tricoder Connection
The C22 USB I/O Cable is required to connect the 5000 TriCoder to a USB port. The USB port does not power the TriCoder – it will operate on batteries or the Worth Data 5V power supply only. Plug the USB end of the C22 cable into the USB port located on the back of the PC or Macintosh. Only one end of the cable fits. -
Page 26: Serial Interface
Serial Interface The TriCoder can operate as a serial interface reader on a PC. To use the serial interface, you must have software reading the serial port directly, or a keyboard emulation program like PortKey, (allows a serial interface TriCoder to look like it‟s working as a keyboard wedge). -
Page 27: Chapter 7: Configuring The Tricoder
Chapter 7: Configuring the TriCoder Once the hardware is connected, the next step is to configure the TriCoder and test your communication. If you are using the serial interface, you should have installed the serial communication software you want to use (see the previous section). The TriCoder setup allows the user to configure the TriCoder for different computer interfaces, and reading of different types of bar codes, as well as configuring some of the more advanced features of the TriCoder. -
Page 28: Usb Hid Keyboard Interface
a problem. USB HID Keyboard Interface The TriCoder can operate as a USB HID keyboard on both a PC and a Macintosh. A USB cable and Setup configuration change is all that is needed. To install the TriCoder as a USB keyboard, use a cable C22. Use the following procedure and the diagram below to install the TriCoder between the keyboard and computer: Take the large flat end of the C22 cable and plug it into your TriCoder. - Page 29 TriCoder for USB HID Keyboard uploads. Pressing the 1 key repeatedly will cycle through the 3 HOST settings. More than one Setup Parameter can be changed before you exit the setup. Pressing while in a Setup Parameter will take you back one step in the Setup Mode;...
-
Page 30: Chapter 8: Tricoder Setup
Chapter 8: TriCoder Setup All of the Setup Parameters are changed via the TriCoder keypad using the Setup Mode. You can also send your setup from the Hardware Utilities via USB using the Full Speed USB setup or by a Clone file also sent from the Hardware Utilities. Using the keypad to setup the TriCoder You can change the Setup Parameters on the TriCoder by going into SETUP MODE from the Main Menu (opening screen option 5). -
Page 31: Using The Hardware Utilities To Change Setup Parameters
Using the Hardware Utilities to change Setup Parameters If you are using the FULL SPEED USB interface, you can use the Integrated Hardware Utilities program to change your setup parameters. To use the Hardware Utilities, you must make sure your TriCoder is turned on, plugged into the computer with a C22 USB cable, and it is set for Full Speed USB interface. -
Page 32: Tricoder Setup Parameters
TriCoder Setup Parameters All parameters are set by the TriCoder keypad by going into SETUP (Option 5) from the Main Menu or opening screen. When you enter the Setup Mode you will see the TriCoder Setup screen with various options to change. Choose the option you would like to change by keying in the number that corresponds to the Setup parameters you would like to change, in that mode the Default settings are shown in bold print. -
Page 33: Bar Code Setup
Bar Code Setup On the Bar Code Setup screen key in the number that corresponds to the setup parameters you would like to change. BAR CODE SETUP CODE 3 OF 9 ------------------------- 1 UPC-A EAN 13 ------------------------ 2 UPC-E EAN 8 ------------------------- 3 CODE 128 ------------------------------- 4 2 OF 5 CODES ------------------------- 5 CODABAR ------------------------------ 6... -
Page 34: Code 128
UPC-A/EAN-13 UPC-A/EAN-13 OPTIONS UPC/EAN ALL -------------- ON/OFF UPC/EAN SUPPLEMENT ON/OFF UPC-A NSC ----------------- ON/OFF UPC-A CHECK ------------- ON/OFF EAN-13 1 ST 2 DIGITS - ON/OFF EAN-13 CHECK ------------ ON/OFF ISBN EAN-13 MODE ----- ON/OFF UPC-A AS EAN-13-------- ON/OFF DONE/EXIT ----------------------- CHANGE SETTING #: _ Use setting 2 to enable reading of the 2 and 5 digit UPC/EAN supplements commonly found on magazines and paperback books as well as the Extended Coupon Codes. - Page 35 2 of 5 Code 2 OF 5 CODE OPTIONS INTERLEAVED 2 OF 5 ------- ON/OFF CHECK DIGIT ------------------- ON/OFF TRANSMIT CHECK DIGIT ON/OFF STANDARD 2 OF 5 ------------ ON/OFF 2 OF 5 CHECK DIGIT LENGTH -- 06 2 DIGITS FROM 00-98 DEFAULT IS 06 TEST MODE ONLY 00 DONE/EXIT --------------------------------...
- Page 36 Code 93 / Code 11 CODE 93/CODE 11 CODE 93 --------------------------- ON/OFF CODE 93 FULL ASCII ---------- ON/OFF CODE 11 --------------------------- ON/OFF CODE 11 CHECK TRAN ------ 0/1/2 DONE/EXIT -------------------------------- CHANGE SETTING #: _ Code 93 is similar in character set to Code 39. See Appendix L: Code 93 for more information.
-
Page 37: I/O Settings
I/O SETTINGS HOST (Computer Interface) The TriCoder is shipped with the HOST Computer Interface set to USB FULL SPEED as the default. I/O SETTINGS HOST ---------------- USB-FULL SPEED TERMINATOR CHARACTER - SINGLE CYCLE UPLOAD BAUD RATE ---------------------- 9600 PARITY ---------------------------- NONE DATA BITS ----------------------- BITS... - Page 38 FULL SPEED USB If you are using Windows and you wish to use the Hardware Utilities to upload data via USB in full speed, choose FULL SPEED USB for the HOST interface. You will also be able to do program uploads/downloads, firmware upgrades, voice uploads, and table downloads.
-
Page 39: Terminator Character
Terminator Character I/O SETTINGS HOST ------------- HID KEYBOARD TERMINATOR CHARACTER - SINGLE CYCLE UPLOAD BAUD RATE ---------------------- 9600 PARITY --------------------------- NONE DATA BITS ----------------------- BITS USB ENUMERATION DELAY: USB HID SPEED ---------------- FAST USB HID ALT OUTPUT ------ DONE/EXIT ------------------------------------ CHANGE SETTING #: _ The Terminator Character is the character sent at the end of each data entry in NON PORTABLE mode and at the end of each field when uploading after data collection (Portable use). -
Page 40: Data Bits
Parity I/O SETTINGS HOST ----------------------------- SERIAL TERMINATOR CHARACTER - SINGLE CYCLE UPLOAD BAUD RATE ---------------------- 9600 PARITY --------------------------- NONE DATA BITS ----------------------- BITS PROTOCOL ----------------------- NONE DONE/EXIT ------------------------------------ CHANGE SETTING #: _ The Parity should match the parity setting of your COM port setting on your Host Computer. Parity can vary on a PC serial port - None is the default and is usually used in conjunction with the 8 data bits setting, while Even or Odd is associated with 7 data bits. - Page 41 USB ENUMERATION DELAY I/O SETTINGS HOST ---------------- USB-FULL SPEED TERMINATOR CHARACTER - SINGLE CYCLE UPLOAD BAUD RATE ---------------------- 9600 PARITY ---------------------------- NONE DATA BITS ----------------------- BITS USB ENUMERATION DELAY: USB HID SPEED ---------------- FAST USB HID ALT OUTPUT ------ DONE/EXIT ------------------------------------ CHANGE SETTING #: _ This setting is adjustable from 0-9 seconds to delay the data from uploading to the computer until the enumeration is successful.
- Page 42 USB ALT OUTPUT I/O SETTINGS HOST ---------------- USB-FULL SPEED TERMINATOR CHARACTER - SINGLE CYCLE UPLOAD BAUD RATE ---------------------- 9600 PARITY ---------------------------- NONE DATA BITS ----------------------- BITS USB ENUMERATION DELAY: USB HID SPEED ---------------- FAST USB HID ALT OUTPUT ------ DONE/EXIT ------------------------------------ CHANGE SETTING #: _ The USB HID ALT OUTPUT setting by default is set to OFF and sends keys to the computer as scanned or keyed from the TriCoder keypad.
-
Page 43: Speaker Options
SPEAKER OPTIONS SPEAKER OPTIONS BEEP VOLUME ----------------------------- 0-9 1 BEEP TONE ------------------------ 1/2/3/4/5 2 VOICE VOLUME ----- HIGH/MED/LOW/OFF 3 KEYPAD TONE ---------------------- ON/OFF 4 DONE/EXIT --------------------------------------- CHANGE SETTING #: _ Beep Volume Press the #1 key on the TriCoder to cycle through the Beep Volume settings. Options are 0-9 with 0 being OFF and 9 Being High - 5 for Medium is the Default volume. -
Page 44: Date & Time Settings
Date & Time Settings DATE & TIME SETTINGS TIME --------------------------- 0907 DATE -------------------------- 122309 DATE FORMAT -------- USA/EURO YEAR OUTPUT --------- - DIGIT 4 SHUT DOWN TIME ----- DATE/TIME FORMAT – SHORT DONE/EXIT ---------------------------- 0 CHANGE SETTING #: _ Time Press the #1 key on the TriCoder keypad to change the Time. -
Page 45: Lcd Options
LCD Options LCD OPTIONS MASTER BACKGD, COLOR --- 1 1 PROMPT BACKGD, COLOR --- 1 2 PROMPT TEXT COLOR --------- 2 3 DATA BACKGD, COLOR -------- 1 4 DATA TEXT COLOR -------------- E 5 BRIGHTNESS --- LOW/MED/HIGH 6 BRIGHTNESS TIMEOUT -------- 05 7 DONE/EXIT ----------------------------- 0 CHANGE SETTING #: _ Master Background Color... -
Page 46: Other Settings
Other Settings OTHER SETTINGS PREAMBLE ------------------------- POSTAMBLE ------------------------ CHARACTERS ----------------------- EOF STRING ------------------------- DONE/EXIT ----------------------------- 0 CHANGE SETTING #: _ Preamble and Postamble The Preamble and Postamble apply to data entered in NON-PORTABLE MODE only. Upload Prefixes are used in programs for portable data collection. -
Page 47: Eof String
Using the Bar Code ID feature and the Preamble or Postamble, you can trim data selectively, trimming characters only on the bar code type specified. To use selective trimming, enter: where b is the Bar Code ID character (see the DataBar/RSS-14/Other Bar Codes Setup parameter) and x is the number of characters to trim from the front of the data. -
Page 48: System Tools
Charging from USB The TriCoder by default will only charge the batteries when the Worth Data power supply is attached to the I/O Port. However you may want to charge via a USB Cable when you are using a F76 Adapter, or if you don‟t need the fast re-charging of the dedicated Power Supply or you only have access to a USB port. -
Page 49: Chapter 9: Using The Integrated Hardware Utilities
Chapter 9: Using the Integrated Hardware Utilities The Hardware Utilities for Windows program is a versatile application that gives you the ability to: Test communication (Serial and USB Full Speed) Upload data from TriCoder to computer Download Programs, Voice, and Tables from the computer to the TriCoder ... - Page 50 If you are connected via USB, you should see TriCoder HCVxxxx in the Far Left Pane as shown below.
-
Page 51: Using The Table Editor
If you do not have your TriCoder turned on and cabled up correctly, or the USB driver is installed incorrectly, you will see this error message: USB TriCoder Not Found You can turn your TriCoder on with the C22 USB Cable connected to your computer and after a short delay it will show up on the right panel after it enumerates and registers on your PC. -
Page 52: Uploading From Tricoder To Your Computer
Uploading from TriCoder to your Computer You can upload programs, data, voice and cloned setup information to your computer from your TriCoder by either the serial port or the USB port. Serial Uploading If you are uploading your TriCoder from the Serial port, make sure your port settings are correct before you begin your upload. It is usually a good idea to check your port settings and test in Non-Portable mode before uploading information from your TriCoder. - Page 53 Clone Files Turn the TriCoder On. In the Hardware Utilities, choose Clone TriCoder as the File type, then specify the name of the file (we recommend using the extension .cln for clone files) Click the START button in the Hardware Utilities. The Hardware Utilities will let you know when your transmission is finished.
-
Page 54: Full Speed Usb Uploading
Full Speed USB Uploading If you are uploading information from your TriCoder via Full Speed USB interface, you will be absolutely amazed at how easy it is! The Hardware Utilities takes care of it all; your TriCoder just has to be turned on. Data Files Make sure you are connected with a C22 USB cable and your TriCoder is on. - Page 55 Type in the name of the file you want to save, or use the default name as shown and click save. That's it! You don't have to do anything on the TriCoder! Program Files Again, make sure you are connected with a C22 USB cable and that your TriCoder is turned on and is on the opening screen.
-
Page 56: Downloading From The Computer To Your Tricoder
Downloading from the computer to your TriCoder You can download saved files on your computer back into your TriCoder using the TriCoder Manager in the Hardware Utilities in either serial or high-speed USB mode. The files must be valid TriCoder programs, tables or clone files. TriCoder programs can be created on your computer using the Virtual TriCoder or created on the TriCoder itself. -
Page 57: Full Speed Usb Downloads
The Hardware Utilities will let you know when your transmission is finished. Full Speed USB Downloads If you are downloading from your computer to your TriCoder via the Full Speed USB interface, the only thing you need to do on your TriCoder is make sure it is set for Full Speed USB and turn it on! The Hardware Utilities program will take care of the rest! Program File Downloads Make sure you are connected to the C22 USB cable and that your TriCoder is on. -
Page 58: Chapter 10: Creating A Custom Program
Chapter 10: Creating a Custom Program You can create a program in the TriCoder to prompt the operator for anything. You can tell the operator what to do next, notify them of errors, date and time stamp the data or review and edit previous data. The TriCoder has room for 4 programs; program #0 is fixed and cannot be changed or deleted, program #1 is editable and prompts for item and quantity, program #2 is based on Program #0 but with some editing allowed and #3 is not pre-set and can be programmed by the user as desired. -
Page 59: Program Name
Program Name Press the number of the program you wish to create or edit; 1, 2, or 3. For this example we will key in 1. The TriCoder then displays: PROGRAM #1 PROGRAM #1 NAME ---------------- 1 SAMPLE PROGRAM EDIT PROGRAM #1 ----------------- 2 DONE/EXIT ----------------------------- 0 PLEASE SELECT OPTION: _ By pressing key 1 on the TriCoder keypad you can change the program name, in this case it is named SAMPLE PROGRAM. -
Page 60: Programming
Programming To edit Program #1 press the 2 key. This will enter you into the editing section and show you programming prompts and allow you to edit each section of the prompt on one screen. The text below is an example of what you see on the TriCoder screen when creating a program. - Page 61 Entry Type The first line on the program screen is the ENTRY TYPE prompt. This prompt determines what type of data is entered for this statement. This is the most important prompt as it determines exactly what happens at this step in the program. <...
- Page 62 Go to statement 34 if a 5 is keyed/scanned Go to statement 02 if anything else is keyed/scanned The STMT TO BRANCH field would look like this: ENTRY TYPE --------------------------- PROMPT TEXT: TRANSACTION? STATEMENT TO BRANCH R18534*02_ Question A question statement creates a program prompt that the user answers YES or NO to. Data is not stored to memory for this type of statement;...
- Page 63 The Time Stamp statement type records only the time information to memory in the HHMM format. Just as with the Date and Time Stamp statement, using DIS in the DATA ID field will display the time information on the TriCoder screen when the statement is executed.
- Page 64 None The None statement entry type is used as a “dummy” statement, recording no data and transmitting only the Upload prefix and suffix. It is typically used as a destination for a branch statement, allowing you to record what action the operator took without recording any data.
- Page 65 data1 data2 data3 myfile.fmtCRLF CRLF CRLF (space) (space) CR and LF are scanned from the Full ASCII Menu and the filename must end with ".fmt". No CRLF is required after the last data item. The TriCoder will do it for you. Here is a program example using refer-backs Stmnt # Type Prompt Min.
-
Page 66: Prompt Text
Then the user would see the Prompt SCAN ITEM NO: and then the “Item Description”, “Price” and “Quantity On Hand” from the Table as shown below: SCAN ITEM NO: 69-1894ES-1 Honeywell VisionPRO TH8000 Thermostat $125.99 You can then display individual data from the table to change by doing the following in the next statement: <... -
Page 67: Voice Message Frequency
for the prompt is 1234, then the next time the PROMPT text is displayed, it would display as follows: ENTER ITEM NO. 1234 To accept 1234 as the actual data (instead of entering new data), simply press the ENTER key on the TriCoder. Entering ! as the first character for the PROMPT text field will cause the TriCoder to increment the last data entered for the statement by 1. - Page 68 DATA ID: The DATA ID field has 6 different functions, depending on what is entered at the prompt: Data Identifiers UPC/EAN Check Digit verification Table Access Display Date/Time Prevent Duplicate Entry Compare Data 1. Data Identifiers The first function of the DATA ID field is to specify Data Identifiers for the data entered for the current statement. Data Identifiers are commonly used by the Automotive and Retail industries and are used to make sure the correct type of data is entered.
-
Page 69: Data Type
Table Lookup: For table lookup functions the TriCoder can display additional fields associated with the „key‟ field displaying up to 3 additional fields from that record in the table. If you have a part number, or the key field, and 1-3 additional fields with data such as description, price, quantity on hand - or any other data, then you can display those fields on the TriCoder screen by using the DATA ID prompt: 4. -
Page 70: Minimum Data Length
DATA LENGTH MAX: To clear the DATE LENGTH MAX: and enter a new value, press CLEAR on the TriCoder keypad and enter the new value. The DATE LENGTH MAX is important when using the Xtra Statement. See the section on the XTRA STATEMENT for more information. -
Page 71: Upload Prefix
you have a program that prompts for (1)BLDG., then (2)AISLE, then (3)ITEM, then (4)QUANTITY, with a loop that goes back to ITEM after QUANTITY. To break out of the loop at ITEM and go back to BLDG, use 01 in the NO/END STMT for ITEM. - Page 72 As an example, let‟s say you wanted to attach an aisle number as a prefix to every item number you entered. Assuming the aisle number is statement #02, entering }02 in the Upload Prefix of the item number statement would attach the aisle number to every item number.
-
Page 73: Upload Suffix
For example, if statement #01 has a Maximum Data Length of 10 and you scan the number 12345, the following Upload Prefix for statement #1 would produce data of 0000012345. PREFIX - - When programming an Upload Prefix, you must press the ENTER key on the TriCoder to terminate the entry, whether you have entered data from the keypad or scanned it from the Full ASCII Menu. -
Page 74: Finishing And Checking Your Program
Finishing and checking your program When you have finished entering your program, press the key to have the TriCoder check your program for errors. If you have referenced a statement number that doesn‟t exist or hasn‟t been defined properly, you will see the message: INVALID STMT. -
Page 75: Reviewing And Modifying Programs
Reviewing and Modifying programs You can review or modify a program at any time. If you have data collected for that program, the only portions you can review or modify are the Prefix and Suffix. This is a safeguard to make sure you do not damage data already collected before it is uploaded. If you need to modify a program field other than the Prefix and Suffix, upload your data then proceed. -
Page 76: Chapter 11: Creating Tricoder Programs On Your Windows Pc
Installing the Hardware Utilities Insert the Worth Data Utilities CD-ROM into your CD-Rom drive on your computer running Windows. If you have autoplay enabled, the CD should begin by itself. If not, Click on Start, then Run, then type D:\setup.exe at the prompt (use your drive letter in place of "D"... - Page 77 Select the TriCoder Tab on the left of the Screen Select Virtual TriCoder on the TriCoder Manager Menu Press the Start Virtual TriCoder button and follow the prompts...
- Page 78 You will then see the following screen(s) for the Virtual TriCoder: From this screen you can start to create a new TriCoder Program. By default the View Table (Program Grid) is activated and will also appear with the Virtual TriCoder screen. For help getting started simply press the Help button and you can get detailed instructions on how to use the Virtual TriCoder.
-
Page 79: Chapter 12: Voice Messages
Chapter 12: Voice Messages The TriCoder's exclusive use of voice prompts allows you to overcome problems such as literacy, language and lighting. With proper planning, voice prompting can make data collection significantly faster and simpler. Why Use Voice Messages and Prompts? Voice messages can be in any language. -
Page 80: Recording And Playback Of Voice Messages
Recording and Playback of Voice Messages Voice Messages are recorded only in the Hardware Utilities Program. You can record, manage, and sort voice files using the Voice option in the TriCoder Manager. Below is a screen shot of this process. It is fairly easy to follow and the help files can guide you if you need more help. -
Page 81: Default Voice Messages
Default Voice Messages The TriCoder comes from the factory with some voice prompts and error messages pre-recorded. You can change any of these messages but keep in mind that the error conditions that the voice error messages are linked to are fixed. For example, the “Change Batteries” message is located at message #20. -
Page 82: Chapter 13: Tables
Chapter 13: Tables The TriCoder allows you to download a lookup table for verifying data and/or displaying data from a table to complement the data collection process. In addition, you can use tables to update things like prices descriptions and other data that you have stored in a file but may be different in the field. -
Page 83: Downloading A Table To The Tricoder
08000000000EXAMPLE2 11111111 22xxxxxx 33333xxx 44444444 Ctrl Z (ASCII 26) (use if a DOS file) EXAMPLE2 above would accept a scan or entry of 22 when EXAMPLE1 would not. Preventing duplicate entry of data Sometimes you might want to make sure that an item in your table is not scanned or entered twice. You can prevent duplicate data when using a data validation table by specifying the following in the DATA ID field: Data ID entry description... -
Page 84: Chapter 14: Troubleshooting
Chapter 14: Troubleshooting Display and Error Messages The following is an alphabetical list of all messages the TriCoder can display. Some describe an error state; others are simply instruction. Message Meaning Operator Action APPEND DATA FILE Using Multiple Data files selected and Press YES or NO. - Page 85 FATAL ENTRY TYPE CANNOT An invalid Entry Type has been UNIT MAY NEED TO BE RESET TO CLEAR ERROR – CONTINUE CYCLE POWER detected in your program. Cycle power & see if it clears the error. This can be RESET PROGRAMS & DATA caused by the TriCoder turning off IN SYSTEM SETUP &...
- Page 86 TABLE FORMAT ERROR The table header is in an invalid format Check table file for format or EOF Ctrl Z (ASCII 26) is missing. errors. Try again. PRESS ANY KEY_ TABLE NOT FOUND A table referenced in a data collection Download table correct...
-
Page 87: General Troubleshooting
General Troubleshooting If you want to what the settings in the TriCoder are, you can enter Setup Mode, key in the number that corresponds to the Parameter(s) in which you are interested, and then read the display settings referring to the TriCoder Manual for an explanation of the options. - Page 88 Poor read rates… Try reading the bar code below as an example of a known “good” bar code. This bar code is a Code 39 bar code and is readable by the TriCoder set to its default settings. Make sure your bar codes have clearly defined dark bars and clean white spaces. If the bars are so light that they are gray instead of black or are so dark that they “bleed”...
-
Page 89: Usb Troubleshooting (For Windows Users)
USB Full Speed Data Upload or HID Keyboard Data Upload, you will be required to install a driver for Human Interface Device (HID) keyboard emulation as well as the Worth Data drivers for Full Speed data transfers. If the driver(s) are not completely installed, when you plug the TriCoder into a USB port, two things can happen: Windows will recognize the device but flag it in the Windows Device Manager with a "!"... -
Page 90: Serial Mode Troubleshooting
Serial mode troubleshooting The following problems pertain mostly to TriCoder‟s setup in serial mode. Using the 5 volt power adapter, the TriCoder does not beep when turned on… Plug something else into the wall outlet to make sure the outlet is working or plug the TriCoder‟s power adapter into an outlet that is working with something else. -
Page 91: Program Troubleshooting
Program troubleshooting The following examples have to do with programming the TriCoder. When editing a program, all I can see are the upload prefixes and suffixes… If there is a data file currently in the TriCoder, you cannot edit any part of the programs except for the Upload Prefix or Upload Suffix. -
Page 92: Planning For Success
Many problems can be resolved over the telephone and will not require that you return the equipment to us. If you do need to return the TriCoder to Worth Data, the Engineer will issue an RMA number. -
Page 93: Chapter 15: Fail-Safe Re-Initialization Procedure
Chapter 15: Fail-safe Re-initialization Procedure Here is a fail-safe way to re-initialize the TriCoder and set it back to the factory defaults: (also useful for deleting a data file and programs no longer needed). After turning on the TriCoder, answer 5 at the Main Menu (opening screen) Press the 8 key for System Setup You will be prompted for a password: Key in WDTRI, then press ENTER Press the 5 key to RESET PROGRAMS &... -
Page 94: Chapter 16: Powering The Tricoder
Powering the TriCoder The TriCoder can be powered by the internal Li-ion battery or by the Worth Data 5-volt power adapter included with the unit. The TriCoder also has a programmable automatic shutoff intended to conserve power. The following information explains how to turn the TriCoder ON and OFF, the differences between battery power and wall power, the two different batteries the TriCoder uses and how to change them. -
Page 95: To Change The Li-Ion Battery
Battery Power For portable use, there is a replaceable, built-in 1950mAh NP-120 Li-ion battery used by the TriCoder. This battery provides the main power for the scanner, display and all electrical circuitry. The internal battery should provide approximately 20 hours of continuous scanning, as well as retain the data in memory and provide for real-time clock operation for several months. -
Page 96: Chapter 17: Firmware Upgrades
Chapter 17: Firmware Upgrades Occasionally it will be necessary for some users to update the TriCoder's firmware to fix a bug or take advantage of new capabilities added to the TriCoder. The TriCoder uses a Flash EPROM and can be updated by downloading a file using the Hardware Utilities. The latest firmware file can always be found on our website at: http://www.barcodehq.com/downloads.html or call us and we can send... - Page 97 Select TriCoder and then Press Next: Select the COM port you are using if you are connecting by Serial Cable or Select USB is you are connecting by USB.
- Page 98 Browse your computer to find the firmware file you want to use. The latest firmware can always be downloaded from our website (www.barcodehq.com/downloads.html). When you have selected the correct file press the Next button. Connect the TriCoder to the computer using a serial cable or USB cable and press the Next button. Then turn the TriCoder on and leave it at the Main Menu (opening screen), and Press the Next button again and follow the prompts and instructions on screen to complete the download of new firmware.
-
Page 99: Failsafe Firmware Update
Failsafe Firmware Update If your TriCoder firmware update is interrupted, you may end up with a TriCoder that will not function properly. If you have a 5000 version TriCoder, you can perform the failsafe update by either USB or serial port. If your firmware update fails, you must use the following failsafe firmware update procedure: Take the battery door and/or handle off of the back of the TriCoder. -
Page 100: Appendix A: How To Scan A Bar Code
Appendix A: How to scan a bar code The TriCoder can be used with a variety of laser scanners. Which one you choose is dependent upon your application and the quality and density of your bar codes. This section will include information on different laser scanners as well as how to use each one. Practice Scanning To practice scanning, turn on the TriCoder and press 3 at the Main Menu (opening screen) to enter NON-PORTABLE MODE. -
Page 101: Appendix B: Laser Scanner Options
Different laser scanners have different scanning specifications. Table L-1 describes the laser scanners available from Worth Data and the scanning requirements for each one. -
Page 102: Appendix C: Cable Pin-Outs
Appendix C: Cable Pin-outs Below are the pin-outs for our cables. All cables showing a Worth Data part number (Cxx) are available for purchase. Unless you have experience making your own cables, we recommend buying your cables from us. For all of the 5000 TriCoder cables, number pins based on the number sequence of the connector (marked on the connector). The I/O... - Page 103 I/O Connector Pin-outs I/O Connector pin-outs are: Function Ground Ground Laser DLE USB D+ Laser EN USB D- Laser Data USB Vbus Laser SOS 5VDC Input 5VDC Input 5VDC Out Laser Trigger Ground Ground Audio Out RS-232 RXD RS-232 TXD Ground RS-422 T+ RS-422 T-...
-
Page 104: Appendix D: Optional Features
Appendix D: Optional Features The following are the features available for the TriCoder: Item # Description 5V/110V Power Supply 5V/220V Europe and South American Power Supply 5V/220V UK Power Supply 5V/240V Australian/New Zealand Power Supply USB I/O Cable I/O Power Supply Adapter Cable 9 Pin Serial I/O Cable Zebra QLxxx Serial Printer Cable Battery Door... -
Page 105: Appendix E: Usb Driver Installation Recovery
11. Click the Next button. 12. Check the "Have Disk" button. 13. In the "Install from Disk" dialog, click the browse button and select the Worth Data Utilities CD-ROM or the directory where you unpacked the files downloaded from www.barcodehq.com/dowloads.html 14. -
Page 106: Manually Updating Tricoder Usb Driver On Windows 98/Me
Check the Only Specify A Location check-box. Click the Next button. 10. In the input box that is displayed, enter the path to the Worth Data Utilities CD-ROM or the folder where the downloaded driver files have been extracted. 11. Click the OK button. -
Page 107: Resolving Incomplete, Aborted Or Incorrect Hid Driver Installation
Resolving incomplete, aborted or incorrect HID driver installation This driver is provided with Windows. Most recent versions of Windows include necessary files in the installed Windows folder so driver installation is easy if not automatic. It is possible for the user to cancel the HID driver installation before it is completed and this results in a problem. -
Page 108: Appendix F: Specifications For Code 39
Appendix F: Specifications for Code 39 Code 39 (or Code 3 of 9) is the de facto standard of non-retail American industry. It is widely used in the automotive industry (AIAG specifications) as well as in government and military applications (LOGMARS specifications). Code 39 is flexible, features a large character set, variable data length and density, and bi-directional readability. -
Page 109: Code 39 Advanced Features And Functions
Code 39 Advanced Features and Functions Mod 43 Check Character Standard Code 39 can be printed with a "Mod 43 Check Character". This Mod 43 check character cannot be used with Full ASCII Code 39. The check character is derived by assigning a value to each character in the data to be bar coded from the table as follows: Char value Char... - Page 110 Full ASCII Extension to Code 39 "Full-ASCII Code 39" expands the Code 39 character set to include all 128 ASCII characters. Symbols 0-9, A-Z and punctuation characters . and - are identical to their Code 39 representations. Lower-case letters, additional punctuation characters and control characters are represented by sequences of two Code 39 characters.
- Page 111 Function/Control Key Support in HID Keyboard Mode The TriCoder, when in HID Keyboard Mode, can transmit Function, Control, Alt and Shift Keys for use with software programs that use these keys for menus or commands. For example, when the TriCoder reads a bar code containing the Code 39 characters for SOH (Control-A), it will transmit the corresponding function key, F1 to your computer.
-
Page 112: Special Key Sequences For Usb
The SHIFT, CTRL, & ALT (Command and Option for MAC) keys must use ON (key pressed) and OFF (key released) bar codes to properly emulate keyboard functions. For example, to encode a bar code sequence for Ctrl-C, you would create a bar code of Ctrl ON, C, and Ctrl OFF. Ctrl C You can also enter any value from ASCII 000 to 255. - Page 113 Function/Control Key Support with PortKey The TriCoder in RS-232 ASCII mode using PortKey can emulate the special keys on the PC keyboard. PortKey expects the "extended key code" convention outlined in the BASIC manuals and most compiler manuals. For example, to transmit a F1 key from a serial TriCoder to the keyboard, a null (ASCII 0) followed by a semicolon (ASCII 59) would be required.
- Page 114 Accumulate Mode Accumulate Mode is an option allowing the TriCoder to accumulate multiple bar codes in its buffer, then transmit them to the computer as if they had been a single bar code. This is useful for entering quantities and other variable data. Accumulate Mode works with Code 39, Code 93 and Code 128 only and can't be used with a check digit.
-
Page 115: Appendix G: Code 128 Specifications
Appendix G: Code 128 Specifications Code 128 is a very powerful bar code, combining an extensive character set and variable length with compactness and error checking. The character set contains all 128 ASCII characters with each character made up of three bars and three spaces. (No double characters are required to make up lower case ad special characters). -
Page 116: Appendix H: Interleaved 2 Of 5 Code
Appendix H: Interleaved 2 of 5 Code Interleaved 2 of 5 Code is a numeric-only, even-number-of-digits bar code. It is widely used in warehouse and industrial applications. A combination of five elements, two wide and three narrow represent each character. Odd-number position digits are encoded in the bars, even-number positions in the spaces. -
Page 117: Appendix I: Upc Specifications
Appendix I: UPC Specifications UPC symbols are found on almost all grocery products and many other retail items. The UPC code most people are familiar with (UPC-A) is a fixed-length (12 digits) numeric only code, with the first digit controlled by UPC coding assignments and the last digit a checksum. UPC-E and UPC-E1 are variations of the standard UPC-A code. -
Page 118: The Upc/Ean Checksum Character
The last character in a UPC-A, UPC-E, UPC-E1, EAN-13 or EAN-8 bar code is the checksum. For reference, these are the methods of calculation: Checksum calculation for UPC-A, EAN-13 and EAN-8 Use Worth Data‟s phone number (it's not a real UPC-A code) as sample data: 18314589938 Assign even and odd positions, starting at the right and moving left:... -
Page 119: Upc-E Checksum Calculation
UPC-E Checksum Calculation Use the sample data of 123456 to demonstrate the UPC-E checksum calculation: The 6 digit UPC-E code is converted to a 10-digit code, using an expansion scheme based on the sixth digit: Because the sample UPC-E code ends in a 6, the insertion digits 0000 are inserted at the sixth digit (insertion position 6): 1234500006 Add the Number System Character of 0 to the sample data: 01234500006... -
Page 120: Appendix J: Codabar Specifications
Appendix J: Codabar Specifications Codabar is widely used in libraries, blood banks, the cotton industry and transportation industries. Its' character set consists of numbers 0 through 9, and punctuation characters + . - / : and $. Symbols a, b, c, d, t, n, * and e are used as start and stop characters. Characters are constructed of four bars and three spaces. -
Page 121: Appendix K: Msi/Plessey Specifications
Appendix K: MSI/Plessey Specifications Plessey is a variable length numeric only bar code. MSI Bar Code is a variable length, numeric-only code with an automatically appended Modulus 10 check digit. MSI is sometimes called Modified Plessey Code. If the user specifies an additional check digit, the MSI code can be 14 digits long, otherwise it has a maximum length of 13 characters. -
Page 122: Appendix L: Code 93 Specifications
Appendix L: Code 93 Specifications Code 93 is variable length, continuous, bi-directional, compact code. Code 93 is an alphanumeric bar code which consists of 43 data characters (0-9,A-Z,$/+%.- and Space), 4 control characters, and a unique start/stop character. The entire set of 128 ASCII characters is represented in Code 93 using combinations of control characters and data characters. -
Page 123: Appendix M: Ascii Code Equivalent Table
Appendix M: ASCII Code Equivalent Table The 128 ASCII codes and their 3 digit decimal equivalents are detailed in the below table. The RS232 Models use the ASCII; the keyboard wedge models have some of the unprintable ASCII characters reassigned to specific keys, (i.e. SOH is f1). 3 digit 3 digit 3 digit... -
Page 124: Appendix N: Rs-422
Appendix N: RS-422 Using the TriCoder with an RS-422 board instead of a standard RS-232 serial port allows multiple TriCoders to be multi-dropped off of a single RS-422 port at a distance up to 4000 feet. Multiple TriCoders can then be polled periodically while they are collecting data. -
Page 125: Tricoder Coding Form
TriCoder Coding Form Program Name: Date: Entry Type D-Data Data ID Next Upload Prefix Upload Suffix Q-Quest Voice Unique Stmt Branch (or Stmt to Prompt Text Message T-Time 3 Chars 01-99 00-99 Num. Branch) Numbers Y-Date or table ID (2-Chs) S-Both Branch Time... -
Page 126: Full Ascii Menu
LEGEND: Full ASCII Menu Char (function) *%U* BARCODE (Items in parentheses are transmitted in keyboard wedge mode.) Decimal DLE(f10) *¯* *%V* *%W* *+P* *%U* *$P* SOH(f1) DC1(Del) *$A* *$Q* */A* *Q* *+A* *+Q* STX(f2) DC2(Ins) “ *$B* *$R* */B* *R* *+B* *+R* ➝...
Need help?
Do you have a question about the 5000 TriCoder and is the answer not in the manual?
Questions and answers