
Related Manuals for LG LRSC26912SW


Summary of Contents for LG LRSC26912SW
- Page 1 website:http'J/www.lgservice.com LRSC 26915SW LRSC 26915TT LRSC 26912SW LRSC 26912TT LRSC 26925SW LRSC 26925TT LRSC 26923SW LRSC 26923TT LRSC 26940SW LRSC 26940SB LRSC 26940TT LRSC 26940ST LRSC 26941SW LRSC 26941SB RSC 26941 ST RATOR...
-
Page 2: Table Of Contents
Table of Contents Introduction Entry Important Safety Instruction Identification of Parts Where to Locate Installation Door Removal Door Replacement Water Pipe Installation Water Connection Instruction Guide Operation Instruction Guide Height Adjustment Operation Starting Adjusting the Temperatures and functions (Dispenser/Automatic Icemaker) Shelf Wine Holder... -
Page 3: Entry
Entry The model and serial numbers are found on the inner case or back of refrigerator compartment of this unit. These numbers are unique to this unit and not available to others. You should record requested information here and retain this guide as a permanent record of your purchase. -
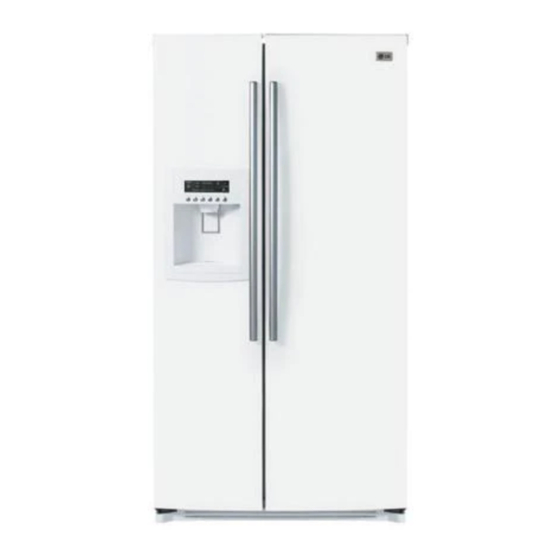
Page 4: Identification Of Parts
Child Entrapment DANGER: Risk of child entrapment. Before you throw away your old refrigerator or freezer: Warning Take off the doors but leavethe shelves in place so that children may not easily climb inside. The appliance is not intended for use young children without supervision. -
Page 5: Where To Locate
Where to Locate Select a Good 1. Place your appliance where it is easy to use. Location 2. Avoid placing the unit near heat sources, direct sunlight, or moisture. 3. To avoid vibrations, the appliance must be leveled. 4. Do not install this refrigerator in areas where the ambient temperature is below 414:. It will have an adverse effect on performance. -
Page 6: Door Removal
Door removal Warning ElectricShock Hazard Disconnect electricalsupply to refrigerator before installing. Failureto do so could result in death or serious injury, If your entrance door is too narrow for the refrigerator to passthrough, remove the refrigerator door and passthe refrigerator laterally. Remove Lower Removethe lower cover by lifting upward, and... -
Page 7: Door Replacement
Move the Push the refrigerator sideways through the Refrigerator entrance door as shown in the right picture, Door replacement Mount the doors in the reverse order of removal after the refrigerator is brought to the installation area. Feed water tube installation Before •... -
Page 8: Water Connection Instruction Guide
Water Connection Instruction Guide Connecting Read all directions carefully before you begin. the Refrigerator to a Water Source Warning Connect to potable water supply only. • Standard screwdriver Tools Required • 7/16-inch and 1/2-inch open-end wrenches or two adjustable wrenches •... - Page 9 Connect 1. Unplug refrigerator or disconnect power. the Tubing to 2. Turn OFF main water supply. Turn on the nearest faucet to relieve the pressure Water Line on the line. It may help to open an outside faucet to allow the water to drain from the line in the house.
-
Page 10: Operation Instruction Guide
Operation Instruction Guide Connect the Tubing Before making the connection to the refrigerator, be sure the refrigerator to the Refrigerator power cord is not plugged into the wall outlet. • If your refrigerator does not have a water filter, Tubing_amp 1/4"Tubing recommend installing one. - Page 11 When Icemaker Ice is clumped together Does Not Operate • When ice is clumped together, take the ice clumps out of the ice storage bin, Smoothly break them into small pieces, and then place them into the ice storage bin again.
-
Page 12: Height Adjustment
Height Adjustment If the freezer Levelthe door by inserting flat (- type) driver into the groove of the left height adjusting screw and rotating it clockwise O. compartment door is lower than the Height Difference refrigerator compartment door iS?" Left Height Adjustment Screw If the freezer Levelthe door by inserting flat (- type) driver into the groove of the right height... -
Page 13: Starting
Starting When your refrigerator is first installed, allow it to stabilize at normal operating temperatures for 2-3 hours prior to filling it with fresh or frozen foods. If operation is interrupted, wait 5 minutes before restarting. AdJusting The Temperatures and Functions Water/Ice Output Dispenser Push Switch... - Page 14 1. Buzzer sound mute Mode The buzzer sound is set to OFF. It activates by sounding the recognition sound or "Ding-" alter pressing and holding "Express FRZ" button more than 4 seconds. It inactivates when resetting the mode power. 2. Display Power saving Mode It places display in standby mode until door is opened.
- Page 15 You can adjust temperature of freezer compartment and refrigerator Compartment. How to adjust , _eezer Compartment temperature adjustment temperature the freezer mperature ! °F ! °F 5°F -8°F compartment FREEZER Setting "_ • • • COLD COLD How to adjust the _frigerator Compartment temperature adjustment...
- Page 16 Automatic • The automatic icemaker can automatically make 8 cubes at a time, Icemaker 120-150 pieces per day. This quantity may vary by circumstance, including ambient temperature, door opening, freezer load. etc. • Icemaking stops when the ice storage bin is full. •...
- Page 17 The Other Ambient Temperature Display Window. Functions • Temperature is displayed only between 16W - 12047. ROOM TEMP • Temperature less than 15W is indicated with LO and temperature more than 12147 is indicated with HI. Door open warning • A warning tone will sound 3 times at thirty-second intervals if the refrigerator or freezer door is left open for more than sixty seconds.
- Page 18 6 Filter Condition (filter replacement • There is a replacement indicator light for the Classification In initial Power On Replace indicator / Filter RESET lighton water filter cartridge on the dispenser. cycle) Display Function • Water filter needs replacement once every six FmerStatus months.
-
Page 19: Shelf
Shelf Shelf Height The refrigerator compartment shelf is movable so that you can place it at a height Adjustment according to space requirement of foods. Pull out refrigerator tray to the front after lifting it slightly. Wine Holder (Applicable to some models only) Wine Holder Bottles can be stored on their sides in this Adjustment... -
Page 20: Egg Bin (Applicable To Some Models Only)
Egg Bin (Applicable to some models only) You carl place the egg box wherever you want it. [Normal] [For Many Eggs] Humidity control in the vegetable compartment The humidity carl be controlled by adjusting the humidity control switch to the left or right when storing vegetabes or fruits. -
Page 21: Optichill Temperature Transition Corner
OptiChill Temperature Transition Corner (Applicable to some models only) By pressing the button, store vegetables, fruits or other types of food such as meat to be defrosted, raw fish, etc. Temperature Change at OptiChill Method to Use You can select optimum temperature range depending on types of foods L._I stored. -
Page 22: Location Of Foods
Location of Foods (Refer to Identification of Parts) Wine Holder Store wine. Snack Drawer Store small foods such as bread, snacks, etc. Freezer Store various frozen foods such as meat, fish, Compartment icecream, frozen etc. snacks, Shelf • Store small packed frozen food. Freezer •... -
Page 23: Storing Foods
Storing Foods • Store fresh food in the refrigerator compartment. How food is frozen and thawed is an important factor in maintaining its freshness and flavor. • Do not store food which spoils easily at low temperatures, such as bananas and melons. -
Page 24: How To Dismantle Parts
How to Dismantle Parts Freezer Separatethe lamp by pulling it out ® while Compartment slightlystriking(1) and rotating @the lamp cover. Turnthe bulbcounterclockwise,Max, 40 W bulb Lamp for refrigerator is used and can be purchased at a service center. Dispenser Lamp Seperate the lamp by pulling it out, and then remove the lamp. - Page 25 To remove the lamp cover, press the protrusion under the lamp cover to the front and Lamp in then pull the lamp cover out. Refrigerator Turn the bulb counterclockwise. Max. 40 W bulb for refrigerator is used and can be Compartment purchased at a service center.
-
Page 26: General Information
General Information Vacation Time During average length vacations, you will probably find it best to leave the refrigerator in operation. Place freezable items in freezer for longer life. When you plan to store the refrigerator, remove all food, disconnect the power cord, clean the interior thoroughly, and Block the doors open to prevent mold and mildew. -
Page 27: Troubleshooting
Troubleshooting Before calling for service, review this list. It may save you both time and expense. This list includes common occurrences that are not the result of defective workmanship or materials in this appliance. Runing of refrigerator Refrigerator Refrigerator control is off. Set refrigerator control. - Page 28 Refrigerator Thermostat is keeping the refrigerator This is normal. The refrigerator goes on compressor at a constant temperature, and off to keep the temperature constant, does not run. Temperatures are too cold Temperature in the Freezer control is set too cold Set the freezer control to a warmer freezer is too cold setting until the freezer temperature is...
- Page 29 Sound and noise Loudersound Today's refrigerators have increased It is normal Forsound levelsto be higher levelswhen storage capacity and maintain more refrigerator is on. even temperatures Louder sound Refrigerator operates at higher pressures This is normal. The sound will level off as levels when during the start of the ON cycle, the refrigerator continues to run.
- Page 30 Odors in refrigerator Interior needs to be cleaned. Clean interior with sponge,warm water and baking soda. Food with strong odor is in the refrigerator. Cover food completely. Some containers and wrapping materials Use a different container or brand or produce odors, wrapping materials.
- Page 31 Dispenser w ill Icehasmelted and Frozen around a uger Remove i cestorage b in, a nd thawand not dispense due toinfrequent use, t emperature thecontents. Clean b in, w ipe dryand ice. Fluctuations and/or p ower o utrages, replace i nproper position. When newiceismade, dispenser should operate.
- Page 32 YourLGRefrigerator willbewillrepaired or replaced, at LG'soption, i f itproves tobedefective in material or workmanship u ndernormaluse, duringthe warrantyperiod("Warranty Period")set forth below, effective fromthe date("Date of Purchase") of original c onsumer p urchase of theproduct, T hiswarranty is goodonlyto theoriginal p urchaser of theproduct a ndeffective onlywhenusedin the United States, including Alaska, H awaii, a ndU.S, T erritories,...
- Page 33 LG Electronics Inc. LG Twin Tower, 20, Yoido-Dong, Youngdungpo-Gu, Seoul, 150-721, Korea. http://www.lge.com P/NO : 3828JD8794A Printed in Korea...
Need help?
Do you have a question about the LRSC26912SW and is the answer not in the manual?
Questions and answers